Spring framework always aspired to simplify enterprise Java development. They offered Spring Boot framework to simplify creating Java-based microservices. Similarly, the Spring Integration framework was designed to provide a solution for simplified application integration. However, some modern enterprise applications started to implement distributed event-driven streaming architecture. These applications showed two common traits.
- Cloud Platform: They run in a cloud platform and follow a microservice architecture.
- Stream Processing: They continuously operate on a stream of events or messages.
Spring Integration framework already offered a similar solution for enterprise integration patterns. In this pattern, one application publishes a message to a common message channel. Other applications can read the message from the channel later. In all this, the applications must agree on a shared channel and the format of the message. And the communication remains asynchronous. Spring realized that this framework could be extended and simplified further to support the modern demand for event-driven streaming architecture. As a result, Spring came up with a new framework – Spring Cloud Streams.
Spring Cloud Stream is a new framework that combines the power of two Spring Frameworks – Spring Boot and Spring Integrations. So, the Spring Cloud Stream builds upon Spring Boot to create standalone, production-grade microservice applications and uses Spring Integration to provide connectivity to message brokers. As a result, Spring Cloud Stream turns out to be a framework for building event-driven stream processing microservices. That’s all about the background.
Spring Cloud Stream architecture
Now let’s try to understand the Spring Cloud Stream Architecture. How does it work? A Spring Cloud Stream application is a message-driven microservice application. All we do in a Spring Cloud Stream application is to consume message events, process it to take necessary business actions, and produce events for other microservices. And a typical spring cloud stream application is internally architecture like this:
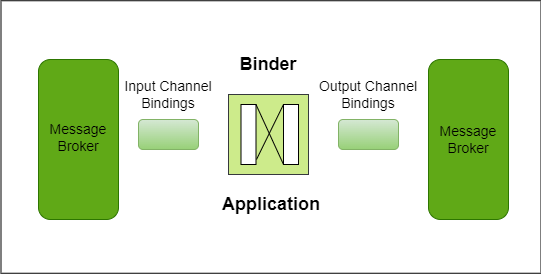
So, we have the main application code for processing message events received through one or more input channels. The core of your application implements all the business logic and takes the necessary business actions. Finally, if needed, you can produce message events to one or more output channels. And that’s where most of the developer focus lies. An application developer is focused on processing message events, implementing necessary business actions, and producing new messages. Rest all is taken care of by the framework.
Spring Cloud Stream allows us to create and configure input/output message channels using simple and straightforward configurations. These channel configurations are also known as spring-cloud-stream-bindings. And these bindings are picked up by the binder to implement the input/output channel and communicate with the external messaging system. So, the binder is a third-party Spring component responsible for providing integration with the external messaging systems. The spring cloud stream supports a bunch of messaging systems. As of date, we have a bunch of open sources and third-party binders. Here is an indicative list:
- Apache Kafka
- Kafka Streams
- RabbitMQ
- Amazon Kinesis
- Google PubSub
- Azure Event Hubs
The binder is responsible for the connectivity and routing of messages from the respective messaging systems. They are also responsible for data type conversions and a few other things. But the most essential feature of the binder is this: They will collect the incoming message events from the messaging system, do the necessary data type conversions, call the user code, and pass each message to us for processing. Similarly, they will take up our outgoing message events, do the necessary data type conversion, and send the message to the underlying messaging system. The point is straight, most of the headache of interacting with the messaging system is taken care of by the binder. However, we will also need to configure the binders according to our requirements. So, in short, A spring cloud stream developer is responsible for the following things.
- Configure input/output channel bindings
- Configure the binder
- Implementing the business logic
Many of the channel binding configurations and the binder configurations are defined in our application YAML. However, several things are configured using Spring Cloud Stream annotations. And if you are familiar with the Spring Boot programming, you should be already familiar with the notion of Spring Annotations and Spring configurations.
Here is the example:
spring:
cloud:
stream:
bindings:
input-channel-1:
destination: users
kafka:
streams:
binder:
applicationId: hellostreams
brokers: localhost:9092
configuration:
default:
key:
serde: org.apache.kafka.common.serialization.Serdes$StringSerde
value:
serde: org.apache.kafka.common.serialization.Serdes$StringSerde
Below are the properties of application.yml file in IDE:
.jpg)
Create the application YAML file. Our application YAML is the first place where we configure the channel bindings and the binder. We can clearly see two configurations.
.jpg)
The first one is the channel bindings. We created only one input channel for this application and named it input-channel-1. However, we can create multiple channels. Some of those will be input channels, and others will be output channels.
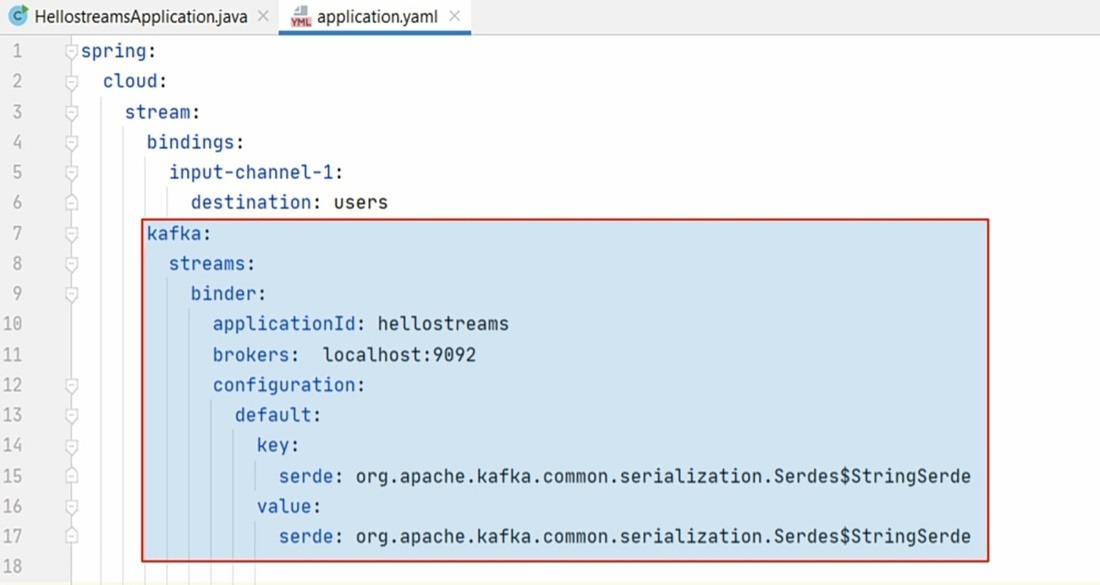
The second one is the binder configurations. The binders are responsible for communicating from the messaging system, so we configure it with the connection details such as hostname and port. Similarly, the binder also needs to perform data type conversion, so we configure it with the message key and value types.
Java
import org.apache.kafka.streams.kstream.KStream;
import org.springframework.cloud.stream.annotation.Input;
public interface KafkaListenerBinding {
@Input("input-channel-1")
KStream<String, String> inputStream();
}
|
Below is the code in IDE:
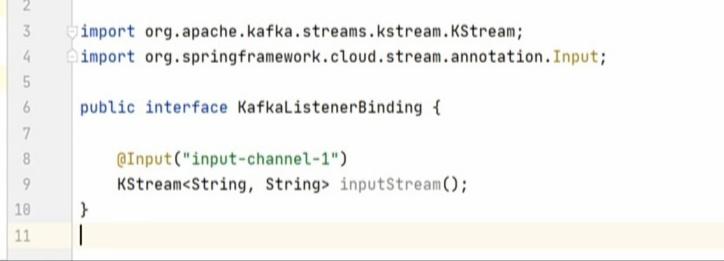
The next and most typical step is to define an interface for your input and output channels. That’s what we did here in the KafkaListenerBinding interface.
We created only one channel, so we defined one method here. This method configures two critical things.
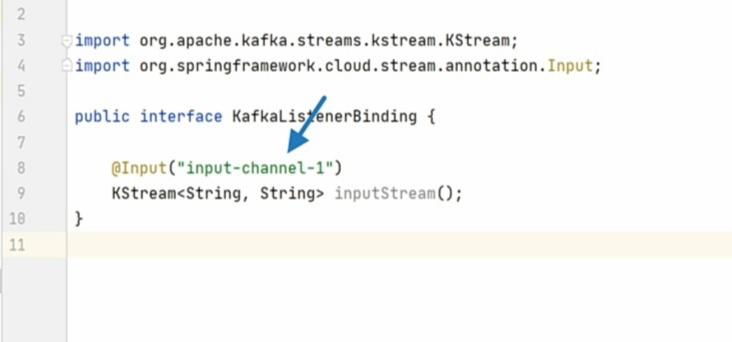
The first one is to configure the input-channel-1 as an input channel. When we configured it in the YAML file, we didn’t specify if we want to use this channel as input or for output. That’s what we do here. The @Input annotation marks this channel as an input channel.
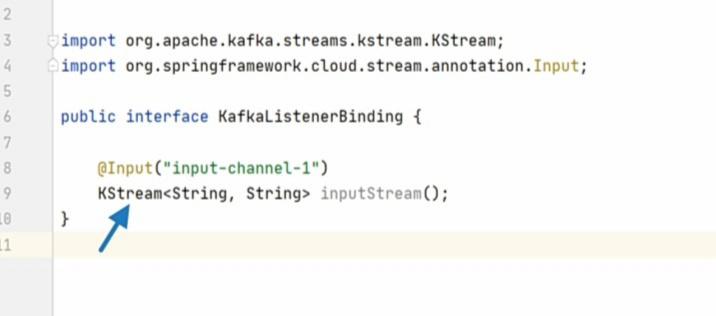
The second critical configuration is to set the expected data type of the message stream. And we are setting it here as a KStream of string key and a string value. KStream is a streaming data type offered by Kafka Streams API. So, we learned two places to configure the bindings and the binder.
The next thing is to implement business logic. That’s what we do in the service class. So, here is service class.
Java
import package_name.KafkaListenerBinding;
import lombok.extern.log4j.log4j2;
import org.apache.kafka.streams.kstream.KStream;
import org.springframework.cloud.stream.annotation.EnableBinding;
import org.springframework.cloud.stream.annotation.StreamListener;
import org.springframework.stereotype.Service;
@Service
@Log4j2
@EnableBinding(KafkaListenerBinding.class)
public class KafkaListenerService {
@StreamListener("input-channel-1")
public void process(KStream<String, String> input) {
input.foreach((k,v) -> log.info(String.format("Key: %s, Value: %s", k, v)));
}
}
|
Below is the code snippet in IDE:
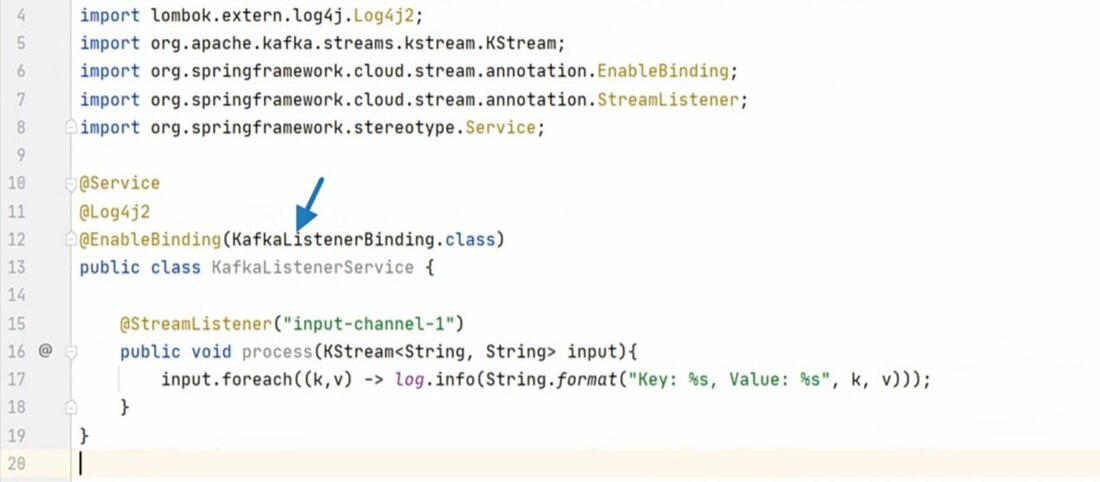
We will enable binding for this class using our KafkaListenerBinding interface. Now Spring knows that we want to communicate with the messaging system for the input output channels defined in this interface. As of now, we configured only one input channel, so the framework will start reading incoming messages from the configured channel. Now let’s come back to the service class. So, enable binding will trigger the reading of messages. But then, we want to process those messages.
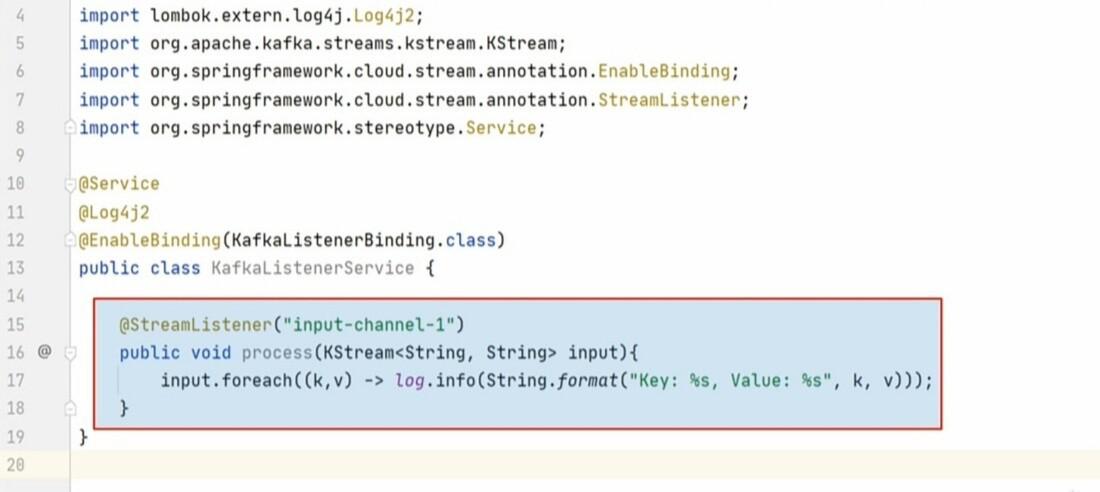
So, we define a process() method and configure it to become a stream listener. We also tell that we want this method to listen to the input-channel-1.
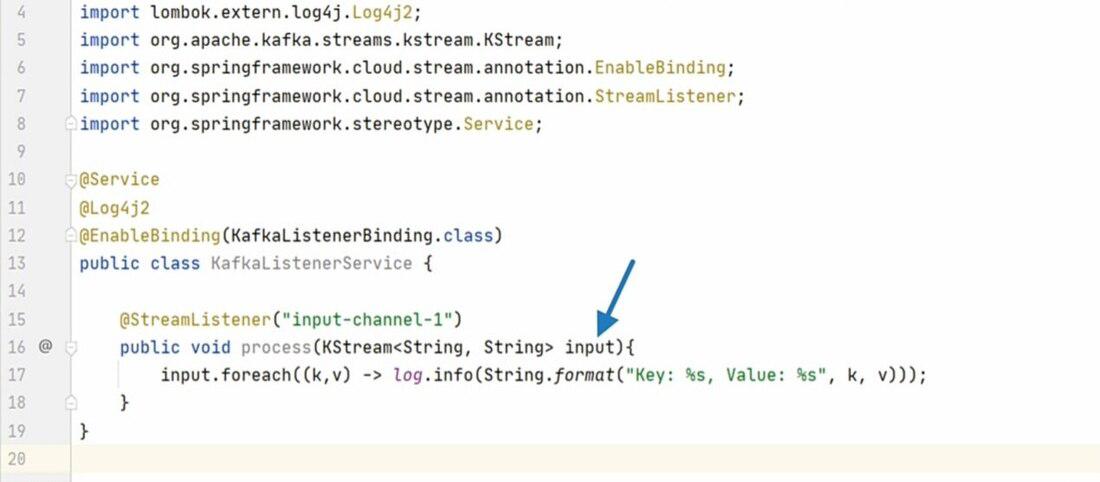
Now the framework will call this method and pass the input stream. So, we are not writing any code for connecting to the Kafka messaging system. We do not need to read messages from the Kafka cluster, all is done by the framework that is Spring Cloud Stream. The framework will read the message from the input-channel-1, invoke this function, and pass the message here in this function. Now we can do whatever we want to do with the incoming message. For now, we just want to put it in the log, but we can implement business logic here.
Share your thoughts in the comments
Please Login to comment...