Installation of Appium on Windows OS
Last Updated :
29 Dec, 2023
Appium is a powerful open-source tool designed to streamline UI automation across various platforms, including mobile, browser, desktop, and TV. It’s particularly useful for software test automation, allowing testers to evaluate app functionality through code in real-world scenarios. Appium unifies automation technologies, providing a user-friendly interface for multiple platforms, including Java, Python, Ruby, and JS.
Prerequisites
- Download Android Studio: Download Android Studio from the provided (Reference link). Skip this step if you’ve already downloaded it.
- Install Gradle: Download and install Gradle using the following (Reference link).
- Install Java JDK: Download and install Java Development Kit (JDK) from the following (Reference link). Skip this step if you’ve already downloaded it.
- Install Python: Download and install Python from the following (Reference link). Skip this step if you’ve already downloaded it.
Installation of Appium on Windows Using Python
Step 1: Install Appium Inspector
Download Appium Inspector from this link(https://github.com/appium/appium-inspector/releases). Double-click the executable (exe) file, a window appears with a caution against running the application.

Select the more info
Select “More info.”

Click on Run anyway
Click “Run anyway” and choose “Only for me” for installation.

Select Only for me and Install
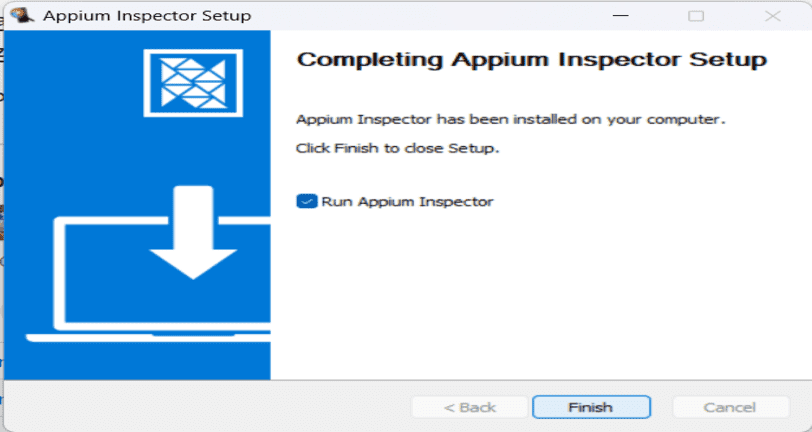
Finish the Download
Finish the download and run Appium Inspector.

Interface of the Appium Inspector
Step 2: Install Appium Server
Download Node.js from this link. Reference link. Run the following command in the command prompt:
npm install -g appium
.png)
Installing Appium
Start Appium using:
appium -p <port number>
.png)
Obtain the port number from Appium Inspector.
.png)
The Appium Server is now running.
The Appium Server is now running.
Step 3: Install UiAutomator2 and Chromium Drivers
Run the following commands in the command prompt:
appium driver install uiautomator2
appium driver install chromium
.png)
UiAutomator2 and Chromium
Step 4: Install PyCharm
Follow the installation steps for PyCharm here. Skip if already installed. Create a new project in PyCharm.
.png)
Create a new Project
After creating a new project, access the settings.
Navigate to the Python Interpreter tab and click on the ‘+’ symbol.
-(1).png)
Click on ‘+’ symbol
Search for “Appium-Python-Client” in the search bar and proceed to install the package
-(1).png)
Install Appium-Python-Client Package
Your Python project is now set up and equipped with the necessary modules installed.
Step 5: Set Up the Emulator
Open Android Studio and click on Device Manager. By default, you’ll find a virtual device. Run the device to proceed.
.png)
Devices are visible in the right-side tab.
Click on the play button next to the device to launch the emulator.
.png)
Open the command prompt and execute to display the list of connected devices.
adb devices
The connected device running in the emulator will be displayed.
.png)
adb devices
Configuration with Respect to Python
Ensure Python is Installed
Make sure that Python 3.x is installed on your system. You can download and install Python from the official website: Python Downloads
Install Required Python Libraries:
Open a command prompt and install the necessary Python libraries for Appium using the following command:
pip install Appium-Python-Client
.png)
Appium-Python-Client
Save and Restart Appium
After installing the required Python libraries, save the configuration in the Appium server and restart it. This can be done through the Appium Desktop application or the command line.
Configure Python Interpreter in PyCharm
If you’re using PyCharm as your IDE, open the settings, navigate to the Python Interpreter tab, and add the installed Appium-Python-Client package to the project interpreter.
With these steps, you ensure that Python is set up correctly to work with Appium for automation scripts. It ensures that the Appium server recognizes Python as a supported language for creating automation scripts.
Simple Python automation Script on the Appium
Step 1: Start the Appium server
Start the Appium server using in command prompt
appium -p <port number>
.png)
Appium server is Running
Step 2: Launch the emulator through Android Studio.
Initiate the emulator in Android Studio by navigating to Device Manager, and then click the play button next to the virtual device.
.png)
Step 3: Execute the Python code
In this code, an Appium driver is initialized for an Android emulator. Using the driver, an element with the text “Battery” in Android settings is located and clicked. Finally, the Appium driver session is terminated. This code provides a foundational understanding of an Appium script, covering steps from connecting to the server to interacting with a specific UI element.
Python
from appium import webdriver
from typing import Any, Dict
from appium.options.common import AppiumOptions
from appium.webdriver.common.appiumby import AppiumBy
cap: Dict[str, Any] = {
"platformName": "Android",
"appium:automationName": "uiautomator2",
"appium:platformVersion": "14",
"appium:deviceName": "emulator-5554",
"appium:appPackage": "com.android.settings",
"appium:appActivity": ".Settings"
}
driver = webdriver.Remote(url, options=AppiumOptions().load_capabilities(cap))
el = driver.find_element(by=AppiumBy.XPATH, value='//*[@text="Battery"]')
el.click()
driver.quit()
|
Output:
C:\Users\guest\PycharmProjects\pythonProject\.venv\Scripts\python.exe
C:\Users\guest\PycharmProjects\pythonProject\.venv\appium_python.py
Process finished with exit code 0
Emulator
The Settings app will open. Appium successfully opens the app.
.png)
Appium Server Logs
.png)
Appium Server logs
Video Demonstration
https://drive.google.com/uc?id=1bX4iqaSQPW1GXgPpGXWIFmaZyMdLwFUm&export=download
This Python code effortlessly launches the Settings app using the Appium server. In summary, Appium streamlines UI automation on Windows, providing a straightforward way to test software across diverse platforms. This covers a simple installation and execution of a basic program.
Share your thoughts in the comments
Please Login to comment...