How to Install Nginx in AWS Linux ?
Last Updated :
24 Apr, 2024
Nginx is a simple web server that can be used for multiple purposes such as load balancer, reversal proxy & HTTP cache as well, the software was created by Igor Sysoev, a Russian developer and it was released in the year 2004. the reason why nginx is popularly used is because it is an open-source software. many of the developers are familiar with Apache web servers but not Nginx, the basic difference between the two servers is that Apache is built for a wide range of modules and flexibility. In contrast, the nginx offers more speed and scalability for the web server.
Installing the nginx in the aws server which is based on the Linux distribution is very easy and we can do this by following a series of steps that help in the proper installation of the nginx web server system in the aws server, installing the nginx in the aws server requires you to first create an account with the amazon web services and having some familiarity with the EC2 instances in the amazon web services so if you are not familiar with the EC2 instances and amazon web services then follow the below articles to get a basic understanding before following this article
Key Terminologies Related to Nignx Software
- Nginx Plus: It is a cloud-native software used for API gateway and also used as a load balancer for server load capacity handling.
- Mail proxy: Nginx also be used to serve as a proxy for mail and it supports various mail transfer protocols such as SMTP, IMAP POP3, etc.
- ModSecurity Module: It is a module that is used for having better security within the Nginx, it is used to serve as a web application firewall.
Key Terminologies Related to Amazon Linux
- Amazon Machine Image: AMI or Amazon machine image is known as a master image and it is used for creating virtual servers which are known as EC2 instances for the AWS.
- Availability Zones: AWS availability zone or AZ is known as a data center or multiple data centers in one AWS region. these are the logical building blocks for the region of AWS and currently there are 69 availability zone present in the AWS.
- Amazon S3 : It provides object storage service with the help of web interface in amazon web services and it stands for amazon simple storage.
- Amazon EC2 instance: EC2 instance is one of the most famous concepts in the terminologies of AWS, it is a simple virtual server used to run the applications on public cloud.
- Bucket: A bucket in amazon web services or AWS is used as a container for the objects which are stored in the amazon S3, we can store any number of object inside of a bucket.
Installation Of Nginx Server in AWS Linux: A Step-By-Step Guide
Following are the requirements for installing the nginx in aws Linux:
- Amazon web services account.
- Credit points or free tier access in an Amazon web services account.
- Basic understanding of Linux terminal.
- Basic understanding of EC2 instances.
Now let us understand how we can install the nginx in the AWS Linux distribution, following are the steps the user must take to install the nginx web server:
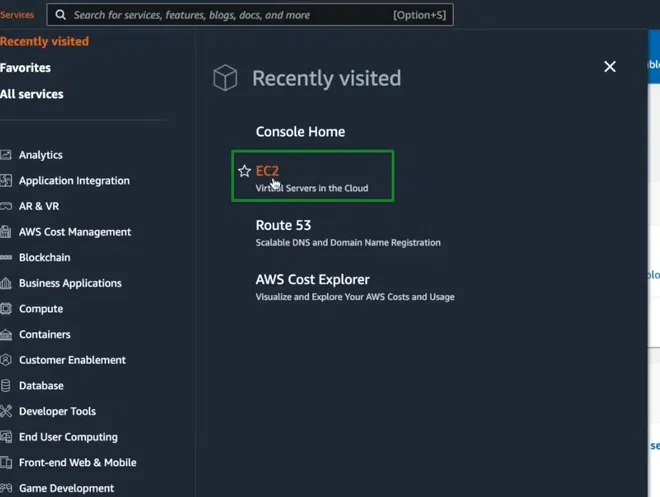
Step 1: Create EC2 Instance
- First step is to create an EC2 instance, for this click on the search option by using shortcut OPTION + S button and selecting EC2 from the menu.
Step 2: Launch Instance
- Next step is to click on the launch instance so that we can create a new EC2 instance.

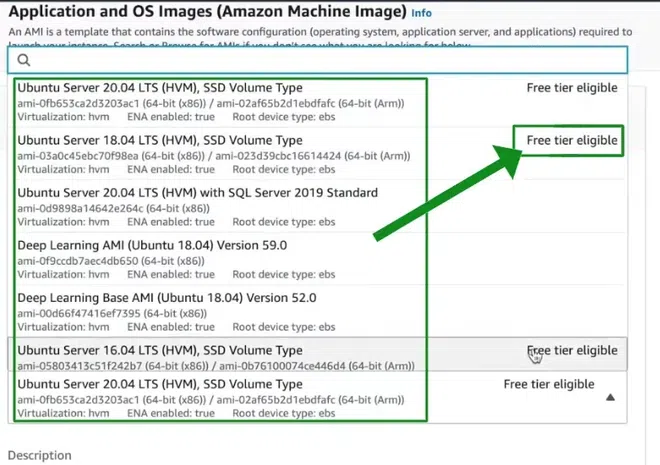
Step 3: Select AMI Version
- Now select the appropriate operating system or AMI for the server, in this article we are going to install it in linux distribution but feel free to choose according to your configuration.

Step 4: Select Version and Tier
- In most of the cases amazon gives credits for free for the selected AMIs, so if possible try to choose a free tier volume for installing the nginx server.
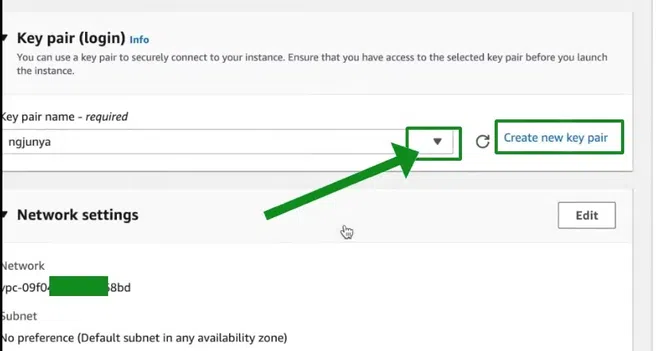
Step 5: Adding Key Pair
- This is an optional step, if login is required for connecting to the server instance then enable the key pair and select a key pair for the instance otherwise the user can also leave it blank if security is not required.
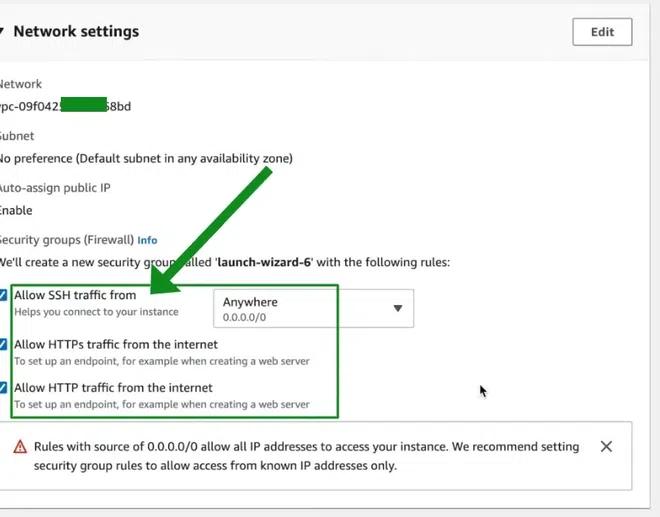
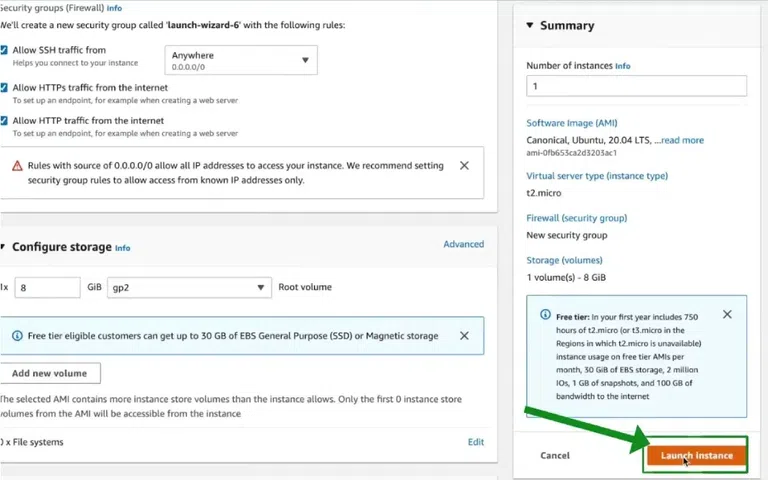
Step 6: Allowing Traffic
- By default the options for HTTPS and HTTP traffic from all over the internet is not allowed, this makes it difficult for the users to access your server from public computers so click on the checkboxes if you want to allow the traffic from the internet.
Step 7: Click on Create Instance
- Next step is to click on the “create instance” button and it will create the instance through which the server will start.
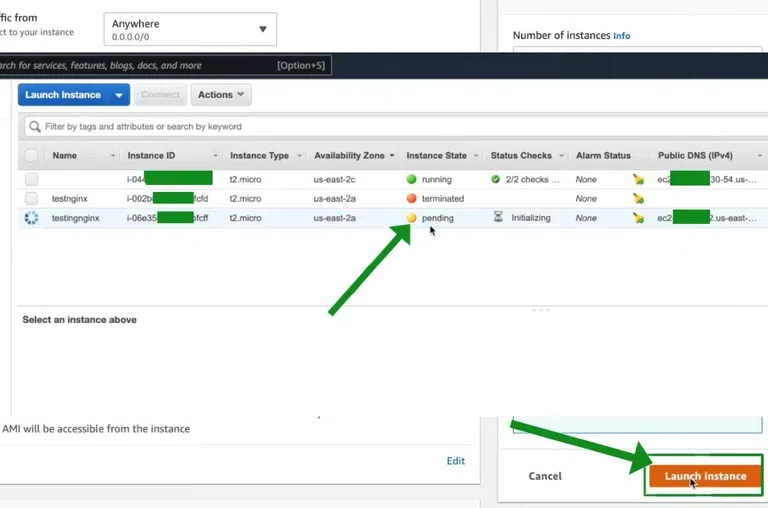
Step 8: Viewing All Instance
- Next, click on the view all instance button to view the instance that we have just created.

Step 9: Wait for Status Change
- Once the instance is created its displayed as pending in the dashboard, wait for a while until it moves from pending to running state then move to the next step.
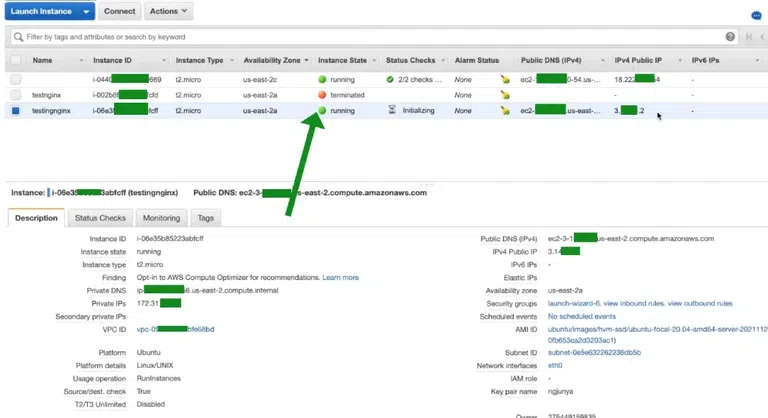
Step 10: Running Status
- The status changes from pending to running, once it starts running then the server starts and we can begin installing the nginx system in it.
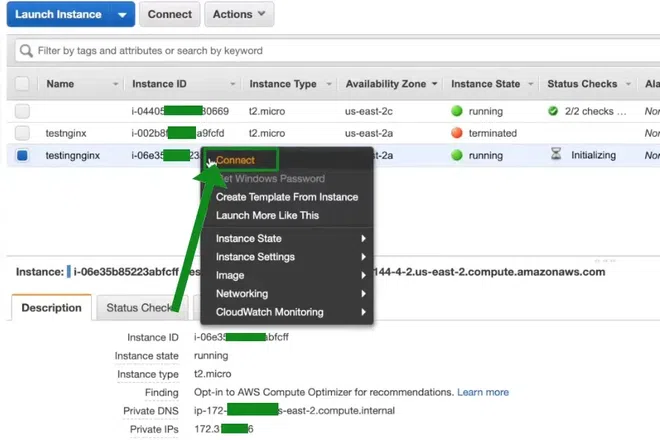
Step 11: Click on Connect
- In this step, right click on the instance name and select the “Connect” option to connect with the instance using terminal.
Step 12: Select Connection Method
By default the connection method selected is standalone SSH client, click on the last option (EC2 Instance connect) as we will not have to install any SSH client for this.

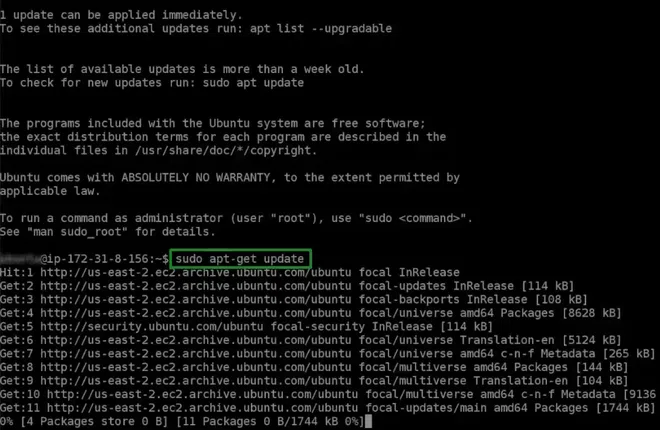
Step 13: Sudo apt-get update
- Run the traditional sudo apt-get update command to update the libraries before installing nginx server in this EC2 instance.
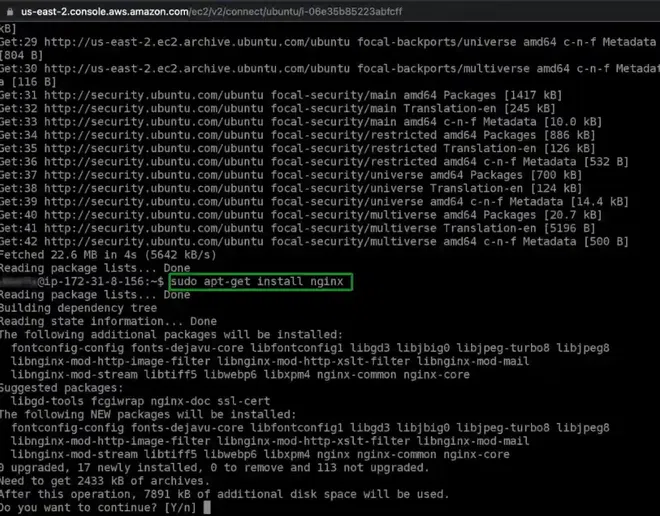
Step 14: Sudo apt-get Install Nginx
- Run the command sudo apt-get install nginx command to finally install the nginx system in this server.
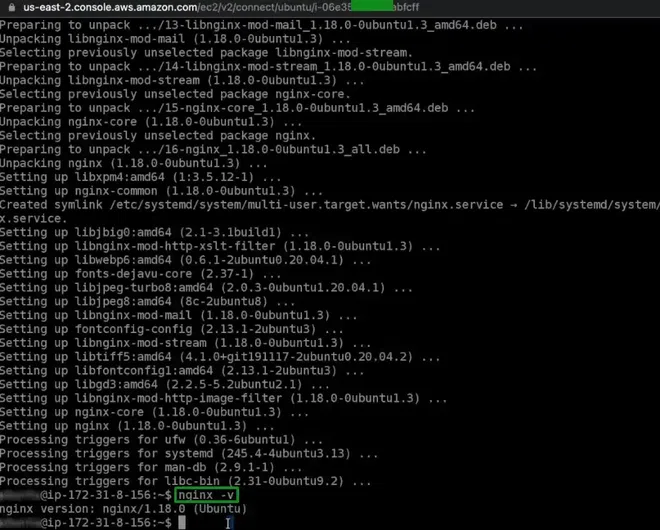
Step 15: Check Nginx Installation
- To check whether the nginx is installed successfully or not, we can run the following command:
nginx -v
- This will return a version of nginx that is installed on the system (it can differ from user to user and time to time)
Step 16: Check Nginx Server Status
- Once nginx is installed and running we can run the following command to check whether the nginx server is running without any error or not:
sudo systemctl status nginx

Step 17: Open Website in Browser
- Finally once all the necessary steps are completed we can check in the browser by opening the server, for this go back to the EC2 instances and copy the IPv4 Public IP of the server to open it in the browser.

Step 18: Open Web Server in Browser
- To open the web server in the browser as a user, simply paste the copied IPv4 Public IP that we have copied, it will show us a webpage similar to the one below to confirm that the nginx is properly installed in the aws web server.
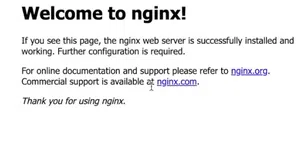
- Once this page is displayed then we can say that the nginx system is successfully installed in the aws server.
Conclusion
Nginx is comparatively a good web server system to apache with its own features as the nginx is more scalable and has more flexibility features as compared to the apache server, the installation process for nginx in aws is simple as we only have to create instance for the server and assign the required AMI (linux in this case) and then we can run the required commands to install the nginx server system in the aws linux distribution.
Installation Of Nginx In Amazon Linux – FAQs
What is Nginx server in AWS?
Nginx is used as a server in AWS and it provides many features and advanced applications such as monitoring, SSL termination feature as well as load balancing and it is used by many enterprises.
Does AWS use Nginx as Load Balancer?
Yes, Nginx and Nginx plus both can be used inside the AWS to manage and control the load balance traffic of the instances.
How to install Nginx on linux server in AWS?
For installing nginx on the linux server inside AWS, create and launch an EC2 instance, connect to the instance and then install the nginx and its required dependencies and then configure the SSL for the nginx to install nginx on linux server successfully in AWS.
Is Nginx in AWS a hosting server?
Nginx is used as a load balancer and reverse proxy as well as web servers but they are only meant for VPS or dedicated server hosting where a lot of traffic comes through the application.
How to install Nginx in EC2?
First step is to choose which type of machine (ubuntu, windows, linux etc.) is required for the project then create an EC2 instance and configure its details, add storage and run the instance and enter the required commands for installing the nginx in EC2.
Share your thoughts in the comments
Please Login to comment...