HTML | DOM Input FileUpload Object
Last Updated :
25 Aug, 2022
The DOM Input FileUpload Object represents the input type of HTML forms i.e “file”. This is used to enable the user side functions of uploading a File onto the website.
Syntax:
document.getElementById("ID")
The ‘ID’ will be assigned to the input element.
Property Values:
- accept: This property is used to Set or return the value of the accept attribute of the file upload button
- autofocus: This property is used to set or return whether a file upload button should automatically get focus upon page load
- defaultValue: This property is used to set or return the default value of the file upload button
- disabled: This property is used to set or return whether the file upload button is disabled, or not
- files: This property is used to return a FileList object that represents the file or files selected with the file upload button
- form: This property is used to returns a reference to the form that contains the file upload button
- multiple: This property is used to set or return whether a user is allowed to select more than one file in the file upload field
- name: This property is used to set or return the value of the name attribute of the file upload button
- required: This property is used to set or return whether a file in the file upload field must be selected before submitting a form
- type: This property is used to return which type of form element the file upload button is
- value: This property is used to return the path or the name of the selected file
The example below shows how the FileUpload works.
Example-1: Uploading File via the FileUpload Object
html
<!DOCTYPE html>
<html>
<head>
<title>
DOM Input FileUpload Object
</title>
<style>
h1 {
color: green;
}
h3 {
font-family: Impact;
}
body {
text-align: center;
}
</style>
</head>
<body>
<h1>
GeeksforGeeks
</h1>
<h3>
DOM Input FileUpload Object
</h3>
<input type="file"
id="myFile">
<p id="submit_text">
</p>
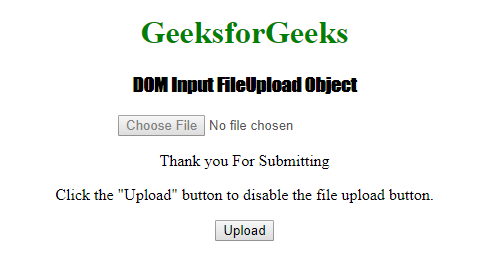
<p>
Click the "Upload" button
to disable the file upload button.
</p>
<button onclick="myFunction()">
Upload
</button>
<script>
function myFunction() {
var x = document.getElementById("myFile");
x.disabled = true;
var y = document.getElementById(
"submit_text").innerHTML =
"Thank you For Submitting";
}
</script>
</body>
</html>
</body>
</html>
|
Output:
Before:

After:
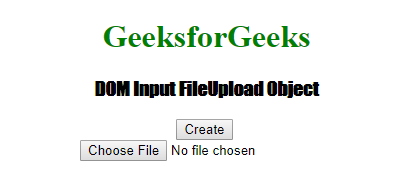
Example-2: Create <input> element type=file.
html
<!DOCTYPE html>
<html>
<head>
<title>
DOM Input FileUpload Object
</title>
<style>
h1 {
color: green;
}
h3 {
font-family: Impact;
}
body {
text-align: center;
}
</style>
</head>
<body>
<h1>
GeeksforGeeks
</h1>
<h3>
DOM Input FileUpload Object
</h3>
<button onclick="myFunction()">
Create
</button>
<br>
<script>
function myFunction() {
var x =
document.createElement("INPUT");
x.setAttribute("type", "file");
document.body.appendChild(x);
}
</script>
</body>
</html>
|
Output:
Before:

After:
Supported Browsers:
- Google Chrome 1
- Edge 12
- Mozilla Firefox 1
- Opera 11
- Safari 1
Share your thoughts in the comments
Please Login to comment...