How to use Tailwind CSS with esbuild ?
Last Updated :
25 Jul, 2023
Tailwind CSS is a utility-first CSS framework for building rapid custom UI. It is a highly customizable, low-level CSS framework that gives you all of the building blocks that you need.
An esbuild is a bundler for the web project that brings the build tool for performance enhancement, along with facilitating to development of an easy-to-use modern bundler. Combining these tools can provide an efficient development experience.
In this article, we will learn how to use Tailwind CSS with esbuild, along with understanding their basic implementation through the examples. In order to use Tailwind CSS with esbuild, we need to follow the below steps.
Steps for installing the tailwind CSS with the esbuild
Follow the below steps to set up a tailwind CSS with the esbuild bundler:
Step 1: Setup a new project by creating a new directory
mkdir tailwind-esbuild
cd tailwind-esbuild
Step 2: Initialize the package.json file
npm init -y
Step 3: Install the tailwind-esbuild dependencies
npm install tailwindcss esbuild
Step 4: Create a Tailwind CSS configuration file
npx tailwindcss init
Step 5: Create a folder inside which create styles.css and add your CSS code
CSS
@import 'tailwindcss/base';
@import 'tailwindcss/components';
@import 'tailwindcss/utilities';
// Rest of CSS Code
|
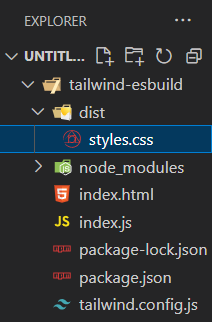
Project Structure
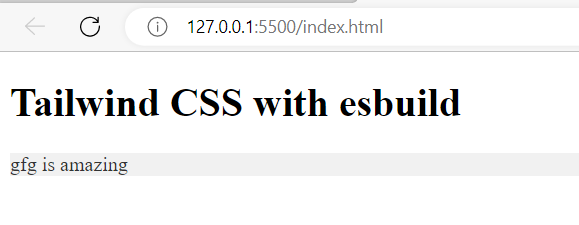
Example 1: In this example, we will use Tailwind CSS with esbuild.
HTML
<!DOCTYPE html>
<html>
<head>
<link rel="stylesheet"
href="dist/styles.css">
</head>
<body>
<h1 class="text-3xl text-center">
Tailwind CSS with esbuild
</h1>
<div class="my-custom-class">
gfg is amazing
</div>
<script src="dist/bundle.js"></script>
</body>
</html>
|
CSS
@import 'tailwindcss/base';
@import 'tailwindcss/components';
@import 'tailwindcss/utilities';
.my-custom-class {
background-color: #f1f1f1;
color: #333;
}
|
Javascript
console.log('TailwindCSS-esbuild');
|
- Step to run: Run the following command to bundle the JavaScript file using esbuild.
npx esbuild index.js --bundle --outfile=dist/bundle.js
The above command will create a file bundle.js inside the ‘dist’ folder which contained bundled javascript.
Output:
Example 2: This is another example that illustrates the implementation of Tailwind CSS with esbuild.
HTML
<!DOCTYPE html>
<html lang="en">
<head>
<meta charset="UTF-8">
<meta name="viewport"
content="width=device-width,
initial-scale=1.0">
<title>Tailwind CSS with esbuild </title>
<link rel="stylesheet"
href="styles.css">
</head>
<body>
<div class="container">
<h1 class="text-3xl font-bold text-blue-500">
Welcome to Tailwind CSS
</h1>
<p class="text-gray-700">GFG</p>
<button id="btn"
class="px-4 py-2 mt-4 bg-blue-500
text-white rounded hover:bg-blue-700">
Click Me
</button>
</div>
<script src="index.js"></script>
</body>
</html>
|
CSS
@import 'tailwindcss/base';
@import 'tailwindcss/components';
@import 'tailwindcss/utilities';
|
Javascript
document.getElementById('btn').addEventListener('click', function() {
alert('Button clicked!');
});
|
Step 7: Run the following command to bundle the JavaScript file using esbuild.
npx esbuild index.js --bundle --outfile=dist/bundle.js
The above command will create a file bundle.js inside the ‘dist’ folder which contained bundled javascript.
Output:

Share your thoughts in the comments
Please Login to comment...