How to Use Azure Traffic Manager to Manage Your Domain Names?
Last Updated :
17 Oct, 2023
In the modern-day digital landscape, managing domain names and ensuring the high availability and performance of your web programs is paramount. Azure Traffic Manager is a powerful Azure service that allows you to gain this goal by intelligently routing site visitors across multiple endpoints, improving both reliability and personal enjoyment. In this article, we are able to discover how to leverage Azure Traffic Manager to correctly manipulate your domains and enhance your net offerings’ performance and availability.
What is Azure Traffic Manager?
Azure Traffic Manager is a DNS-based totally international traffic load balancer that directs customer requests to specific Azure services or endpoints based on various routing strategies. It performs a critical position in distributing traffic across a couple of areas and ensuring the excessive availability of your applications.
Key components
- Traffic Routing: Azure Traffic Manager helps various visitors routing strategies, together with Priority, Weighted, Geographic, and Performance-primarily based routing. Each approach may be custom-designed to suit your particular requirements.
- Health Monitoring: It continuously video displays units the fitness of your endpoints and routinely routes visitors away from unhealthy endpoints, making sure the high-quality consumer enjoys.
- Global Distribution: Azure Traffic Manager has an international presence, permitting you to distribute traffic throughout more than one Azure region or external endpoints internationally.
- Easy Configuration: It gives a consumer-pleasant interface and seamless integration with other Azure offerings, making it clean to set up and manipulate.
How to Use Azure Traffic Manager to Manage Your Domain Names
Step by Step Guide to configure and use Azure Traffic Manager to manage your domain names efficiently:
Step 1: Create an Azure Traffic Manager Profile
Log in to Azure Portal: Sign in to the Azure portal (https://portal.Azure.Com).
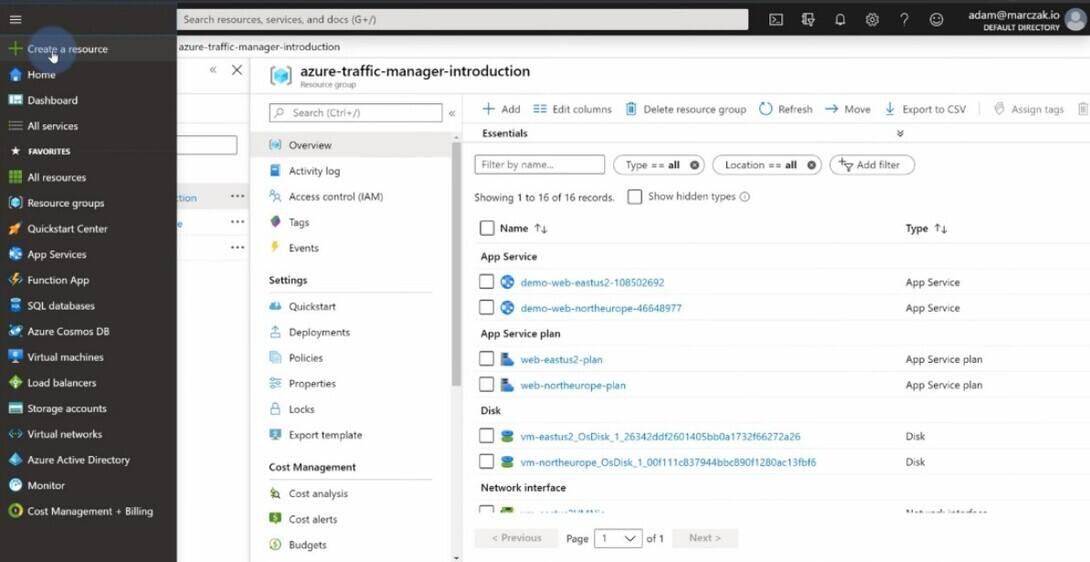
Create a Traffic Manager Profile: Click on the “+ Create a resource” button, look for “Traffic Manager,” and select “Traffic Manager profile” from the quest outcomes.
.jpg)
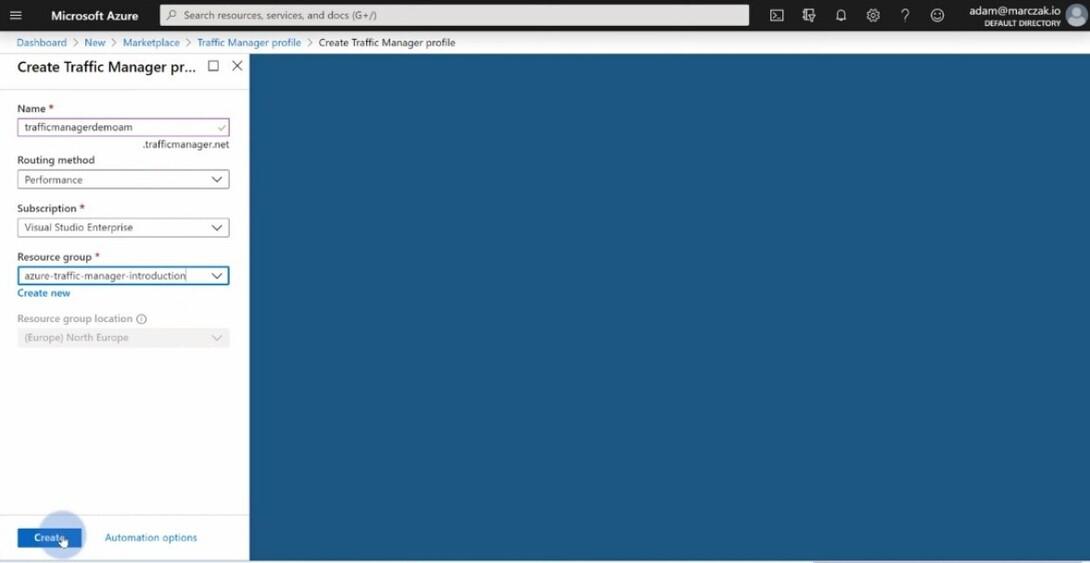
Fill in Profile Details: In the introduction wizard, offer a completely unique call on your Traffic Manager profile, choose the routing method that fits your wishes (e.g., Priority, Weighted, Geographic, or Performance), and choose the subscription and aid organization.
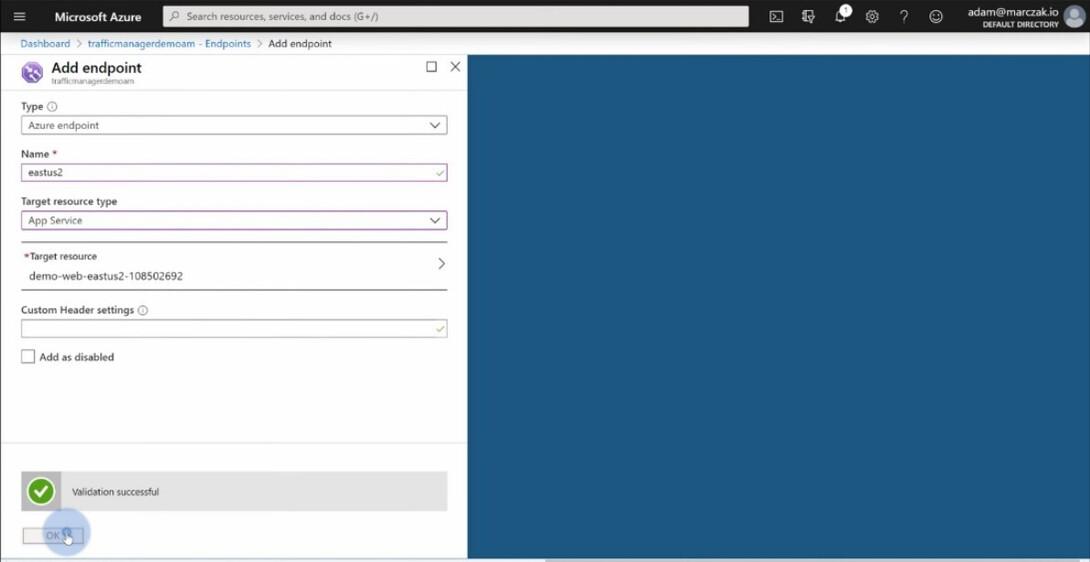
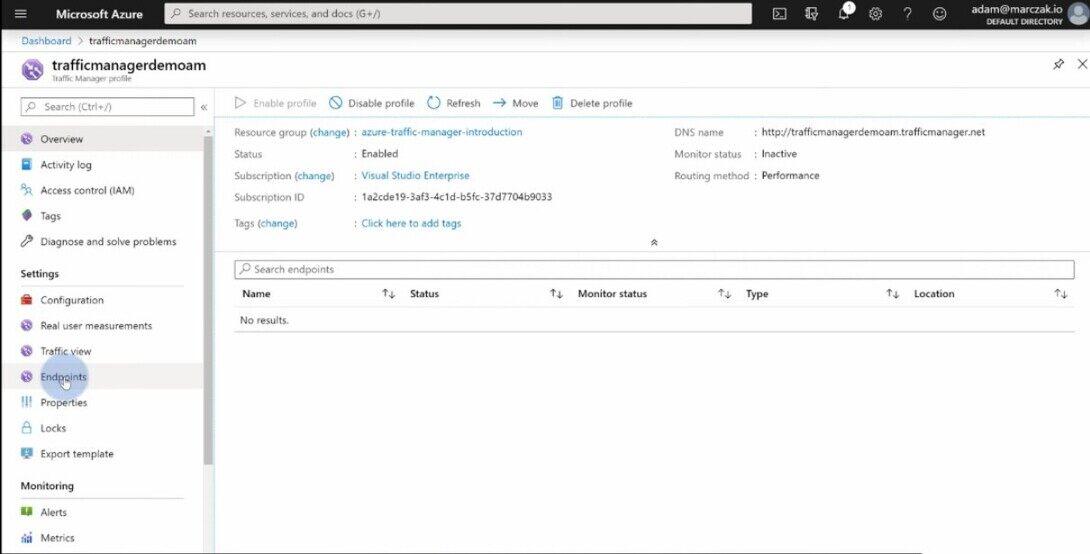
Add Endpoints: Add the endpoints (Azure assets or outside services) that you want to manage underneath the Traffic Manager profile. You can specify the endpoint type, IP deal with, and different relevant info.
Create the Profile: Review your settings and click “Create” to create the Traffic Manager profile.
Step 2: Configure DNS Settings
After your Traffic Manager profile is created, you need to configure your DNS settings to direct traffic via Azure Traffic Manager. Follow those steps:
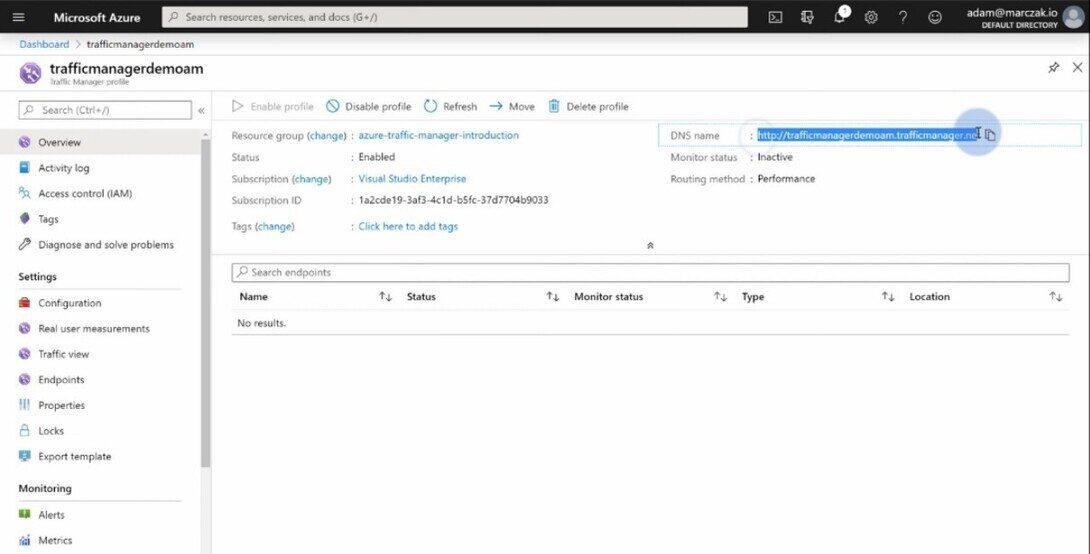
Obtain the DNS Name: In the Azure portal, navigate on your Traffic Manager profile, and in the “Settings” segment, locate the DNS name . This is the DNS name you may use for your domain.
Update DNS Records: Access your domain registrar’s manipulate panel and replace the DNS facts to your domain. Create a CNAME file that points to the DNS call of your Traffic Manager profile.
Propagation: DNS modifications may additionally take some time to propagate globally. Be patient and allow some time for the changes to take effect.
Step 3: Configure Traffic Manager Settings
Now that your DNS settings are up to date, you can configure Traffic Manager settings for top-quality overall performance:
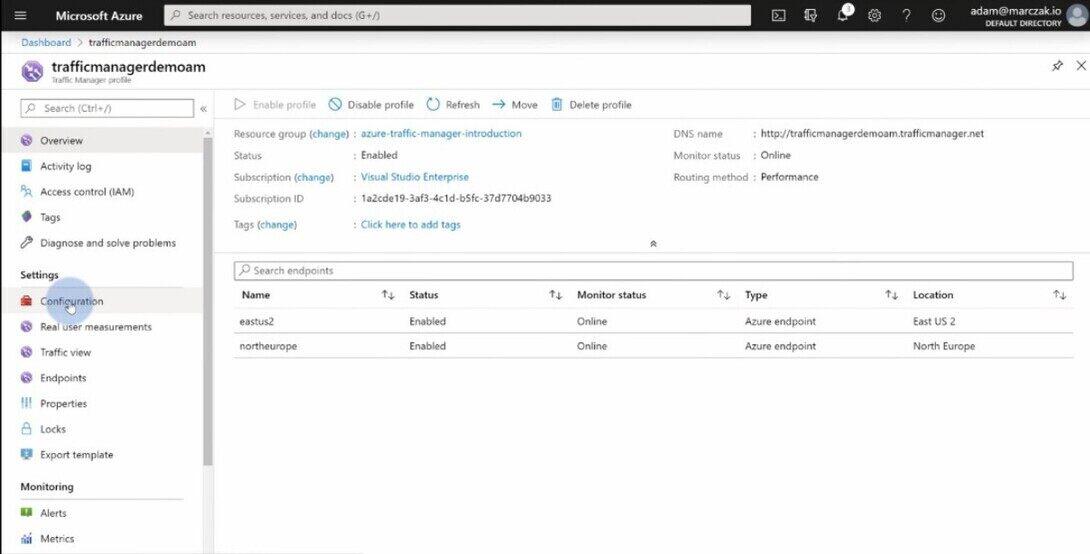
Add Configuration
Monitor Endpoint: Configure health probes to display the health of your endpoints. You can specify the protocol, port, and path to be checked.
Monitor Endpoint
Routing Method: Adjust the routing method according to your requirements. For instance, you could use the “Performance” method to route traffic to the closest endpoint or “Weighted” routing to distribute site visitors based totally on predefined weights.

Routing Method
Step 4: Monitor and Optimize
Regularly reveal the overall performance and fitness of your endpoints the usage of Azure Traffic Manager’s tracking gear and Azure Monitor. Adjust the configuration as needed to optimize traffic routing for the great person experience.
Best Practices and Tips
1. Choose the Right Routing Method:
- Understand the requirements of your application and pick the most suitable routing method (Priority, Weighted, Geographic, or Performance).
- For excessive availability, recall the usage of the “Priority” routing technique to designate a primary endpoint and one or more backup endpoints.
2. Distribute Endpoints Across Multiple Regions
To enhance reliability, distribute your endpoints throughout multiple Azure areas or outside data facilities. This guarantees that your software stays handy even though one region reports an outage.
3. Implement Health Probes
- Configure health probes on your endpoints to frequently check their health popularity. Ensure that endpoints are healthy before directing visitors to them.
- Customize probe settings based on the specific needs of your utility, including the protocol, port, and route to check.
4. Set Low TTL Values
Consider putting a low TTL (Time-to-Live) price in your DNS statistics. A shorter TTL permits for faster failover in case of endpoint issues, as DNS updates propagate faster.
5. Use Azure Monitor and Alerts
- Leverage Azure Monitor and Azure Alerts to proactively screen the overall performance and fitness of your Traffic Manager profile and endpoints.
- Set up indicators to be notified of any troubles or unusual traffic patterns.
Conclusion
Azure Traffic Manager is a valuable tool for coping with your domain names and making sure excessive availability and most desirable performance to your internet packages. By following the stairs outlined on this guide, you may efficiently configure and use Traffic Manager to distribute visitors intelligently, beautify reliability, and supply an notable consumer experience for your audience global. Whether you are going for walks a small website or a large-scale application, Azure Traffic Manager may be a game-changer in handling your domains and web services.
FAQs On Azure Traffic Manager
1. What is Azure Traffic Manager, and why should I use it to manage my domains?
Azure Traffic Manager is a worldwide visitors load balancer provider furnished by using Microsoft Azure. It lets in you to distribute incoming traffic across multiple endpoints, improving the provision and overall performance of your web packages. Using Traffic Manager guarantees that your customers are directed to the closest, healthiest endpoint, ensuing in a better consumer revel in.
2. Can I use Azure Traffic Manager with non-Azure endpoints and services?
Yes, Azure Traffic Manager may be used to manipulate domain names and path traffic to both Azure and non-Azure endpoints. You can add outside, non-Azure endpoints like on-premises servers or sources hosted with different cloud companies.
Share your thoughts in the comments
Please Login to comment...