As our systems get more complex and complex, there is often a need to update the underlying data to accommodate the evolution of the system. SQL provides a variety of ways to update the data so that the system developer can manipulate the data in whatever way necessary. In this article, we will be looking at how one can update the top 100 records using SQL.
Note: I will be using MySQL for this article. Also, for demonstration, I will only update the top 3 rows. However, the steps will be the same irrespective of the number of rows.
Update Statement in SQL
The UPDATE statement is a powerful tool used to modify existing records in a database table. It allows developers to make changes to one or more columns within a specified table based on specific criteria, such as conditions defined in the WHERE clause.
The syntax for the UPDATE statement:
UPDATE table_nameSET column1 = value1, column2 = value2, …WHERE condition;
Explanation:
- table_name is the name of the table from which records will be updated.
- column1, column2, etc., represent the columns within the table that will be updated.
- value1, value2, etc., are the new values to be assigned to the respective columns.
The WHERE clause is optional but recommended, as it allows you to specify conditions that must be met for the update to occur. If omitted, all records in the table will be updated.
Setting Up Environment
Let’s start by creating a table and adding some sample data in the table.
CREATE TABLE test(id INTEGER, title VARCHAR(100));

INSERT INTO test (id, title)
VALUES
(1, 'Title 1'),
(2, 'Title 2'),
(3, 'Title 3'),
(4, 'Title 4'),
(5, 'Title 5'),
(6, 'Title 6'),
(7, 'Title 7'),
(8, 'Title 8'),
(9, 'Title 9'),
(10, 'Title 10');
The following is the current data in the table:
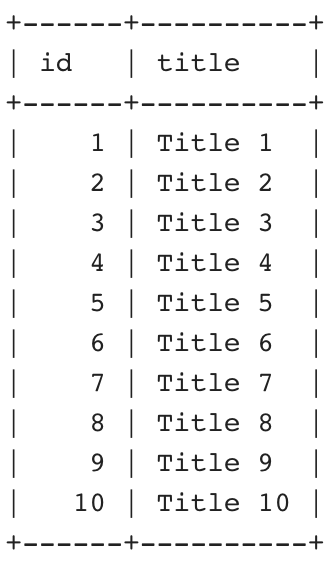
Initial data
Now that we have the setup in place, let now go forward to see how we can update the top 100 records of the table. We are going to have a look in this article at two methods to update the top 100 records of the table.
Method 1: Using LIMIT clause
The LIMIT clause is used to restrict the records returned by the query. We can make use of the LIMIT clause in conjunction with UPDATE clause to restrict the query to only update the top n records. However, to make this work, we need to provide an ordering using the ORDER BY clause for the SQL engine to understand what records to return.
The following query updates the top 3 records depending on the ascending order of the id column:
UPDATE test SET id=-10
ORDER BY id
LIMIT 3;
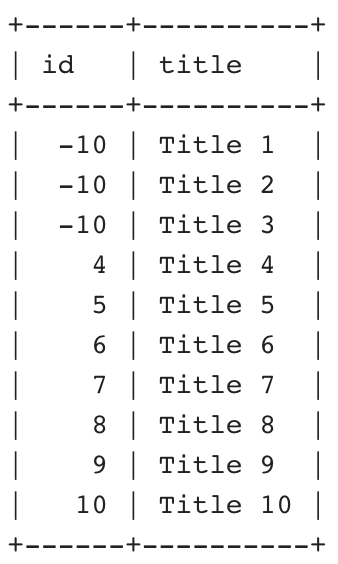
The following image shows the records in the table after the update command is executed.

Updated data
Method 2: Using Row Number
This is a little bit of a hack and is a little bit complicated than the above method but it does not need the user to define an ordering.
First, we will start by altering the table to add a column which will be used to store the row number value. We will add a column named row_num of integer type to the table.
ALTER TABLE test ADD row_num int;
Now we will define a variable which we will use to assign the row number to the record. We will initialize it with 0 and use it in the update statement to assign value to the newly added row_num column.
SET @row_number = 0;
UPDATE test
SET row_num= (@row_number:=@row_number + 1);
We will make use of the row_num column in the WHERE clause to filter out the required records
UPDATE test
SET id=-10
WHERE row_num<=3;
Finally, we will drop the extra column using the ALTER clause so that there is no change in the original schema of the table.
ALTER TABLE test DROP COLUMN row_num;
Output:
Updated data
Example of Updating Top 100 Records in SQL
Let’s now use the concepts we have learned in this article in a technical example.
First let’s create the table and insert some data inside it. The following query creates an employee table and inserts nine records in it.
-- create
CREATE TABLE EMPLOYEE (
  empId int,
  name varchar(100),
  dept varchar(50)
);

-- insert
INSERT INTO EMPLOYEE(empId,name,dept) VALUES (100, 'Clark', 'Engineering');
INSERT INTO EMPLOYEE(empId,name,dept) VALUES (5, 'Jill', 'Sales');
INSERT INTO EMPLOYEE(empId,name,dept) VALUES (6, 'Ava', 'Marketing');
INSERT INTO EMPLOYEE(empId,name,dept) VALUES (2, 'Dave', 'Accounting');
INSERT INTO EMPLOYEE(empId,name,dept) VALUES (71, 'Tom', 'Sales');
INSERT INTO EMPLOYEE(empId,name,dept) VALUES (4, 'Jake', 'Sales');
INSERT INTO EMPLOYEE(empId,name,dept) VALUES (8, 'Ben', 'Marketing');
INSERT INTO EMPLOYEE(empId,name,dept) VALUES (9, 'Alice', 'Engineering');
INSERT INTO EMPLOYEE(empId,name,dept) VALUES (11, 'Mike', 'Marketing');
The above query creates an employee table with three fields and inserts the data for nine employees. The following query returns the initial data in the table:
SELECT * FROM EMPLOYEE;
The following is the initial data:
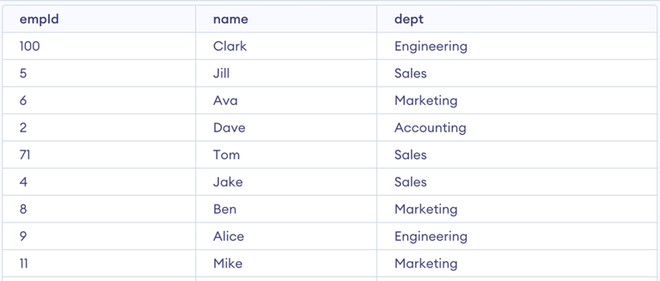
EMPLOYEE TABLE
Now let’s try to update the department of the top 3 employees ordered by employee id to ‘Analytics‘. For this, we are going to make use of the concepts learned in method 1. We will use make use of the LIMIT clause to get the desired results. In the following query, we make use of the ORDER BY clause to order the employees by their employee id and the LIMIT clause in the end to restrict the update statement to the top 3 records:
UPDATE EMPLOYEE SET dept='Analytics'
ORDER BY empId
LIMIT 3;
As you can see in the below image the department of Dave, Jake and Jill has been updated to Analytics from Accounting, Sales, and Sales respectively.
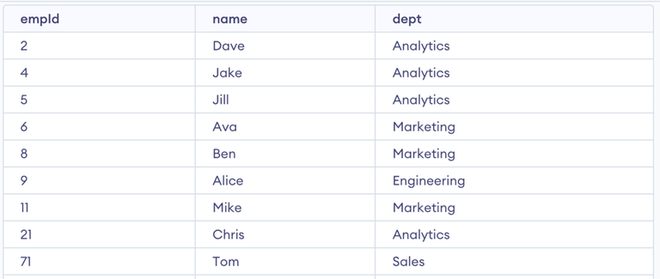
Updated data
Explanation: The output of the query is an updated EMPLOYEE table where the department for the top 3 employees (based on ascending empId) is set to ‘Analytics’.
Conclusion
In this article, we covered how we can update the top n records of the table in SQL. We had a chance to look at two different methods to go about doing this, first using LIMIT clause and the other using row number in conjunction with UPDATE clause. We also saw how we can use the concepts we learned in this article to a real-life situation through the technical example.
Share your thoughts in the comments
Please Login to comment...