How to Set up a Wireless Network in Puppy Linux
Last Updated :
01 Feb, 2024
Puppy Linux is a lightweight operating system often used from a USB stick on various PCs. Connecting it to WiFi allows web access and keeping it updated. However, being compact means built-in tools are basic. Setting up wireless internet requires installing extra software initially. A quick command line process scans networks, selects yours, and saves the details. On the next boot, Puppy auto-connects with the saved WiFi profile. Doing this small setup allows taking your portable Puppy Linux anywhere while wirelessly accessing the internet and downloading the latest packages. It brings network connectivity to this compact OS.
Key Features of Puppy Linux
- Small Size – Puppy Linux is very small, usually less than 300MB. This makes it fast to download and easy to run on old computers.
- Runs from RAM – Puppy Linux loads into and runs from your computer’s RAM. This makes it very fast and responsive. It doesn’t need to keep accessing the hard drive.
- Portable – You can run Puppy Linux from a USB drive or CD without installing anything on the hard drive. Take your operating system and files with you anywhere.
- Easy to Use – The interface is designed to be beginner friendly. The menus and tools are simple and easy to use for basic tasks.
- Compatible – Puppy Linux can run many Windows applications if needed. It also works easily with peripherals like printers, scanners, cameras, etc.
- Customizable – There are small versions called “pups” that allow you to add features that you want for your specific needs. This keeps the OS light.
Setting up a Wireless Network in Puppy Linux
Step 1 : Click on the green shield icon in your screen’s lower right corner to open the menu. Select ” Internet Connection Wizard “ which is one of the options listed in the menu.
The Internet Connection Wizard is a tool that will guide you through the process of establishing an Internet connection on your computer.
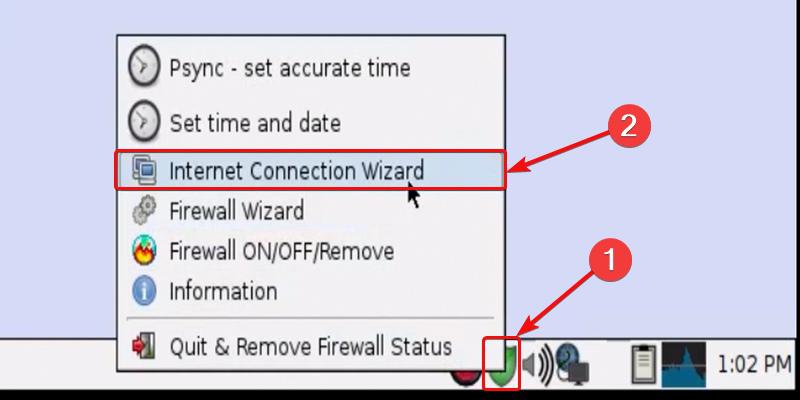
Select Internet Connection Wizard
Step 2 : Within the Internet Connection Wizard menu, you will need to select the option for ” Wired or Wireless LAN. “ This specifies that you will be establishing a local area network internet connection, either through a wired ethernet cable or over a wireless Wi-Fi network.
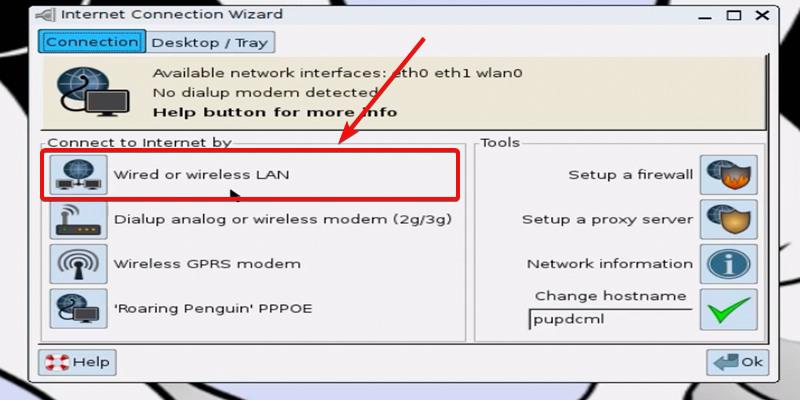
Select Wired or wireless LAN
Step 3 : After clicking on the ” Wired or Wireless LAN “ option within the Internet Connection Wizard menu, you will be presented with three sub-option choices related to establishing this type of connection. Select the third Option that reads ” Network Wizard. “
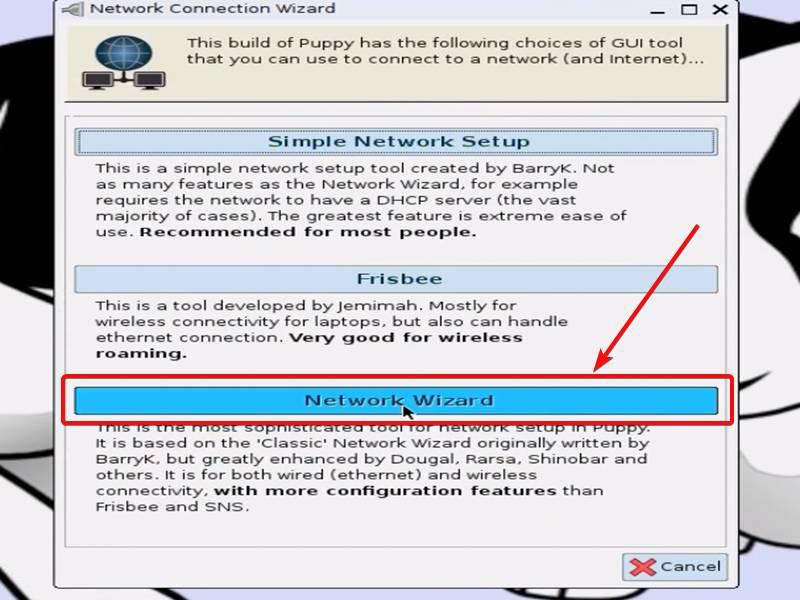
Click on Network Wizard
Step 4 : After launching the Network Wizard within the internet connection set-up sequence, you will be prompted to select the network interface card you wish to connect with. Click on ” wlan0 “ from the list to set up a connection over the wireless network adapter in your computer.
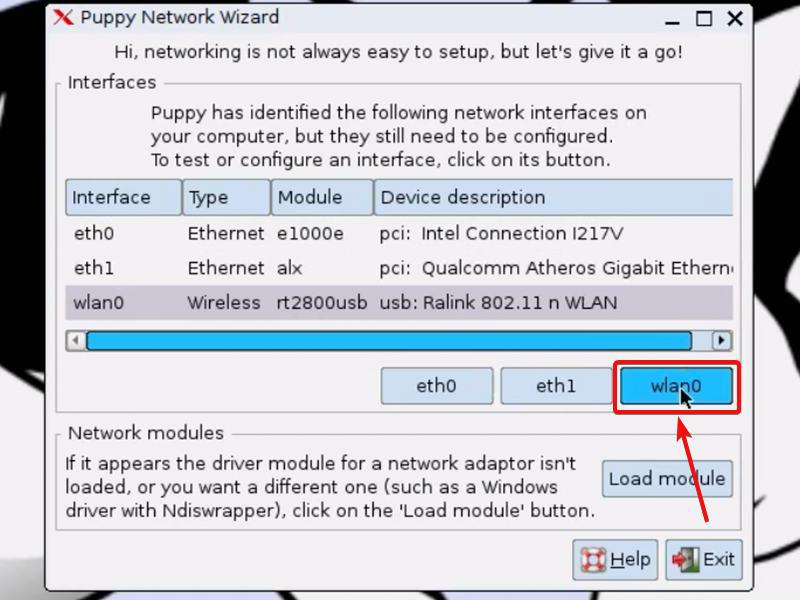
Select the wlan0 Option
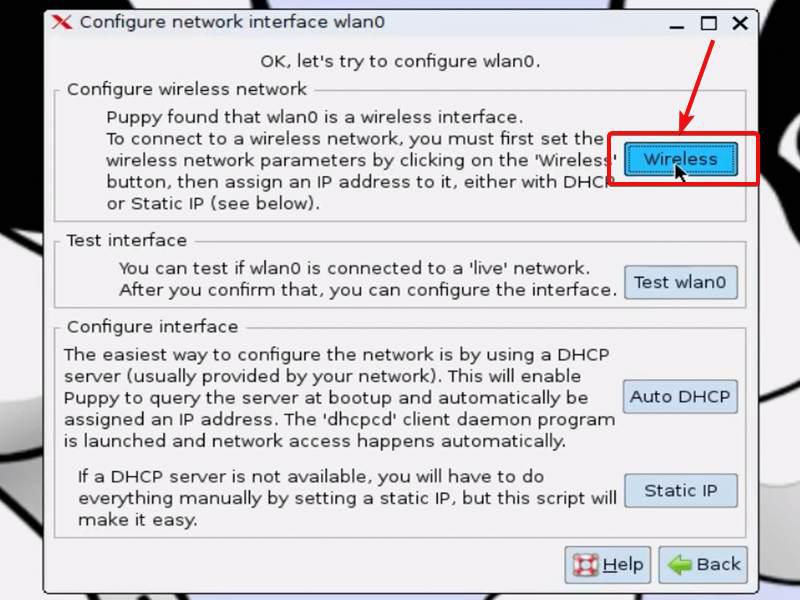
Step 5 : After selecting your computer’s wlan0 wireless network card within the Network Wizard, click on the ” Wireless “ option from the next set of choices provided. Selecting Wireless will initiate a system-wide scan to detect any and all Wi-Fi networks currently broadcasting wireless signals that are within range of your computer’s location.
Step 6 : After the Network Wizard scans for detectable wireless networks nearby, you may need to additionally install hardware driver modules that allow your wireless card to fully interact with some Wi-Fi signals found. To enable complete compatibility and functionality with a variety of network types, click on the ” Add to List “ option to append the ” rt2800usb “ wireless modules to your wlan0 network interface card.
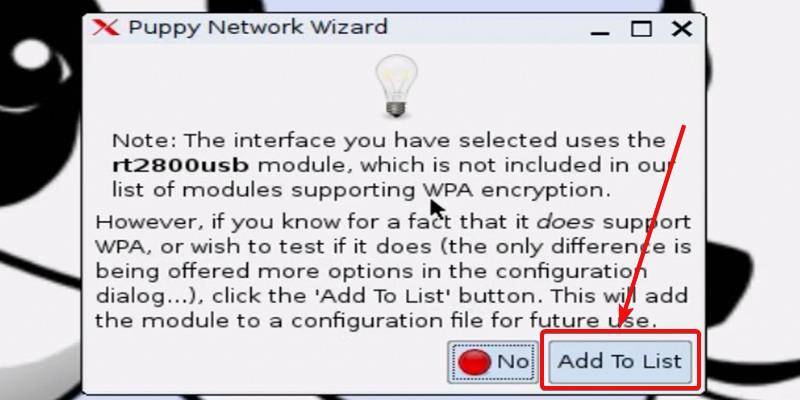
Add To List
After adding the Module into the List Click on the ” Ok ” To Confirm the Module.
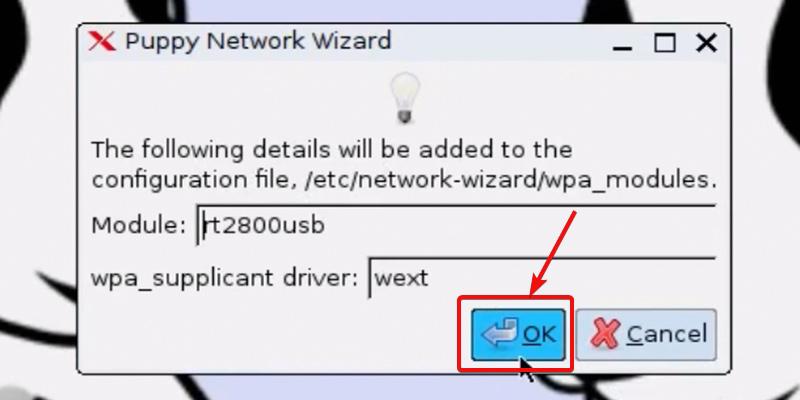
Click on OK
Step 7 : After successfully installing the rt2800usb wireless modules/drivers to your wlan0 network card through the ” Add to List ” confirmation in the Network Wizard, you will return to the main wireless network configuration menu. At this point, with the compatible drivers now loaded to facilitate communication across various wifi standards, you will want to click the ” Scan “ button to immediately Start the surrounding wireless network search.
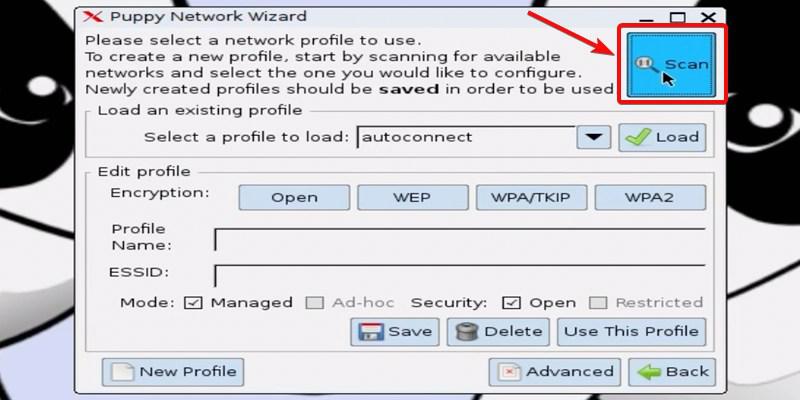
Click on Scan Option
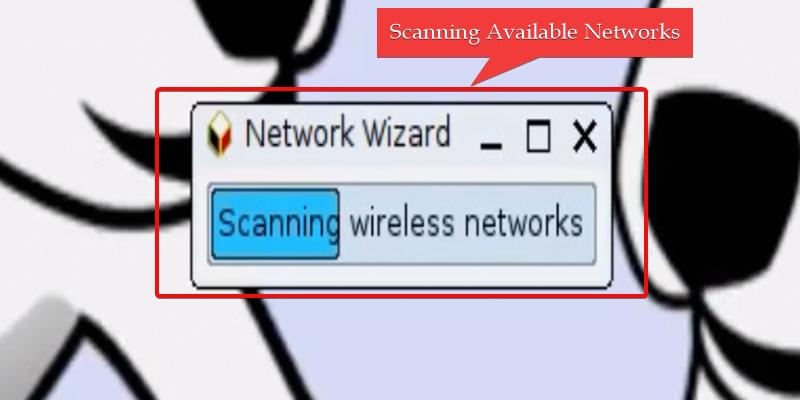
Scanning the Available Wireless Networks
Step 8 : Upon successful completion of restarting the wireless network scan with the rt2800usb modules integrated to recognize a wide range of Wi-Fi signal types, you should now see the full list of discovered wireless Networks in the Network Wizard menu. Select the Network and then Click on ” Ok “.
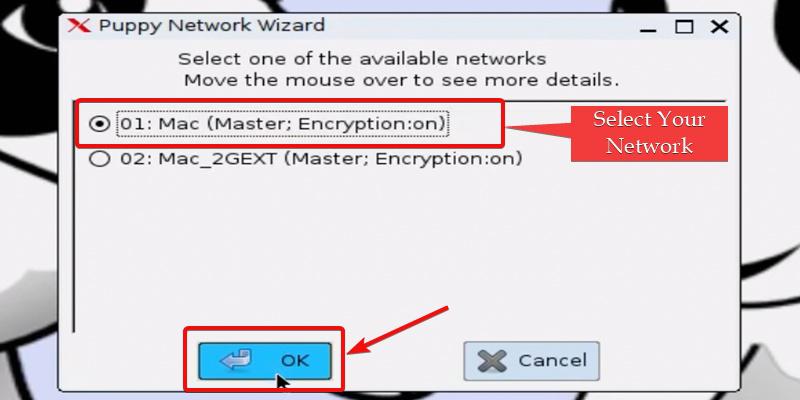
Select your Network
Step 9 : After selecting your specific target wireless network SSID, you will next need to specify the type of security protocol that the Wi-Fi network leverages, either ” WPA2 “ encryption requiring a password, or an open unencrypted connection.
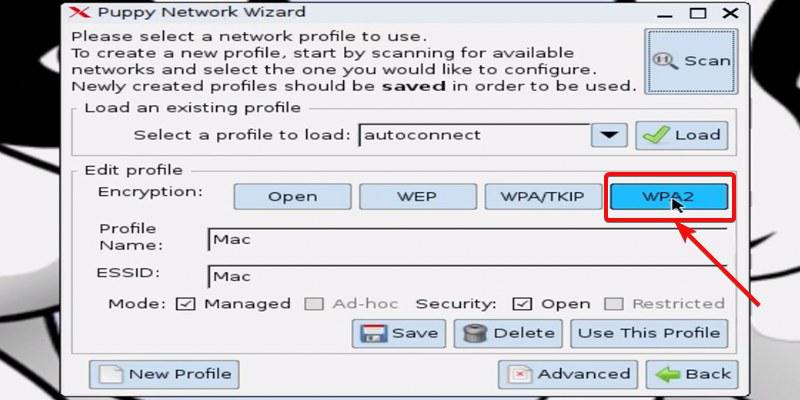
Select the WPA2 Option
Step 10 : After specifying WPA2 encryption is implemented on the wireless network you are connecting to, you will be prompted within the Network Wizard to enter the matching network security password or “shared key” configured on that Wi-Fi access point. Accurately type the password key used for that wireless network into the field provided.
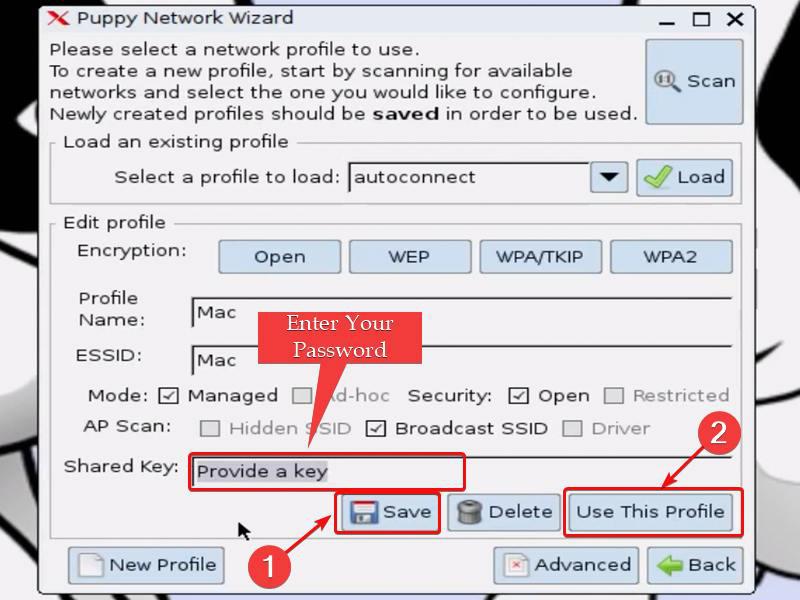
Enter you Password and Click on Use this Profile
Step 11 : With your selected wireless network credentials and connection profile now saved after progressing through the Network Wizard menus, the last step is to initialize the automatic IP assignment process that fully joins your computer with that Wi-Fi network. To accomplish this, click on the ” Auto DHCP “ option to enable your wireless card to automatically obtain needed networking parameters from that secure wireless network you recently input the password to access.
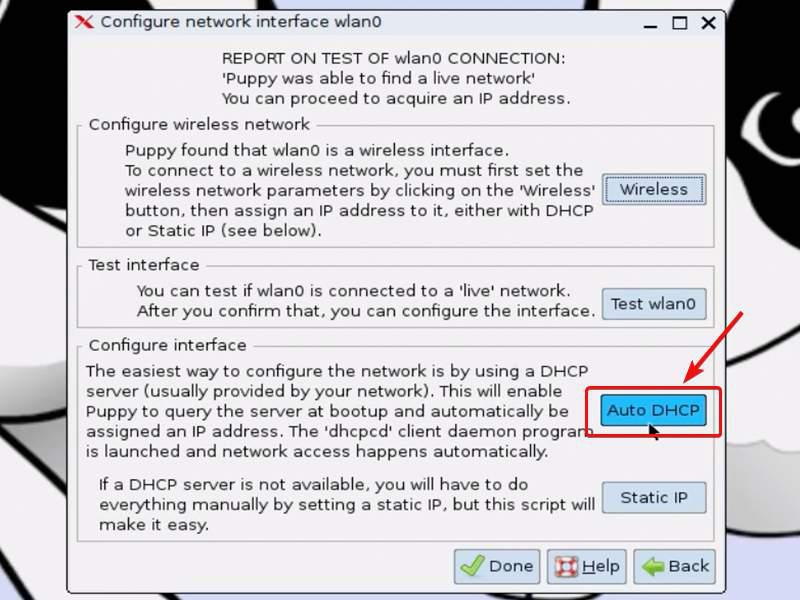
Click on Auto DHCP
This window will Pop-Up after clicking on Auto DHCP, It will be Start Connecting to our Wireless Network.
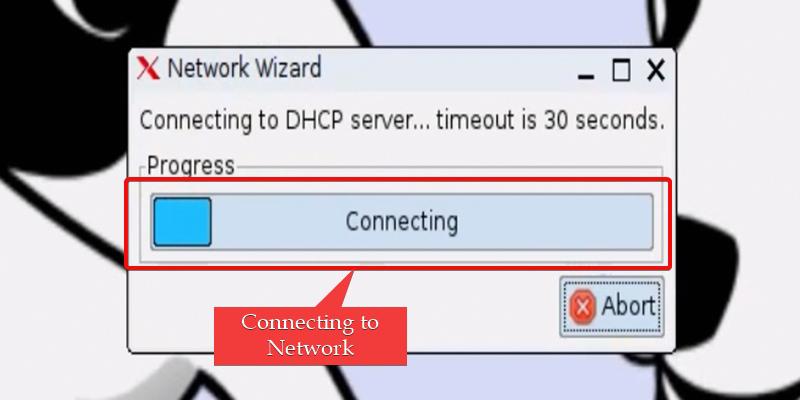
Connecting to the Network
After that you can see the Message in Dialog Box that says ” NETWORK CONFIGURATION OF wlan0 SUCCESSFUL “. It means that you are connected to the Network, Click on Yes to Save the Configuration for the Next Time.
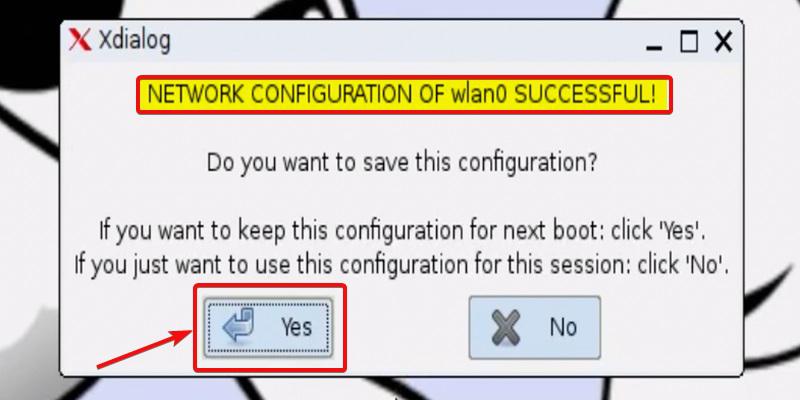
Network CONFIGURATION OF wlan0 SUCCESSFUL
Great ! Now you are Successfully Connected to the Network , Click on ” Done ” and you can go and Surf the Internet or Whatever you want to do.
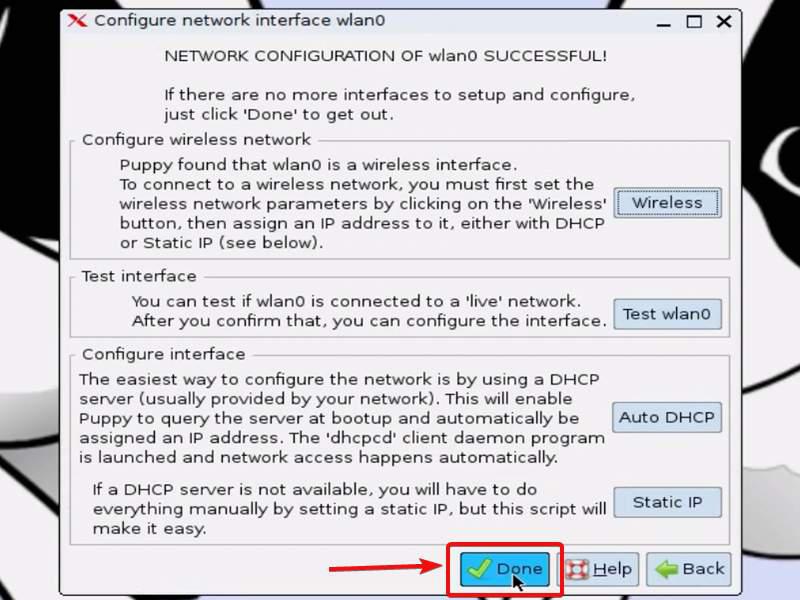
Click on Done
Conclusion
The step-by-step Network Wizard provides an easy way to get Puppy Linux connected to the internet over Wi-Fi. By guiding users to select wireless network hardware, scan for available wireless networks, install needed drivers, choose and save a network password, and automatically configure technical details behind the scenes, anyone can get online quickly even with limited technical experience. Within minutes, wireless internet access can be set up on a Puppy Linux computer by simply advancing through the Network Wizard menus and inputting your Wi-Fi network password when prompted. The wizard handles the complicated network configurations automatically, allowing even networking beginners to get Puppy Linux online over any modern wireless network.
Share your thoughts in the comments
Please Login to comment...