How To Reset Jenkins Security Settings From The Command Line ?
Last Updated :
20 Feb, 2024
This article guides you through in resetting Jenkins security settings from the command line. It is crucial to understand the associated risks and prioritize alternative solutions whenever possible. We’ll dive into the completely disabling security (a highly discouraged option. Remember, security is essential so perform the configurations carefully and only use this method as a last resort.
What is Jenkins?
Jenkins is an automation hosting web server built on top of Java. It is used for continuous integration and continuous deployment. It comes with supporting a lot of plugins that help in integrating many tools and services. It helps in building pipelines and functions automatically when the monitoring is noticed it triggers the actions as per the request.
Step-By-Step Implementation Of Reseting Jenkins Security Settings From CLI
Firstly let’s set the Jenkins on top of AWS using Amazon Linux As Image and Then Start the Jenkins server. The following are step-by-step implementations of Jenkins setup.
Step 1: Navigate to EC2 Dashboard
- Navigate to AWS Sign in Console and sign in with your login credentials.
- Then Search for the service Amazon EC2 and go to that Dashboard.
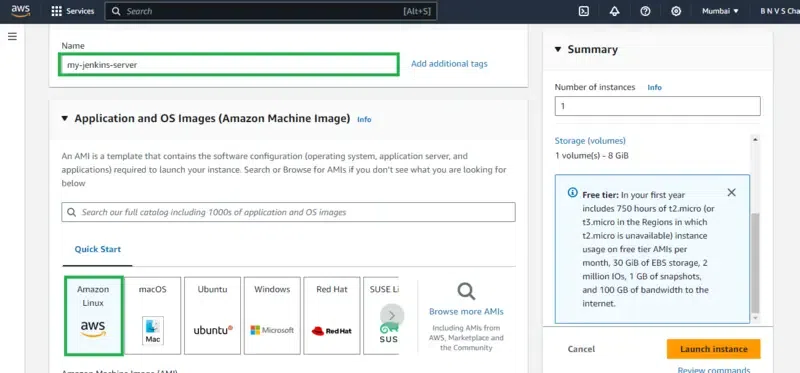
- From This EC2 dashboard, Click on the Launch instances as shown in the below screenshot.

- Name The Instance and Choose Amazon Linux AMI Image.
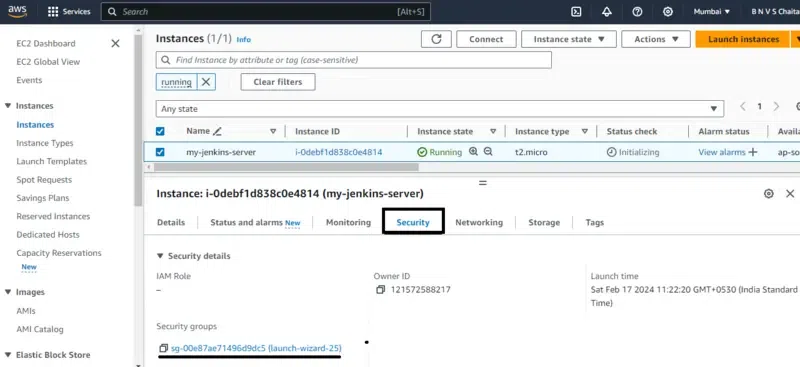
Step 2: Configuring Security Groups
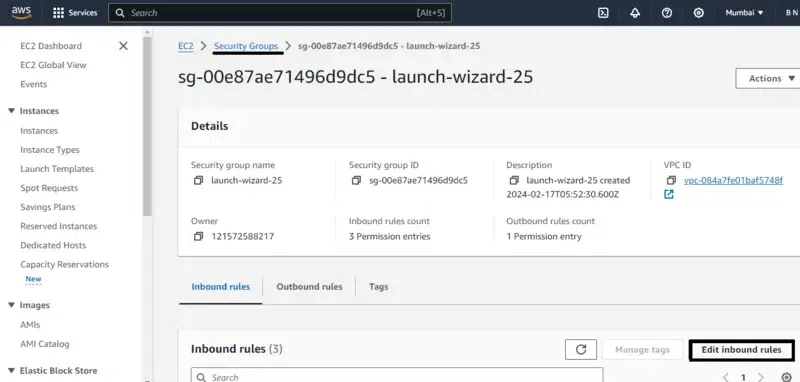
- Provide the permissions for incoming traffic for port 8080 from any IP. You can restrict the access to make the jenkins server more secure but for now, lets allow all the traffic. For that firstly go to Security groups.
- Next go to the inbound traffic as shown in the below figure.
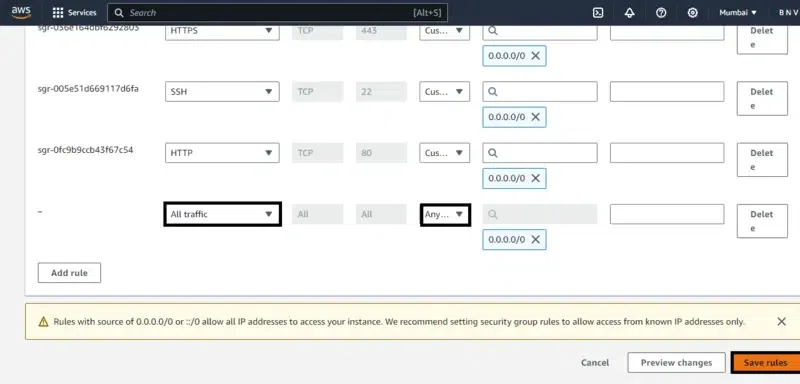
- Configure the security Inbound rules by allowing all traffic and ports as of now, so that we don’t face network issues from AWS EC2.
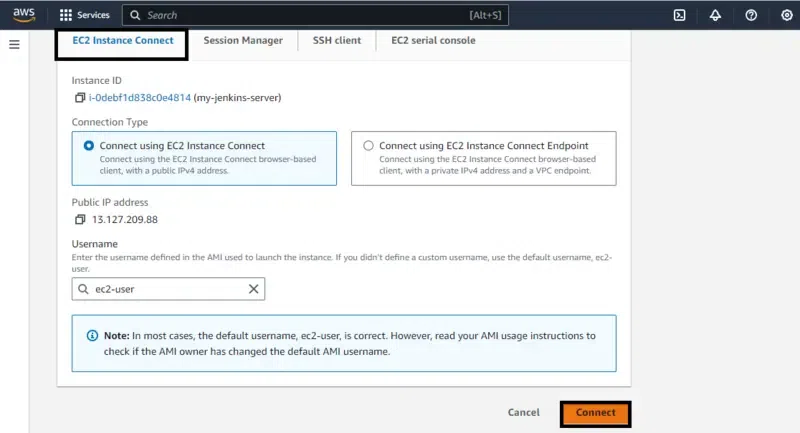
Step 3: Connect To EC2 Console
For the CLI mode of interaction we are using EC2 Console other prefered alternative way will be downloading ssh key and connecting from local command line.
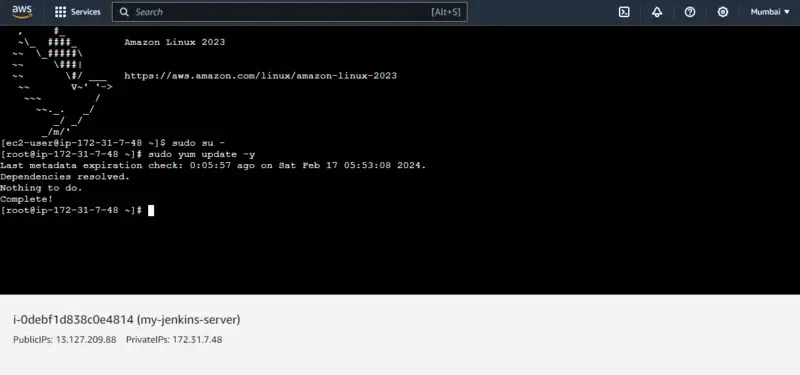
Step 4: Update The System
For having more access and powers switch to root or else you run same commands with using sudo initially.
yum update -y
Step 5: Add The Jenkins Repository
wget -O /etc/yum.repos.d/jenkins.repo https://pkg.jenkins.io/redhat/jenkins.repo

rpm --import https://pkg.jenkins.io/redhat/jenkins.io-2023.key
Step 6: Install The Java
- Jenkins requires java, so you need to install it on your Amazon Linux Instance
sudo yum install java-17* -y
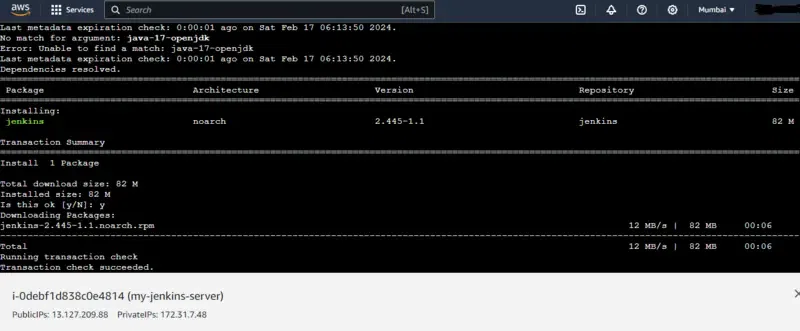
Step 7: Install The Jenkins
Install the Jenkins after successful installation of Java software or else it raises error in the jenkins setup. Jenkins is build on top of java.
yum install jenkins
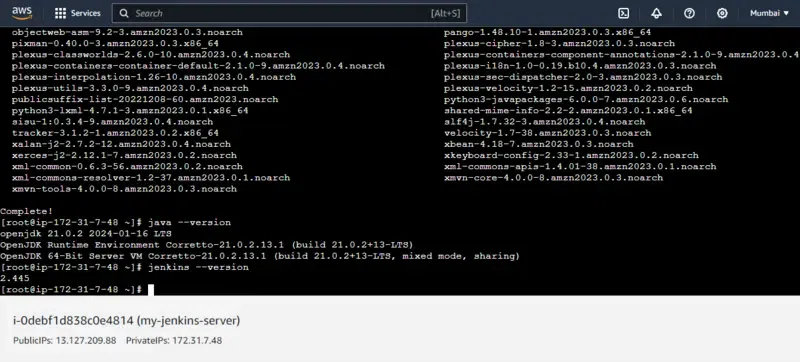
Step 8: Verify The Jenkins And Java Installation
- Verify the installation of jenkins and java by checking their versions with commands as follows:
java  --version
Jenkins  --version
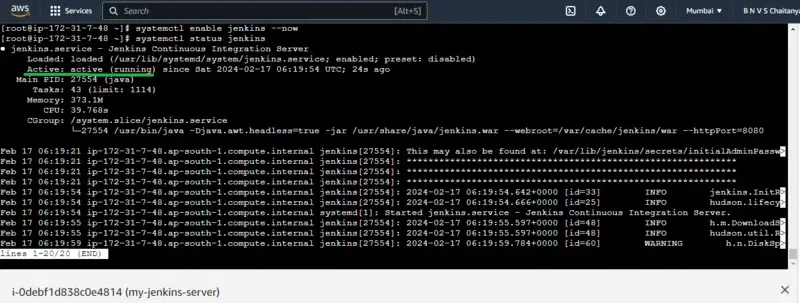
Step 9: Start The Jenkins Server
Start the jenkins server with the following command:
systemctl start jenkins
or
systemctl enable jenkins --now
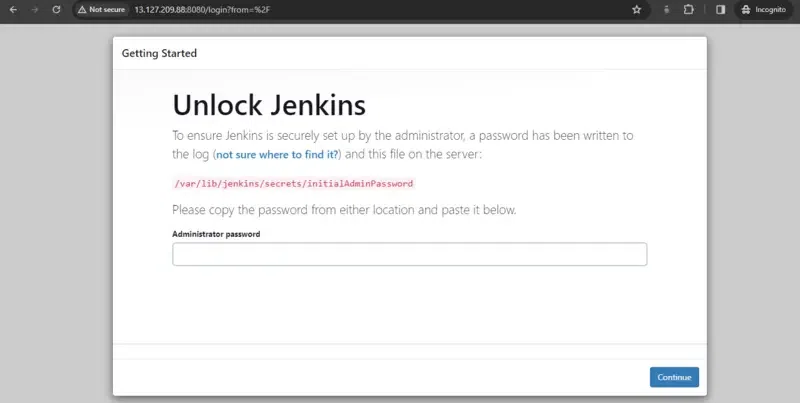
- To be more sure about successful installation, you can launch it on the your using public IP with port 8080 as shown in the below screenshot.
Resetting The Jenkins Security Settings From the Command line
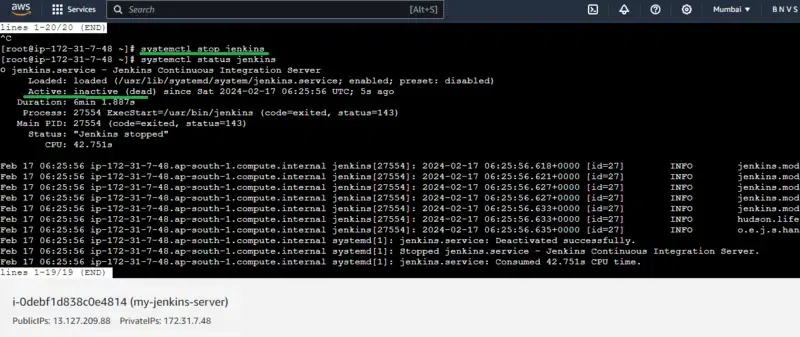
Step 10: Stop The Jenkins Server
- For resetting the Jenkins firstly we have to stop the Jenkins Server or else the configuration issues raise. So stop the jenkins server on using the following command
systemctl stop jenkins
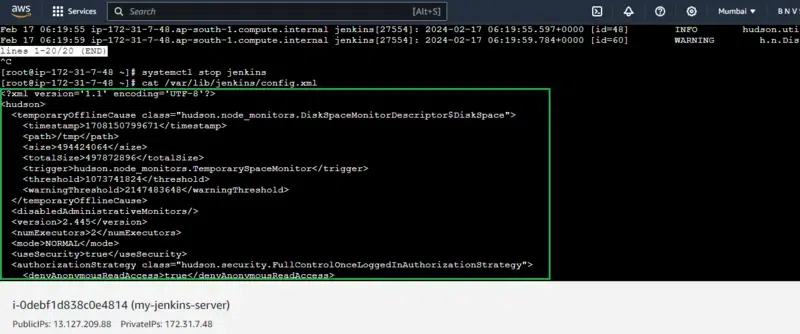
Step 11: Configuring The Jenkins File
- Edit config.xml: Navigate to the Jenkins home directory (e.g., /var/lib/jenkins) and open config.xml in a text editor.
vim /var/lib/jenkins/config.xml
- The configuration jenkins file will looks as shown in the below screenshot.
Step 12: Disabling the security Section Of Jekins
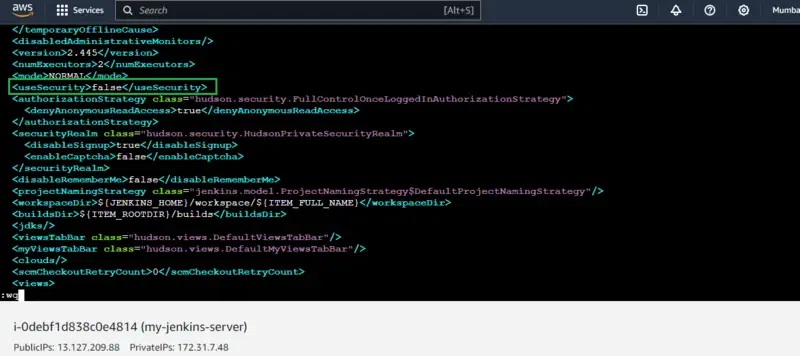
- Locate <useSecurity> containing line as <useSecurity>true</useSecurity>.
- Change the value by replacing true with false. The config file code will be look like this:
<?xml version='1.1' encoding='UTF-8'?>
<hudson>
  <temporaryOfflineCause class="hudson.node_monitors.DiskSpaceMonitorDescriptor$DiskSpace">
    <timestamp>1708150799671</timestamp>
    <path>/tmp</path>
    <size>494424064</size>
    <totalSize>497872896</totalSize>
    <trigger>hudson.node_monitors.TemporarySpaceMonitor</trigger>
    <threshold>1073741824</threshold>
    <warningThreshold>2147483648</warningThreshold>
  </temporaryOfflineCause>
  <disabledAdministrativeMonitors/>
  <version>2.445</version>
  <numExecutors>2</numExecutors>
  <mode>NORMAL</mode>
  <useSecurity>true</useSecurity>
  <authorizationStrategy class="hudson.security.FullControlOnceLoggedInAuthorizationStrategy">
    <denyAnonymousReadAccess>true</denyAnonymousReadAccess>
  </authorizationStrategy>
  <securityRealm class="hudson.security.HudsonPrivateSecurityRealm">
    <disableSignup>true</disableSignup>
    <enableCaptcha>false</enableCaptcha>
  </securityRealm>
  <disableRememberMe>false</disableRememberMe>
  <projectNamingStrategy class="jenkins.model.ProjectNamingStrategy$DefaultProjectNamingStrategy"/>
  <workspaceDir>${JENKINS_HOME}/workspace/${ITEM_FULL_NAME}</workspaceDir>
  <buildsDir>${ITEM_ROOTDIR}/builds</buildsDir>
  <jdks/>
  <viewsTabBar class="hudson.views.DefaultViewsTabBar"/>
[root@ip-172-31-7-48 ~]# vim /var/lib/jenkins/config.xml
[root@ip-172-31-7-48 ~]# vim /var/lib/jenkins/config.xml
[root@ip-172-31-7-48 ~]# cat /var/lib/jenkins/config.xml
<?xml version='1.1' encoding='UTF-8'?>
<hudson>
  <temporaryOfflineCause class="hudson.node_monitors.DiskSpaceMonitorDescriptor$DiskSpace">
    <timestamp>1708150799671</timestamp>
    <path>/tmp</path>
    <size>494424064</size>
    <totalSize>497872896</totalSize>
    <trigger>hudson.node_monitors.TemporarySpaceMonitor</trigger>
    <threshold>1073741824</threshold>
    <warningThreshold>2147483648</warningThreshold>
  </temporaryOfflineCause>
  <disabledAdministrativeMonitors/>
  <version>2.445</version>
  <numExecutors>2</numExecutors>
  <mode>NORMAL</mode>
  <useSecurity>false</useSecurity>
  <authorizationStrategy class="hudson.security.FullControlOnceLoggedInAuthorizationStrategy">
    <denyAnonymousReadAccess>true</denyAnonymousReadAccess>
  </authorizationStrategy>
  <securityRealm class="hudson.security.HudsonPrivateSecurityRealm">
    <disableSignup>true</disableSignup>
    <enableCaptcha>false</enableCaptcha>
  </securityRealm>
  <disableRememberMe>false</disableRememberMe>
  <projectNamingStrategy class="jenkins.model.ProjectNamingStrategy$DefaultProjectNamingStrategy"/>
  <workspaceDir>${JENKINS_HOME}/workspace/${ITEM_FULL_NAME}</workspaceDir>
  <buildsDir>${ITEM_ROOTDIR}/builds</buildsDir>
  <jdks/>
  <viewsTabBar class="hudson.views.DefaultViewsTabBar"/>
  <myViewsTabBar class="hudson.views.DefaultMyViewsTabBar"/>
  <clouds/>
  <scmCheckoutRetryCount>0</scmCheckoutRetryCount>
  <views>
    <hudson.model.AllView>
      <owner class="hudson" reference="../../.."/>
      <name>all</name>
      <filterExecutors>false</filterExecutors>
      <filterQueue>false</filterQueue>
      <properties class="hudson.model.View$PropertyList"/>
    </hudson.model.AllView>
  </views>
  <primaryView>all</primaryView>
  <slaveAgentPort>-1</slaveAgentPort>
  <label></label>
  <crumbIssuer class="hudson.security.csrf.DefaultCrumbIssuer">
    <excludeClientIPFromCrumb>false</excludeClientIPFromCrumb>
  </crumbIssuer>
  <nodeProperties/>
  <globalNodeProperties/>
  <nodeRenameMigrationNeeded>false</nodeRenameMigrationNeeded>
</hudson>
The below screenshots the practical configuring to false for disabiling the security.
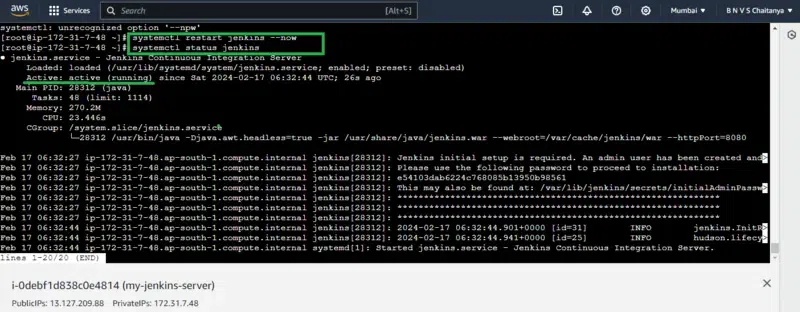
Step 4: Restart The Jekins Server
- Save the changes and restart Jenkins using the appropriate command as following.
systemctl restart jenkins
After restarting the jenkins check the status of jenkins, If it is running then the jenkins configuration is working fine and security of jenkins is disabled.
Conclusion
Resetting Jenkins security settings from the command line should be a last resort due to the inherent security risks. Always prioritize alternative solutions and exercise extreme caution when using these methods. Remember, securing your Jenkins server is crucial for maintaining the integrity and reliability of your CI/CD pipeline.
Jenkins Security – FAQ’s
How can I reset Jenkins security settings using the command line?
On using the “groovy” script option in Jenkins CLI with this following command you can reset.
java -jar jenkins-cli.jar -s http://jenkins-server groovy = < reset-security.groovy`.
Is it possible to reset Jenkins security without restarting the server?
Yes, by execution of the script with the command `java -jar jenkins-cli.jar -s http://jenkins-server groovy = < reset-security.groovy` you can reset security without a server restart.
What should I do if I forget my Jenkins admin password?
You can reset the password using the “forgot password” link on the Jenkins login page or by modifying the Jenkins configuration file directly.
Can I automate Jenkins security resets in a script or CI/CD pipeline?
Yes, you can create a script or incorporate the Jenkins CLI command into your CI/CD pipeline to automate security resets.
Are there any risks associated with resetting Jenkins security settings?
Resetting security settings may temporarily disrupt access, so it’s essential to plan the reset during a maintenance window to minimize any impact on ongoing activities.
Share your thoughts in the comments
Please Login to comment...