How to Integrate Stripe Payments in React App using Express ?
Last Updated :
11 Mar, 2024
Many of the projects you develop might have a requirement to integrate the payment module in your application. Stripe serves as a payment processing platform designed to help applications securely accept and handle online payments. In this article, we will see how we can easily integrate payment systems in our application.
Approach to integrate Stripe Payments in React App:
- List all the requirements for the project and create the folder structure of the project accordingly.
- Choose and install the required dependencies necessary for the project.
- Create an account on Stripe’s website and get the API keys.
- Course, PaymentForm and PaymentSuccess are custom components, and are present in the ./src directory.
- In the default functional component named `App`, implement routing to handle and display different pages.
- Refer to Stripe’s documentation page for getting help on how to integrate it with ReactJS.
Steps to Integrate Stripe Payments in React App:
Step 1: Create a new React App project by opening a terminal and using the following command:
npx create-react-app stripe-frontend
Step 2: Navigate to your project folder created above, i.e. ‘stripe-frontend’, using the following command:
cd stripe-frontend
Step 3: Install the necessary packages for this project
npm install --save axios react-router-dom @stripe/react-stripe-js @stripe/stripe-js
Step 4: Install Tailwind CSS & daisyUI plugin
npm install -D tailwindcss daisyui
Step 5: Configure Tailwind CSS
npx tailwindcss init
Now, paste the below snippet in the `tailwind.config.js` file created after the above step.
 /** @type {import('tailwindcss').Config} */
module.exports = {
  content: ["./src/**/*.{html,js}"],
  theme: {
    extend: {},
  },
  plugins: [require("daisyui")],
}
Step 6: Add the Tailwind directives to CSS file, i.e. `index.css` of our React project.
@tailwind base;
@tailwind components;
@tailwind utilities;
Folder Structure:
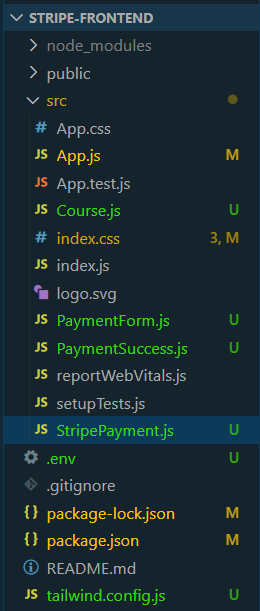
Frontend Folder Structure
The updated dependencies in package.json file will look like:
"dependencies": {
    "@stripe/react-stripe-js": "^2.5.1",
    "@stripe/stripe-js": "^3.0.6",
    "@testing-library/jest-dom": "^5.17.0",
    "@testing-library/react": "^13.4.0",
    "@testing-library/user-event": "^13.5.0",
    "axios": "^1.6.7",
    "react": "^18.2.0",
    "react-dom": "^18.2.0",
    "react-router-dom": "^6.22.2",
    "react-scripts": "5.0.1",
    "web-vitals": "^2.1.4"
  },
"devDependencies": {
    "daisyui": "^4.7.2",
    "tailwindcss": "^3.4.1"
}
Steps to obtain Stripe’s API key
Step 1: Create an account on Stripe
NOTE: Don’t forget to select the country as “United States” to be able to test Stripe Payment API in test/developer mode. If you select another country, e.g. “India” then you will have to put your business details and a lot of information.

Create Account on Stripe
Step 2: Navigate to the following URL: https://dashboard.stripe.com/test/apikeys. This will give you API keys to be used for our project.
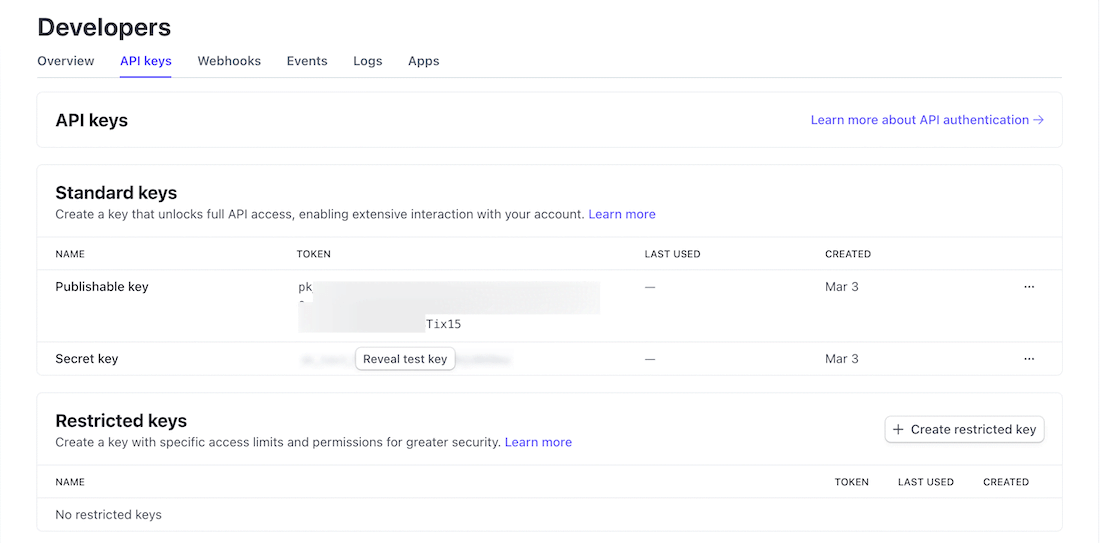
Getting the Stripe API Key from the Stripe website
Step 3: Create an .env file and hide your PUBLISHABLE_KEY there.
REACT_APP_STRIPE_PUBLISHABLE_KEY=<YOUR_STRIPE_PUBLISHABLE_KEY>
Example of Integrating Stripe Payments in React App
Code Example: Create the required files as seenin folder structure and add the following codes.
Javascript
import { BrowserRouter, Route, Routes } from "react-router-dom";
import "./App.css";
import StripePayment from "./StripePayment";
import Course from "./Course";
import PaymentSuccess from "./PaymentSuccess";
const App = () => {
return (
<div className="App">
<BrowserRouter>
<Routes>
<Route path="/" element={<Course />} />
<Route path="payment" element={<StripePayment />} />
<Route path="success" element={<PaymentSuccess />} />
</Routes>
</BrowserRouter>
</div>
);
};
export default App;
|
Javascript
import React, { useState, useEffect } from "react";
import { loadStripe } from "@stripe/stripe-js";
import { Elements } from "@stripe/react-stripe-js";
import axios from "axios";
import PaymentForm from "./PaymentForm";
const stripe = loadStripe('Your API KEY');
const StripePayment = () => {
const [clientSecret, setClientSecret] = useState(null);
useEffect(() => {
axios
items: [{ id: 1, name: "momos", amount: 40.00 }],
})
.then((resp) => setClientSecret(resp.data.clientSecret));
}, []);
const options = {
clientSecret,
theme: "stripe",
};
return (
clientSecret && (
<Elements stripe={stripe} options={options}>
<PaymentForm></PaymentForm>
</Elements>
)
);
};
export default StripePayment;
|
Javascript
const Course = () => {
return (
<div className="flex justify-center">
<div className="card w-96 bg-gray-200 shadow-xl">
<figure class="px-10 pt-10">
<img
wp-content/cdn-uploads/20210420155809/gfg-new-logo.png"
alt="GeeksForGeeks Course"
/>
</figure>
<div className="card-body">
<h2 className="card-title">
Full Stack Development with React & Node JS - Live
</h2>
<p>
Looking to become a full-stack developer? This live, online course
with a focus on the popular JS library React for front-end and
Node.js for back-end along with APIs and deployment is a must-have
program for any aspiring developer.
</p>
<p>
<b>Course Price: $40.00</b>
</p>
<div className="card-actions justify-center">
<a
className="btn btn-primary rounded-lg text-white mt-5"
href="/payment"
>
Purchase
</a>
</div>
</div>
</div>
</div>
);
};
export default Course;
|
Javascript
import React, { useState } from "react";
import {
PaymentElement,
useStripe,
useElements,
} from "@stripe/react-stripe-js";
const PaymentForm = () => {
const stripe = useStripe();
const elements = useElements();
const [message, setMessage] = useState(null);
const [isLoading, setIsLoading] = useState(false);
const handleSubmit = async (e) => {
e.preventDefault();
if (!stripe || !elements) return;
setIsLoading(true);
setMessage("Payment in Progress");
const resp = await stripe.confirmPayment({
elements,
confirmParams: {
return_url: PAYMENT_SUCESS_URL,
},
});
if (resp.error) setMessage("Some Error Occurred !!");
setIsLoading(false);
};
return (
<div className="container mx-auto">
<form onSubmit={handleSubmit}>
<div className="card w-100 bg-base-100 bg-gray-200 shadow-2xl rounded-lg">
<div className="card-body p-6">
<h1 className="card-title font-bold text-2xl mb-4 justify-center">
Complete your payment here!
</h1>
<PaymentElement />
<div className="card-actions justify-center">
<button
className="btn btn-primary rounded-xl text-white px-4 py-2 mt-6"
disabled={isLoading || !stripe || !elements}
>
{isLoading ? "Loading..." : "Pay now"}
</button>
</div>
{message && <div>{message}</div>}
</div>
</div>
</form>
</div>
);
};
export default PaymentForm;
|
Javascript
const PaymentSuccess = () => {
return (
<h1 className="font-bold text-xl">Your Payment is successful !</h1>
);
}
export default PaymentSuccess;
|
To start the frontend runt eh following command.
npm start
Steps to Setup Stripe Payments in Backend
Step 1: Create a npm project inside a new folder `stripe-backend` folder as follows:
mkdir stripe-backend
cd stripe-backend
Step 2: Initialize the Node application using the following command.
npm init -y
Step 3: Install necessary packages
npm install --save express cors body-parser stripe dotenv
Folder Structure:
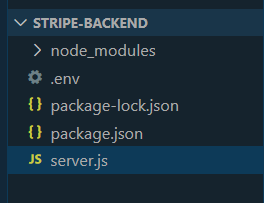
Backend Folder Structure
The updated Dependencies in package.json file of backend will look like:
"dependencies": {
    "body-parser": "^1.20.2",
    "cors": "^2.8.5",
    "express": "^4.18.3",
    "stripe": "^14.19.0"
}
Step 4: Create a .env file in your backend root folder and paste the “Secret key” from Stripe inside it to hide the key.
STRIPE_API_SRECRET_KEY=<YOUR_STRIPE_API_SRECRET_KEY>
Step 5: Create a file `server.js` which will run our Express Server and serve the React App with the CLIENT_SECRET.
Javascript
require('dotenv').config()
const express = require("express");
const cors = require("cors");
const bodyParser = require("body-parser");
const stripe = require("stripe")('<API KEY>');
const app = express();
const PORT = process.env.PORT || 4000;
app.use(cors());
app.use(bodyParser.json());
const calculateTotalOrderAmount = (items) => {
return items[0].amount * 100;
};
app.post("/create-payment-intent", async (req, res) => {
const { items } = req.body;
const paymentIntent = await stripe.paymentIntents.create({
amount: calculateTotalOrderAmount(items),
currency: "usd",
description: "This is for GFG Stripe API Demo",
automatic_payment_methods: {
enabled: true,
},
});
res.send({
clientSecret: paymentIntent.client_secret,
});
});
app.listen(PORT, () => {
console.log(`Server started on PORT ${PORT}`);
});
|
To start the backend server run the following command.
node server.js
Output:
.gif)
Share your thoughts in the comments
Please Login to comment...