How to Fix java.lang.UnsupportedClassVersionError in Java?
Last Updated :
28 Jan, 2021
The UnsupportedClassVersionError is a sub-class of the LinkageError and thrown by the Java Virtual Machine (JVM). When a class file is read and when major and minor version numbers are not supported, this error is thrown, and especially during the linking phase, this error is thrown

A sample snapshot of UnsupportedClassVersionError
Situations when the error is thrown :
When we tried to compile a program using a higher version of Java and execute it using a JVM of a lower version, this error is thrown. But the reverse case is not true.
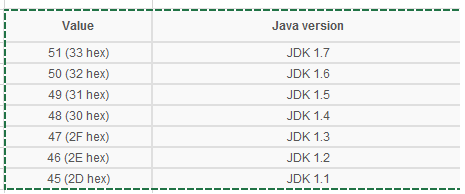
Hence, it is important to note the java versions
Get the installed java version :
java –version (In command prompt(windows), we can give)

Check java version
Fixing the program via command line :
In order to overcome the UnsupportedClassVersionError, we can either compile our code for an earlier version of Java or run our code on a newer Java version. It is about our choice of decision only. If a third-party library is used then, it is better to run on a newer java version and if it is for distribution, it is best to compile to an older version.
Using JAVA_HOME Environment Variable :

While doing Java programs, always it is good to set JAVA_HOME and setting that value in path
We can check that in command prompt in the below way also
C:\Windows\system32>echo %JAVA_HOME%
C:\Program Files\Java\jdk-9.0.4
Requirements to run a java program on a new JRE:
Move to the directory and locate the bin directory. For example, if the JRE is in location like
C:\Program Files\Java\jdk-11.0.2, then navigate till C:\Program Files\Java\jdk-11.0.2\bin
Execute the program as
java <filename> // Even we can give filename with full package
Requirements to run a java program on an older JRE :
Example :
C:\Program Files\Java\jdk1.8.0_31\bin\javac <filename along with package>
In order to ensure compatibility, we can point “-bootclasspath” at the rt.jar of the targeted JRE:
javac -bootclasspath "C:\Program Files\Java\jdk1.8.0_31\jre\lib\rt.jar"
\ -source 1.8 -target 1.8 <filename>
[Applicable mainly to JDK 8 and lower]
But in JDK 9, the “–release” parameter was added to replace “-source” and “-target”.
The “–release” option supports targets 6, 7, 8, 9, 10, and 11. As an example, let us use “–release” to target Java 8:
javac --release 8 <filename>
There are many IDEs are available for Java development
Let us see how we can overcome “UnsupportedClassVersionError” in Eclipse
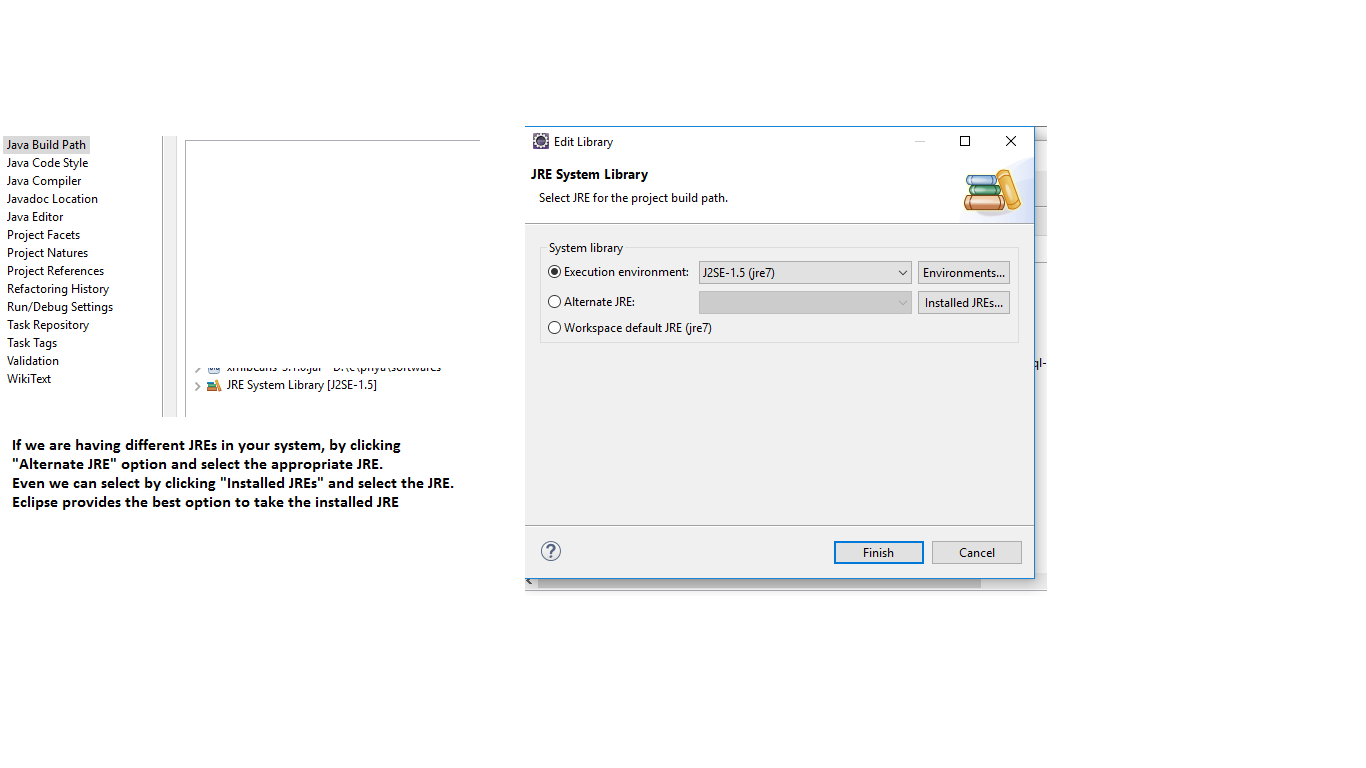
Selecting JRE using Java Build Path->Installed JRE
Java compiler level selection :
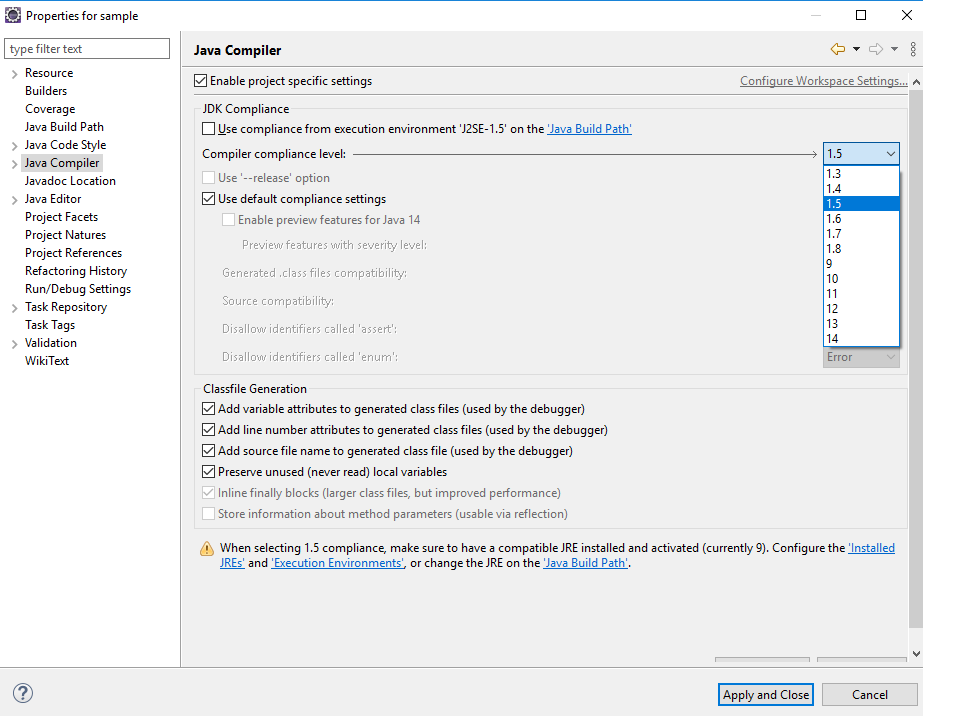
Java compiler selection
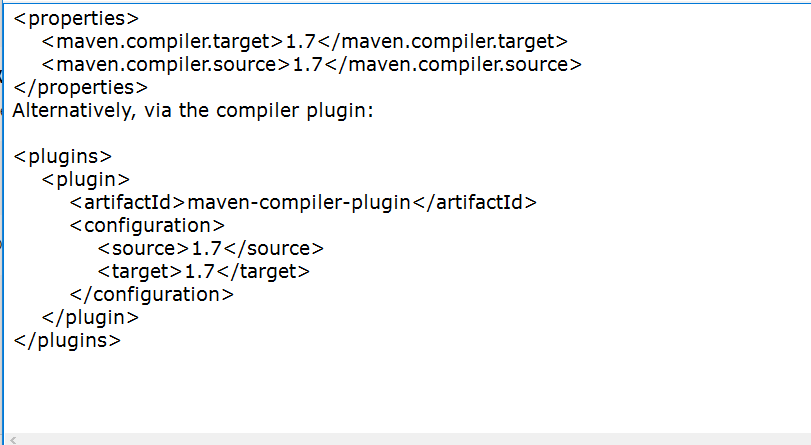
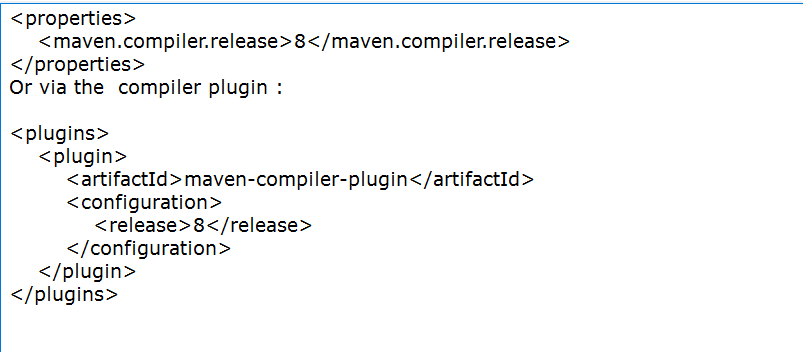
Maven
We can control the version of Java when we build and package a file in Maven. When using Java 7 or older, we set the source and target for the compiler plugin.
Let’s set the source and target using compiler plugin properties:
–release option added in Java 9
Conclusion :
By setting the environment changes either via command-line way or via IDE way or via Maven way, we can overcome “unsupportedclassversion”.
Share your thoughts in the comments
Please Login to comment...