Excel is the best tool to play with your data. It will provide you with everything that can make your life very easy. But in Excel, one thing that irritates us a lot is the blank rows. In many cases, we need to format our data many times, which leads to blank rows.
To sort out this problem you can delete blank rows from Excel. This article will guide you through practical and straightforward methods to delete blank rows in Excel, ensuring your spreadsheets remain tidy and functional.

Delete Blank Rows in Excel
Here, We have provided Six quick and easy ways to delete rows in Excel using different methods. You can use any of these methods based upon your need along with a quick tip in the end.
How to Remove Single Blank Rows in Excel
This is the most common and easy way to delete the blank rows, but again these are only for cases when we have less number of rows.
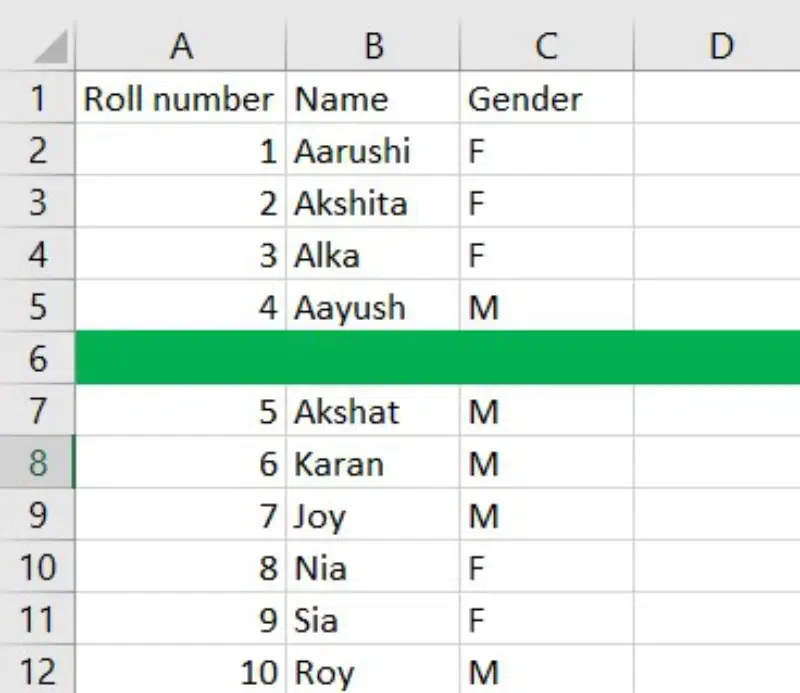
Step 1: Open an Excel Sheet with Blank Rows
Open your Excel sheet containing blank rows. Here, for your convenience, we have marked the blank row with green color.
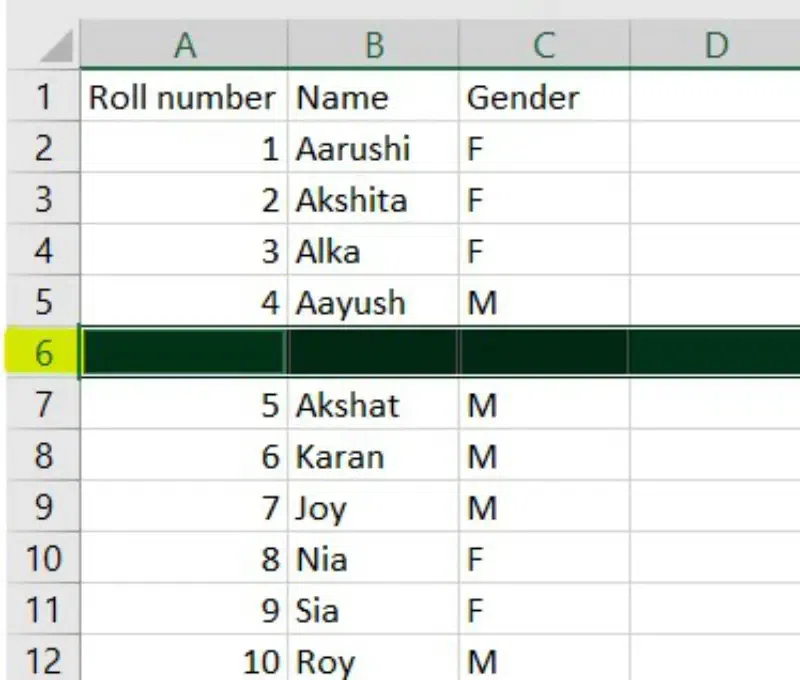
Step 2: Press CTRL and Left Click on Blank Row
Now we have to hold on to the CTRL button and left-click on the blank rows you want to delete, as shown in the figure. The yellow color shows the selection of blank rows.
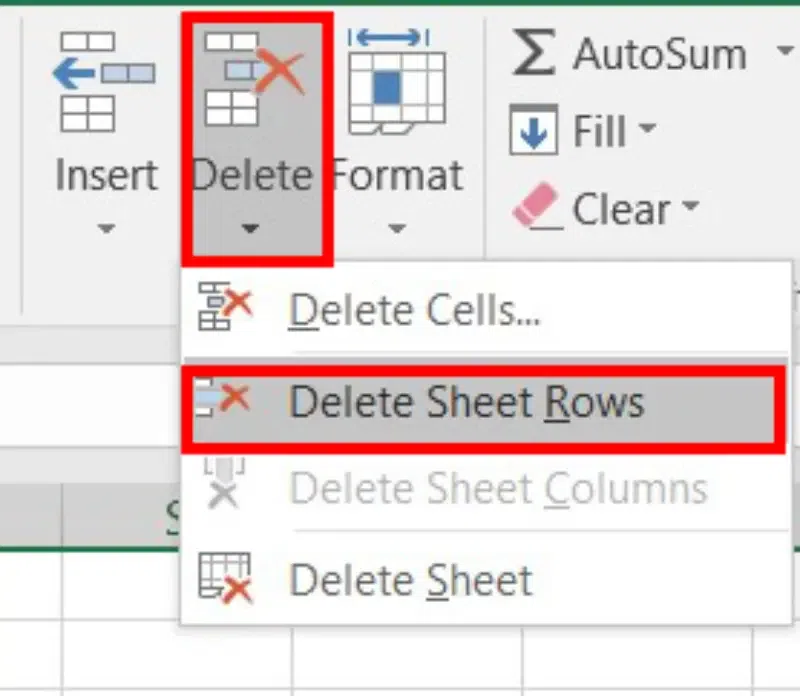
Step 3: Select Delete and Click on Delete Sheet Rows
Now, just go to the Delete menu and select Delete Sheet Rows from the dropdown. The blank rows will be deleted from your spreadsheet.
How to Delete All Blank Rows At Once in Excel
Step 1: Select Column, Go to Insert Tab and Click on Find and Select
Just select the column and go to the Home tab, and then click on the Find & Select command.
.webp)
Selecting Find from the drop-down.
.webp)
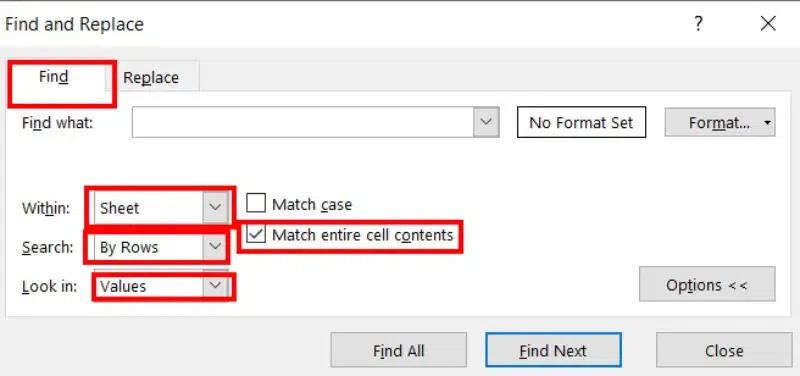
Step 2: Click on Find Tab
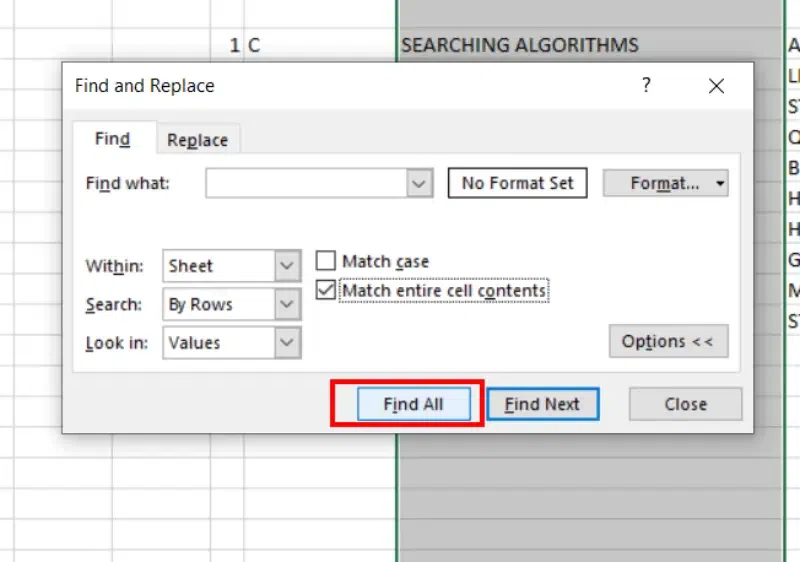
Access the ‘Find‘ section within the ‘Find and Replace‘ dialog box. Alternatively, you can quickly open this by pressing CTRL + F. Leave the ‘Find what‘ text field empty and choose ‘Sheet‘ for ‘Within‘, ‘By Rows‘ for ‘Search‘, and ‘Values‘ for ‘Look in‘, respectively.
Ensure you check the box for ‘Match entire cell contents‘, as depicted in the figure.
Step 3: Click on Find All and Delete
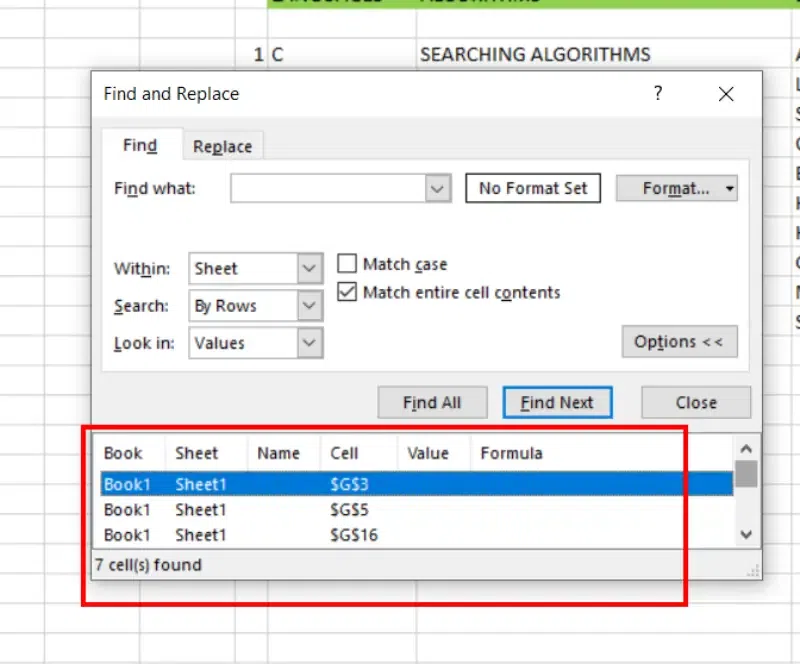
Select on Find All option to return all blank cells, and then we can delete all the rows.
You can see a list of all blank rows
How to Delete Blank Rows in Excel using Sorting
Sorting is quite a familiar term if you are doing coding, but in a spreadsheet, this is also something that solves very big problems. Sorting in Excel is complex. Let’s see how we can delete blank rows using the sorting method.
Step 1: Select Dataset
Select the entire range of data where you want to delete the blank rows.
Step 2: Go to the Data Tab and Select Sorting
Go to the Data menu and select Sort. You can select the sorting type as per your wish either in ascending or descending. In this example, we choose sorting from smallest to large.
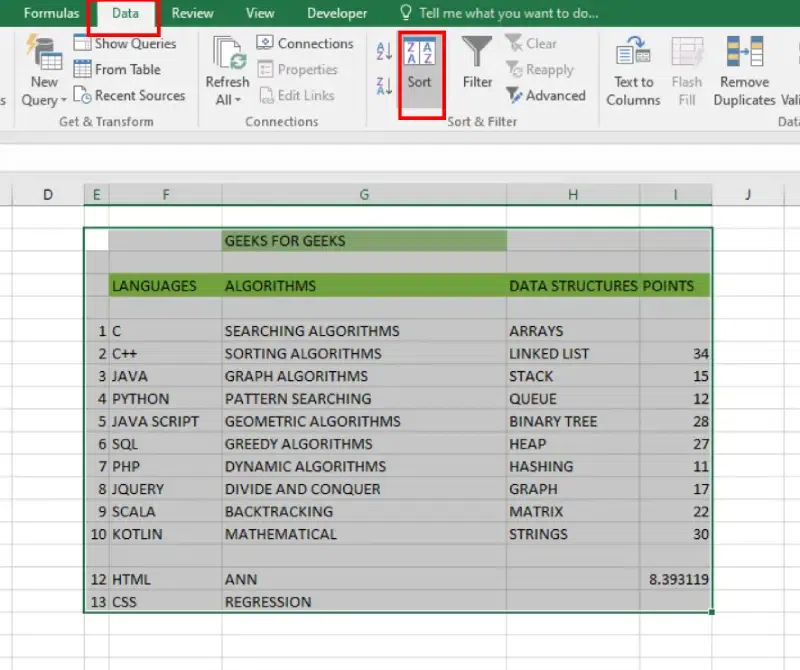
All the blanks will disappear and data will be arranged in ascending order.
How to Delete Blank Rows in Excel using Filter Option
Adding a filter first, then deleting the rows, is an old technique for getting rid of empty rows. The directions are listed below:
Step 1: Select the Dataset
Mark all the data you want to clear up.
To cover a large data set you can press CTRL+ SHIFT + DOWN to mark rows and CTRL + SHIFT + RIGHT to mark columns
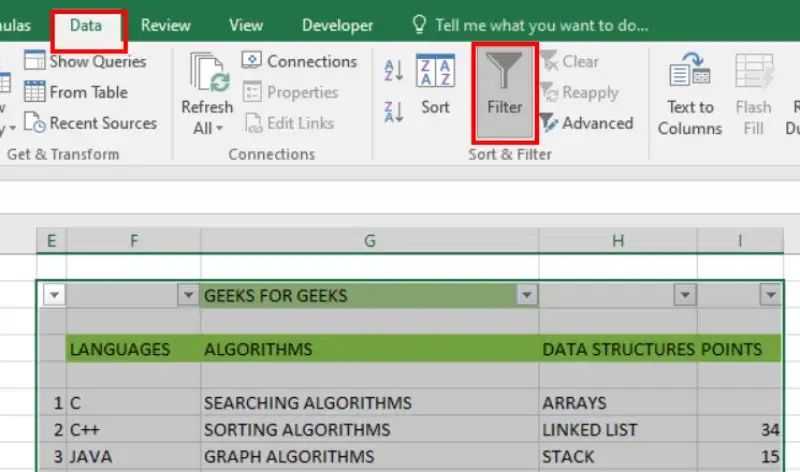
Step 2: Access the Data Tab, Select Filter, and Uncheck the Blanks Option
Click on the Data Menu, Click on the Filter icon, and deselect Blanks.
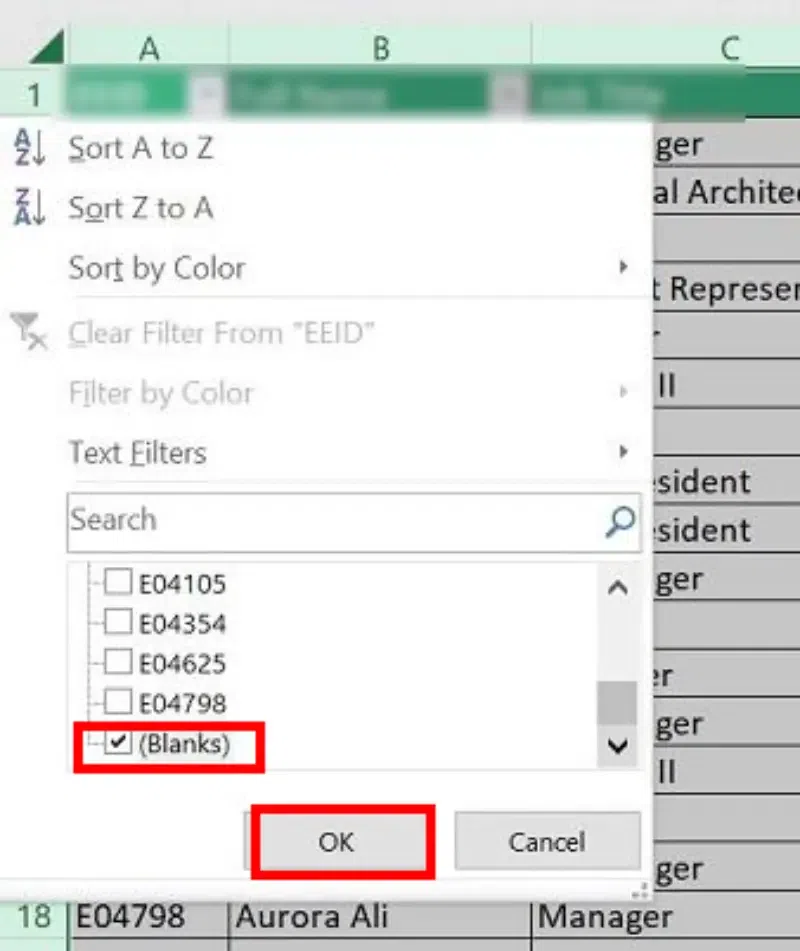
Alternatively, you can Select Blanks only which will leave you with just Blank rows
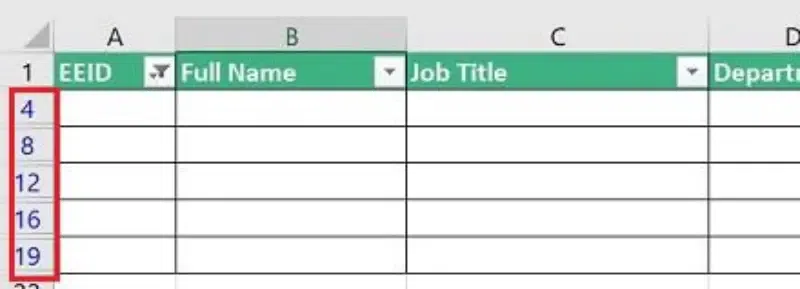
Step 3: Empty Rows Displayed
You will be left with nothing in the rows if you choose blanks. These cells are marked in blue, as you can see. You can simply remove these.
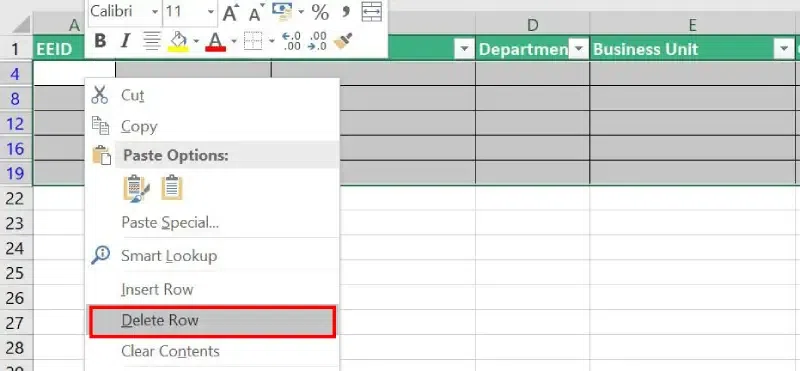
Step 4: Select Filtered Blank Rows, Right-Click and Click on Delete Rows
Select all the filtered blank rows, Right-Click on the selected cells and choose Delete Rows, and then Click OK.
Confirm Deletion by clicking on Ok.
Step 5: Clear Applied Filter
Now we’ll have to clear the applied filter, press the Clear button under the Data tab.
.webp)
How to Delete Blank Rows in Excel if Certain Column is Blank
Use this technique if you have a table with a lot of empty cells dispersed over many columns, and you simply need to eliminate the rows with no data in any cell in any column.
.webp)
Since there is no key column in this situation, we cannot tell whether the row is empty or not. The helper column is therefore added to the table
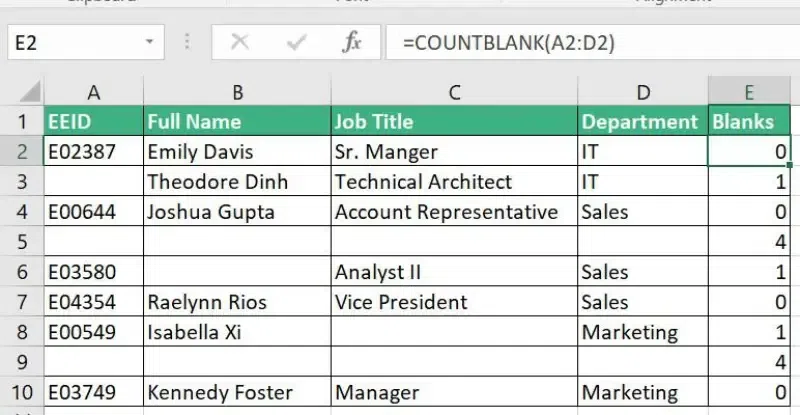
Step 1: Create a Blank Column and Insert CountBlank Formula
Let us add the “Blanks” column at the end, Insert the following formula in the first cell of the “Blanks” column
=COUNTBLANK(A2:D2) and Copy the formula throughout the entire column.
In the example, a “Blanks” column (E) is added, and the formula “=COUNTBLANK(A2:D2)“calculates the number of blank cells in each row. Pressing Enter displays the count of blank cells in column E for each row.
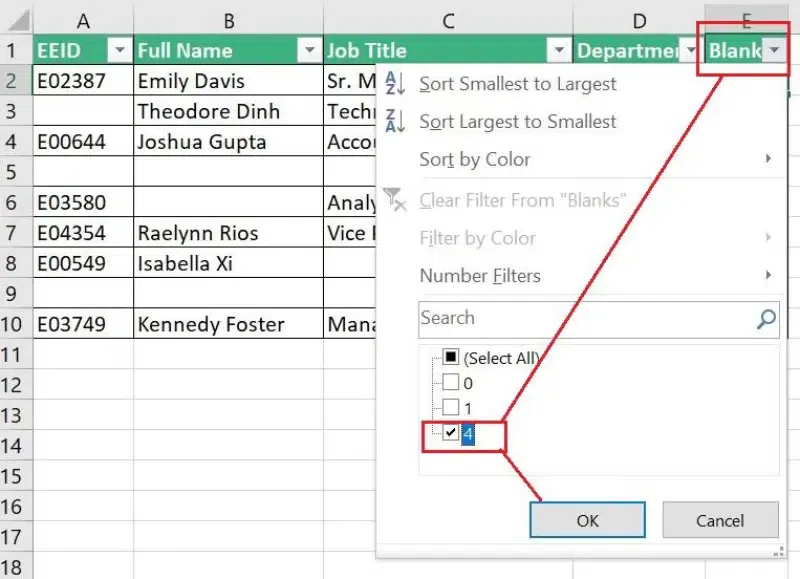
Step 2: Apply Filter
Now that we have added a key column to our table, add a filter to the Blanks column, to show only rows with the max value (4). Here, number 4 represents that all the cells in a certain row are empty.
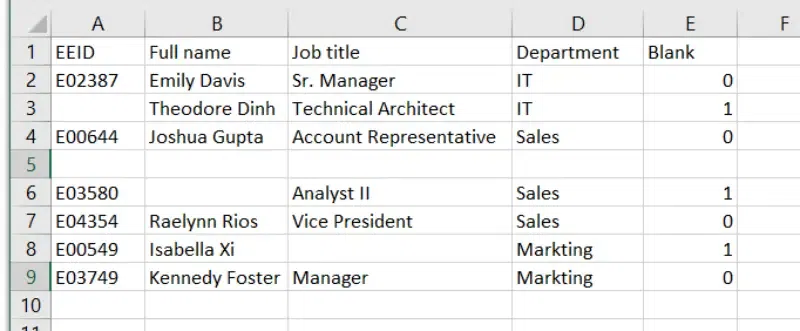
Step 3: Select Filtered Rows and Remove Rows
Select all the filtered rows and remove the rows by right-clicking and selecting Delete option. Clear the filter applied under the Data tab.

You may now eliminate the helper column. Alternatively, you can add a fresh filter to the column to only display the rows with one or more blank cells.
How to Delete Blank Rows in Excel Using Go To Special
This method helps you to delete rows in your data if they contain 1 or more blank cells.
Step 1: Enter the Dataset
Enter the data in your Excel Sheet.
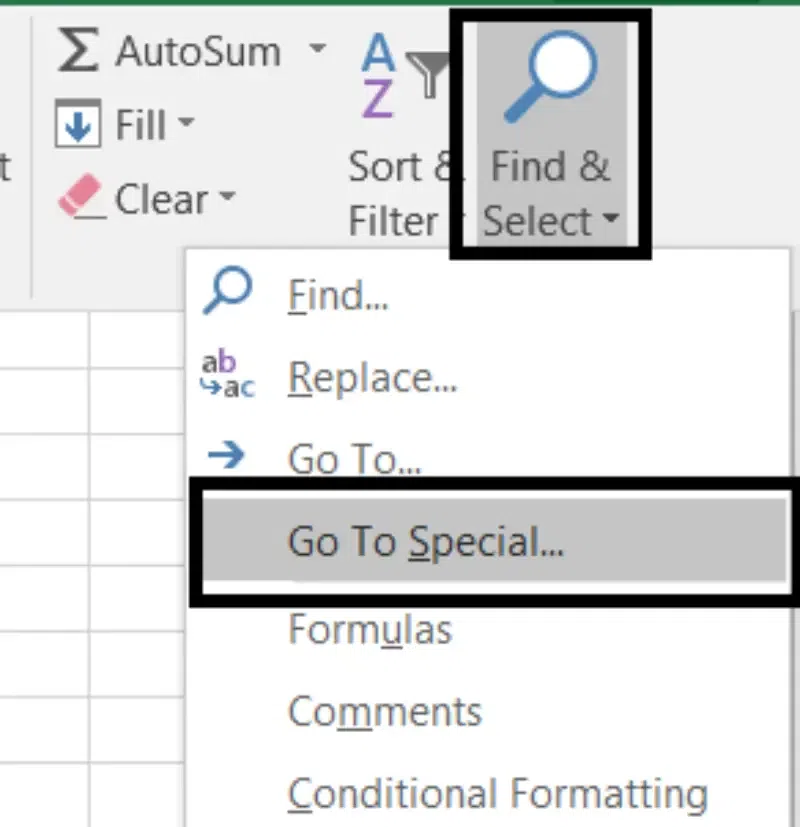
Step 2: Go to Home, Select Find and Select and Click on Go to Special
In the Home tab, Click the “Find & Select” button on the right side of the Ribbon, to find the blank rows. Now click on ‘Go To Special‘.
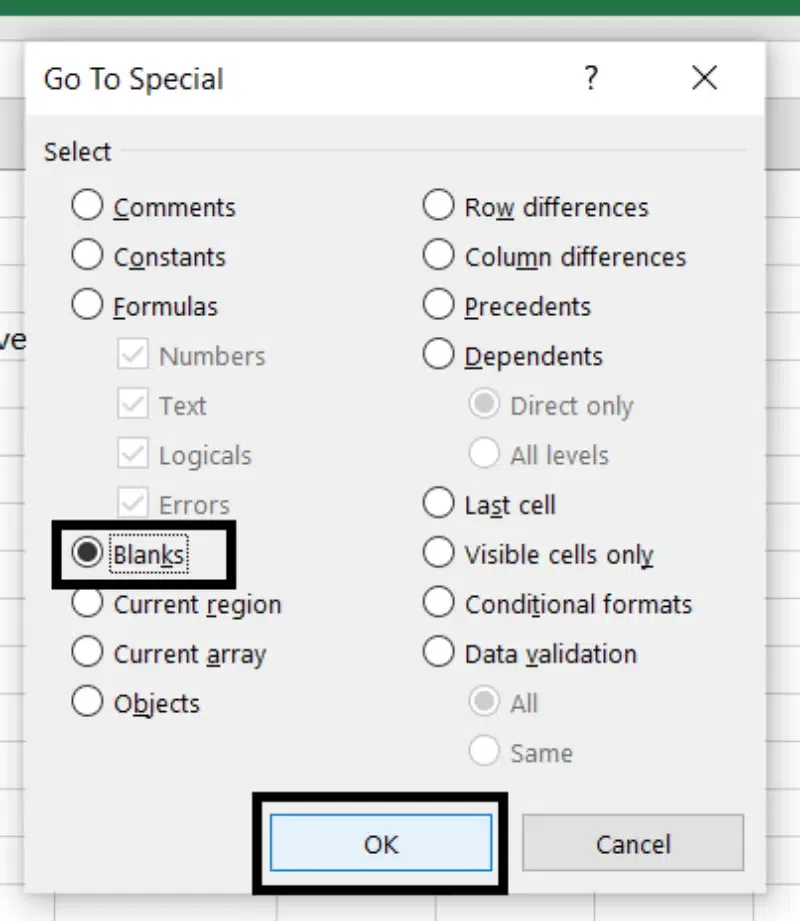
Step 3: Select “Blanks” and Click on “Ok” Button
Select the Blanks option from the prompt box and Click on the OK button. This selects the blank cells in the data.
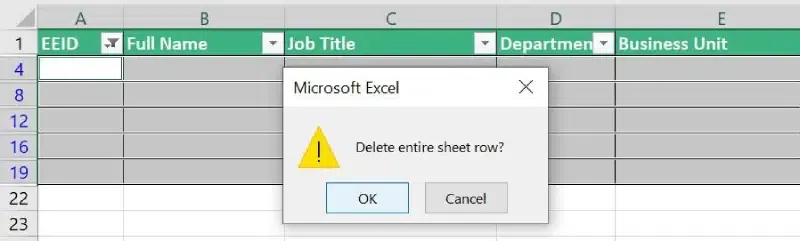
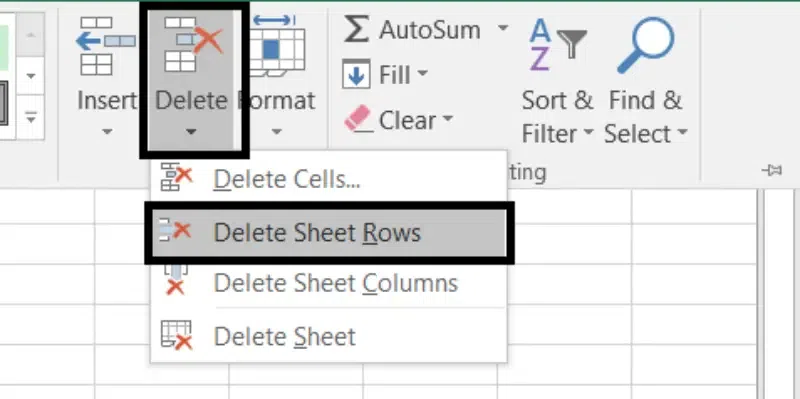
Step 4: Go to Delete Option and Select Delete Sheet Rows
Now delete the entire rows instead of just the selected cells. In the Home tab, go to the delete button click on the arrow below it, and select ‘Delete Sheet rows‘.
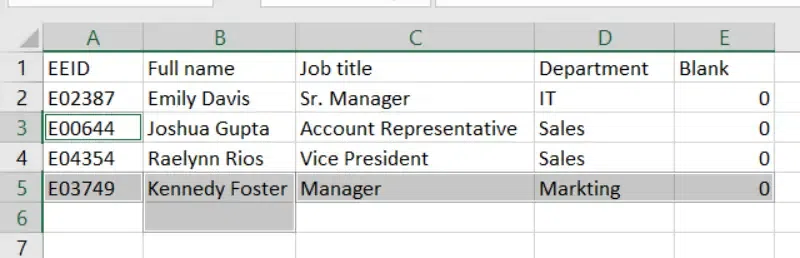
Now you can see the result after deleting the rows which have blank cells.
Quick Tip: If You delete Blank Rows by Selecting Blank Cells the entire data will be deleted
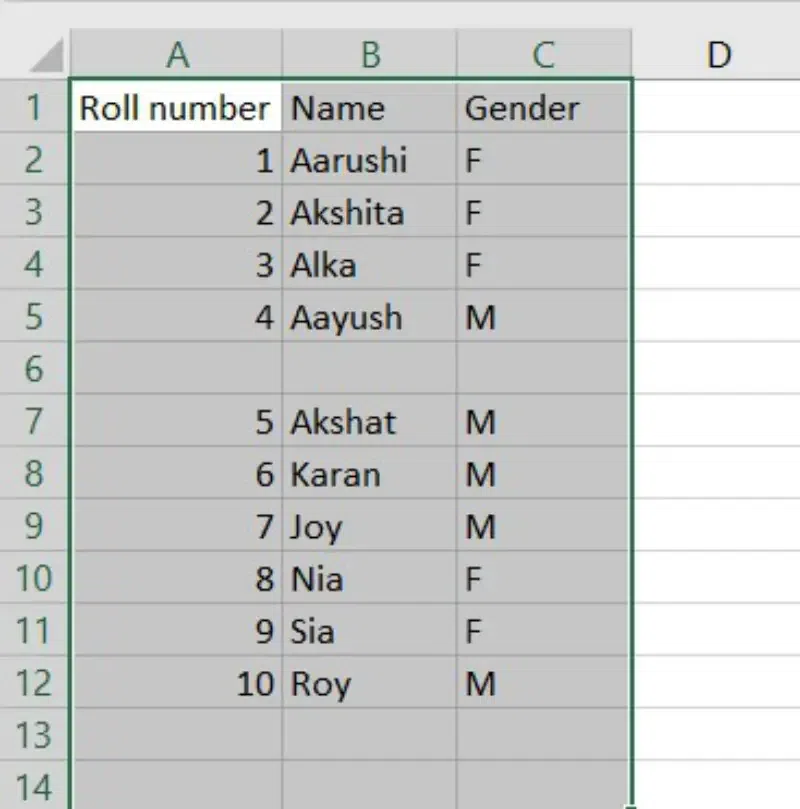
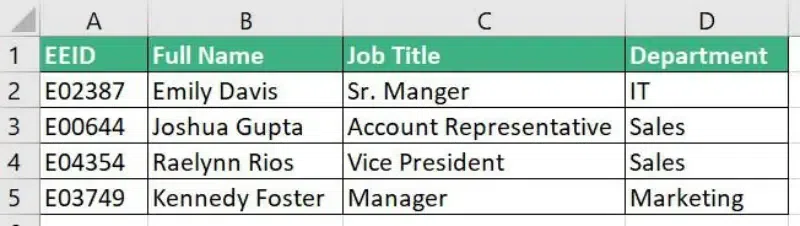
For example, we have an Employee dataset, and we want to eliminate the empty rows
.webp)
Step 1: Select Empty Rows, Navigate to Delete Option and Select Entire Row
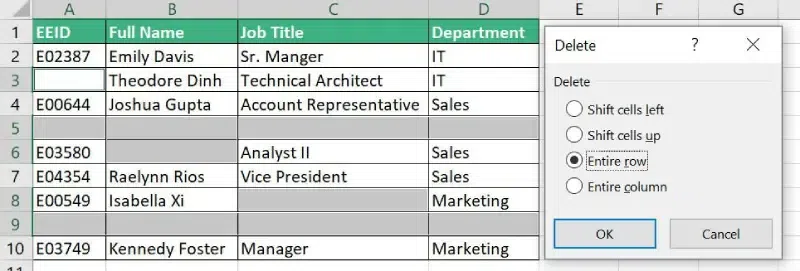
Step 2: Preview Results
Conclusion
In conclusion, deleting blank rows in Excel is a crucial step in data management. It simplifies data usage and prevents inaccuracies. The article provides various methods, supplemented with examples, to effectively remove these blank rows. The choice of method depends on the specific data set. By following these steps, users can ensure cleaner, more efficient spreadsheets.
How to Delete Blank Rows in Excel – FAQs
How to Quickly Remove Blank Rows in Excel?
Follow the Below steps to remove blank rows in Excel:
- Step 1: Select the range of cells or entire worksheet form where you want to remove blank rows.
- Step 2: Press the “Ctrl + Shift + Arrow down ” Keys to select all the data in the selected column(s).
- Step 3: Right-click on any of the selected row headers and choose “Delete” from the context menu.
- Step 4: In the “Delete” dialog box, select “Entire row” and click “Ok“.
- Step 5: Blank rows will be removed, and the remaining rows will be shifted up to fill the gaps.
How do I delete hidden blank rows in Excel?
To delete hidden blank rows in Excel:
- Select the entire worksheet.
- Press
F5, then click on “Special“.
- Choose “Visible cells only” and click “OK“.
- Press
Ctrl + - (minus key) to delete the selected rows.
- Choose “Shift cells up” and click “OK“.
How do I automatically Delete blank rows?
Once you’ve highlighted the whole worksheet, hit CTRL + G, followed by clicking the “Special” button. A dialog box will pop up; choose “Blanks” and then click “OK.” This action highlights all the empty rows in your sheet, allowing you to delete them either by hand or using an automatic process.
How do you Delete thousands of blank rows in Excel?
To remove a large number of empty rows in Excel, the ‘Go To Special’ tool comes in handy. Begin by highlighting the cell area you’re targeting for empty row removal, or just click on any cell if you want to check the whole sheet. Next, hit ‘F5‘ or navigate through ‘Find & Select‘ to ‘Go To Special‘, then select ‘Blanks‘ and confirm with ‘OK‘.
What is the shortcut to delete blank rows in Excel?
Ctrl + – (Minus key on the keyboard) is the shortcut to delete rows in Excel.
Share your thoughts in the comments
Please Login to comment...