How to Customize the Legend in Chart.js ?
Last Updated :
05 Jan, 2024
In this article, we will learn how to customize the legend of a chart using the Chart JS CDN library. The chart legend displays data about the datasets that are appearing on the chart. This legend is customizable as per the users’ requirements to enhance the look and feel of the chart in conjunction with the chart layout.
CDN Link:
<script src="https://cdn.jsdelivr.net/npm/chart.js"></script>
These are the following ways to customize the Legend:
Approach 1: By Customizing Legend Title Configuration
Define the configuration of the title of the legend within the options.plugins.legend.title namespace. The legend title configuration is used to customize the title that appears above the legend in a chart. This title provides additional context or information about the data represented in the chart.
Syntax:
const chart = document.getElementById('myChart');
new Chart(chart, {
    type: 'line',   // Any type can be defined, for ex: line, bar etc..
    data: { ... },
     options: {
        legend: {
          display: true,  // Set to false to hide the legend
          position: 'top', // Options: 'top', 'left', 'bottom', 'right'
          title: {
            display: true,
             text: 'Number of Days', // Name of title
             font: {
                    size: 14,
                    weight: 'bold'
             },
             padding: 20,
             color: 'green'
          }
       }
     }
});
Example: This example shows the implementation of the above-explained approach.
HTML
<!DOCTYPE html>
<html lang="en">
<head>
<meta charset="UTF-8">
<meta name="viewport"
content="width=device-width, initial-scale=1.0">
<style>
body {
background-color: rgb(239, 237, 237);
}
</style>
<title>Chart</title>
</head>
<body>
<div>
<canvas id="myChart"></canvas>
</div>
<script src=
<script>
const ctx = document.getElementById('myChart');
new Chart(ctx, {
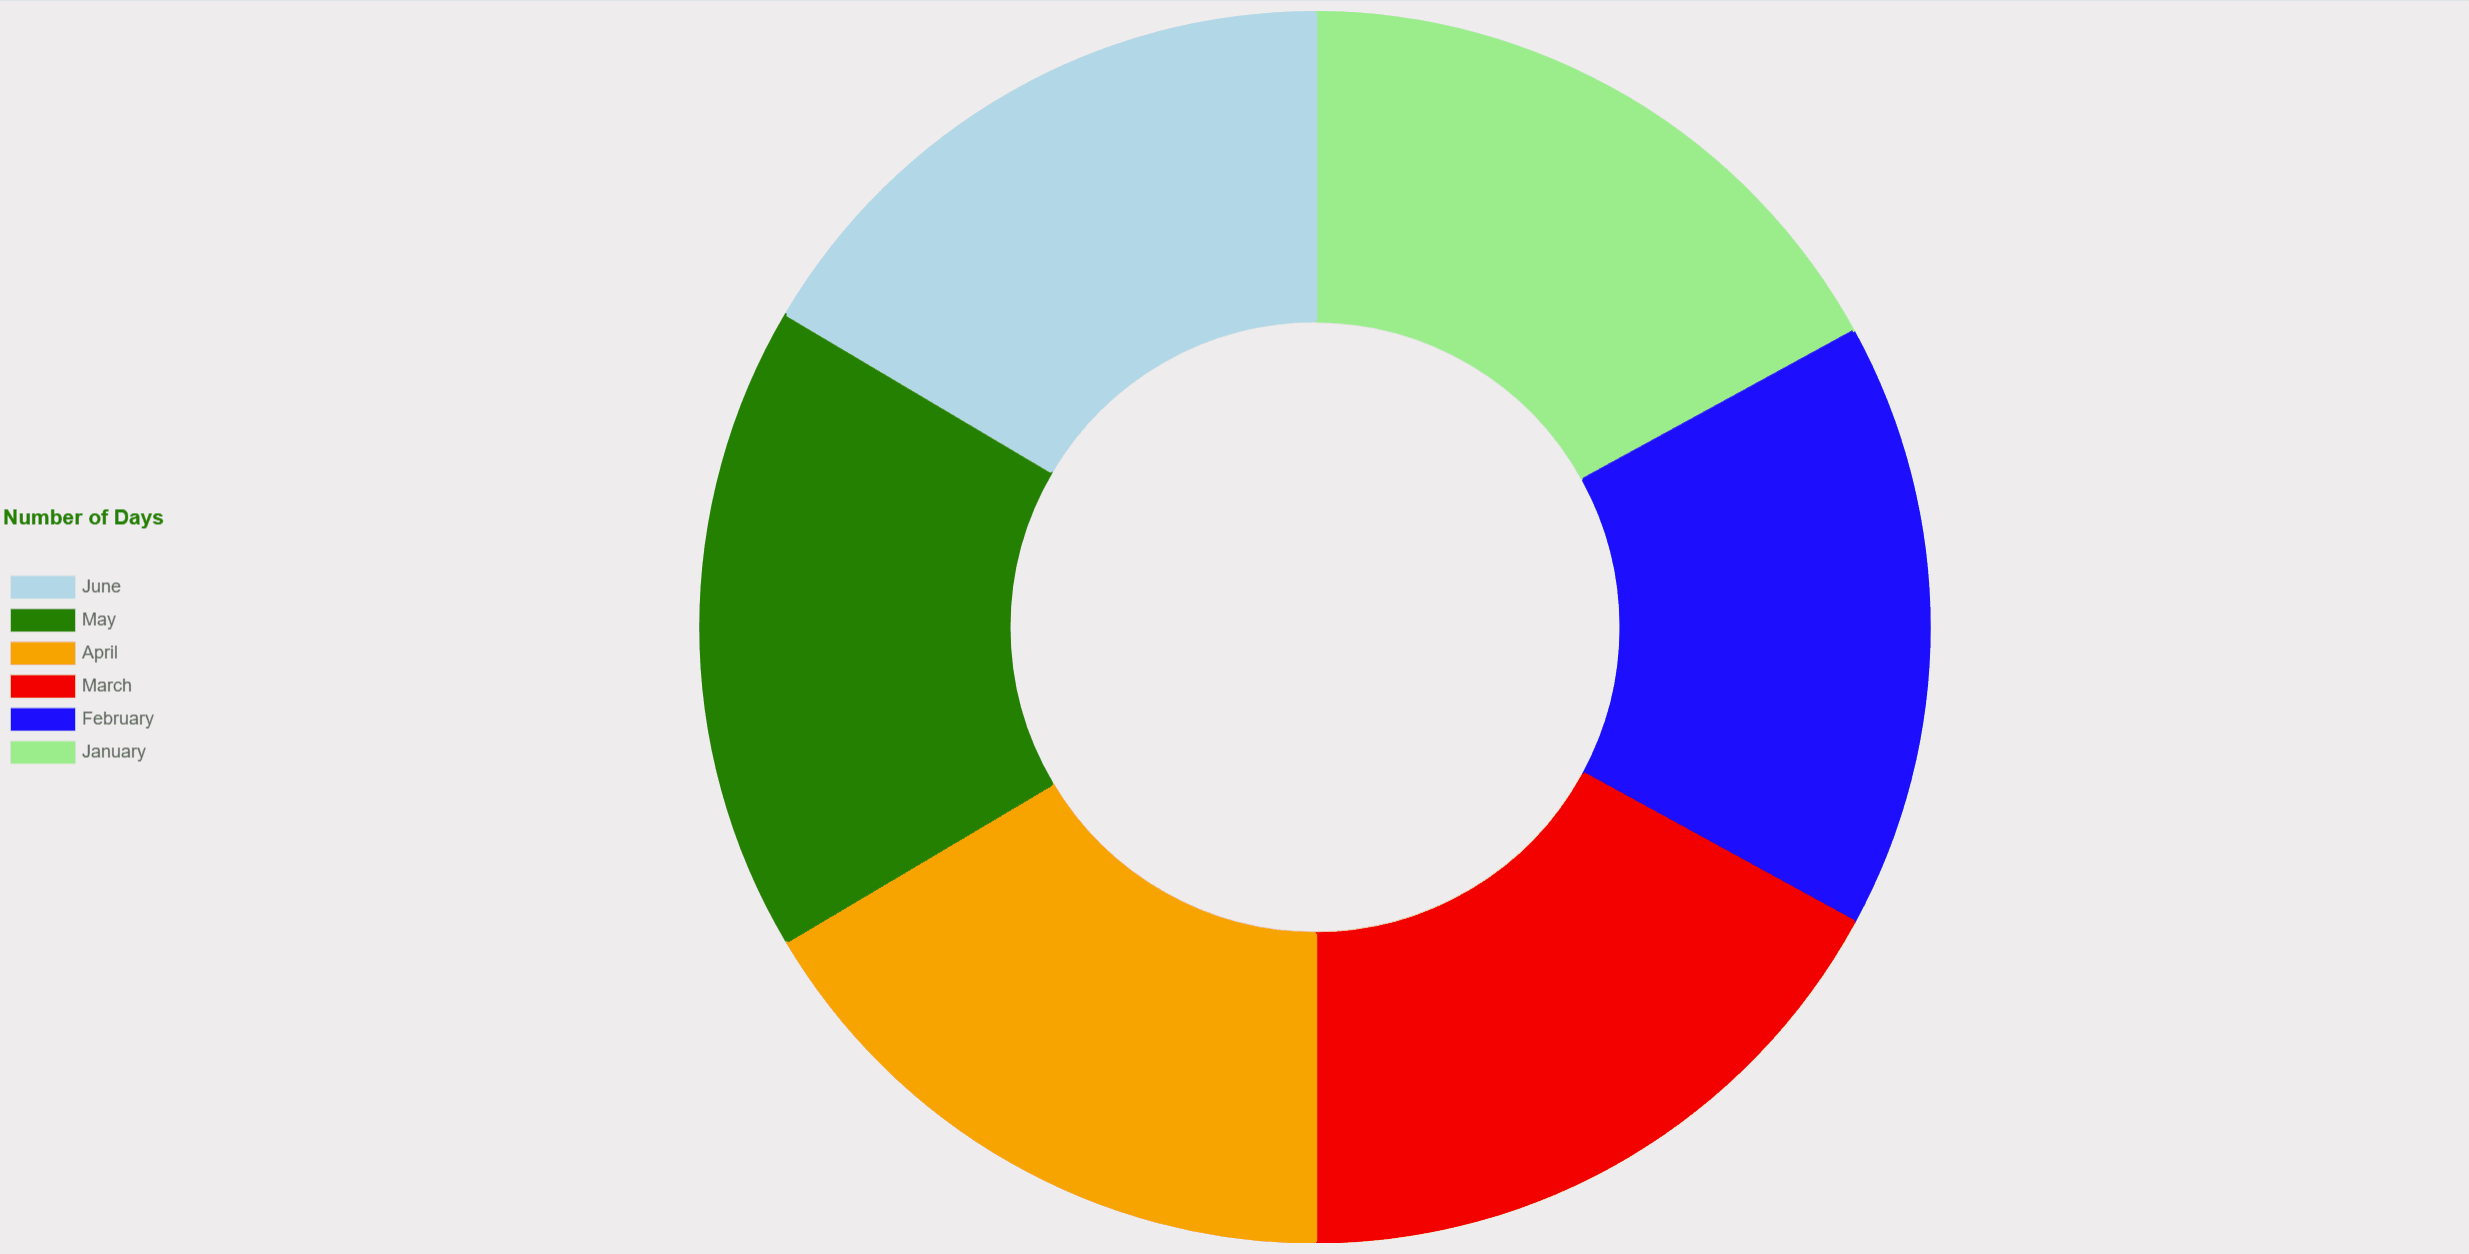
type: 'doughnut',
data: {
labels: ['January', 'February', 'March',
'April', 'May', 'June'],
datasets: [{
label: 'Number of Days (2024)',
data: [31, 29, 31, 30, 31, 30],
borderWidth: 3,
backgroundColor: ['lightgreen', 'blue', 'red',
'orange', 'green', 'lightblue'],
borderColor: ['lightgreen', 'blue', 'red',
'orange', 'green', 'lightblue'],
}]
},
options: {
aspectRatio: 2,
plugins: {
legend: {
display: true,
position: 'left',
reverse: true, // Reverse order of legend labels
title: {
display: true,
text: 'Number of Days',
font: {
size: 14,
weight: 'bold'
},
padding: 20,
color: 'green'
}
}
}
}
});
</script>
</body>
</html>
|
Output:
Approach 2: By Customizing Legend label Configuration
In Chart.js, the legend label configuration refers to the settings that control the appearance and behavior of individual labels within the legend. Each label typically corresponds to a dataset in the chart. You can customize legend dataset labels within your dataset in this manner.
Syntax:
    const ctx = document.getElementById('myChart');
    new Chart(ctx, {
      type: 'bar',
      data: {
        labels: ['January', 'February', 'March', 'April', 'May', 'June'],
        datasets: [{
          label: 'Legend Label 1',
          data: [10, 30, 20, 50, 40, 60],
          borderWidth: 3,   // Border of label block
          backgroundColor: 'lightgreen',  // Background color of label block
          borderColor: 'green',
        },
        // Other datasets..
        ]
      },
      options: {
        plugins: {
          legend: {
            display: true,
            position: 'bottom',
            labels: {
                font: {  // Customize legend label font
                    size: 14,
                    weight: 'italic',
                    padding: 10
                }
            }
          }
        }
      }
    });
Example: This example shows the implementation of the above-explained approach.
HTML
<!DOCTYPE html>
<html lang="en">
<head>
<meta charset="UTF-8">
<meta name="viewport"
content="width=device-width, initial-scale=1.0">
<style>
body {
background-color: rgb(239, 237, 237);
}
</style>
<title>Chart</title>
</head>
<body>
<div>
<canvas id="myChart"></canvas>
</div>
<script src=
<script>
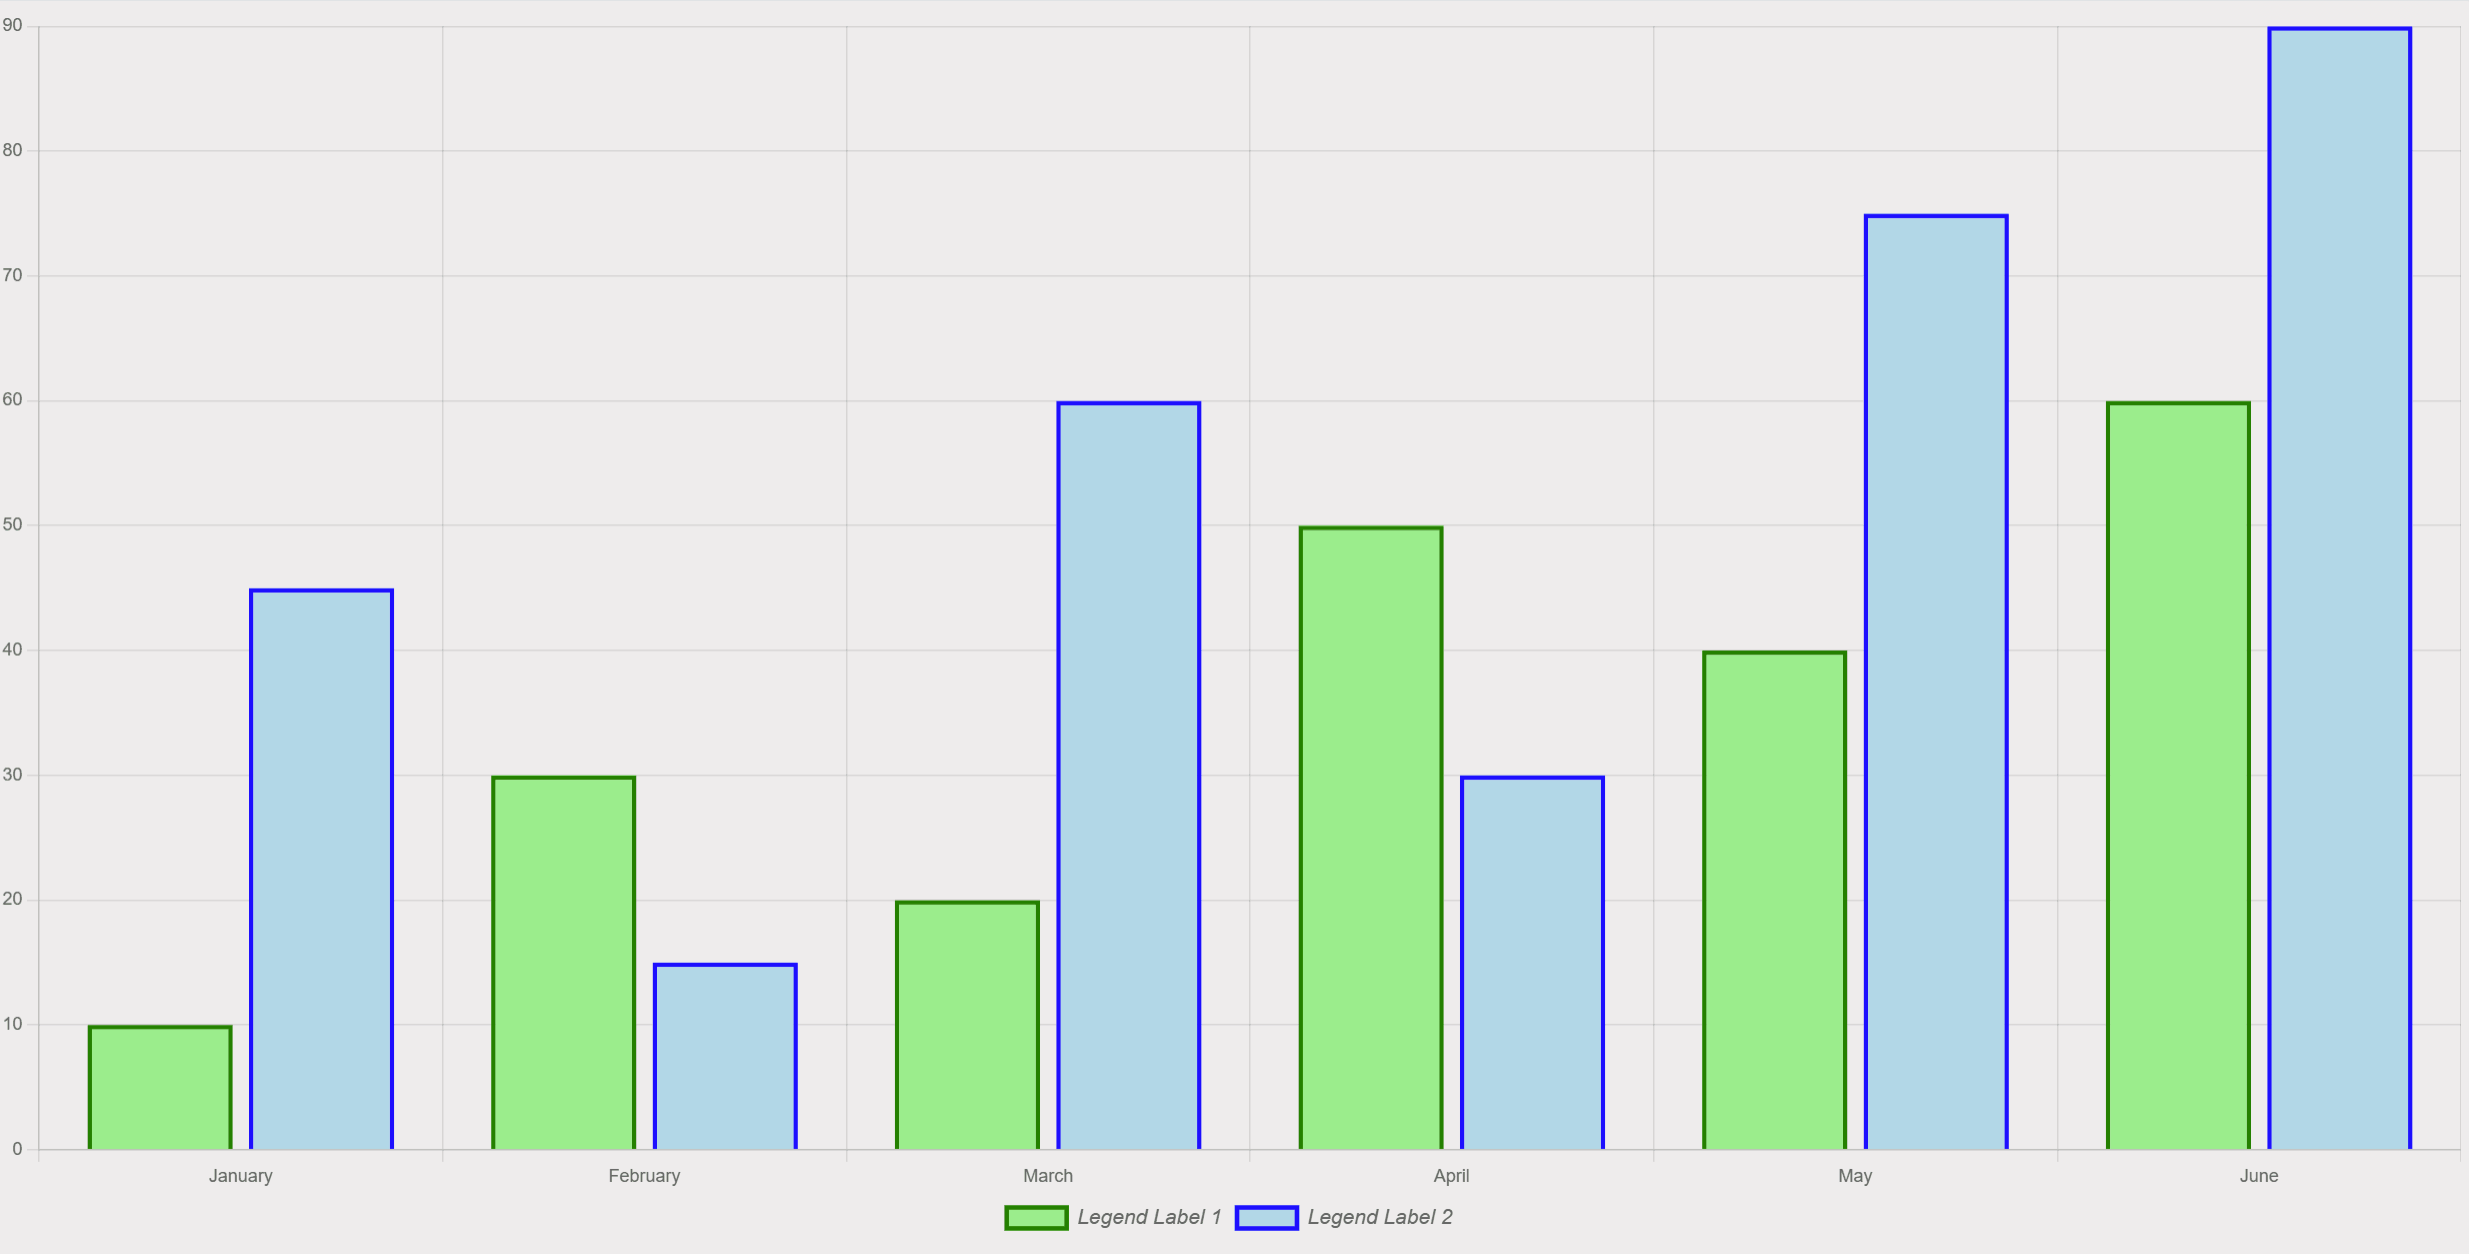
const ctx = document.getElementById('myChart');
new Chart(ctx, {
type: 'bar',
data: {
labels: ['January', 'February', 'March',
'April', 'May', 'June'],
datasets: [{
label: 'Legend Label 1',
data: [10, 30, 20, 50, 40, 60],
borderWidth: 3,
backgroundColor: 'lightgreen',
borderColor: 'green',
},
{
label: 'Legend Label 2',
data: [45, 15, 60, 30, 75, 90],
borderWidth: 3,
backgroundColor: 'lightblue',
borderColor: 'blue',
}]
},
options: {
plugins: {
legend: {
display: true,
position: 'bottom',
labels: {
font: {
size: 14,
weight: 'italic',
padding: 10
}
}
}
}
}
});
</script>
</body>
</html>
|
Output:
Approach 3: By Customizing Legend on-click actions
In Chart.js, you can use the legend.onClick callback function to customize the chart as well as the legend on click. This function is triggered when a legend item is clicked, allowing you to define custom behavior. Additionally, the e.stopPropagation() line prevents the default behavior of toggling the visibility of the corresponding dataset when the legend item is clicked. This allows you to have full control over the action triggered by the legend click.
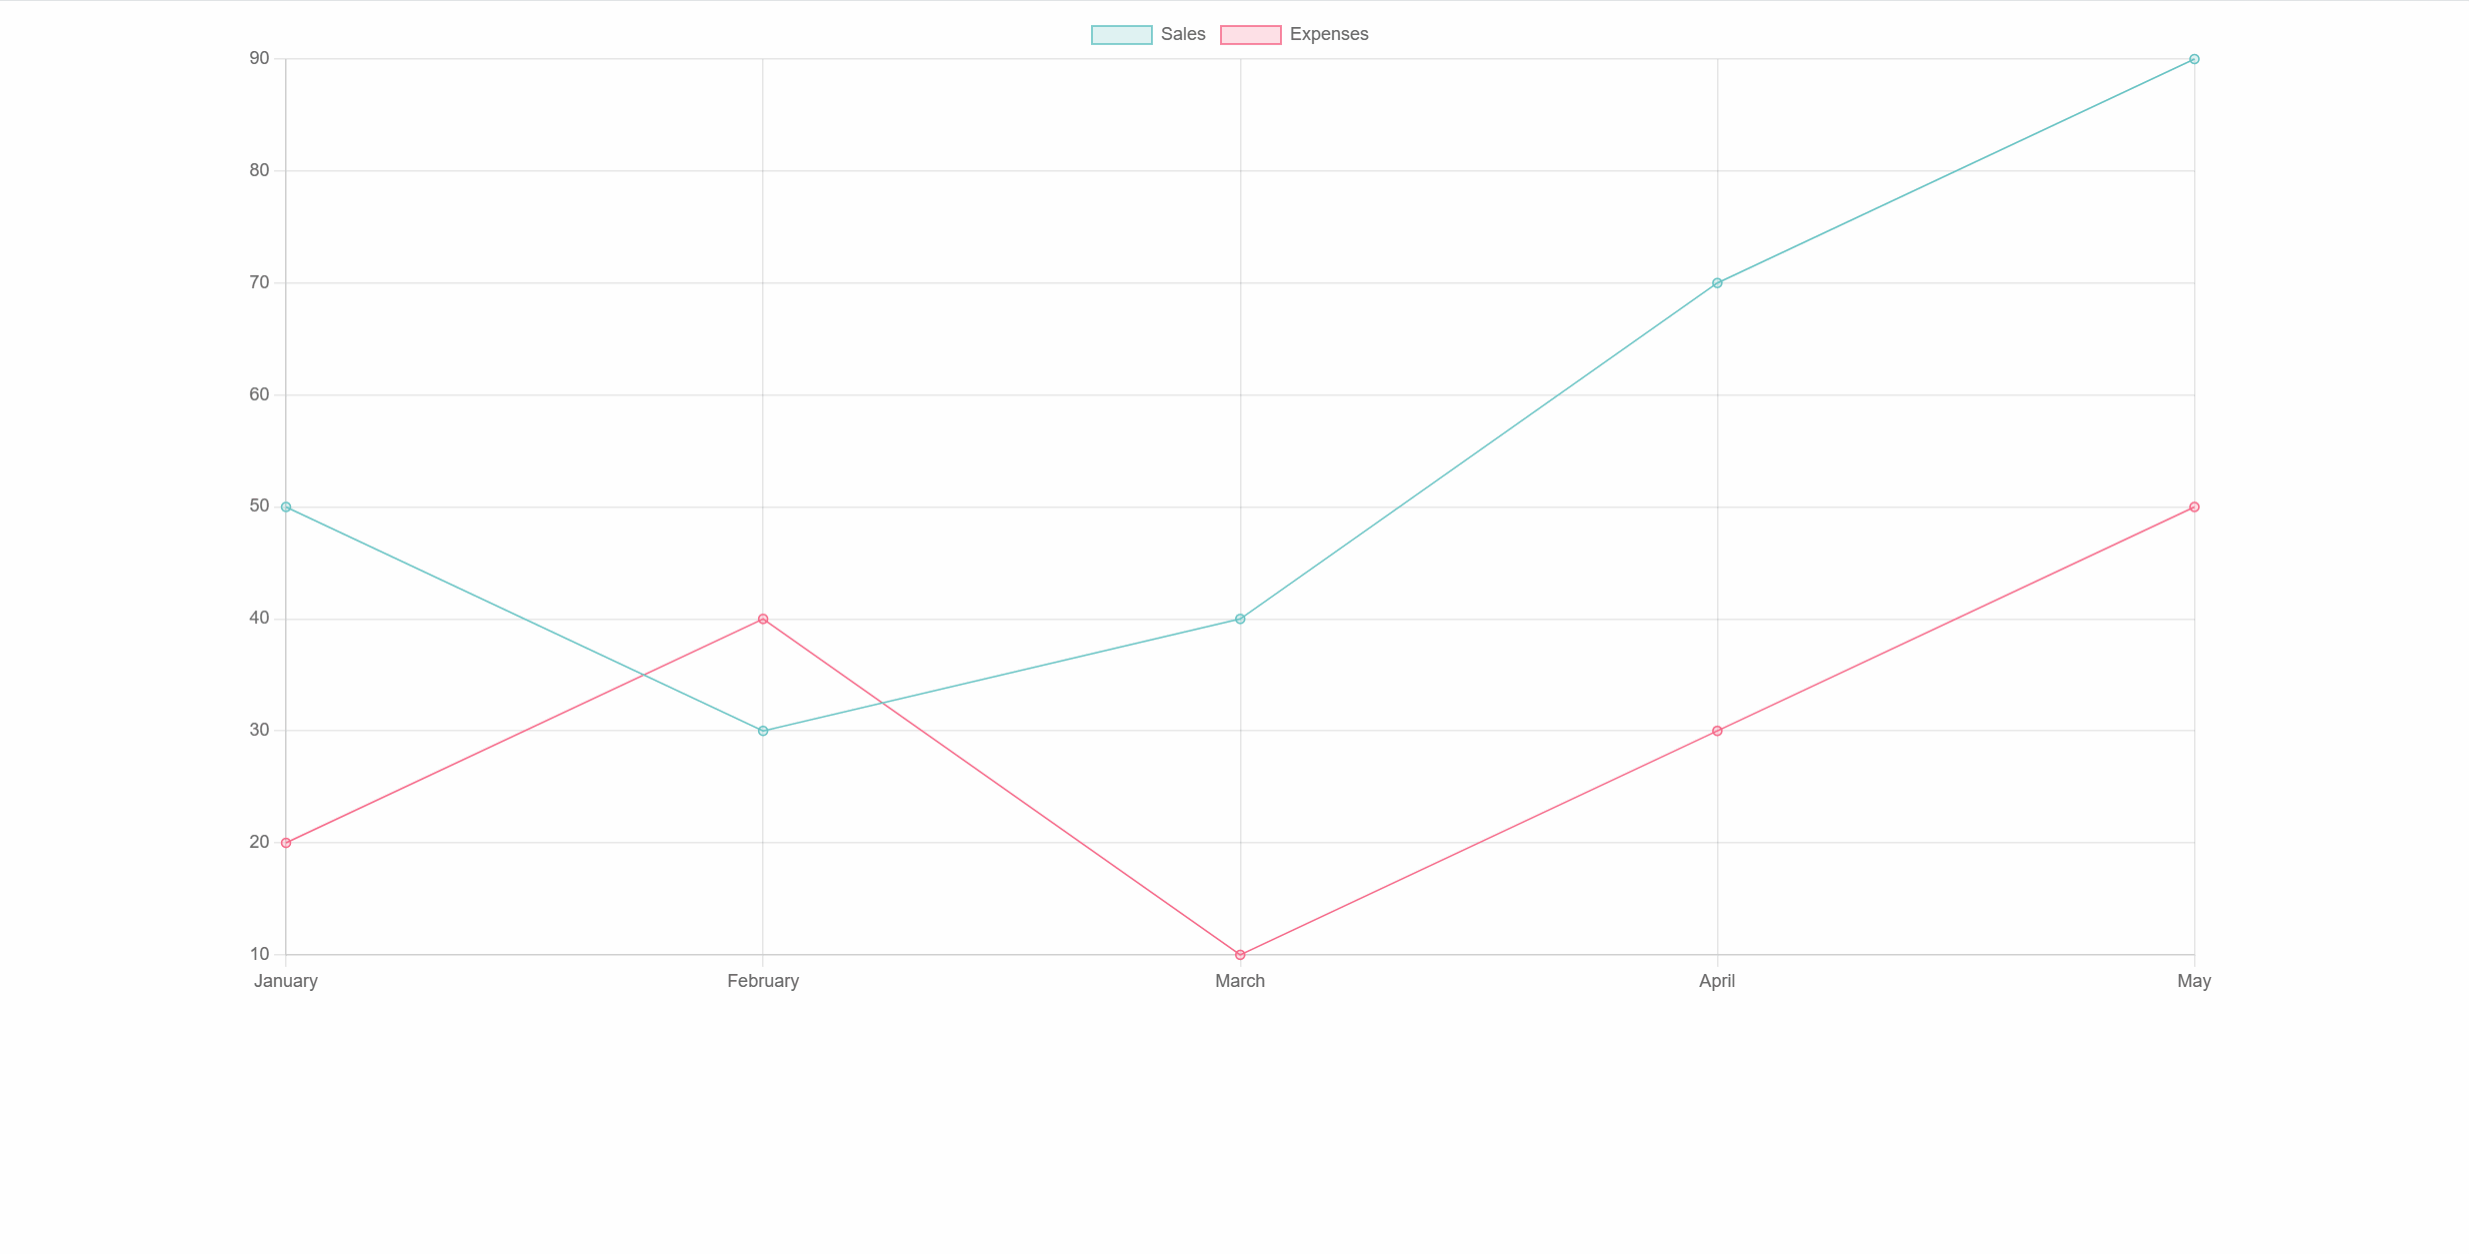
Example: This example shows clicking on a legend item triggers the onClick function, which generates random data for both datasets and updates the chart.
HTML
<!DOCTYPE html>
<html lang="en">
<head>
<meta charset="UTF-8">
<meta name="viewport"
content="width=device-width, initial-scale=1.0">
<title>Dynamic Legend Action</title>
<script src=
</head>
<body>
<div style="width: 80%; margin: auto;">
<canvas id="myChart"></canvas>
</div>
<script>
document.addEventListener('DOMContentLoaded', function () {
let ctx = document.getElementById('myChart')
.getContext('2d');
// Initial data
let initialData = {
labels: ['January', 'February',
'March', 'April', 'May'],
datasets: [
{
label: 'Sales',
data: [50, 30, 40, 70, 90],
backgroundColor: 'rgba(75, 192, 192, 0.2)',
borderColor: 'rgba(75, 192, 192, 1)',
borderWidth: 1
},
{
label: 'Expenses',
data: [20, 40, 10, 30, 50],
backgroundColor: 'rgba(255, 99, 132, 0.2)',
borderColor: 'rgba(255, 99, 132, 1)',
borderWidth: 1
}
]
};
let myChart = new Chart(ctx, {
type: 'line',
data: initialData,
options: {
legend: {
display: true,
position: 'top',
onClick: function (e, legendItem) {
// Generate random data for each dataset
myChart.data.datasets.forEach(function (dataset) {
dataset.data = Array.from({ length: initialData.labels.length },
() => Math.floor(Math.random() * 100));
});
// Update the chart
myChart.update();
// Prevent the default legend behavior (toggle visibility)
e.stopPropagation();
}
}
}
});
});
</script>
</body>
</html>
|
Output:
Share your thoughts in the comments
Please Login to comment...