Introduction to Amazon EKS (Elastic Kubernetes Service) refers to the cloud-based managed service offered by Amazon Web Services (AWS) for deploying, managing, and scaling containerized applications using Kubernetes. Amazon EKS simplifies the process of running Kubernetes on AWS infrastructure, providing users with a reliable and scalable platform for orchestrating containerized workloads.
Imagine Amazon EKS as a special tool from Amazon that helps people easily handle lots of computer programs at once. It’s like having a super organized and efficient system for managing all your apps and making sure they run smoothly. With Amazon EKS, you can save time and effort by letting it take care of the hard work, like making sure your apps are always available and working well.
Prerequisites
The following resources and tools must be installed and configured before you can begin this tutorial. These are necessary in order to build and maintain an Amazon EKS cluster.
A command-line tool for managing Kubernetes clusters is called Kubectl. The command-line utility eksctl automates numerous repetitive procedures while working with EKS clusters.
Required IAM permissions: In order to interact with Amazon EKS IAM roles, service linked roles, AWS CloudFormation, a VPC, and related resources, the IAM security principal you’re using needs to have the necessary permissions. See Using service-linked roles in the IAM User Guide and Actions, resources, and condition keys for Amazon Elastic Container Service for Kubernetes for additional details.
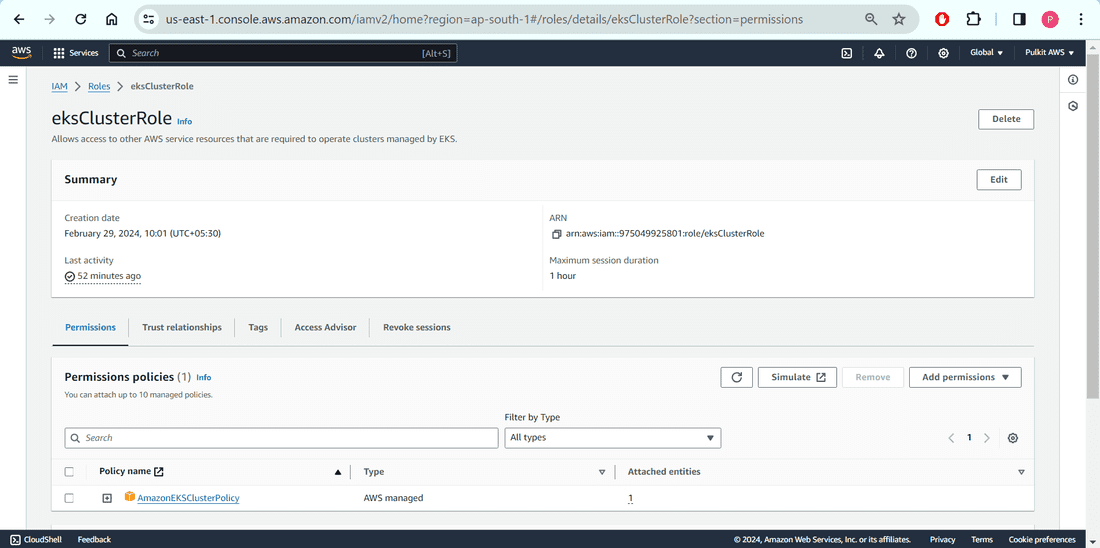
Set Up IAM Roles (For Cluster and NodeGroup)
Establishing the role of the Amazon EKS cluster. The cluster role can be created via the AWS CLI or the AWS Management Console.
- Go to https://console.aws.amazon.com/iam/ to access the IAM console.
- Select roles, then add a new role.
- Choose the AWS service under Trusted Entity Type.
- Select EKS from the Use Cases for other AWS services selection menu.
- Select Next after selecting EKS-Cluster for your use case.
- Select Next from the Add permissions tab.
- Type a special name for your role in the Role name field, like eksClusterRole.
- Type a description such as “Amazon EKS – Cluster role” in the Description field.
- Select the Create role option.
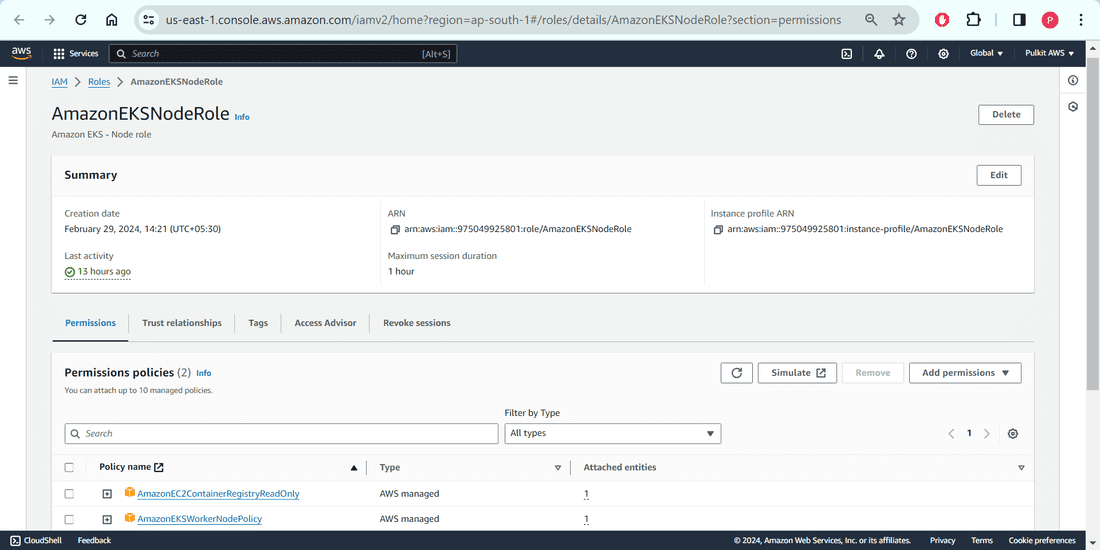
Establishing the role for creating node group. The cluster role can be created via the AWS CLI or the AWS Management Console.
- Go to https://console.aws.amazon.com/iam/ to access the IAM console.
- Select Roles from the left navigation pane.
- Select Create role from the Roles page.
- Perform the following actions on the Select trusted entity page:
- Select the AWS service under the Trusted entity type section.
- Select EC2 under Use case.
- Select Next.
- Attach a custom policy or carry out the following actions on the Add permissions page:
- AmazonEKSWorkerNodePolicy should be entered in the Filter policies box. In the search results, choose the check box next to AmazonEKSWorkerNodePolicy.
- Next search for, AmazonEC2ContainerRegistryReadOnly in the Filter policies box. In the search results, choose the check box next to AmazonEC2ContainerRegistryReadOnly.
- Select Next.
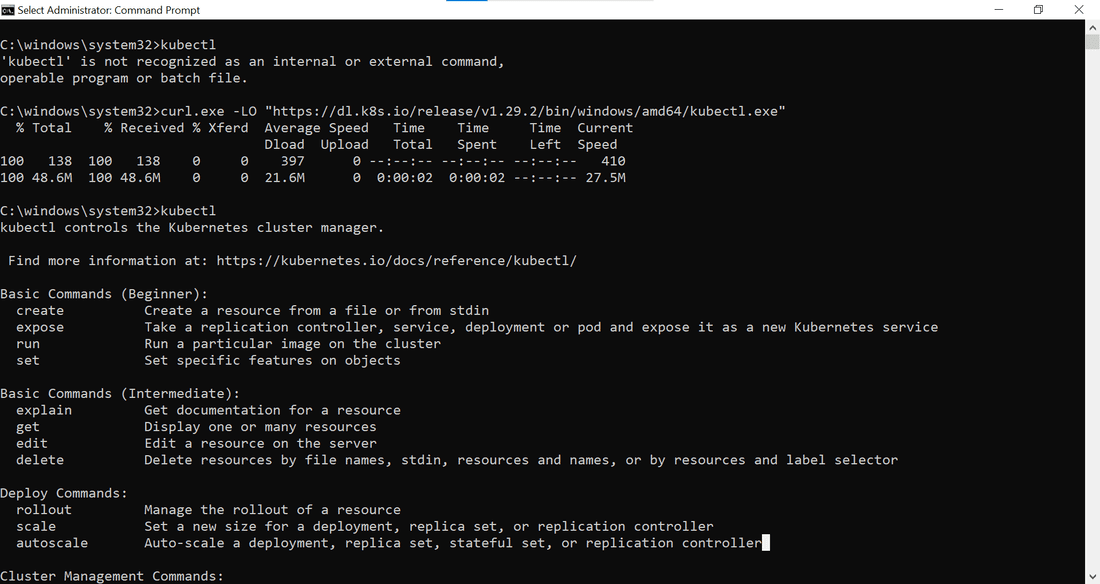
Install and Configure kubectl
Step 1: Download kubectl 1.29.2, the most recent 1.29 patch release. Or, use this command if curl is installed on your system:
curl.exe -LO "https://dl.k8s.io/release/v1.29.2/bin/windows/amd64/kubectl.exe"
Step 2: Please verify it in terminal using following command –
kubectl version --client OR kubectl
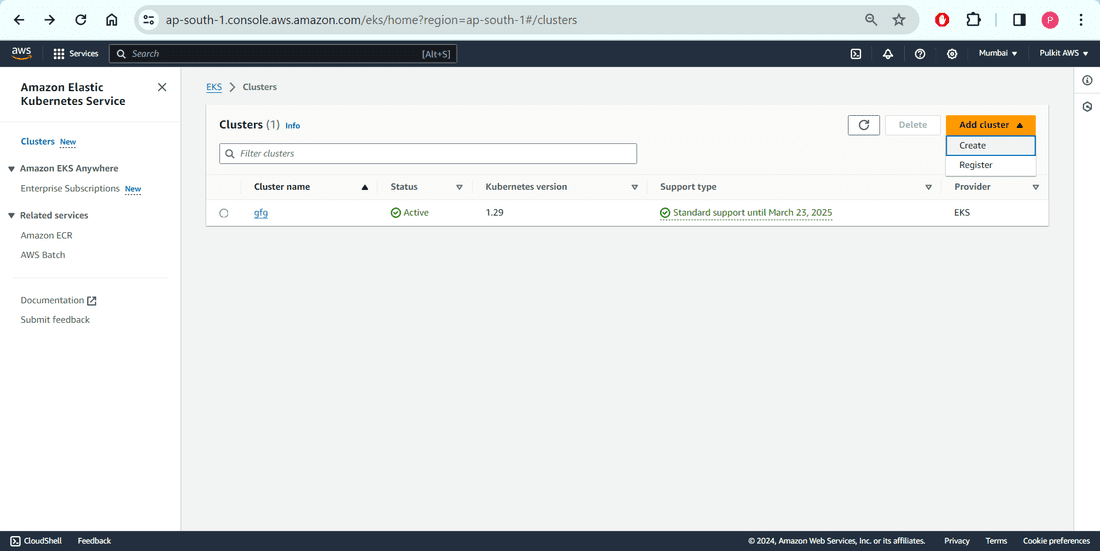
Create an Amazon EKS Cluster
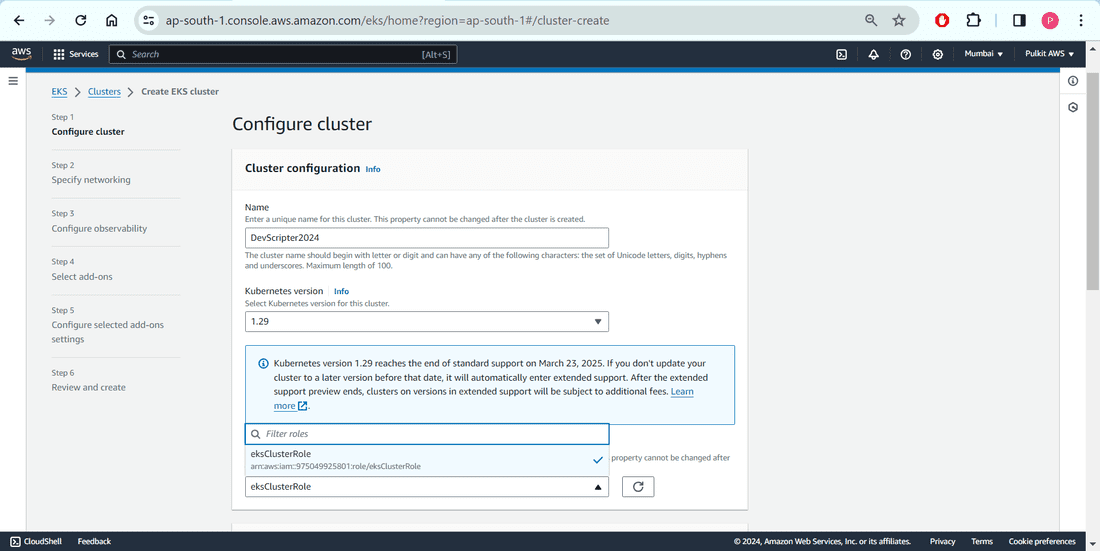
In order to create AWS EKS Cluster, please follow the snapshots. We will be creating Kubernetes Cluster on AWS with the name “DevScripter2024” and we attach 2 nodes with it of average configurations, just for demonstration purpose. The node group name will be “devscripter2024-node-group”. You can add as many nodes as you can using different node groups and different configurations as per the organization needs.
Step 1: Please click on “Add Cluster” then “Create”.
Step 2: Mention the name you want to give to your cluster. I am giving “DevScripter2024”. Choose your cluster role too.
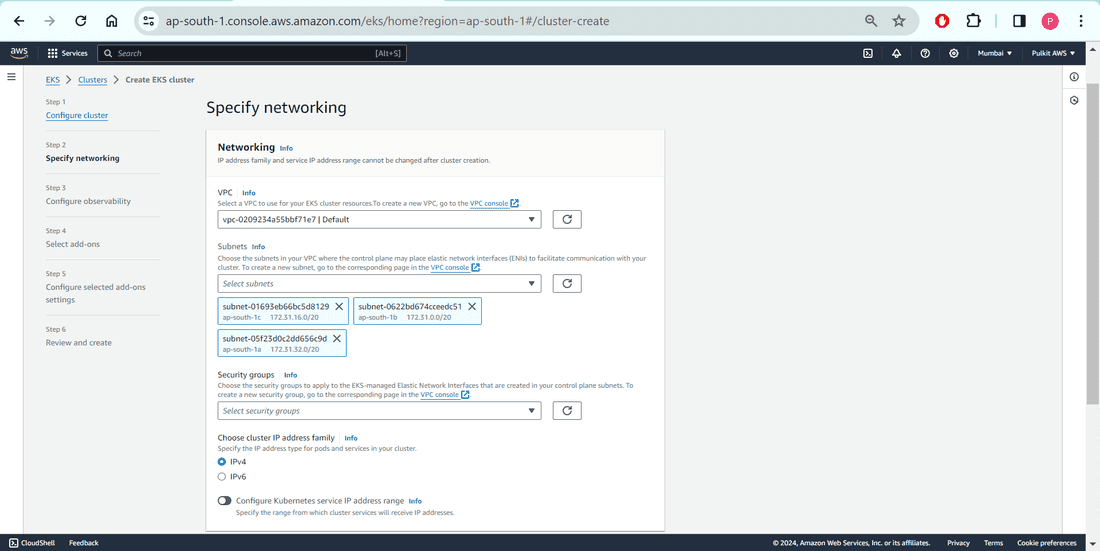
Step 3: I will keep all the configurations default as this is for demonstration purpose. You can update as per your organization`s requirements.
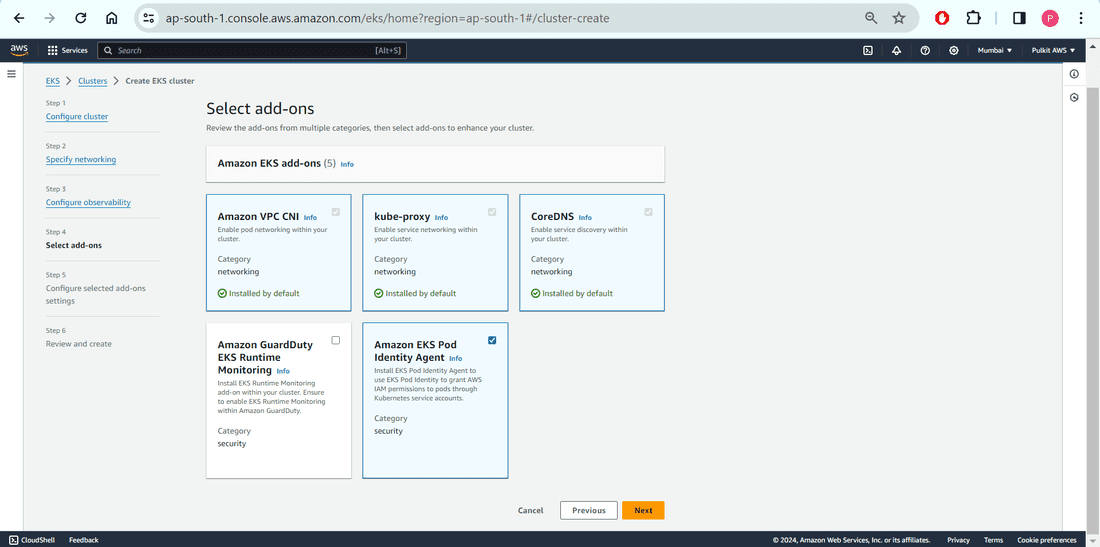
Step 4: I will keep all the configurations default as this is for demonstration purpose. You can update as per your organization`s requirements.
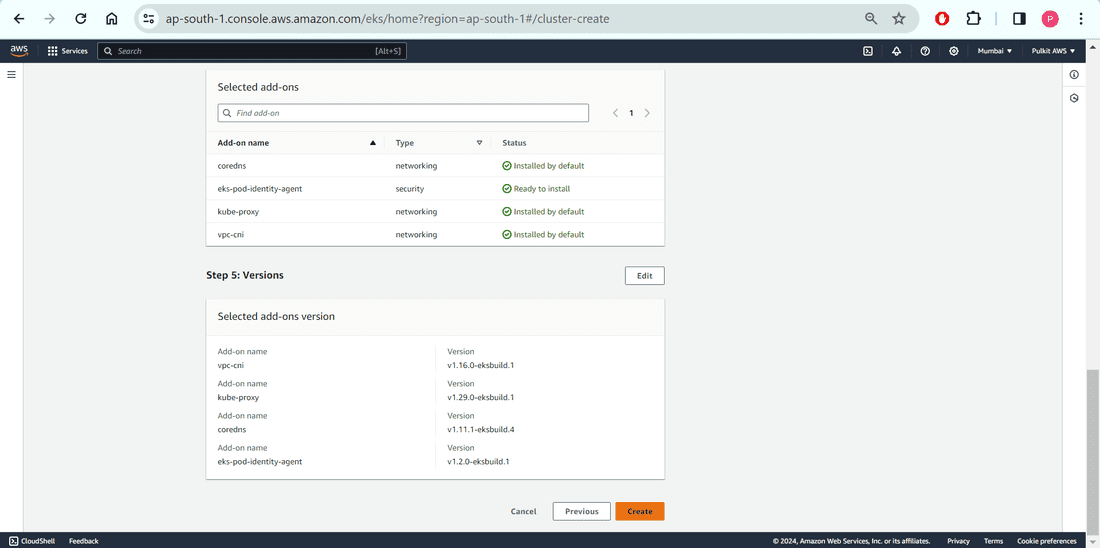
Step 5: I will keep all the configurations default as this is for demonstration purpose. You can update as per your organization`s requirements.
Step 6: It will take around 15-20 minutes to spin up. Please wait.
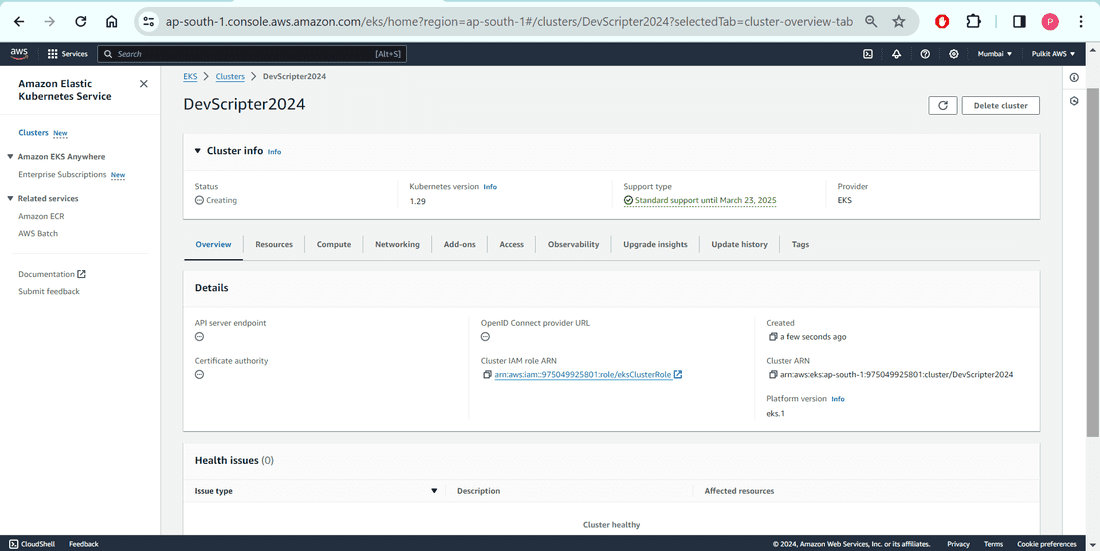
Step 7: Fantastic Job! It is up and running with Status “Active”. Its time to add the Nodes (via NodeGroup, IAM Role). Please see right below corner of the snapshot.
.png)
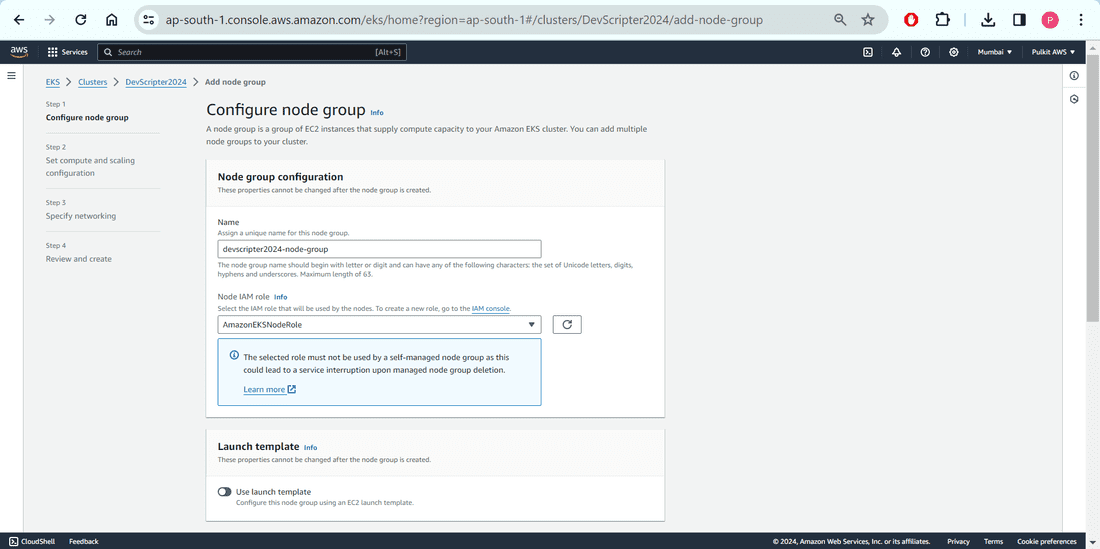
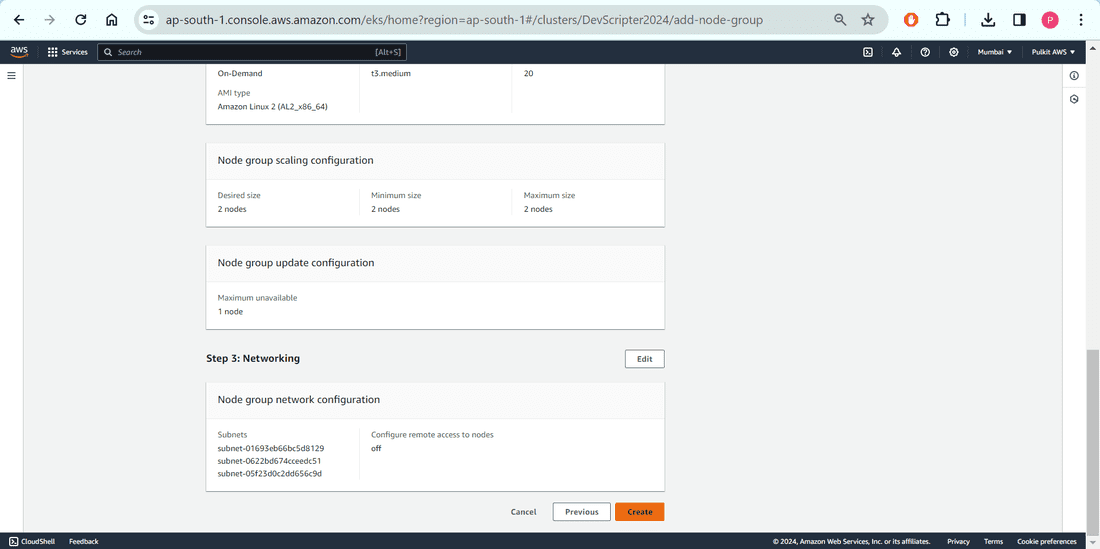
Configure Worker Nodes
Step 1: Start configuring node group.
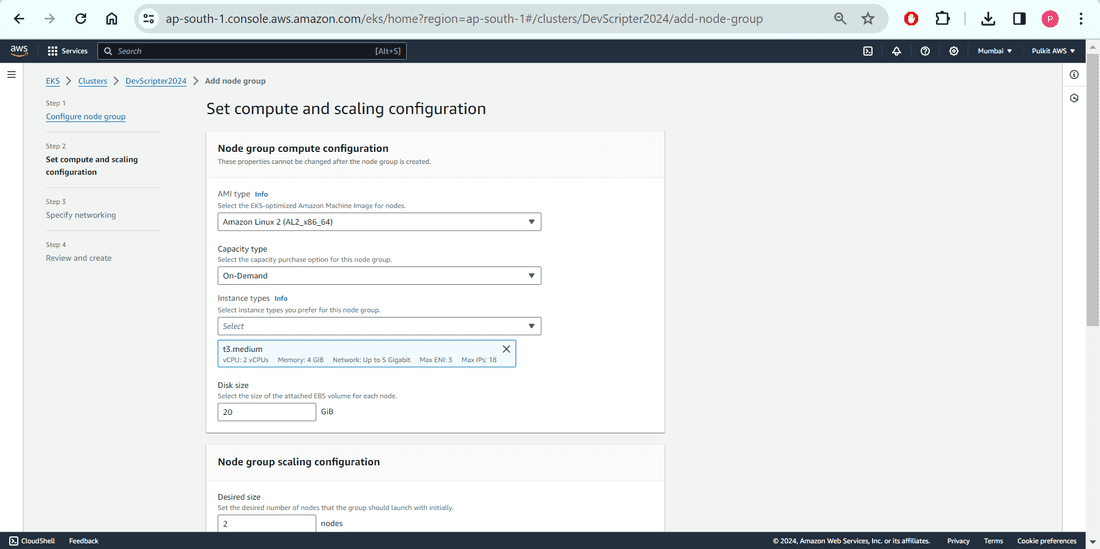
Step 2: I will keep all the configurations default as this is for demonstration purpose. You can update as per your organization`s requirements.
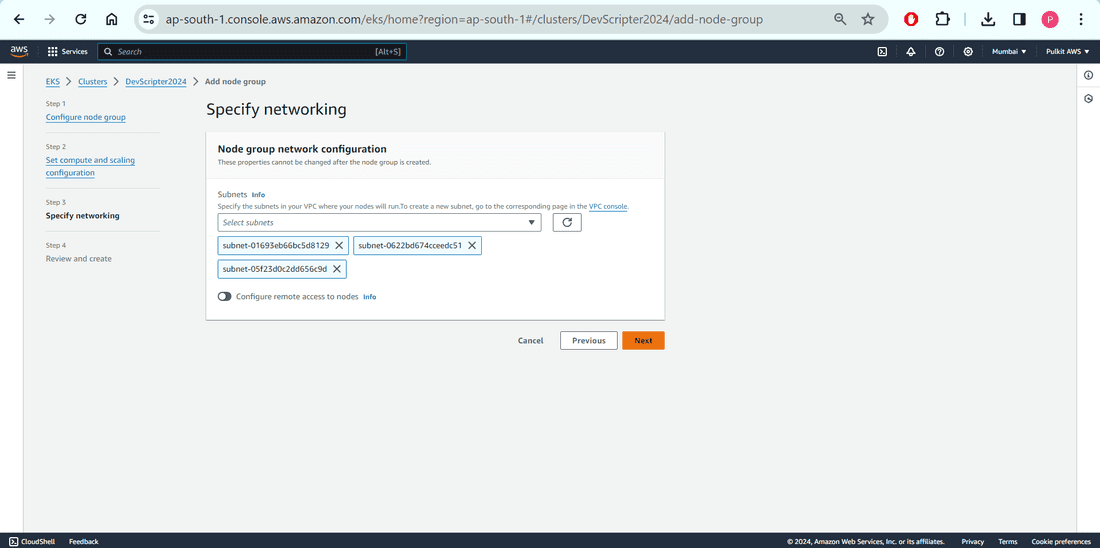
Step 3: I will keep all the configurations default as this is for demonstration purpose. You can update as per your organization`s requirements.
Step 4: I will keep all the configurations default as this is for demonstration purpose. You can update as per your organization`s requirements.
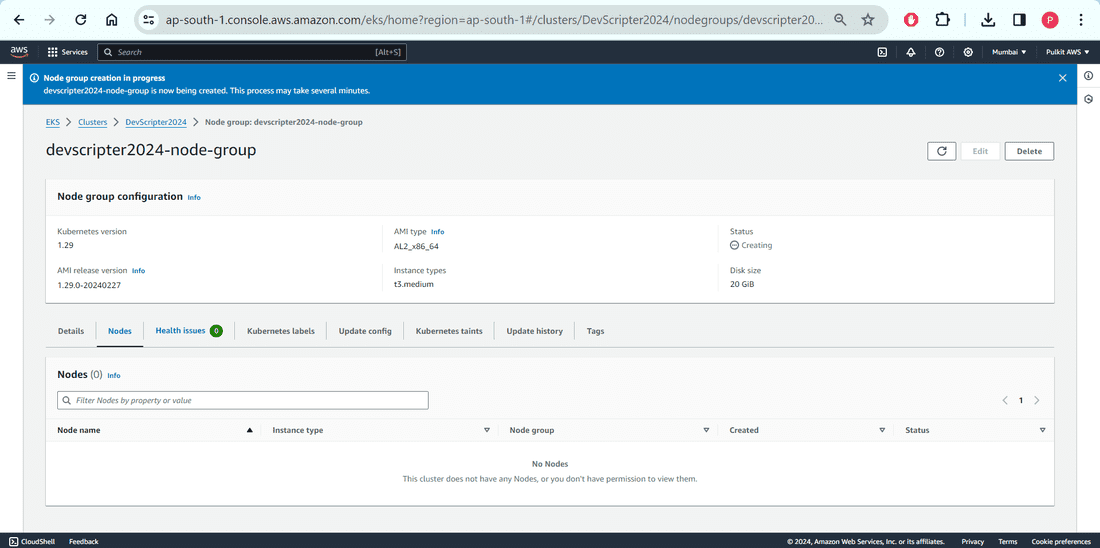
Step 5: Good work! After couple of minutes, you will see the node ready here.
Authenticate and Access the Cluster
1. Please fetch the Access Key and Secret Key ID from the “Security Credentials” -> “My security credentials” -> “Access keys”
2. Please set in the terminal.
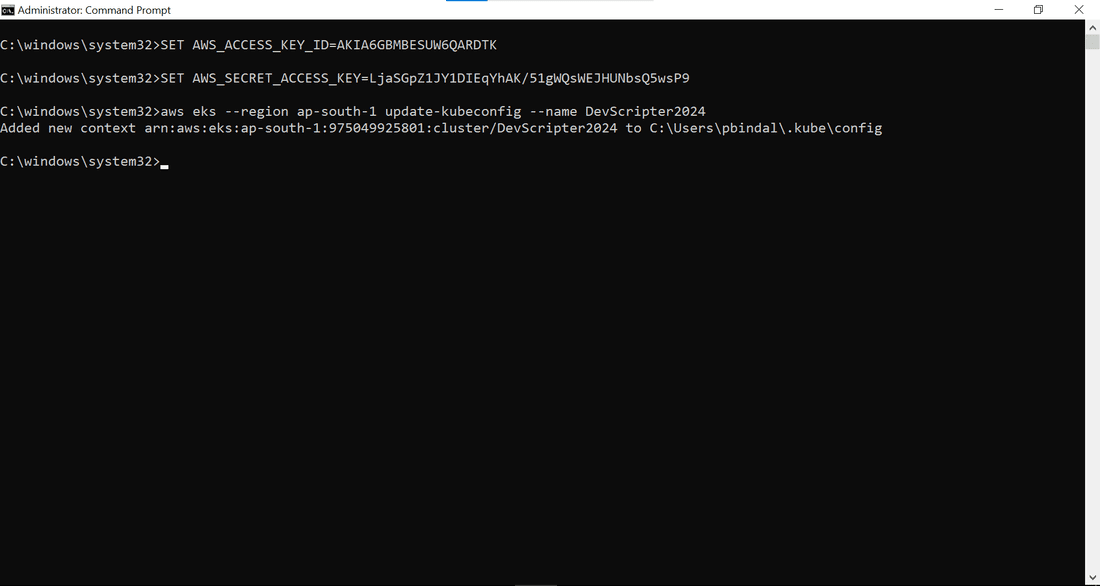
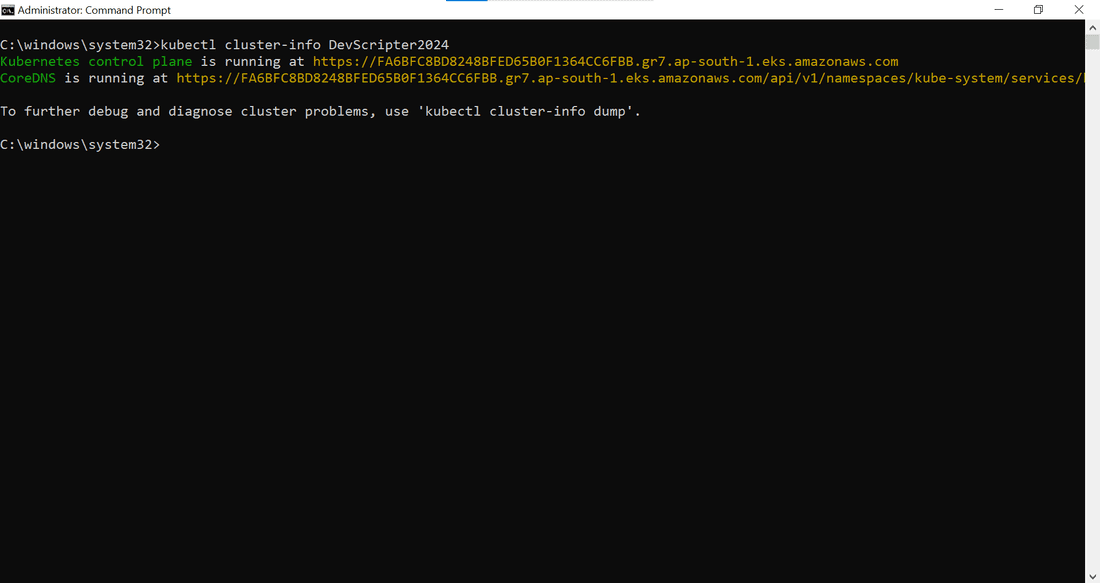
3. Login to the cluster using the command
aws eks --region ap-south-1 update-kubeconfig --name DevScripter2024
4. This verifies the we have successfully connected to our Kubernetes Cluster “DevScripter2024”.
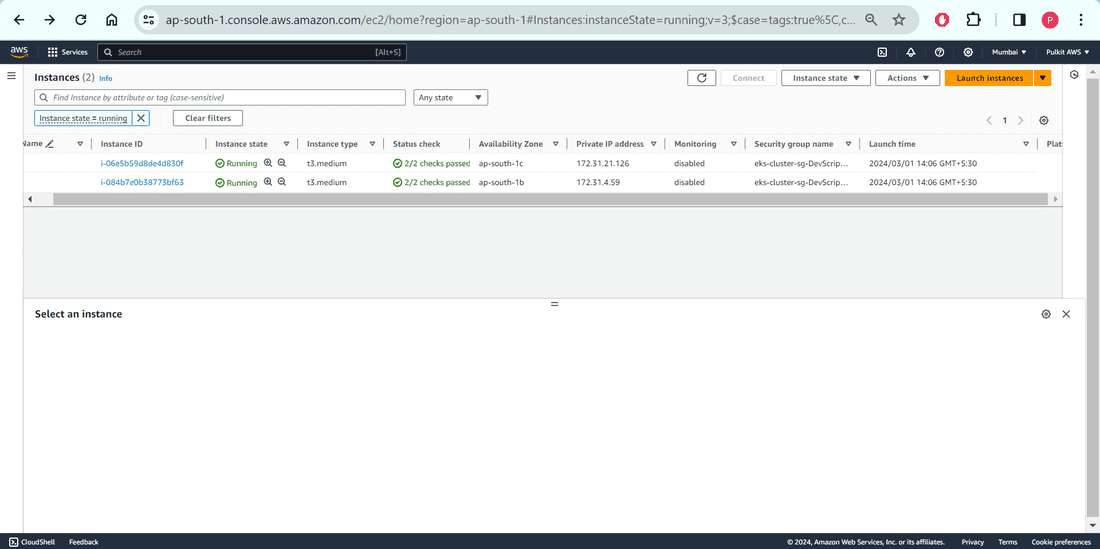
5. Let`s find out the nodes.
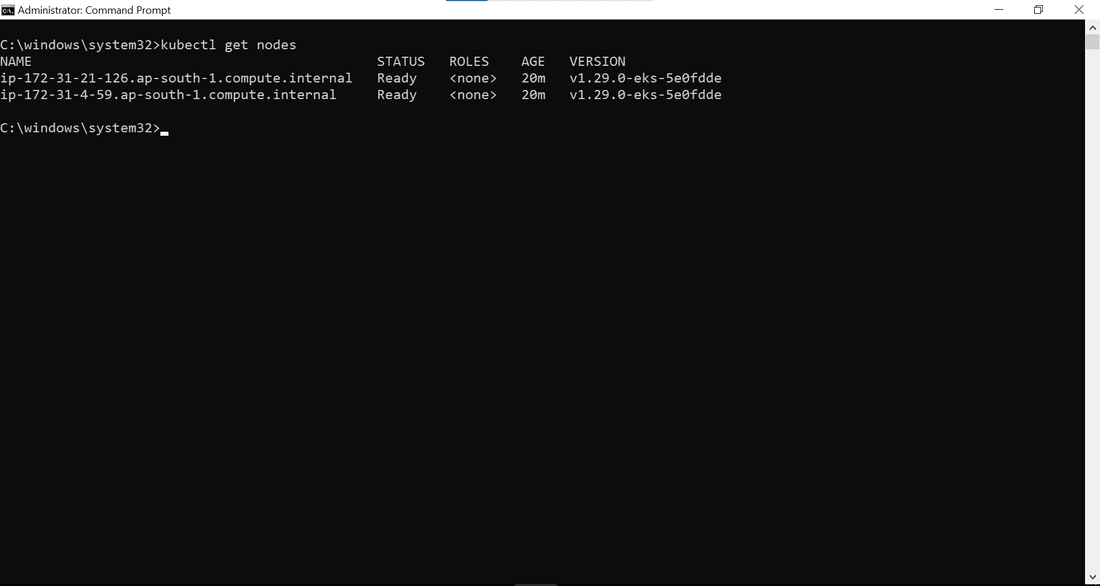
6. Nodes are nothing but running EC2 Instance at the backend. Please check and compare Private IP Address and Status. (This snap and the previous one, for better understanding)
Verify Cluster Configuration
1. Its time to verify the cluster configuration.
Conclusion
In conclusion, Amazon EKS (Elastic Kubernetes Service) simplifies the deployment, management, and scaling of containerized applications using Kubernetes on AWS infrastructure. By automating repetitive procedures and providing a reliable platform for orchestrating containerized workloads, Amazon EKS streamlines the process of running applications, allowing users to focus on their core tasks without worrying about infrastructure management. With easy setup and configuration, along with seamless integration with AWS services, Amazon EKS offers organizations a powerful solution for modernizing their application infrastructure and achieving scalability and efficiency in the cloud.
Create Amazon EKS cluster – FAQ’s
How do I create an EKS cluster in AWS?
- Use
eksctl to create an AWS EKS cluster: eksctl create cluster --name <cluster-name> --region <region> --nodegroup-name standard-workers --node-type t2.micro --nodes 3 --nodes-min 1 --nodes-max 4 --managed.
- Configure kubectl to use the new cluster:
aws eks --region <region> update-kubeconfig --name <cluster-name>.
What is Amazon EKS clusters?
Amazon EKS (Elastic Kubernetes Service) is a managed Kubernetes service by AWS, simplifying the deployment, management, and scaling of containerized applications. It provides a reliable and scalable platform for running containerized workloads using Kubernetes orchestration.
Share your thoughts in the comments
Please Login to comment...