How to Capture udp Packets in Python
Last Updated :
31 Jan, 2024
Capturing UDP (User Datagram Protocol) packets is a fundamental skill for network programmers and security enthusiasts. Python, being a versatile and powerful programming language, offers various libraries and tools to facilitate packet capture. In this article, we’ll explore how to capture UDP packets using Python, specifically focusing on the popular library Scapy.
What are UDP Packets?
UDP, or User Datagram Protocol, is one of the core protocols of the Internet Protocol (IP) suite. It operates at the transport layer and provides a connectionless, lightweight, and fast communication method for data transfer between devices on a network. Unlike TCP (Transmission Control Protocol), which is connection-oriented and ensures reliable data delivery, UDP is connectionless and does not guarantee delivery or order of packets.
How to Capture UDP Packets in Python?
Below, are the step-by-step Implementation of How to Capture UDP Packets in Python.
Create a Virtual Environment
First, create the virtual environment using the below commands
python -m venv env
.\env\Scripts\activate.ps1
File Structure
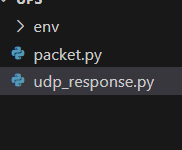
Capture UDP Packets in Python
udp_response.py: In this example, This Python code creates a UDP server using the `socket` module. It specifies an IP address (127.0.0.1) and port (5005) to listen on, then creates a UDP socket. The server continuously listens for incoming UDP packets, printing details such as the sender’s address and the received data in UTF-8 encoding. The `while True` loop ensures the server remains active and responsive to incoming UDP packets.
Python3
import socket
UDP_IP = "127.0.0.1"
UDP_PORT = 5005
sock = socket.socket(socket.AF_INET, socket.SOCK_DGRAM)
sock.bind((UDP_IP, UDP_PORT))
print(f"Listening for UDP packets on {UDP_IP}:{UDP_PORT}")
while True:
data, addr = sock.recvfrom(1024)
print(f"Received packet from {addr}: {data.decode('utf-8')}")
|
packet.py: In this example, below code This Python script functions as a UDP client, sending the message “Hello, UDP!” to a specified target IP address and port (127.0.0.1:5005). It utilizes the `socket` module to create a UDP socket, sends the encoded message, and prints a confirmation. The `finally` block ensures proper socket closure.
Python3
import socket
UDP_IP = "127.0.0.1"
UDP_PORT = 5005
message = "Hello, UDP!"
sock = socket.socket(socket.AF_INET, socket.SOCK_DGRAM)
try:
sock.sendto(message.encode(), (UDP_IP, UDP_PORT))
print(f"Sent UDP packet to {UDP_IP}:{UDP_PORT}: {message}")
finally:
sock.close()
|
Run the Server
use the below command for run the server.
python script_name.py
Output
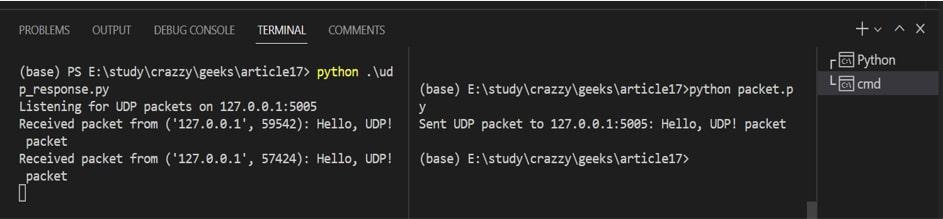
Sending and Receiving packets via socket
Video Demonstration
Advantages of UDP Packets in Python
- Low Latency: UDP minimizes communication delays by eliminating connection setup overhead.
- Simplicity: Lightweight and straightforward, UDP omits complex features for faster data transmission.
- Broadcast/Multicast Support: UDP enables efficient one-to-many communication for applications like live streaming.
- Connectionless Nature: No continuous connection maintenance simplifies data transfer in real-time scenarios.
- Real-Time Application Suitability: Ideal for time-sensitive applications like online gaming or VoIP, prioritizing data flow over perfect delivery
Share your thoughts in the comments
Please Login to comment...