The Apache server or Apache HTTP servers are an open source web server software which was developed by Apache Software Foundation in the year 1995, it was released under the license of Apache License 2.0 they are the servers that are used for accepting various HTTP directories requests from the user, and in response, the Apache server provides them with the information that they require in the form of the webpage and other forms.
In this article, we will see the complete steps to automatically redirect HTTP requests to HTTPS on Apache web servers.
What is HTTP Protocol?
The HTTP protocol stands for Hyper Text Transfer Protocol, it allows us to communicate and transfer data online between two computers or machines. it is also known as the foundation block of the World Wide Web (WWW) because the HTTP protocol can be used to access the data that is available on the World Wide Web. As we know HTTP is a protocol so it has a set of rules that allows the transmission of data and data files such as video files, audio files, text, images, etc.
What is HTTPS Protocol?
As you may guess, the HTTPS Protocol is an extension of the original HTTP protocol, the additional “S” alphabet in the HTTPS protocol is defined as “secure” The HTTPS protocol uses an encryption layer which is known as asymmetric encryption, this encryption is used to encrypt the data that is being sent over a network or address.
Apart from that, HTTPS protocol makes use of the RSA and AES algorithms for encryption, the RSA algorithm is used to exchange the keys during the initial setup of the connection and AES encrypts the data transfer.
Difference Between HTTP and HTTPS:
|
HTTP stands for HyperText Transfer Protocol.
|
HTTPS stands for HyperText Transfer Protocol Secure.
|
|
The URL for HTTP starts with “http://”
|
The URL for HTTPS starts with “https://”
|
|
HTTP Protocol uses port number 80 for default communication.
|
HTTPS Protocol uses port number 443 for communication.
|
|
HTTP protocol is less secure because the data packets being sent are not secure.
|
HTTPS protocol is more secure as it sends the data with encryption.
|
|
HTTP is an application layer protocol.
|
HTTPS is a transport layer protocol.
|
|
HTTP protocol does not use SSL certification.
|
HTTPS protocol uses the SSL certification to provide encryption.
|
|
HTTP protocol is very fast.
|
HTTPS protocol is slower as compared to HTTP because it provides encryption.
|
Now that we have understood the difference between both the HTTP and the HTTPS protocols, let’s understand how we can force redirect any HTTP protocol-based website to HTTPS protocol.
How to automatically redirect HTTP to HTTPS on Apache servers?
There are multiple steps involved which also require some packages to be installed to redirect the Apache servers from the HTTP protocol to the HTTPS protocol easily, these steps are broken down into the following parts:
Step 1: Install Apache2 Server
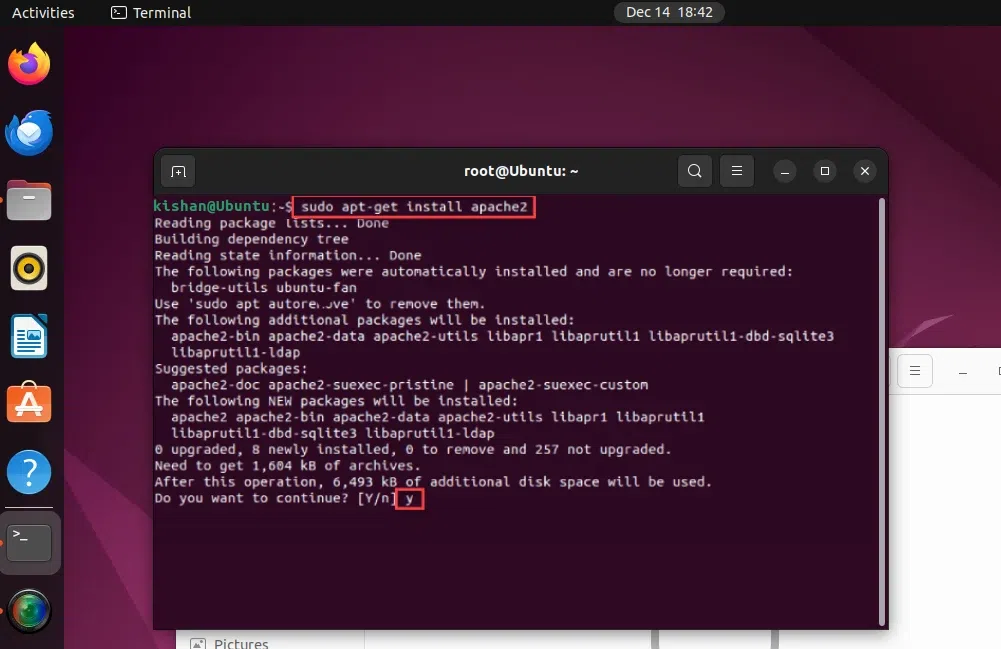
To automatically redirect HTTP to HTTPS in Apache we first need to install some components inside our system. first of all, if you have not downloaded and installed the Apache server inside your system then you can simply install the Apache server by using the following command in your terminal window:
sudo apt-get install apache2
Output:
Step 2: Purge Openssl and Reinstall Openssl
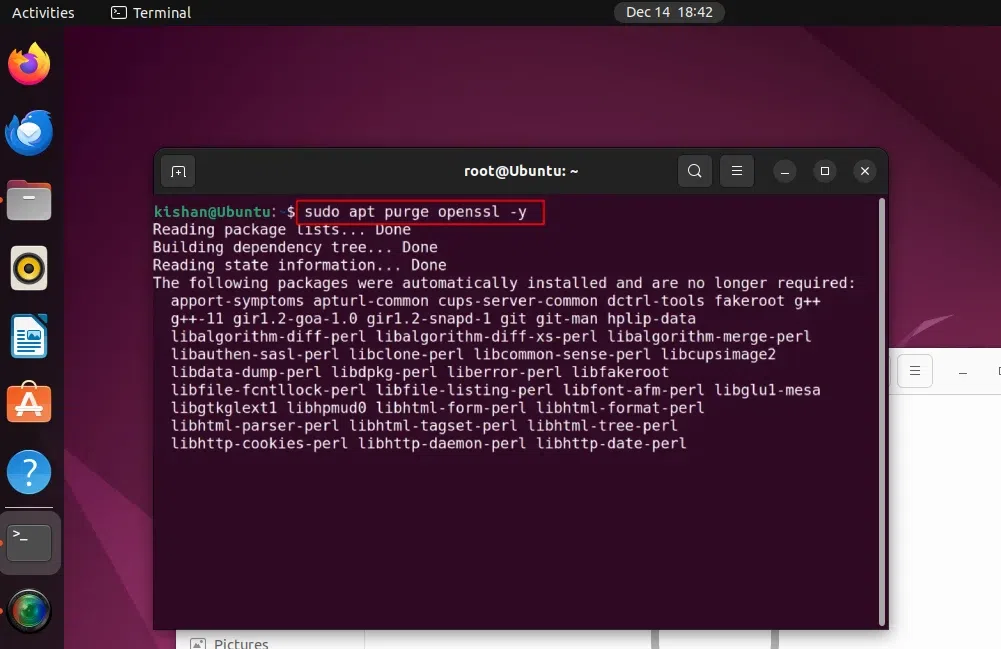
Once the above step is completed, then we will have to first purge the OpenSSL. the OpenSSL provides us with the certification we need for the HTTPS protocol, so you will have to purge the OpenSSL to delete unwanted files. this step is only required if you had the OpenSSL installed previously. do to that you will have to use the command mentioned below:
sudo apt purge openssl -y
Output:
Step 3: Create the Folder for the Certificate
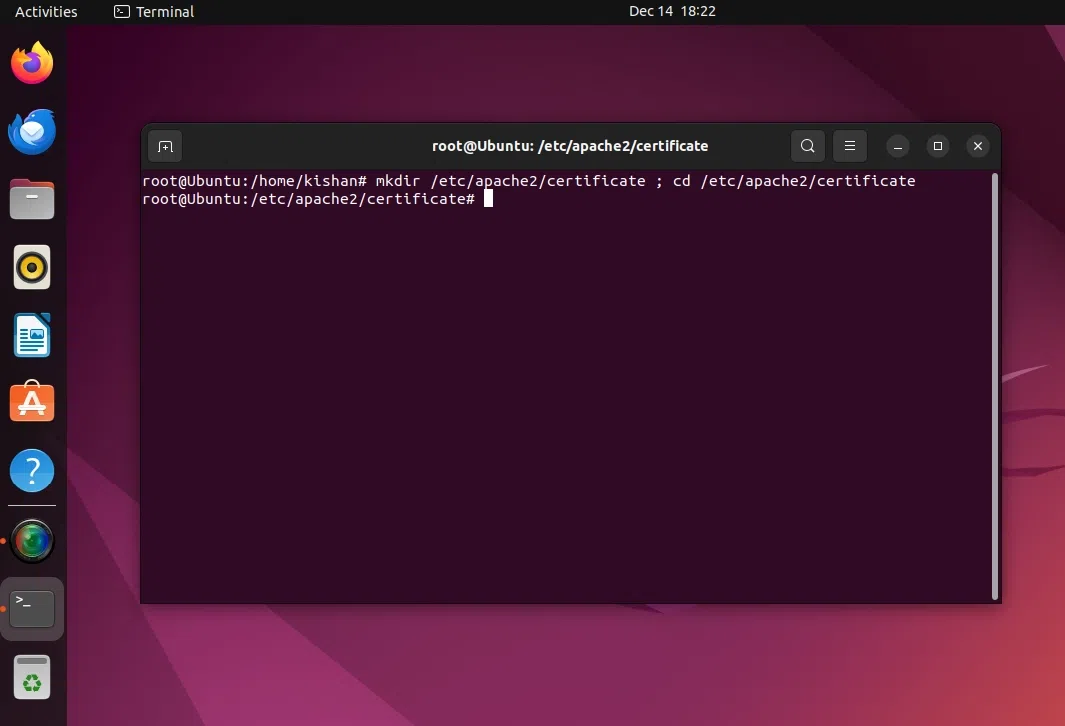
Now we need to create a folder that will hold all the files of our certificate, so in a way we will create the folder named “certificate” and this certificate will hold the files of the certificate. we use the following Ubuntu command to create the folder named “certificate“:
mkdir /etc/apache2/certificate ;
cd /etc/apache2/certificate
Output:
Step 4: Generate the Certificate
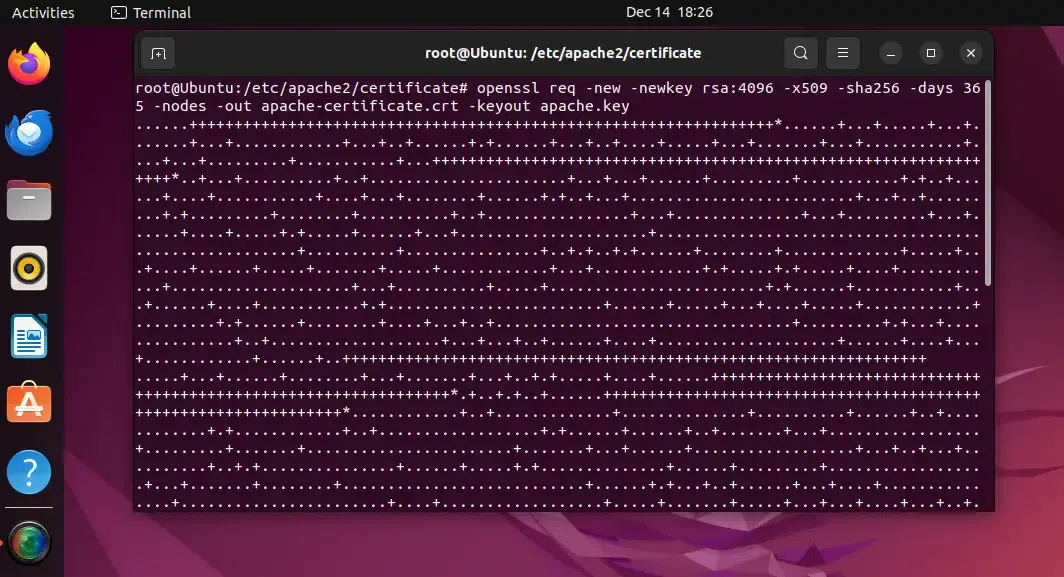
After completing the above step, you can now simply create the certificate, the command for creating a certificate using OpenSSL is the following:
openssl req -new -newkey rsa:4096 -x509 -sha256 -days 365 -nodes -out apache-certificate.crt -keyout apache.key
The above command is very simple to understand, first, we use the OpenSSL keyword to use the OpenSSL package, then we wrote -req to request a new certificate, for this new certificate we need to generate a new key as well so will use the -new key to generate the key pair for it, then we define the algorithms the key and certificate will use (i.e. RSA and SHA) after this we use -days to define the duration of the certificate, here I have used 365 days or 1 year because it’s the most common timeframe for HTTPS certificates.
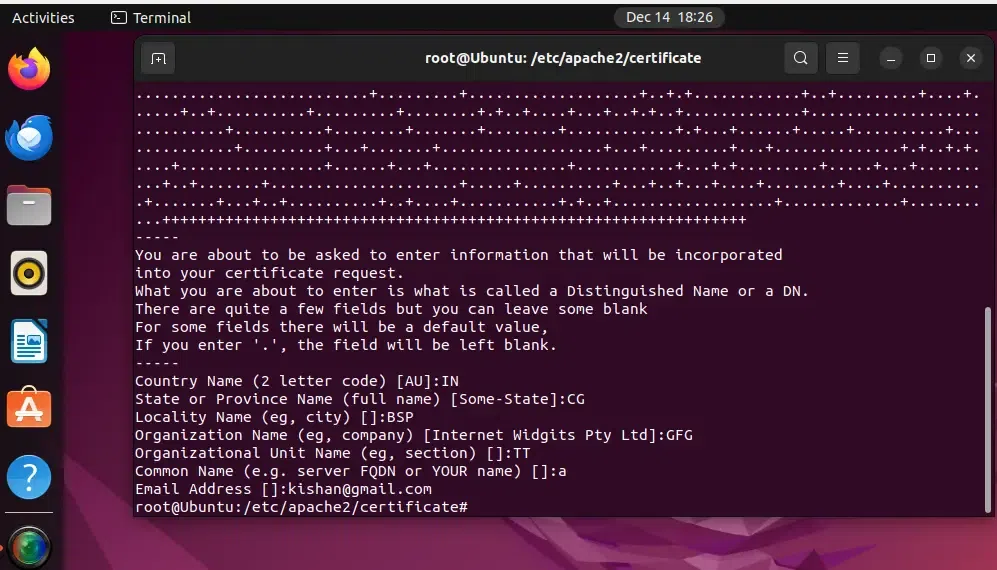
Step 5: Add Details for the Certificate
After the certificate has been generated, it will ask you to add additional details for the certificate, such as country code state, etc.
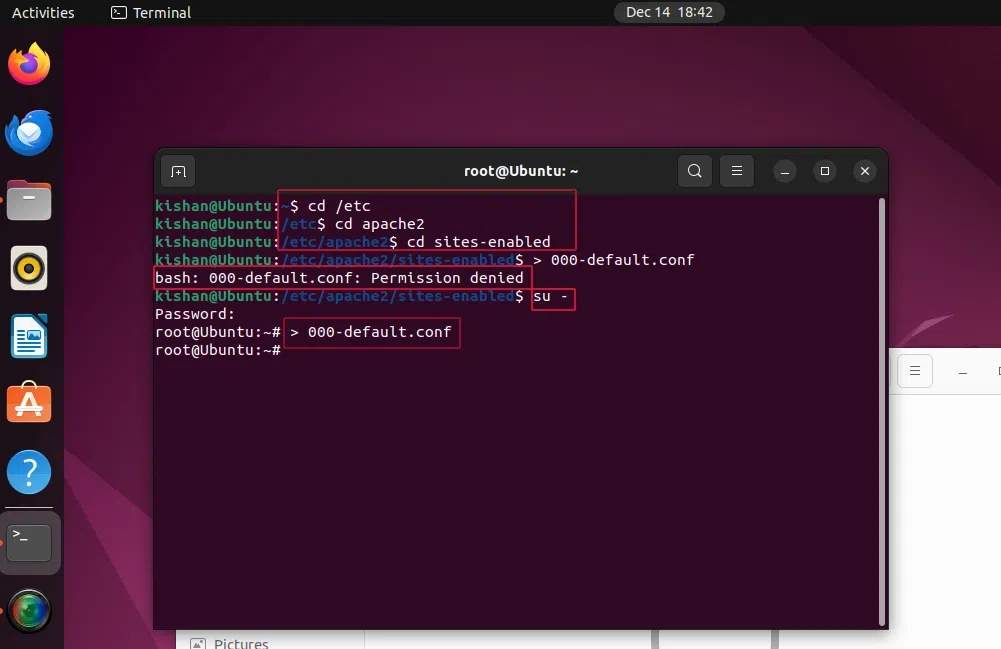
Step 6: Edit the 000-default.conf File
Now we need to edit the 000-default.conf file as well. this file contains all the default settings for the Apache server, such as the IP address for the website, the port numbers being used for HTTP and HTTPS connections, etc. We will simply edit this default file and remove the comment (#) of the header code.
For this, you will first have to go to the location where your apache2 server is installed, in my case it’s installed at /etc/apache2/. once you have reached the apache2 server simply navigate to the sites-enabled/ directory and open the 000-default.conf file.
Note: If it says permission denied then you will have to get the root access by using the su – command and submitting your root user password.
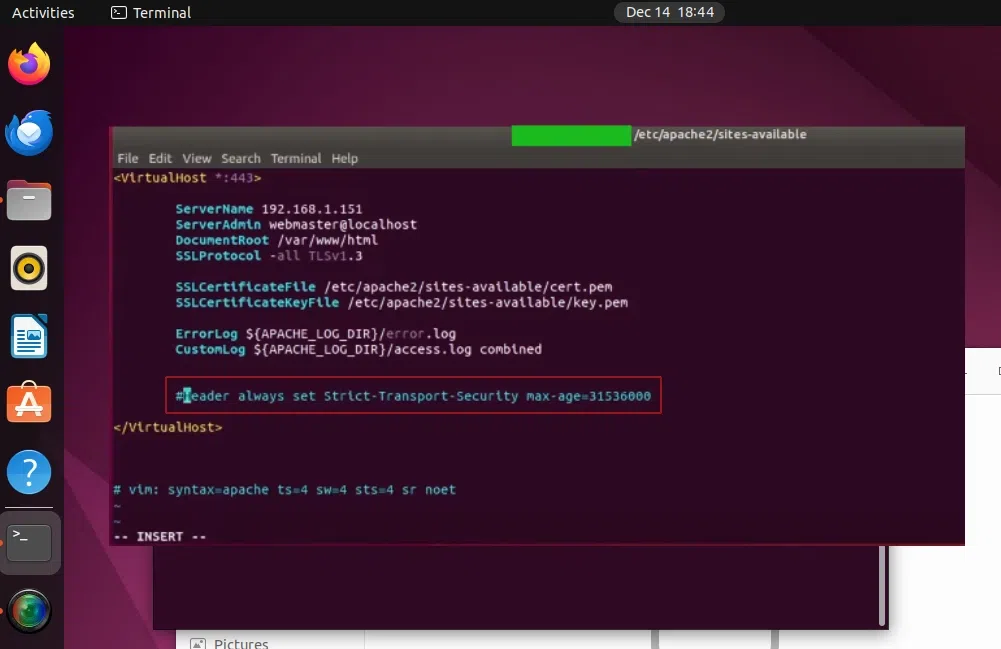
Step 7: Changing the Code
Now in port 443, we will need to change the code, we only have to modify the line where it says the header is always set because by default this line of code is commented, so simply remove the # and the code will be active.
Current Code:
#Header always set Strict-Transport-Security max-age=31536000
Updated Code:
Header always set Strict-Transport-Security max-age=31536000
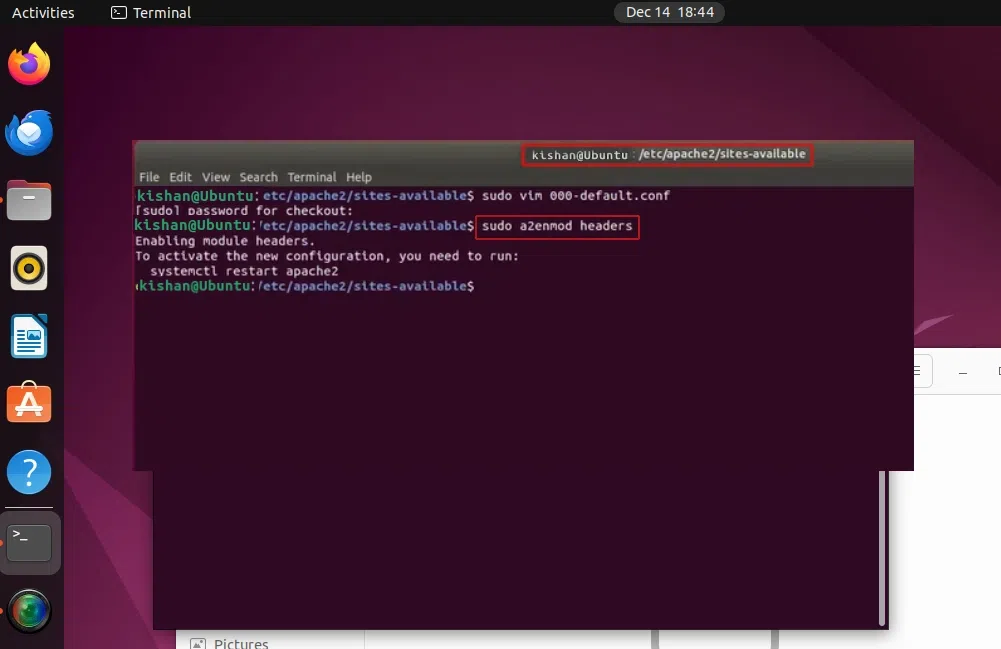
Step 8: Enable Module Headers
Now in this step, we need to enable the module headers so that they accept the header that we just uncommented, we will simply use the following command:
sudo a2enmod headers
Step 9: Rewrite the SSL
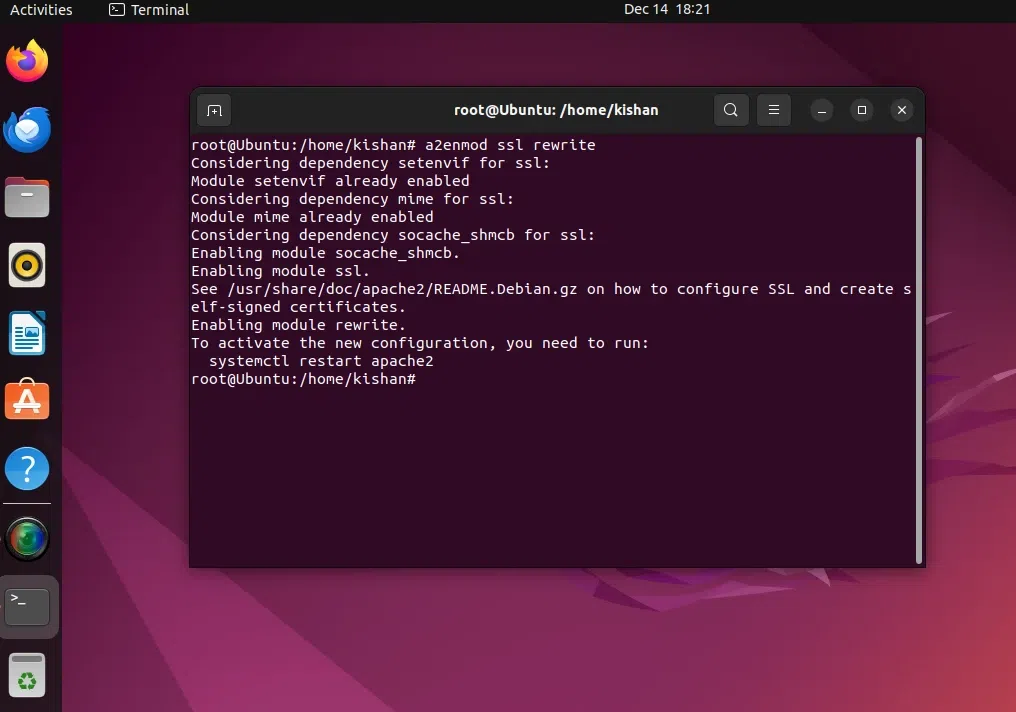
Once the above step is complete we will have to rewrite the SSL as well, we will use the a2enmodule, which is a script that simply enables the module that is specified in the Apache server. To do that we will run the following script:
a2enmod ssl rewrite
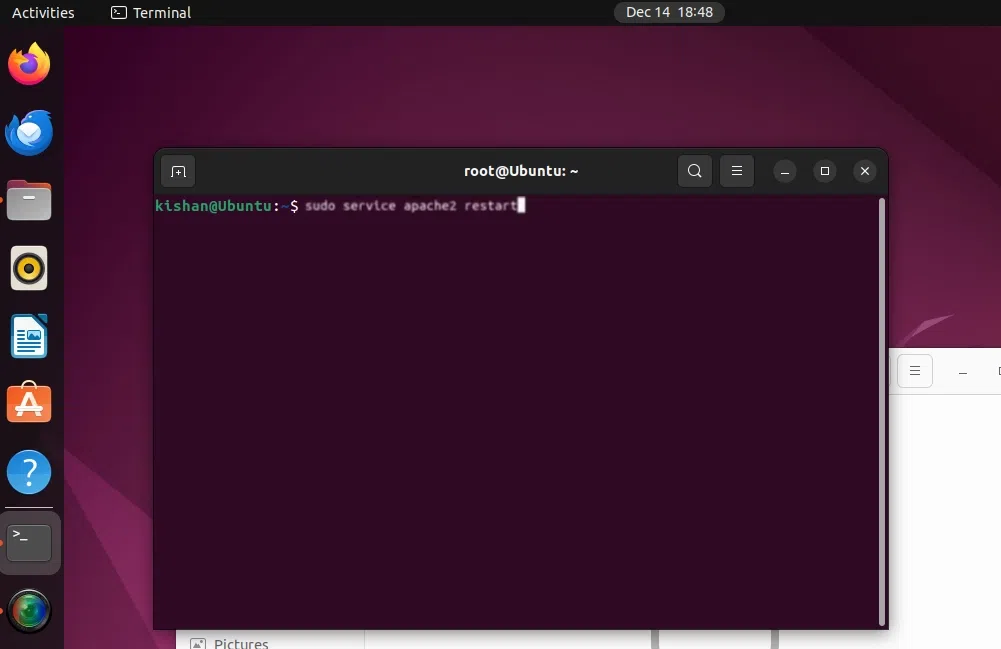
Step 10: Restart the Apache Server
Once we have used the a2enmod script to enable the module, we will have to restart the Apache server, and for that, we will use the following command:
sudo service apache2 restart
This script will restart the Apache server for us.
How to Check if HTTP Redirects to HTTPS Automatically?
After completing the last step (Step 10) you can go to your preferred browser and type the IP address which is available in your /site-enabled/ directory and see that it shows the following warning:
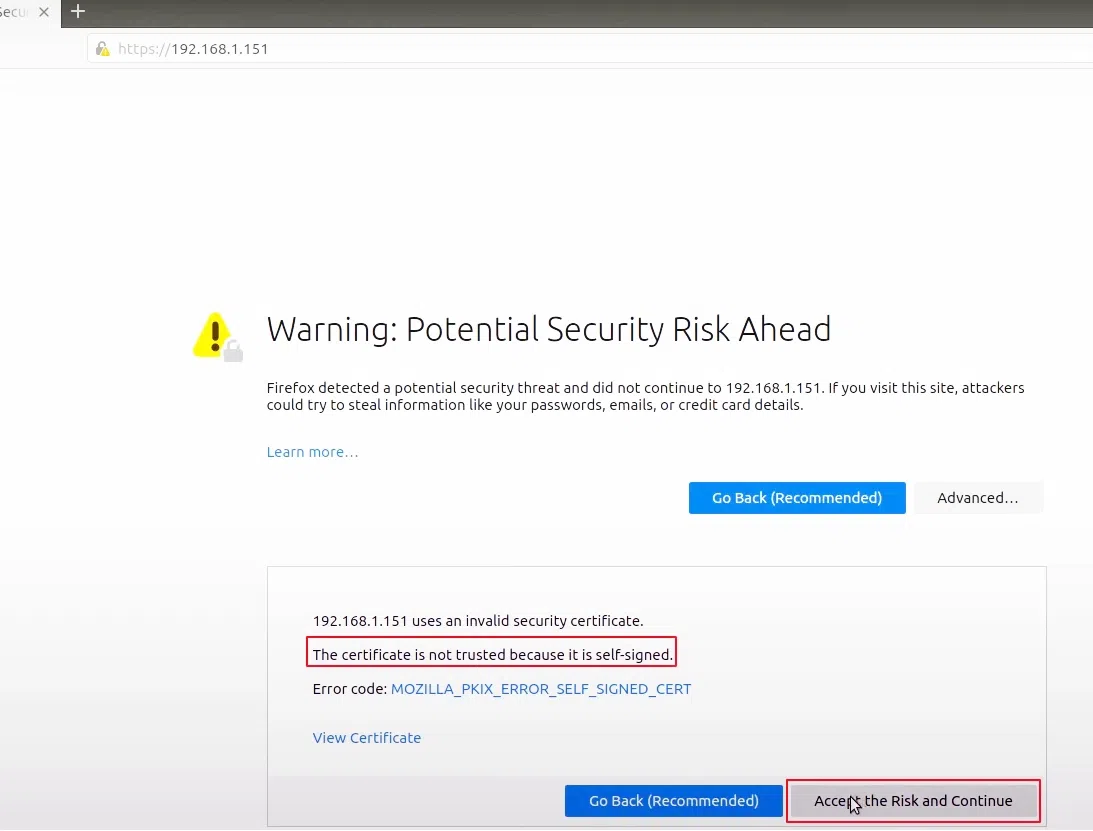
This error is simply present because the certificate we have used is a self-signed certificate, a self-signed certificate is not authorized by a trusted certificate authority which is why it shows a warning sign. we can simply click on the “Advanced” option and then click on the “Accept the Risk and Continue” button.
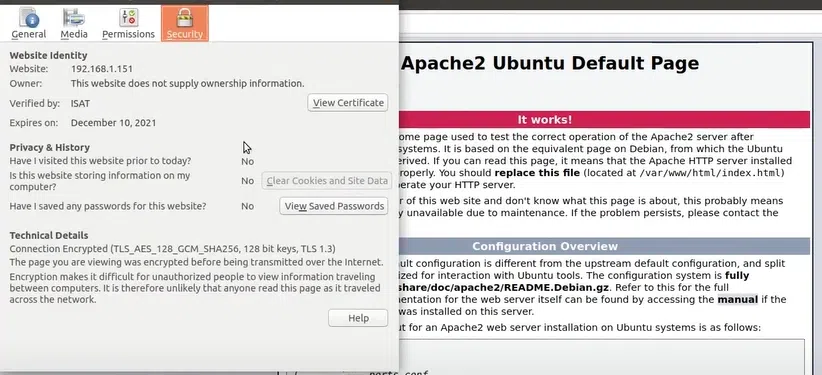
Now you can see that if we click on the lock option of the site or IP address then it will show us the following SSL certificate:
Once you have successfully completed all the above steps, you will be able to see the URL which redirects us to HTTPS.
Conclusion
In conclusion, using HTTPS certificates on your websites is a great way to protect your website from information being leaked as well as make sure you get all the visitors because these days all the modern web browsers show a warning panel to the users before entering the website if the website does not have any SSL certificate present in it, which lowers the number of users you get on your website. So it’s a crucial factor to redirect the HTTP to HTTPS in your website automatically.
Share your thoughts in the comments
Please Login to comment...