How to Add a Python 3 Kernel to Jupyter IPython
Last Updated :
09 Oct, 2023
In this article, we will cover how to install the IPython kernel and integrate it with Jupyter Notebook. We will look at what is Jupyter notebook, followed by a detailed step-by-step tutorial to install IPython kernel and its integration with Jupyter Notebook along with the screenshots to get a better understanding in Python.
Jupyter Notebook
The Jupyter Notebook is the original web application for creating and sharing computational documents that contain live code, equations, visualizations, and narrative text. It offers a simple, streamlined, document-centric experience. Jupyter has support for over 40 different programming languages and Python is one of them.
Steps to Install IPython Kernel
Following are the steps by which we can install IPython Kernel:
Step 1: Install Ipython kernel
We will use pip command to install the ipython kernel run the following command,
pip install ipython
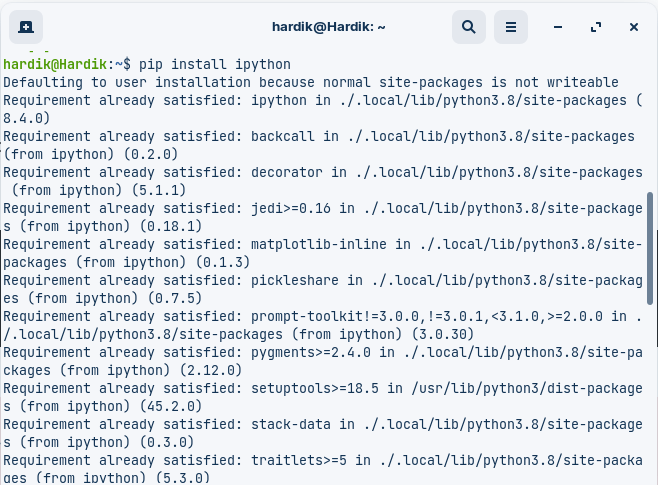
To verify the installation run the below command to check ipython version, if the ipython was installed successully then it will show its version,
ipython --version

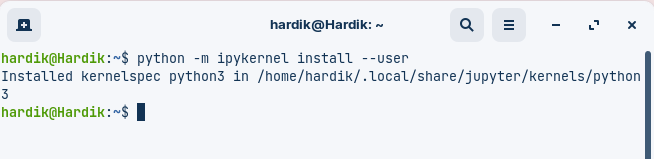
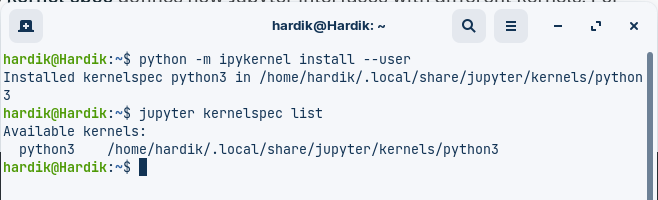
Step 2: Integrate ipython kernel with Jupyter Notebook
To integrate the ipython kernel with Jupyter Notebook run the below command,
python -m ipykernel install --user
To verify the installation and list all the available kernel run the below command,
jupyter kernelspec list
Step 3: Testing the Installation
We can test our installation process by writing the following command. This command will start a new IPython session.
ipython
Share your thoughts in the comments
Please Login to comment...