Handle User Events in Angular Components
Last Updated :
02 Apr, 2024
User events are very important for creating interactive and responsive applications in Angular. These events allow users to interact with the user interface (UI) elements, and Angular provides a convenient way to handle these events within components.
In Angular, user events can be handled using event binding. Event binding allows you to bind component methods or expressions to specific events that occur on UI elements. When a user interacts with the UI element, the corresponding event is triggered, and Angular executes the associated method or expression.
Steps to Create Angular Project
Step 1: Create a new Angular project
ng new user-events-demo
Step 2: Navigate to the project directory.
cd user-events-demo
Folder Structure:
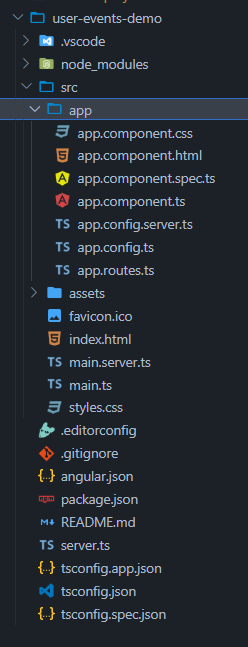
project structure
The updated Dependencies in package.json file will look like:
"dependencies": {
    "@angular/animations": "^17.2.0",
    "@angular/common": "^17.2.0",
    "@angular/compiler": "^17.2.0",
    "@angular/core": "^17.2.0",
    "@angular/forms": "^17.2.0",
    "@angular/platform-browser": "^17.2.0",
    "@angular/platform-browser-dynamic": "^17.2.0",
    "@angular/platform-server": "^17.2.0",
    "@angular/router": "^17.2.0",
    "@angular/ssr": "^17.2.3",
    "express": "^4.18.2",
    "rxjs": "~7.8.0",
    "tslib": "^2.3.0",
    "zone.js": "~0.14.3"
  }
Step 3: Start the development server
ng serve --open
Step 4: Generate a new component
ng generate component user-events
Approach 1: Event Binding
This syntax directly binds an event to a component’s method or expression, making it suitable for straightforward event handling without passing any additional data.
HTML
<!-- user-events.component.html -->

<div style="display: grid;">
    <h3>Event Binding</h3>
    <div>
        <button (click)="handleClick()">Click me</button>
        <button (dblclick)="handleDoubleClick()">Double Click me</button>
    </div>

    <div>
        <h3>Keyboard Event</h3>
        <input (keyup)="handleKeyUp($event)" placeholder="Press a key">
        <p>Last key pressed: {{ lastKey }}</p>

    </div>
    <div>
        <h3>Mouse Events</h3>
        <div (mouseover)="handleMouseOver()" (mouseout)="handleMouseOut()"
            style="background-color: lightgray; padding: 20px;">
            Hover over me
        </div>
        <p>Mouse over: {{ isMouseOver }}</p>
    </div>
    <div>
        <h3>Focus Events</h3>
        <input (focus)="handleFocus()" (blur)="handleBlur()" placeholder="Focus/Blur">
        <p>Input focused: {{ isFocused }}</p>
    </div>
</div>
//user-events.component.ts

lastKey: string = '';
isMouseOver: boolean = false;
isFocused: boolean = false;

handleClick() {
    console.log('Click event triggered');
}

handleDoubleClick() {
    console.log('Double click event triggered');
}

handleKeyUp(event: any) {
    this.lastKey = event.key;
}

handleMouseOver() {
    this.isMouseOver = true;
}

handleMouseOut() {
    this.isMouseOver = false;
}

handleFocus() {
    this.isFocused = true;
}

handleBlur() {
    this.isFocused = false;
}
Approach 2: Event Binding with $event Object
By passing the event object as an argument to the component method, this syntax enables access to additional event data, such as mouse coordinates or input values, providing more complex event handling scenarios.
HTML
<!-- user-events.component.html -->

<h3>Event Binding with $event Object</h3>
<input (input)="handleInput($event)" placeholder="Type something">
<p>Input value: {{ inputValue }}</p>
//user-events.component.ts

inputValue: string = '';

handleInput(event: any) {
    this.inputValue = event.target.value;
}
Approach 3: Template Statement
Template statement offers a concise inline syntax within templates, this approach simplifies the execution of simple operations or toggling boolean flags directly within the UI.
HTML
<!-- user-events.component.html -->

<h3>Template Statement</h3>
<button (click)="message = 'Button clicked!'">Click me</button>
<p>{{ message }}</p>
//user-events.component.ts

message: string = '';
Approach 4: Event Filter
Event filter has the ability to filter events based on specific conditions like keypresses or mouse actions, this syntax enhances code readability and maintainability by isolating event-specific logic, improving the overall structure of the application.
HTML
<!-- user-events.component.html -->

<h3>Event Filter</h3>
<input (keyup.enter)="handleEnterKeyUp($event)" placeholder="Press Enter">
<p>Enter key pressed: {{ enterKeyPressed }}</p>
//user-events.component.ts

enterKeyPressed: boolean = false;

handleEnterKeyUp(event: any) {
    if (event.key === 'Enter') {
        this.enterKeyPressed = true;
    }
}
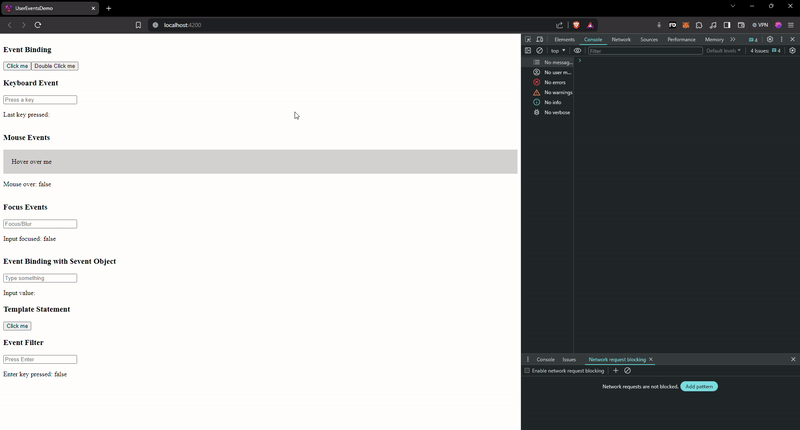
Output:
Share your thoughts in the comments
Please Login to comment...