Flutter – How to Integrate Mapbox
Last Updated :
26 Nov, 2023
Maps have become an aspect of our routines. Whether you’re exploring a city looking for a coffee shop or keeping tabs on delivery maps is incredibly valuable. When it comes to creating apps incorporating maps not only improves the user experience but is also frequently necessary, for applications that rely on location-based services. If you’re developing a travel app, a fitness tracker, ride-sharing service or any other application that needs maps, for navigation and location-based details. Let’s see how we can implement maps in our Flutter application using Mapbox. A sample video is given below to get an idea about what we are going to do in this article.
What is Mapbox?
Mapbox is an advanced and flexible map service that can be easily integrated into your mobile and web applications. It has some fantastic features such as Mapbox Studio, Vision, Atlas, and other commonly known SDKs. Many companies, including Facebook, Snap Inc., and Shopify, have benefitted from its mapping services.
One of the options that comes to mind is the Google Maps Platform. However, if you’re a startup entering the market a developer aiming to publish your app, on the Play Store or a student community creating solutions for your school Google Maps might become quite expensive as your user base grows. This is when alternative solutions such, as Mapbox become relevant.
Mapbox offers a decent and effective pricing structure. Even provides a free tier specifically designed for development purposes.
Benefits of Mapbox over Google Maps
Customization
Mapbox has more flexible customization options than Google Maps. You can customize the look and feel of your map, including the base layer, styling, and controls.
Pricing
Mapbox’s pricing is generally more affordable than Google Maps, especially for high-volume usage. It also offers many free tier benefits to use its navigation and maps APIs.
Open source
Mapbox is built on top of OpenStreetMap, an open-source mapping platform. This means that Mapbox data is more transparent and accessible than Google Maps data.
Step by Step Implementation
Step 1: Create a New Project in VS Code
- Create and name a folder of your choice.
- Open VS Code and open the newly created folder in it.
- Open the command palette by pressing CTRL + SHIFT + P and type Flutter.
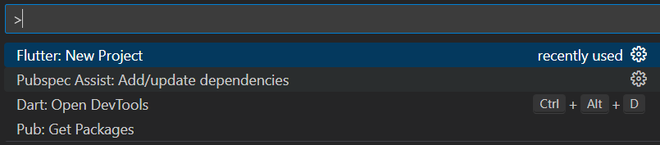
- Choose Flutter: New Project from the listed options.
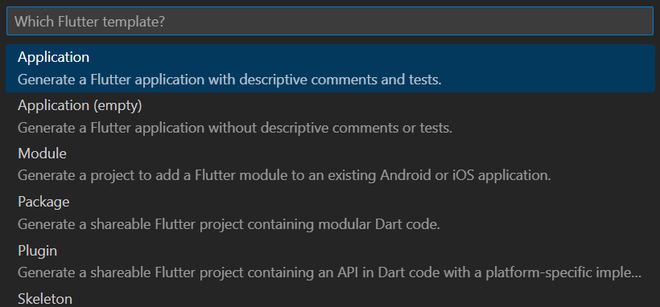
- Select Application from the drop down and it will open in the current folder you are in.
- Now name the app as per your choice, We are naming it with “mapbox” (Use lowercase convention).
Step 2: Creating Map Style
- Head on to the Mapbox website and create an account by filling up the required details.
- Go to the dashboard and click on Create a map in the studio.
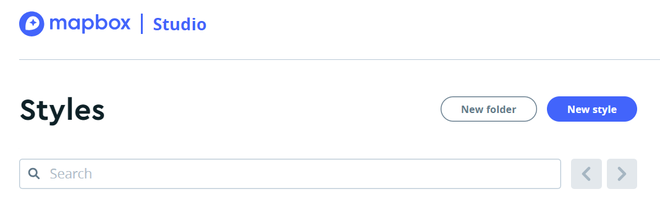
- Click on the new style and make a new map style to your requirements.
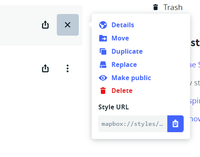
- After customizing your map, publish and come back to your styles screen, click on your new style and copy the style URL that we will be using in the app.
Step 3: Adding required permissions
- This app requires internet permission to download the map from Mapbox API.
- Add the following internet permission line in android/app/src/main/AndroidManifest.xml file
<uses-permission android:name="android.permission.INTERNET"/>

Step 4: Installing required packages
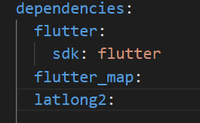
- To use the Mapbox maps, we need to specify certain packages in pubspec.yaml file.
- Head over to pubspec.yaml file and add the following lines below the dependencies section.
flutter_map:
latlong2:
- flutter_map: This package is used to display the map on the screen and interact with it by using the Mapbox API.
- latlong2: This package is used to specify the latitude and longitude of the map to display. It is the only package that is supported by flutter_map.
After adding the above lines click Ctrl + S to allow Flutter to download and install those packages.
Step 5: Creating Map Screen in map.dart file
We need to create a dart file and write code to create a UI for displaying the map.
- Create a new dart file named map.dart in lib/ folder.
- Add the following code to it.
Dart
import 'package:flutter/material.dart';
import 'package:flutter_map/flutter_map.dart';
import 'package:latlong2/latlong.dart';
class MapScreen extends StatefulWidget {
const MapScreen({super.key});
@override
State<MapScreen> createState() => _MapScreenState();
}
class _MapScreenState extends State<MapScreen> {
final MapController controller = MapController();
LatLng latLng = const LatLng(48.8584, 2.2945);
@override
Widget build(BuildContext context) {
return FlutterMap(
mapController: controller,
options: MapOptions(
initialCenter: latLng,
initialZoom: 18,
),
children: [
TileLayer(
urlTemplate: "your-mapbox-map-template-url"
),
],
);
}
}
|
- In the above code, a stateful widget named MapScreen is made which returns the FlutterMap widget that displays your map.
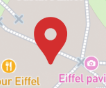
- Using LatLng, location coordinates are specified in the code. Currently, for this post, we specified the Eiffel Tower location, so change it as per your need. It is the location that is shown when the map is loaded.
Step 6: Adding Location Marker
- We need a marker to show where the location is on the map.
- It can be added using a Marker widget, which takes a location latlng and a child that can be any widget.
- We are adding a red location pin icon to show the current location as shown below.
Dart
MarkerLayer(
markers: [
Marker(
point: latLng,
width: 60,
height: 60,
alignment: Alignment.topCenter,
child: Icon(
Icons.location_pin,
color: Colors.red.shade700,
size: 60,
),
),
],
),
|
Step 7: Working on the main.dart file
Now, we need to create a User Interface to display our map screen.
- Head over to the main.dart file present in the lib/ folder.
- Put the below code in main.dart.
Dart
import 'package:flutter/material.dart';
import 'package:mapbox/map.dart';
void main() {
runApp(const MyApp());
}
class MyApp extends StatelessWidget {
const MyApp({super.key});
@override
Widget build(BuildContext context) {
return const MaterialApp(
title: "Maps",
debugShowCheckedModeBanner: false,
home: MapScreen(),
);
}
}
|
Step 8: Running the Application
To run your app, select Run from the toolbar and click on Run Without Debugging or CTRL + F5 then select your preferred device to test the app. You can modify the code and update the UI as per your choice.
Overall Implementation
main.dart
Dart
import 'package:flutter/material.dart';
import 'package:mapbox/map.dart';
void main() {
runApp(const MyApp());
}
class MyApp extends StatelessWidget {
const MyApp({super.key});
@override
Widget build(BuildContext context) {
return const MaterialApp(
title: "Maps",
debugShowCheckedModeBanner: false,
home: MapScreen(),
);
}
}
|
map.dart
Dart
import 'package:flutter/material.dart';
import 'package:flutter_map/flutter_map.dart';
import 'package:latlong2/latlong.dart';
class MapScreen extends StatefulWidget {
const MapScreen({super.key});
@override
State<MapScreen> createState() => _MapScreenState();
}
class _MapScreenState extends State<MapScreen> {
final MapController controller = MapController();
LatLng latLng = const LatLng(48.8584, 2.2945);
@override
Widget build(BuildContext context) {
return FlutterMap(
mapController: controller,
options: MapOptions(
initialCenter: latLng,
initialZoom: 18,
),
children: [
TileLayer(
urlTemplate: "your-mapbox-map-template-url"
),
MarkerLayer(
markers: [
Marker(
point: latLng,
width: 60,
height: 60,
alignment: Alignment.topCenter,
child: Icon(
Icons.location_pin,
color: Colors.red.shade700,
size: 60,
),
),
],
),
],
);
}
}
|
Output:
Frequently Asked Questions (FAQs)
Q1: How do I create a new Flutter project in Visual Studio Code?
You can create a new Flutter project in VS Code by using the Flutter CLI, and in the article, you can find step-by-step instructions for setting up a new project.
Q2: Where can I obtain the Map Style for my Flutter app, and how do I customize it?
You can create and customize your Map Style on the Mapbox website.
Q3: How do I add location markers to the map in my Flutter app?
You can add location markers using the “Marker” widget, which takes a location (latlng) and a child widget.
Q4: Can I customize the map’s initial location, and how do I do it?
Yes, you can customize the initial location by specifying the latitude and longitude coordinates in your code.
Q5: What is the free tier of Mapbox?
Currently, Mapbox provides 50,000 map loads per month and other free usages of their navigation API.
Share your thoughts in the comments
Please Login to comment...