Let’s explore a new way to create APIs using FastAPI. It’s fast, easy, and powerful. In this article, we’ll also see how to use MongoDB to do things like adding, reading, updating, and deleting data in our API.
MongoDB with FastAPI
After creating an API, the next step is to have a database that can store the data received through the API, enabling CRUD (Create, Read, Update, Delete) operations. In this article, we will explore MongoDB, a widely-used NoSQL (non-relational) database management system. MongoDB stores data in a flexible, JSON-like format known as BSON (Binary JSON), making it suitable for both structured and semi-structured data.
Setting up the Project
Now, let’s explore a basic example where our primary objective is to perform crud operation in employee details through API endpoints and verify if they are successfully registered in the MongoDB database. MongoDB can be configured either on a local environment (Windows | MacOS) or through the MongoDB Atlas web version. In this article, we will demonstrate the setup with a local MongoDB installation, but the process remains the same for MongoDB Atlas, with the only difference being the connection string.
Spinning up MongoDB in MacOS
- Running MongoDB as a Mac OS service
- Running MongoDB manually as a background process.
In this example we would be running the MongoDB as a background process. To run MongoDB the following command can be used
mongod --config /usr/local/etc/mongod.conf --fork
For MacOS silicon processor use the command
mongod --config /opt/homebrew/etc/mongod.conf --fork
Output
-(1).png)
For WindowsOS use the command
mongod.exe --config "C:\path\to\your\mongod.conf"
The output of the following command would be like in windows
about to fork child process, waiting until server is ready for connections.
forked process: 1531
child process started successfully, parent exiting
Setup DB and create user
To begin with the furthur steps we need to connect mongosh with the running instance by the command.
mongosh
Output:
-(1).png)
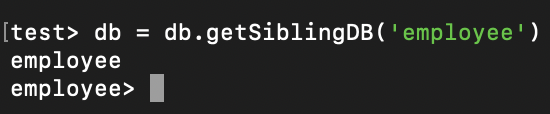
First switch to the database that is to be created by the following command. In the following example we will be using the employee database.
db = db.getSiblingDB('employee')
Output:
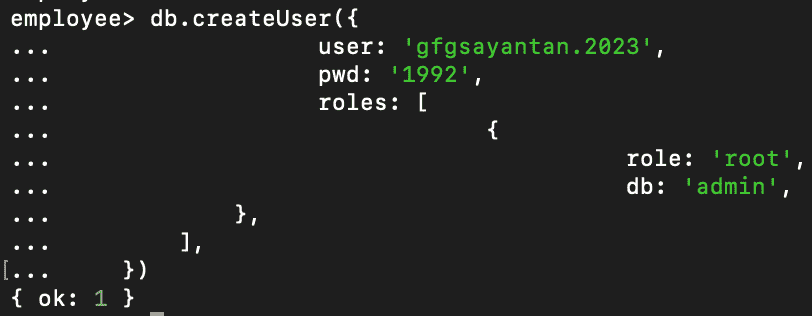
After creating the database we need to create the user by the following command
db.createUser({
                  user: 'gfgsayantan.2023',
                  pwd: '1992',
                  roles: [
                              {
                                        role: 'root',
                                        db: 'admin',
            },
        ],
    })
Output:
After creating the user we can verify if the user creation is successful by following command
db.getUsers()
The output should be
{
  users: [
    {
      _id: 'employee.sayantanbose',
      userId: new UUID("0e0e36aa-0212-4cec-8ebb-6d1d18c10964"),
      user: 'sayantanbose',
      db: 'employee',
      roles: [ { role: 'root', db: 'admin' } ],
      mechanisms: [ 'SCRAM-SHA-1', 'SCRAM-SHA-256' ]
    }
  ],
  ok: 1
}
Output:
.png)
And with this our MongoDB connection is successful.
Connecting MongoDb with Fast API
Creating directory and installing dependencies.
mkdir fastAPI
cd fastAPI
python -m venv fastAPI
source fastAPI/bin/activate
#Install the dependencies
pip install fastapi uvicorn pydantic pymongo
#To start the server
python3 main.py
Output:
-(1)-(1).png)
In the provided code, we create a directory and set up a virtual environment. Establishing a virtual environment is considered a best practice, as it ensures that dependencies are isolated to that specific environment rather than being installed globally. Once the virtual environment is activated, we proceed with the installation of necessary packages using pip.
Creating MangoDB Connection
Here we are creating the MongoDB connection string to connect with the running instance of MongoDB.
Python3
from pymongo import MongoClient
MONGO_USERNAME = "sayantanbose"
MONGO_PASSWORD = "1992"
MONGO_HOST = "localhost"
MONGO_PORT = 27017
MONGO_DB = "employee"
client = MongoClient(
f"mongodb://{MONGO_USERNAME}:{MONGO_PASSWORD}@{MONGO_HOST}:
{MONGO_PORT}/{MONGO_DB}")
db = client[MONGO_DB]
|
In the provided code, we define the data schema that will be stored in the database. This can be regarded as the specific data structure that will encompass the details of employees.
Python3
from pydantic import BaseModel
class Employee(BaseModel):
first_name: str
last_name: str
email: str
phone_number: str
salary: float
|
CRUD App with FastAPI and MongoDB
Create Employee: In the create_employee function, we are accepting an employee object of type Employee that we have defined in our schema. As it is a post request we will receive a body where the information of the employee object will be stored. As email is a unique field we first check if the employee with that email exists then we throw a 404 status code else we register the employee to our database.
Get All Employee: In the get_all_employees function we get all the employees in our MongoDB.
Get Particular Employee: In the get_employee_by_email function, we receive the email from the URL param. After verifying if the email exists in our database we return the employee details.
Update Particular Employee: In the update_employee_by_email function, we are receiving a body with updated details. We first check if an employee with the email exists then we check if the email is the same as with the updated details as the email is unique and cannot be changed. After verifying we just update the details of the employee to our database.
Delete Particular Employee: In the delete_employee_by_email we are receiving an email for the URL param. So we are verifying whether employees with such emails exist or not. If exist then the details of the employee are deleted from the database.
Python3
from fastapi import HTTPException
from fastapi import APIRouter, HTTPException
from MongoDB.mongo_connection import db
from models.model import Employee
router = APIRouter()
@router.post("/create_employee/")
async def create_item(employee: Employee):
existing_employee = db.items.find_one({"email": employee.email})
if existing_employee:
raise HTTPException(
status_code=404, detail="Email Address already exists")
result = db.items.insert_one(employee.dict())
inserted_employee = db.items.find_one({"email": employee.email})
print(inserted_employee)
inserted_email = str(inserted_employee['email'])
return {"message":
f"Employee with email {inserted_email} has been created."}
@router.get("/get_all_employees/")
async def get_all_employees():
employees = list(db.items.find({}))
if not employees:
return []
for employee in employees:
employee["_id"] = str(employee["_id"])
return employees
@router.get("/get_employee_by_email/")
async def get_employee_by_email(email: str):
employee = db.items.find_one({"email": email})
if not employee:
raise HTTPException(status_code=404, detail="Employee not found")
employee["_id"] = str(employee["_id"])
return employee
@router.put("/update_employee_by_email/")
async def update_employee_by_email(email: str,
updated_employee: Employee):
existing_employee = db.items.find_one({"email": email})
if not existing_employee:
raise HTTPException(
status_code=404, detail="Employee not found")
if updated_employee.email != email:
raise HTTPException(
status_code=400, detail="Email cannot be changed")
existing_employee_id = existing_employee.get('_id')
if existing_employee_id:
existing_employee_id = str(existing_employee_id)
updated_employee_dict = updated_employee.dict()
updated_employee_dict.pop('_id', None)
db.items.update_one(
{"email": email},
{"$set": updated_employee_dict}
)
updated_employee_doc = db.items.find_one({"email": email})
updated_employee_doc.pop('_id', None)
print(updated_employee_doc)
return {"message": f"Employee with email {email} has been updated.",
"updated_employee": updated_employee_doc}
@router.delete("/delete_employee_by_email/")
async def delete_employee_by_email(email: str):
existing_employee = db.items.find_one({"email": email})
if not existing_employee:
raise HTTPException(
status_code=404, detail="Employee not found")
db.items.delete_one({"email": email})
return {"message": f"Employee with email {email} has been deleted."}
|
Testing the API
Create Employee
To test the API, create a POST request to the ‘/create_employee/’ endpoint using Postman. We should receive a 200 status code along with the configured success message. The body of the Post request would be
{
    "first_name": "Sayantan",
    "last_name": "Bose",
    "email": "sayantan.bose.2023@gfg.com",
    "phone_number": "6291753297",
    "salary": 800000.00
}
And the returned response should be
{
    "message": "Employee with email sayantan.bose.2023@gfg.com has been created."
}
Get All Employees
To get the list of all employees we need to make a get request in the endpoint ‘/get_all_employees/’. We should receive a 200 status code along with all the employees that are registered in the DB
The returned response should be of structure
[
    {
        "_id": "650d4a6c3b3363329b11c8db",
        "first_name": "Sayantan",
        "last_name": "Bose",
        "email": "sayantan.bose@gfg.com",
        "phone_number": "6291753266",
        "salary": 890007.0
    },
    {
        "_id": "6511a418af34cce93c95ce6c",
        "first_name": "Sayantan",
        "last_name": "Bose",
        "email": "sayantan.bose.2023@gfg.com",
        "phone_number": "6291753297",
        "salary": 800000.0
    }
]
Get Particular Employee
To get a particular employee we need to pass a param to the url and make a get request to the endpoint ‘/get_employee_by_email/’ so that the information of the particular employee is returned as a response. To perform our testing we can use the following url and the email id is considered a unique attribute in our example.
http://localhost:8000/get_employee_by_email/?email=sayantan.bose.2023@gfg.com
And the response returned is
{
    "_id": "6511a418af34cce93c95ce6c",
    "first_name": "Sayantan",
    "last_name": "Bose",
    "email": "sayantan.bose.2023@gfg.com",
    "phone_number": "6291753297",
    "salary": 800000.0
}
Update Particular Employee in flast api using Mongodb
To update a particular employee we need to pass a param to the url so that the information of the particular employee is retrieved and updated with the updated information passed as a body of the post request made in the enpoint ‘/update_employee_by_email/’. To perform our testing we can use the following url and the email id is considered a unique attribute in our example.
http://localhost:8000/update_employee_by_email/?email=sayantan.bose@gfg.com
And the body should be passed with the updated information. In the example we are updating the “salary” and “phone_number” attribute.
{
    "first_name": "Sayantan",
    "last_name": "Bose",
    "email": "sayantan.bose.2023@gfg.com",
    "phone_number": "6291753266",
    "salary": 850000.00
}
And the response returned is
 {
    "message": "Employee with email sayantan.bose.2023@gfg.com has been updated.",
    "updated_employee": {
        "first_name": "Sayantan",
        "last_name": "Bose",
        "email": "sayantan.bose.2023@gfg.com",
        "phone_number": "6291753266",
        "salary": 850000.0
    }
}
Delete Particular Employee
To delete a particular employee we need to pass a param to the url and make a delete request to the endpoint ‘/delete_employee_by_email/’ so that the information of the particular employee is deleted from the database. To perform our testing we can use the following url and the email id is considered a unique attribute in our example.
http://localhost:8000/delete_employee_by_email/?email=sayantan.bose.2023@gfg.com
And the response returned is
{
    "message": "Employee with email sayantan.bose.2023@gfg.com has been deleted."
}
So we have tested all our CRUD endpoints and all the enpoints are working correctly. This ensures that our code implementation is correct. The entire code can be found in the Github Repository.
Here is a small video demostration of the above example and setting up the DB connection.
In conclusion, we have successfully demonstrated how to set up a FastAPI application to perform CRUD operation, interact with a MongoDB database, and store data. MongoDB’s automatic generation of unique IDs for each request ensures data integrity and easy retrieval.
Share your thoughts in the comments
Please Login to comment...