Environment Setup in GraphQL
Last Updated :
05 Mar, 2024
GraphQL is an open-source data query language for APIs and It is a server–side runtime for executing the query. The server’s GraphQL runtime takes care of executing the query and ensuring that the right data is fetched and sent back.
Before getting started with the GraphQL development journey it is important to set up your environment properly. This article will guide you through the essential steps to create an environment for GraphQL development.
How to Setup an Express Server?
Setting up an Express server is a fundamental step in building web applications with Node.js. Express is a flexible and minimalistic web application framework that provides a robust set of features for web and mobile applications.
Follow this to create an Express server before proceeding -> https://www.geeksforgeeks.org/steps-to-create-an-express-js-application/
Example of a basic Express App
Javascript
import express from "express";
const app = express();
const PORT = process.env.PORT || 8000;
app.get("/", (req, res) => {
res.json({ message: "server is up and running" });
});
app.listen(PORT, () => console.log("server is started"));
|
Setting up the GraphQL
Step 1: Install the following package to use graphQL in the express project. Run the following command in the terminal.
npm install @apollo/server
npm install graphql
Step 2: Import these libraries into your express application.
import { ApolloServer } from '@apollo/server';
import { expressMiddleware } from '@apollo/server/express4';
Example:
Javascript
import express from "express";
import { ApolloServer } from "@apollo/server";
import { expressMiddleware } from "@apollo/server/express4";
const app = express();
const PORT = process.env.PORT || 8000;
app.get("/", (req, res) => {
res.json({ message: "server is up and running" });
});
app.listen(PORT, () => console.log("server is started"));
|
Step 3: Create a graphQL sever and define the Schema. Add the following code in the express application.
Syntax
const yourServerName = new ApolloServer({
  typeDefs: "",
  resolvers: {},
});
Example
Javascript
import express from "express";
import { ApolloServer } from "@apollo/server";
import { expressMiddleware } from "@apollo/server/express4";
const app = express();
const PORT = process.env.PORT || 8000;
const gqlServer = new ApolloServer({
typeDefs: `
type Query{
hello: String
}`,
resolvers: {
Query: {
hello: () => `hi this is a graphQL Server`,
},
},
});
app.get("/", (req, res) => {
res.json({ message: "server is up and running" });
});
app.listen(PORT, () => console.log("server is started"));
|
The schema is defined in the typeDefs property using GraphQL’s schema definition language .
A resolver for the “hello” query is provided in the resolvers property.
Step 4: Start the graphQL server. To do that wrap the whole code inside a async function.
await yourServerName.start();
Javascript
import express from "express";
import { ApolloServer } from "@apollo/server";
import { expressMiddleware } from "@apollo/server/express4";
async function init() {
const app = express();
const PORT = process.env.PORT || 8000;
const gqlServer = new ApolloServer({
typeDefs: `
type Query{
hello: String
}`,
resolvers: {
Query: {
hello: () => `hi this is a graphQL Server`,
},
},
});
await gqlServer.start();
app.get("/", (req, res) => {
res.json({ message: "server is up and running" });
});
app.listen(PORT, () => console.log("server is started"));
}
init();
|
Step 5: Expose the graphQL server at a endpoint. By exposing the endpoint you can access the GraphQL Playground.
app.use("/yourEndpointName", expressMiddleware(yourServerName));
Javascript
import express from "express";
import { ApolloServer } from "@apollo/server";
import { expressMiddleware } from "@apollo/server/express4";
async function init() {
const app = express();
app.use(express.json());
const PORT = process.env.PORT || 8000;
const gqlServer = new ApolloServer({
typeDefs: `
type Query{
hello: String
}`,
resolvers: {
Query: {
hello: () => `hi this is a graphQL Server`,
},
},
});
await gqlServer.start();
app.get("/", (req, res) => {
res.json({ message: "server is up and running" });
});
app.use("/graphql", expressMiddleware(gqlServer));
app.listen(PORT, () => console.log("server is started"));
}
init();
|
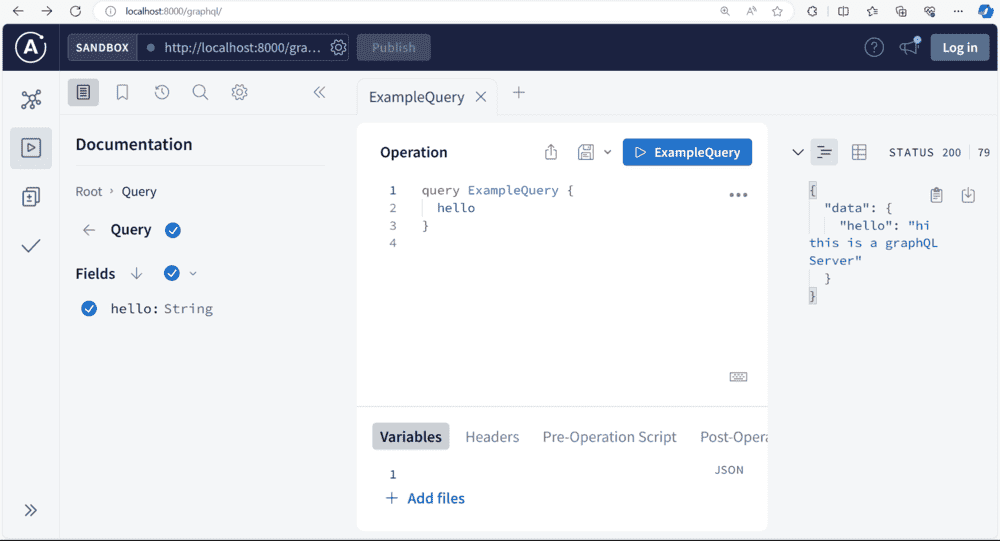
Step 6: Start the express server and hit the endpoint to which our graphQL server is exposed to.
Example:
http://localhost:8000/graphql/
Dependencies
"dependencies": {
    "@apollo/server": "^4.10.0",
    "express": "^4.18.2",
    "graphql": "^16.8.1"
  },
Project Structure
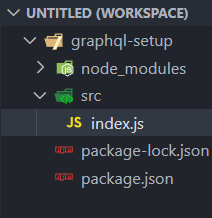
Project Structure
Output:
Accessing http://localhost:8000/ will respond with.
{
"message": "server is up and running"
}.
Accessing http://localhost:8000/graphql allows sending GraphQL queries.
Example: Project Structure:
Conclusion
Setting up the environment for GraphQL development is the first step towards building scalable and efficient APIs. By following these steps you will create a robust foundation for developing and maintaining GraphQL based applications. This basic setup allows you to run your server and interact with the GraphQL Playground and help you progress in it.
Share your thoughts in the comments
Please Login to comment...