EasyUI jQuery textbox Widget
Last Updated :
18 Apr, 2022
EasyUI is an HTML5 framework for using user interface components based on jQuery, React, Angular, and Vue technologies. It helps in building features for interactive web and mobile applications saving a lot of time for developers.
In this article, we will learn how to design a textbox using jQuery EasyUI. The textbox is used to input text in a form.
Downloads for EasyUI for jQuery:
https://www.jeasyui.com/download/index.php
Syntax:
<input class="easyui-textbox">
Properties:
- width: The width of the component.
- height: The height of the component.
- cls: Add a CSS class to the textbox.
- prompt: The prompt message to be displayed in the input box.
- value: The default value.
- type: The textbox type.
- label: The label selector bound to the textbox.
- labelWidth: The label width.
- labelPosition: The label position.
- labelAlign: The label alignment.
- multiline: It defines a multiline textbox.
- editable: It defines if the user can type text directly into the field.
- disabled: It defines if the field needs to be disabled.
- readonly: It defines if the component is read-only.
- icons: The icons attached to the textbox.
- iconCls: The background icon displayed on the textbox.
- iconAlign: It defines the position of the icons.
- iconWidth: The icon width.
- buttonText: The displaying text of the button that is attached to the textbox.
- buttonIcon: The displaying icon of the button that is attached to the textbox.
- buttonAlign: Position of the button.
Events:
- onChange: This event fires when the field value is changed.
- onResize: This event fires when the textbox is resized.
- onClickButton: This event fires when the user clicks the button.
- onClickIcon: This event fires when the user clicks on an icon.
Methods:
- options: Return the options object.
- textbox: Return the textbox object.
- button: Return the button object.
- destroy: Destroy the textbox component.
- resize: Resize the component width.
- disable: Disable the component.
- enable: Enable the component.
- readonly: Enable/Disable read only mode.
- clear: Clear the component value.
- reset: Reset the component value.
- initValue: Initialize the component value.
- setText: Set the displaying text value.
- getText: Get the displaying text value.
- setValue: Set the component value.
- getValue: Get the component value.
- getIcon: Get specified icon object.
Approach:
- First, add jQuery Easy UI scripts needed for your project.
<script type=”text/javascript” src=”jquery.min.js”></script>
<!–jQuery libraries of EasyUI –>
<script type=”text/javascript” src=”jquery.easyui.min.js”> </script>
<!–jQuery library of EasyUI Mobile –>
<script type=”text/javascript” src=”jquery.easyui.mobile.js”> </script>
Example:
HTML
<!doctype html>
<html>
<head>
<meta charset="UTF-8">
<meta name="viewport" content="initial-scale=1.0,
maximum-scale=1.0, user-scalable=no">
<link rel="stylesheet" type="text/css"
href="themes/metro/easyui.css">
<link rel="stylesheet" type="text/css"
href="themes/mobile.css">
<link rel="stylesheet" type="text/css"
href="themes/icon.css">
<script type="text/javascript" src="jquery.min.js">
</script>
<script type="text/javascript"
src="jquery.easyui.min.js">
</script>
<script type="text/javascript"
src="jquery.easyui.mobile.js">
</script>
<script type="text/javascript">
$(document).ready(function (){
$('#gfg').textbox({
buttonText:'Search'
});
});
</script>
</head>
<body>
<h1>GeeksforGeeks</h1>
<h3>EasyUI jQuery textbox widget</h3>
Enter name : <input id="gfg" class="easyui-textbox">
</body>
</html>
|
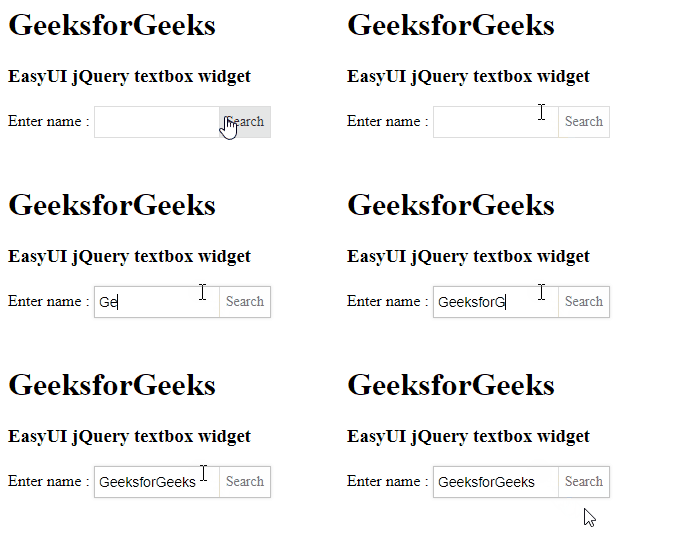
Output:

Reference: http://www.jeasyui.com/documentation/
Share your thoughts in the comments
Please Login to comment...