Create or Manage Heroku_postgres Database Instance
Last Updated :
08 Jun, 2023
Heroku is a Platform-as-a-Service (PaaS) provider in the cloud that enables programmers to create, operate, and manage apps. In order to make it simpler for developers to deploy and manage their applications, Heroku offers a number of services and add-ons. Heroku Postgres, a managed SQL database service, is one example of such a service. We’ll discover how to set up and maintain a Heroku Postgres database instance in this tutorial.
Key Terminologies:
- Heroku: A Platform-as-a-Service (PaaS) provider in the cloud that enables programmers to create, operate, and manage apps.
- Heroku Postgres: An SQL database management solution offered by Heroku is called Postgres.
- SQL: Relational database management is done using a programming language called Structured Query Language.
- Database instance: A server-based instance of a database service that gives users access to a certain database.
You can use the Heroku CLI or the Heroku Dashboard web interface to set up or administer a Heroku Postgres database instance. Here’s how to accomplish it using both approaches:
Using the Heroku CLI:
Step 1: Install the Heroku CLI
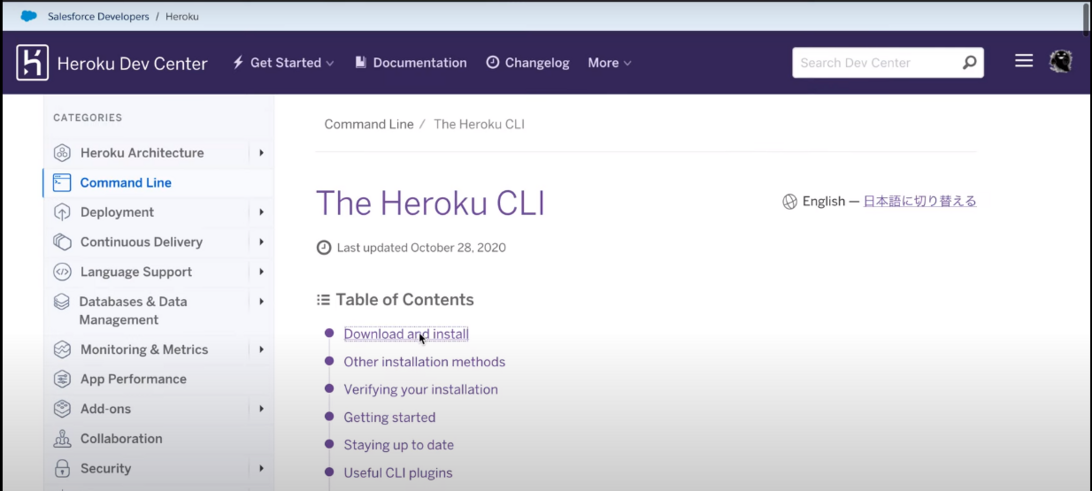
Heroku cli
brew tap heroku/brew && brew install heroku
Step 2: Log in to your Heroku account.
Open a terminal window and enter the following command to access your Heroku account after installing the Heroku CLI:
heroku login
By doing so, a web page will open for you to input your Heroku login information. You should see a message confirming your login once you have entered your credentials.
Step 3: Create a new Heroku app.
We can now create a new Heroku app after installing and configuring the Heroku CLI. To build a new app, execute the command below:
heroku create
Substitute the name of your new app for “app-name”. This will produce a fresh Heroku app and make it the terminal session’s active working directory.
Step 4: Provision a new Heroku Postgres database
Now that the app has been developed, we can set up a fresh Heroku Postgres database instance. To create a new Heroku Postgres database instance, execute the command below:
heroku addons:create heroku-postgresql
By doing this, a fresh Heroku Postgres database instance will be created and added as an add-on to your Heroku app.
Step 5: Connect to the Heroku Postgres database instance.
You can establish a connection to the database instance using the Heroku CLI after it has been provisioned. To view the URL for your Heroku Postgres database instance, issue the following command:
heroku pg:info
The URL for your Heroku Postgres database instance will be displayed. When using a database client like pgAdmin or psql to connect to your database instance, copy this URL.
Step 6: Manage the Heroku Postgres database instance
You may now administer the Heroku Postgres database instance via the Heroku CLI or a variety of other tools and methods once it has been deployed and linked. To connect to your database instance and launch a psql session, for instance, use the command line:
heroku pg:psql
By doing this, you can connect to your database instance and start a psql session. You can create and maintain tables in your database from here using SQL commands.
Using the Heroku Dashboard:
Steps to create and manage a Heroku Postgres database instance:
Step 1: Create a Heroku account
We must first register a Heroku account in order to create a Postgres database instance on Heroku. Create a free account on the Heroku website.

create account.
Step 2: Create a new Heroku app.
You can create a new app by logging into the Heroku dashboard after creating an account and selecting the “New” option.
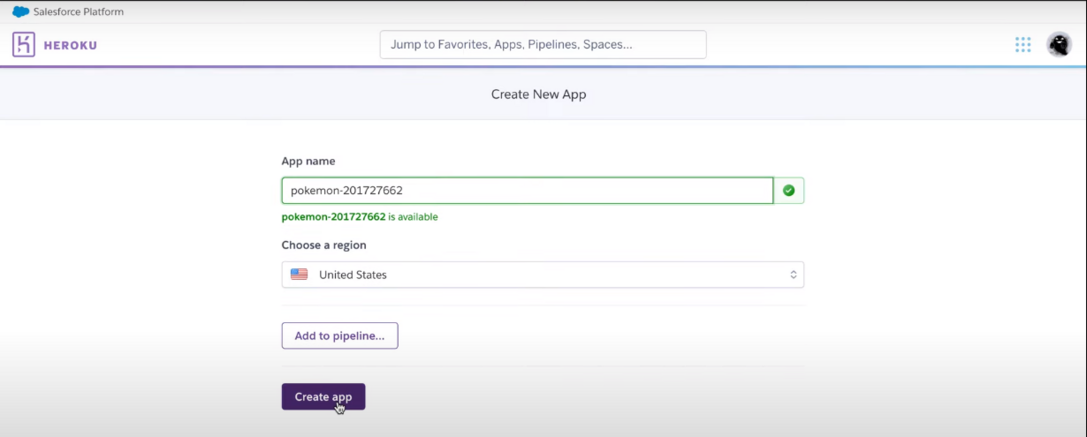
create app.
Choose the location where you want your app to run after giving it a name.
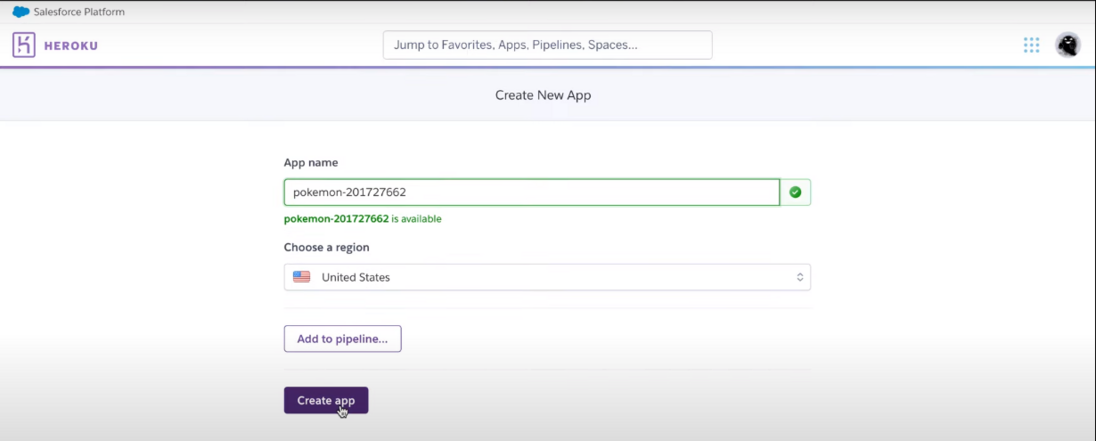
chose the location
Step 3: Provision of a new Heroku Postgres database
You can now provision a new Heroku Postgres database instance after creating the app. Search for “Heroku Postgres” under the “Add-ons” heading in the “Resources” tab of the Heroku dashboard.
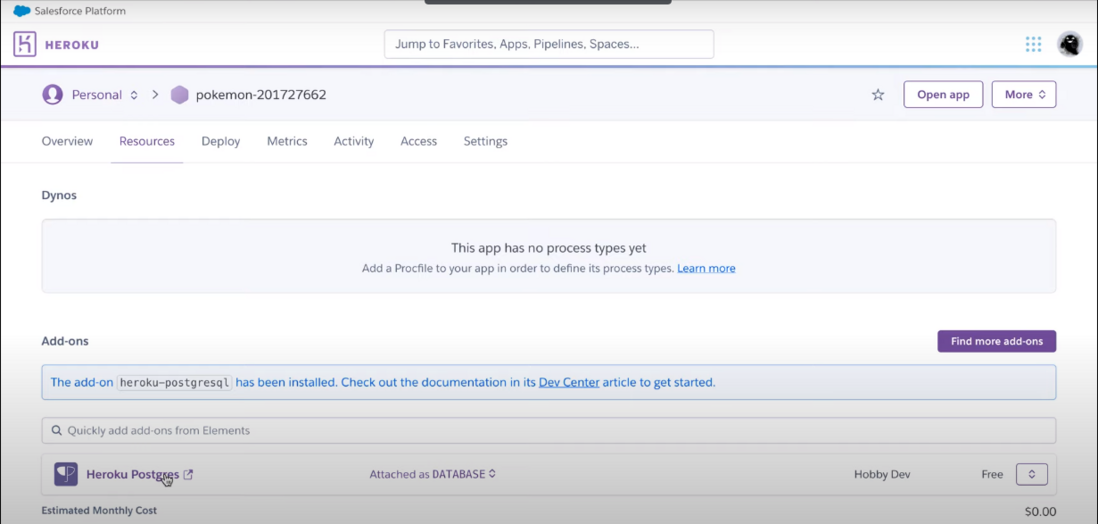
Heroku Postgres
Choose the “Heroku Postgres” add-on and the optimal plan for your requirements. To provision a new Heroku Postgres database instance, click the “Provision” button.
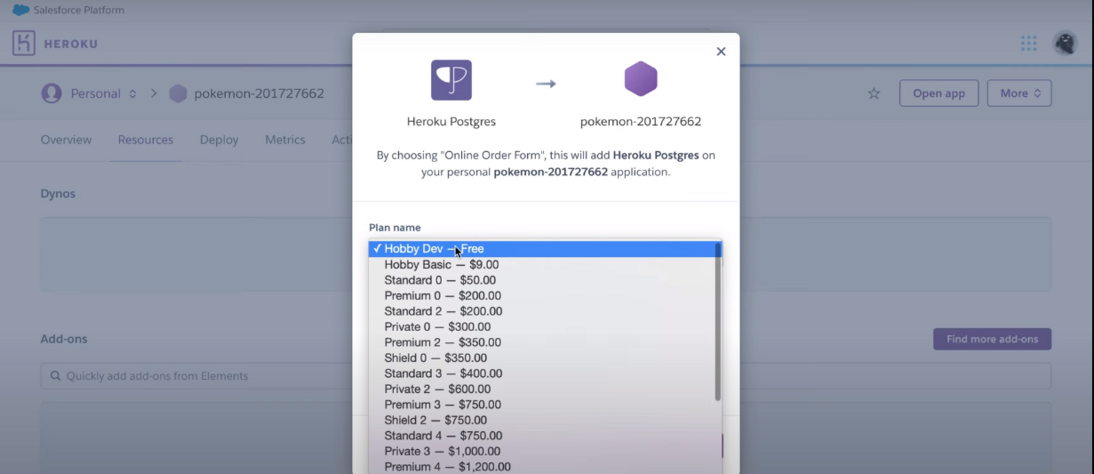
Heroku add-ons
Step 4:Connect to the Heroku Postgres database instance
You can connect to the database instance once it has been provisioned by using a database client like pgAdmin or psql. To achieve this, open your Heroku app’s “Settings” tab and select the “Reveal Config Vars” button.
settings
This will display your app’s configuration settings, including the Heroku Postgres database’s URL. To connect to your database instance, copy the URL and utilize it.
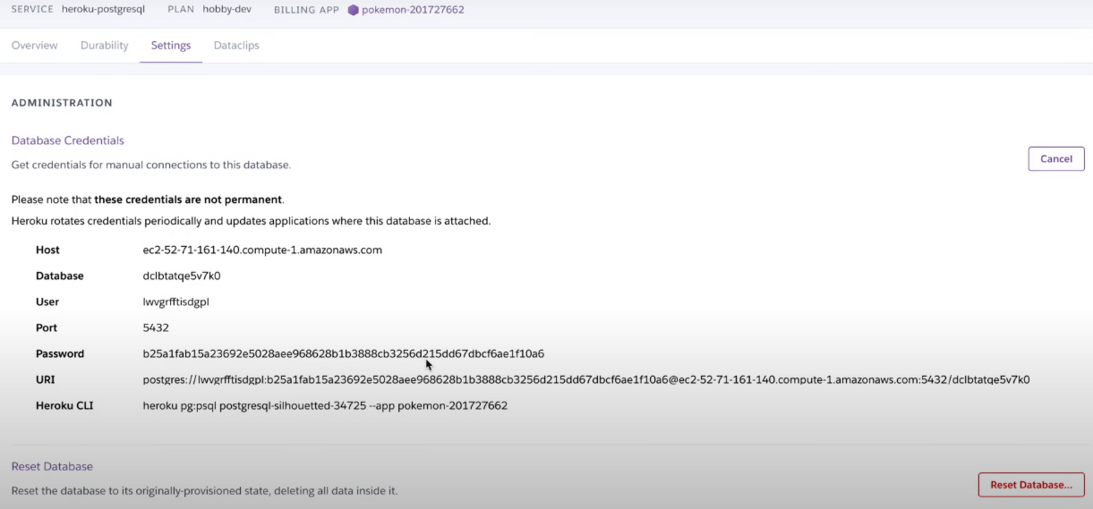
credentials
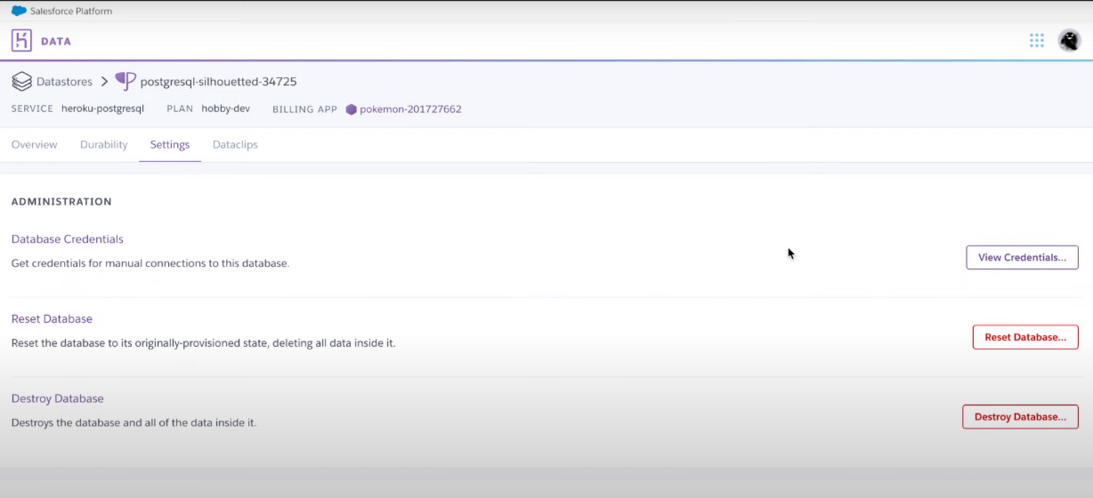
Step 5: Manage the Heroku Postgres database instance
You may now administer the Heroku Postgres database instance using a variety of tools and procedures after it has been deployed and linked.
Administrative
For instance, you can create and maintain tables in your database using SQL commands, or you can browse and edit the data in your database using a program like pgAdmin.
Share your thoughts in the comments
Please Login to comment...