Create a Restaurant Website Template using React-Native
Last Updated :
25 Dec, 2023
The restaurant template app helps customers to explore, choose, and order their preferred dishes from restaurants. In this article, we will create a Tour and Travels website template using React Native.
Preview of final output: Let us have a look at how the final output will look like.
-300.png)
Preview of the App
Prerequisite:
Approach to create Restaurant Website Template:
- The Restaurant website template app is a simple application that helps customers to explore, choose, and order their preferred dishes from restaurants.
- In this app, we created a beautiful home page with attractive user interface.
- We created a folder named ‘screens’ for the app to write code in separate components. In the Screens folder, we wrote separate code for the home screen and menu screen so that students can understand the code easily.
- we added a poster to the top of the app and also added a view menu option by which users can view the menu of the restaurant.
- we added a flatlist of dishes with images and prices by which user can order food according to their preference.
Steps to Create React Native Application:
Step 1: Create a react native application by using this command in the command prompt
React-native init RestaurantApp
Step: 2 We have to download some dependencies which requires for our app. We use navigation in our app to go for one screen to another screen. so, firstly we install the navigation dependencies.
npm install @react-navigation/native
npm install react-native-screens react-native-safe-area-context
npm install @react-navigation/native-stack
Step 3: We will use some Icons in our app . so, we will install dependency for icon
npm i react-native-vector-icons
Project Structure:
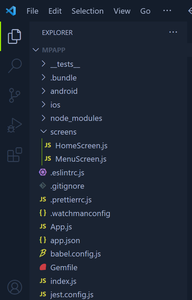
Structure of the app
The updated dependencies in package.json file will look like:
"dependencies": {
    "expo-constants": "~13.2.4",
    "@expo/vector-icons": "^13.0.0",
    "react-native-paper": "4.9.2",
    "react-native-screens": "~3.15.0",
    "@react-navigation/native": "*",
    "@react-navigation/native-stack": "*",
    "react-native-safe-area-context": "4.3.1"
}
Example: Write the below source code into the App.js file.
Javascript
import React from 'react';
import { NavigationContainer } from '@react-navigation/native';
import { createStackNavigator } from '@react-navigation/stack';
import HomeScreen from './screens/HomeScreen';
import MenuScreen from './screens/MenuScreen';
const Stack = createStackNavigator();
const App = () => {
return (
<NavigationContainer>
<Stack.Navigator initialRouteName="Home">
<Stack.Screen name="Home" component={HomeScreen} />
<Stack.Screen name="Menu" component={MenuScreen} />
</Stack.Navigator>
</NavigationContainer>
);
};
export default App;
|
Javascript
import React from 'react';
import { View, Text, ImageBackground,
TouchableOpacity, StyleSheet }
from 'react-native';
const HomeScreen = ({ navigation }) => {
const bannerImageUrl =
return (
<View style={styles.container}>
<ImageBackground
source={{ uri: bannerImageUrl }}
style={styles.banner}
resizeMode="cover"
>
</ImageBackground>
<View style={styles.bannerContent}>
<Text style={styles.bannerText}>Welcome to our</Text>
<Text style={styles.restaurantName}>Awesome Restaurant</Text>
</View>
<TouchableOpacity
style={styles.viewMenuButton}
onPress={() => navigation.navigate('Menu')}
>
<Text style={styles.buttonText}>View Menu</Text>
</TouchableOpacity>
</View>
);
};
const styles = StyleSheet.create({
container: {
flex: 1,
},
banner: {
width: '100%',
height: 200,
borderRadius: 20,
marginTop: 30,
},
bannerContent: {
backgroundColor: 'lightyellow',
padding: 20,
borderRadius: 8,
marginTop: 20,
},
bannerText: {
fontSize: 24,
color: 'black',
fontWeight: 'bold',
marginLeft: 70,
},
restaurantName: {
fontSize: 32,
color: 'black',
fontWeight: 'bold',
marginTop: 10,
marginLeft: 30,
},
viewMenuButton: {
backgroundColor: '#FF6347',
padding: 15,
borderRadius: 8,
marginBottom: 20,
marginLeft: 40,
marginRight: 40,
marginTop: 60,
},
buttonText: {
color: '#fff',
fontSize: 18,
fontWeight: 'bold',
textAlign: 'center',
},
});
export default HomeScreen;
|
Javascript
import React from 'react';
import { View, Text, FlatList, TouchableOpacity, Image, StyleSheet } from 'react-native';
const menuData = [
{
id: '1',
name: 'Classic Burger',
price: '$10',
},
{
id: '2',
name: 'Vegetarian Pizza',
price: '$12',
},
{
id: '3',
name: 'Spaghetti Bolognese',
price: '$15',
},
{
id: '4',
name: 'Chicken Caesar Salad',
price: '$12',
},
{
id: '5',
name: 'Sushi Platter',
price: '$18',
},
{
id: '6',
name: 'Chocolate Brownie Sundae',
price: '$8',
},
];
const MenuScreen = () => {
const renderItem = ({ item }) => (
<TouchableOpacity style={styles.menuItem}>
<Image source={{ uri: item.image }} style={styles.itemImage} />
<View style={styles.itemDetails}>
<Text style={styles.itemName}>{item.name}</Text>
<Text style={styles.itemPrice}>{item.price}</Text>
</View>
</TouchableOpacity>
);
return (
<View style={styles.container}>
<Text style={styles.menuTitle}>Our Menu</Text>
<FlatList
data={menuData}
keyExtractor={(item) => item.id}
numColumns={2}
renderItem={renderItem}
columnWrapperStyle={styles.columnWrapper}
/>
</View>
);
};
const styles = StyleSheet.create({
container: {
flex: 1,
padding: 16,
},
menuTitle: {
fontSize: 24,
fontWeight: 'bold',
marginBottom: 16,
color: '#333',
},
menuItem: {
flex: 1,
margin: 8,
backgroundColor: '#fff',
borderRadius: 8,
overflow: 'hidden',
},
itemImage: {
height: 150,
borderRadius: 8,
},
itemDetails: {
padding: 10,
},
itemName: {
fontSize: 16,
fontWeight: 'bold',
color: '#333',
},
itemPrice: {
fontSize: 14,
color: '#888',
},
columnWrapper: {
justifyContent: 'space-between',
},
});
export default MenuScreen;
|
Step to run the Project:
Step 1: Depending on your operating system, type the following command
React-native run-android
React-native run-ios
Output:
Output of the app
Share your thoughts in the comments
Please Login to comment...