React Native State
Last Updated :
08 Mar, 2022
In React Native, for data that is going to change, we have to use state. You can think of it as a variable. It allows us to store data and also change it when we want.
Whenever you define a state, you need to provide an initial value for it. After that, you can use setState function provided by React Native to change it whenever you want. Whenever setState is called and state changes, it will re-render the component in which it’s being used.
To use state, you need to import useState from “react”.
Syntax:
const [stateName,setStateName] = useState(<initial_value>);
Creating Application:
Step 1: Open your Terminal and run the below command. It will install Expo CLI globally in your system.
npm install -g expo-cli
Step 2: Now, create a new React Native Project by running the below command.
expo init "Your_Project_Name"
Step 3: You’ll be asked to choose a template. Select blank template.
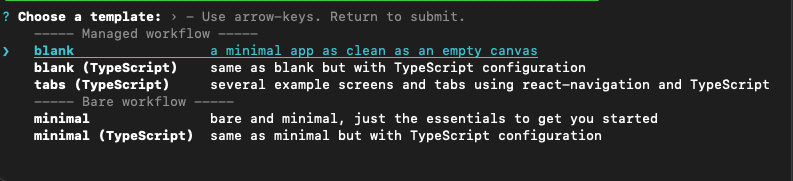
blank template
Step 4: Now go to the project folder and run below command to start the server.
cd "Your_Project_Name"
npm start
Project Structure: It will look like the following.
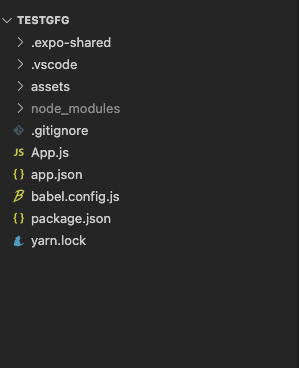
Project Structure
Example 1: Open App.js file and write the below code in that file.
App.js is the main file that renders first when you run your app. We will create a state called message. We will provide an empty string as the initial value for this state. There will be one TextInput which allows user to insert any text message. We will save this text string in message state using setMessage function. And when user hit the submit button on keyboard, an alert will show with the message.
Javascript
import { StyleSheet, SafeAreaView, Text, TextInput } from "react-native";
import { useState } from "react";
export default function App() {
const [message, setMessage] = useState("");
return (
<SafeAreaView style={styles.container}>
<TextInput
placeholder="Enter message here"
value={message}
onChangeText={(text) => setMessage(text)}
style={styles.input}
onSubmitEditing={() => alert(message)}
/>
</SafeAreaView>
);
}
const styles = StyleSheet.create({
container: {
flex: 1,
backgroundColor: "#fff",
alignItems: "center",
justifyContent: "center",
},
input: {
fontSize: 20,
color: "#228B22",
fontWeight: "bold"
},
});
|
Output:

Example 2: Open App.js file and write the below code in that file.
App.js is the main file that renders first when you run your app. In this example, we will create a state called number. We will provide 0 as the initial value for this state. There will be one Button. Whenever the user presses the button, we will increment the number state by 1 using setNumber. This number will be displayed in a Text component.
Every time when the user presses the button, the state will change and it re-renders the Text component.
Javascript
import { StyleSheet, SafeAreaView, Text, Button } from "react-native";
import { useState } from "react";
export default function App() {
const [number, setNumber] = useState(0);
return (
<SafeAreaView style={styles.container}>
<Text style={styles.number}>{number}</Text>
<Button
title="Change State"
onPress={() => {
setNumber(number + 1);
}}
/>
</SafeAreaView>
);
}
const styles = StyleSheet.create({
container: {
flex: 1,
backgroundColor: "#fff",
alignItems: "center",
justifyContent: "center",
},
number: {
fontSize: 20,
color: "#228B22",
fontWeight: "bold",
},
});
|
Output:

Reference: https://reactnative.dev/docs/state
Like Article
Suggest improvement
Share your thoughts in the comments
Please Login to comment...