Jenkins is a popular tool for Continuous Integration. Using Jenkins, we can externalize the build process for our code. It allows teams to collaborate more efficiently and deliver software in shorter cycles. In this article, we will learn how to build a react app in Jenkins.
Steps To Install Jenkins and Push The Code To GitHub
Copy the code using the following GitHub link.
https://github.com/StellarStrategist/jenkins-react.git
Step 1: Install NodeJS on your system
For the purpose of this tutorial, I have a NodeJS installed on my Windows machine.
- Install NodeJS on Windows
- Install NodeJS on Linux
- Install NodeJS on MacOS
- Install NodeJS on your system
Step 2: Generate a new react Project
Open a command line tool in your system and type the following command:
npx create-react-app my-app
This command will create a new react app in your present working directory by the name of ‘my-app’. Remember the location of your project and leave it as it is for now.
Step 3: Install Jenkins on your System
Next, please make sure you have Jenkins up and running on Linux. There are many ways to use Jenkins depending on your needs. For this tutorial, I have setup Jenkins using Docker image.
- Jenkins on Docker in AWS EC2 instance
- Jenkins on Debian Linux
If you use a windows machine, the best way to go through the tutorial is to simply install docker on your machine and pull the Jenkins image.
Now run the following command on your machine:
docker pull jenkins/jenkins:lts
This will automatically pull the LTS version of Jenkins on your machine. Now run the docker container by using the following command:
docker run -u 0 -d -p 8080:8080 -p 50000:50000 -p 3000:3000 -v /data/jenkins:/var/jenkins_home jenkins/jenkins:lts
This command will run your docker container and bind the port 3000 on your host machine to port 3000 on your docker container which will easily allow you view your react application.
To learn how to find the initial admin password, please refer the following image:

Copy the password as shown above and go to http://localhost:8080:
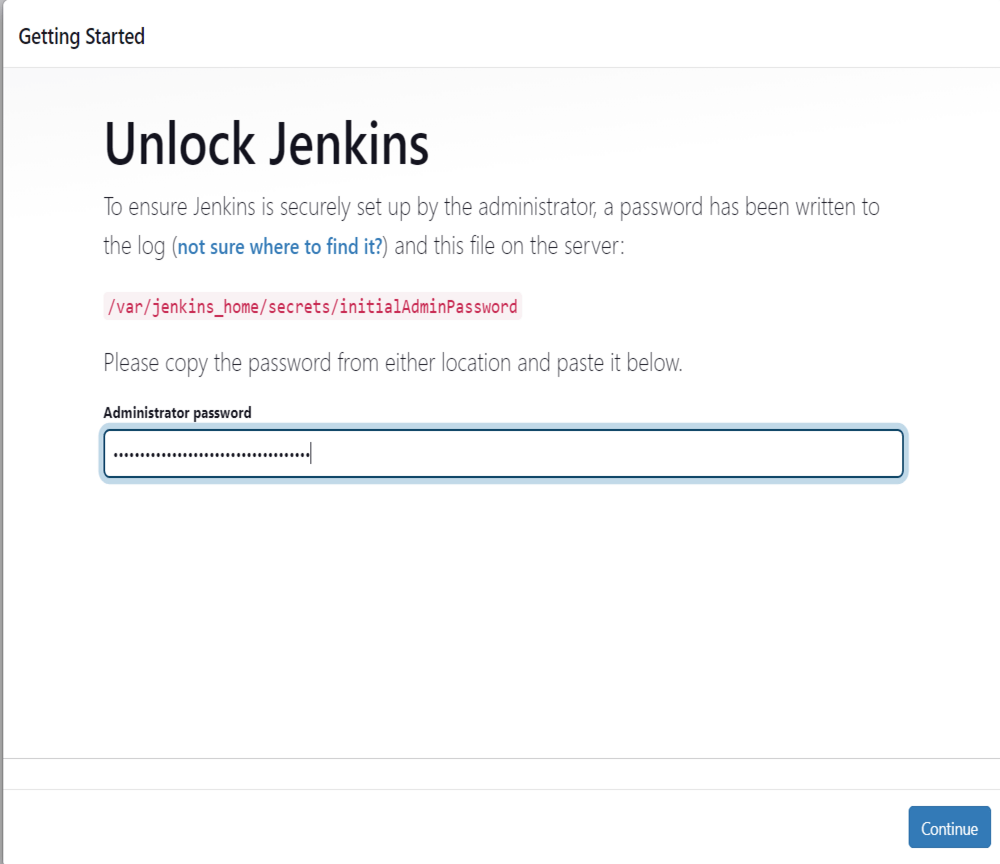
Paste the password you have copied and click on continue. After this, the steps of installation are exactly the same as in the articles linked above.
Step 4: Create the Jenkinsfile in your Project
Now open your project in your IDE. I have used VS Code in this tutorial. In this step we will create all the Jenkins related files for this tutorial.
Create a new folder called Jenkins in the home directory of your folder. Inside it, create another folder called scripts.
Create two text files inside it called deliver.sh and kill.sh.
deliver.sh
#!/usr/bin/env sh

npm run build

npm start &
sleep 1
echo $! > .pidfile

echo 'Now...'
echo 'Visit http://localhost:3000 to see your Node.js/React application in action.'
This is a bash script that we will run to build our project. Then, we run npm start and while the project starts we put the thread to sleep for a second. In that time, our project will be started on port 3000 when we run this script.
kill.sh
#!/usr/bin/env sh

kill $(cat .pidfile)
This bash script will stop the React development server by killing the script.
Save it and navigate to the root directory of your folder. Create one more text file inside it called Jenkinsfile and add the following content to it.
pipeline {
    agent any
    tools {nodejs "NODEJS"}
    stages {
        stage('Build') {
            steps {
                sh 'npm install'
            }
        }
        stage('Deliver') {
            steps {
                sh 'chmod -R +rwx ./jenkins/scripts/deliver.sh'
                sh 'chmod -R +rwx ./jenkins/scripts/kill.sh'
                sh './jenkins/scripts/deliver.sh'
                input message: 'Finished using the web site? (Click "Proceed" to continue)'
                sh './jenkins/scripts/kill.sh'
            }
        }
    }
}
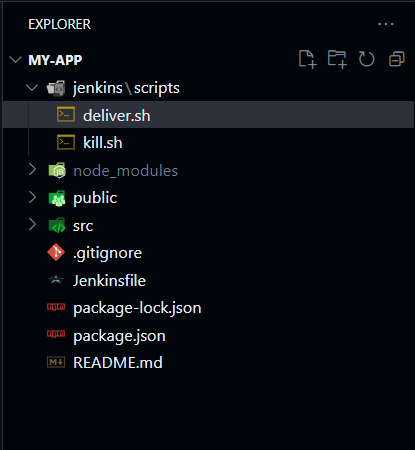
This is the script that Jenkins refers to when it interacts with your GitHub repository. The final directory structure should look as follows
Step 5: Install Git in your Linux Environment
Git is necessary for communication between GitHub and Jenkins. To install git in Ubuntu, run the following command in your terminal:
sudo apt install git-all
Step 6: Add your code to GitHub
The final pre-requisite step is to add your project with the Jenkinsfile and folder to a public GitHub repository. Simply add the folder in which you have created the react project to GitHub. Learn how to create git repository and set it up. Make sure that your repository is public.
Steps to Build React App in Jenkins
Step 1: Configure Jenkins Tools
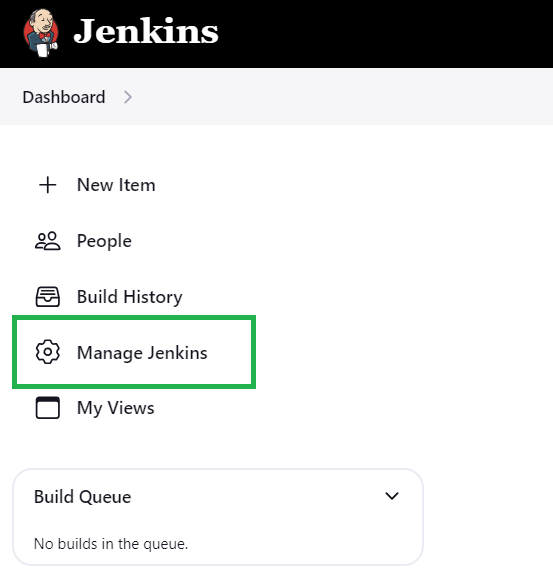
Go to your Jenkins dashboard and click on the Manage Jenkins Option:
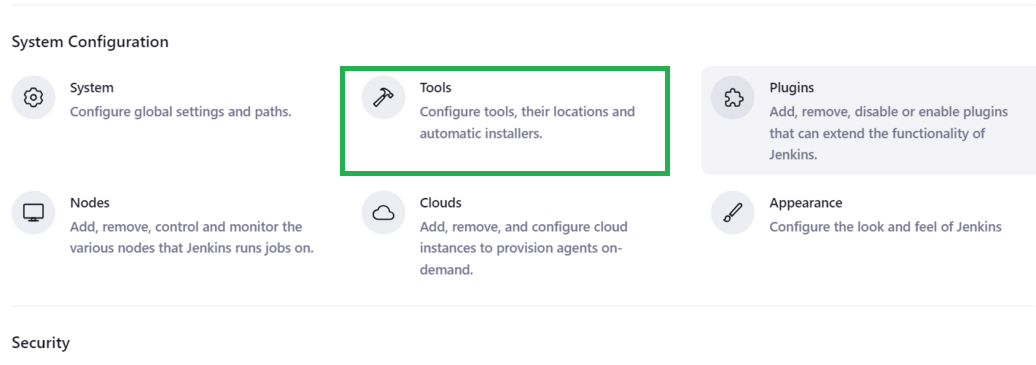
Next, click on Tools:
Scroll to the bottom of the tools page to the NodeJS section as follow and click on Add NodeJS option:
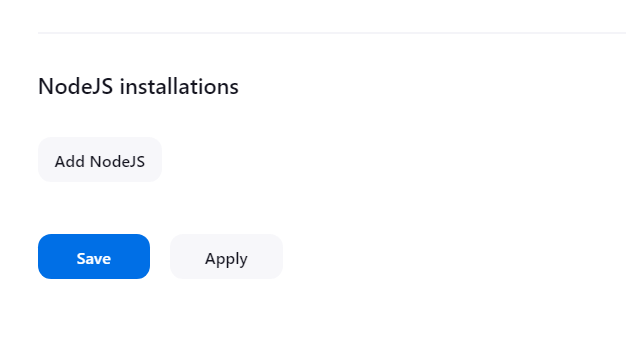
This will open a new form. Make sure your inputs match exactly as in the picture given below as the Name should be the same as in the Jenkinsfile.
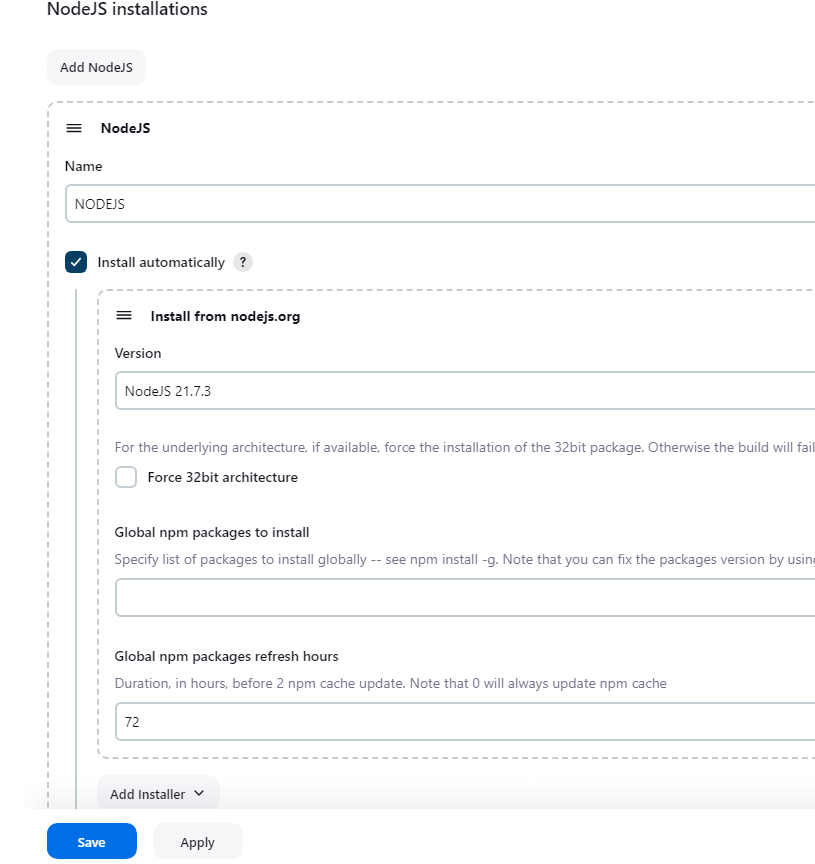
After this click on save and proceed back to the Manage Jenkins page.
Step 2: Install the NodeJS Plugins
On the Manage Jenkins Page, click on the option Plugins:

Now head to the available plugins options on the sidebar:
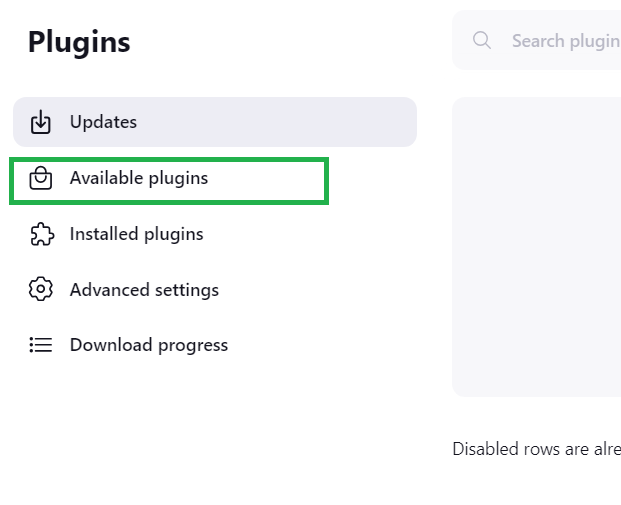
Type “NodeJS” in the search bar and click on install:
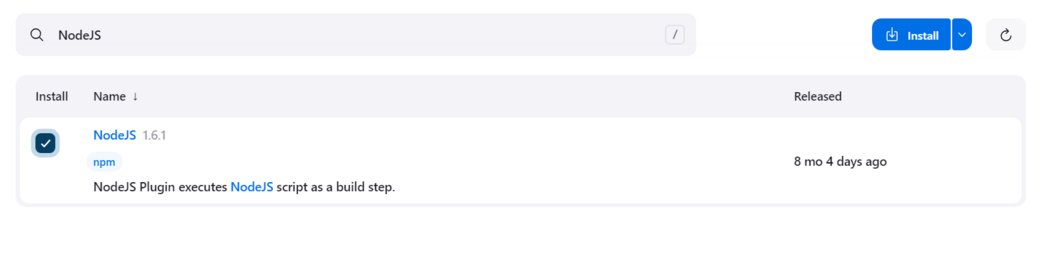
After the installation is complete, click on Go back to top page:
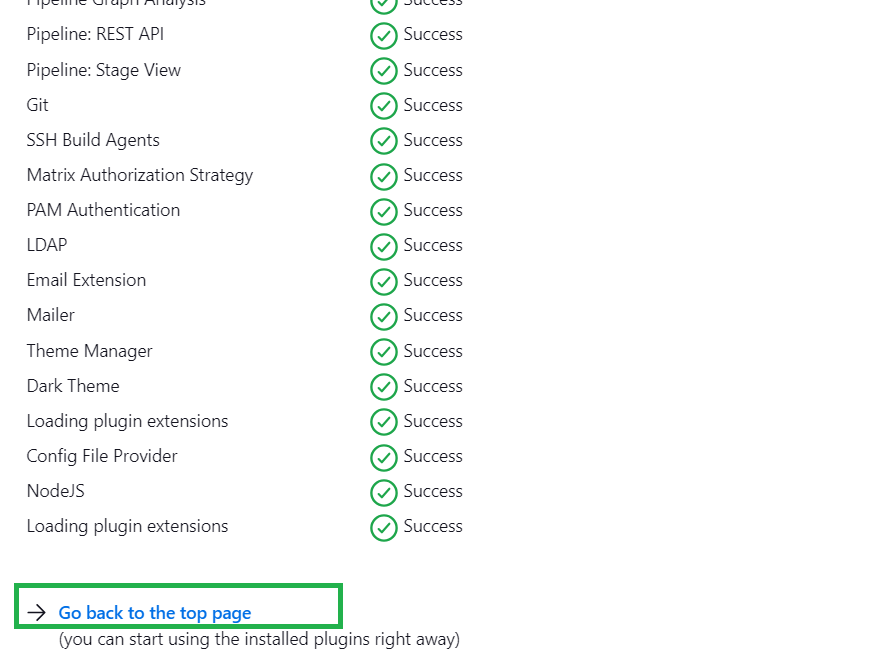
This will take you to your Jenkins Dashboard where we will create our react job.
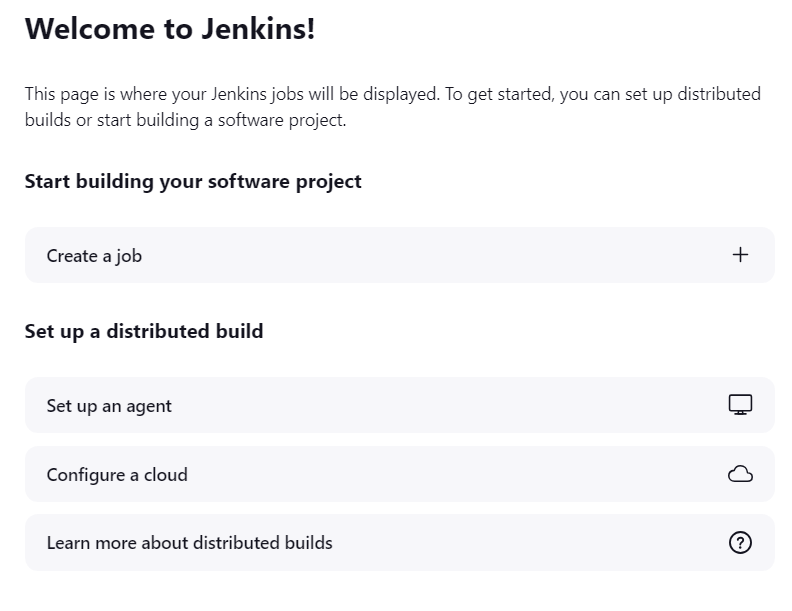
Step 3: Create your First Job
On the Jenkins Dashboard, click on the create Job option:
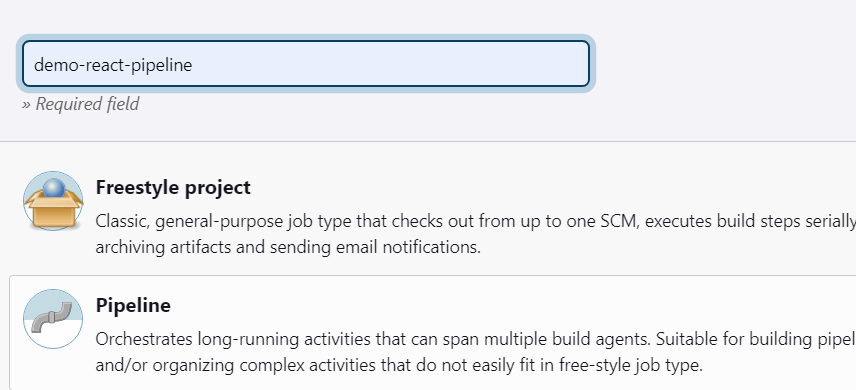
Next, enter a name for your project and select ‘Pipeline’ and click on OK:
Step 4: Configure your Job
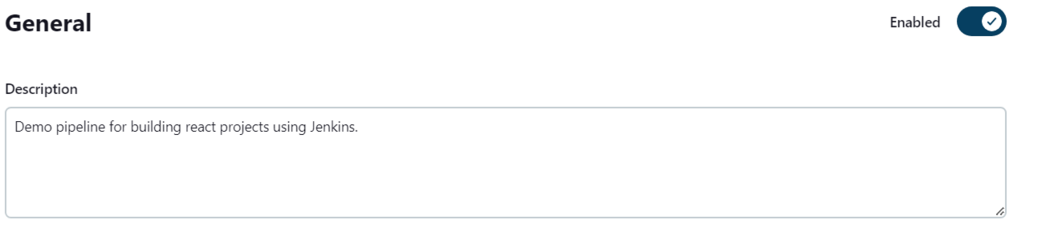
After you have created the Job, you will automatically be taken to the configuration page:
You can optionally enter a description for your project:
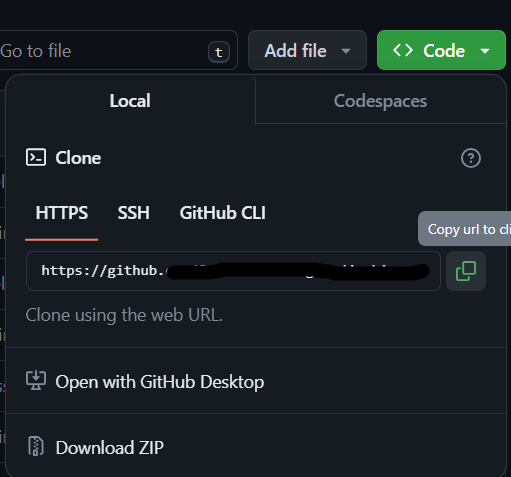
Go to your project page in GitHub and copy the public URL to your project:
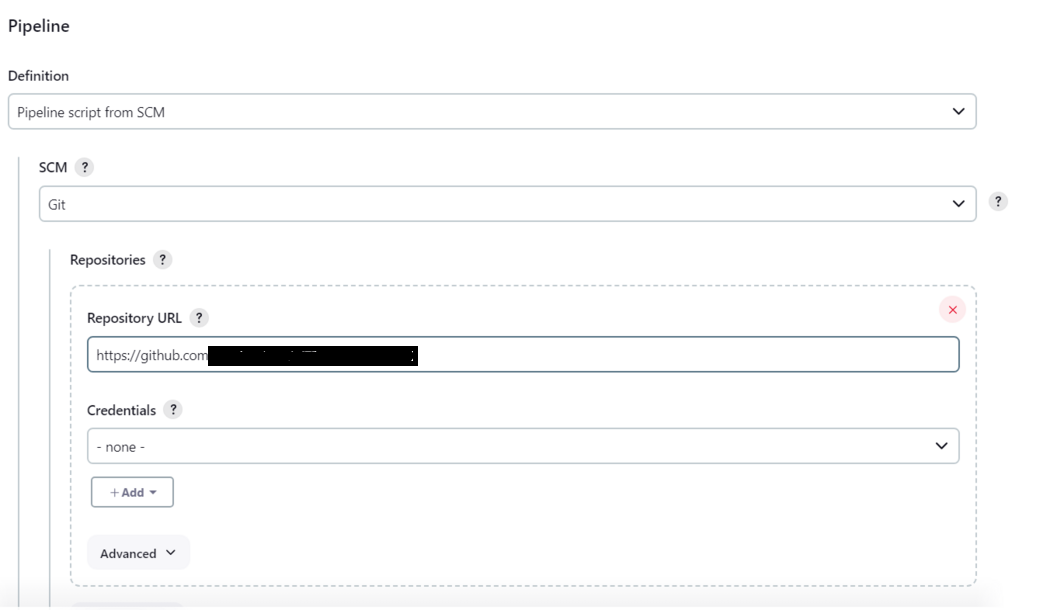
After this head back to the Jenkins configuration page. Leave leave all settings as they are and Head over to the ‘Pipeline’ section and edit the settings as follows:
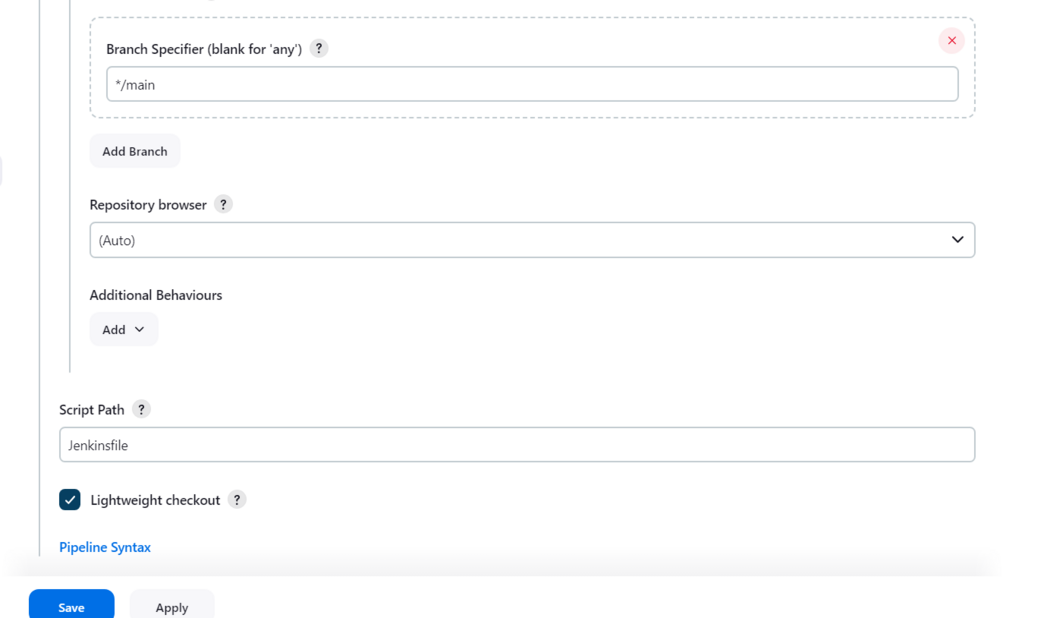
Specify the name of your branch and the Script path which is the path to the Jenkinsfile we have created in our project as follows and click on save:
Now are configuration is complete and we will see our build in action.
Step 5: Run build Job
Go the home page of your job and click on build now:

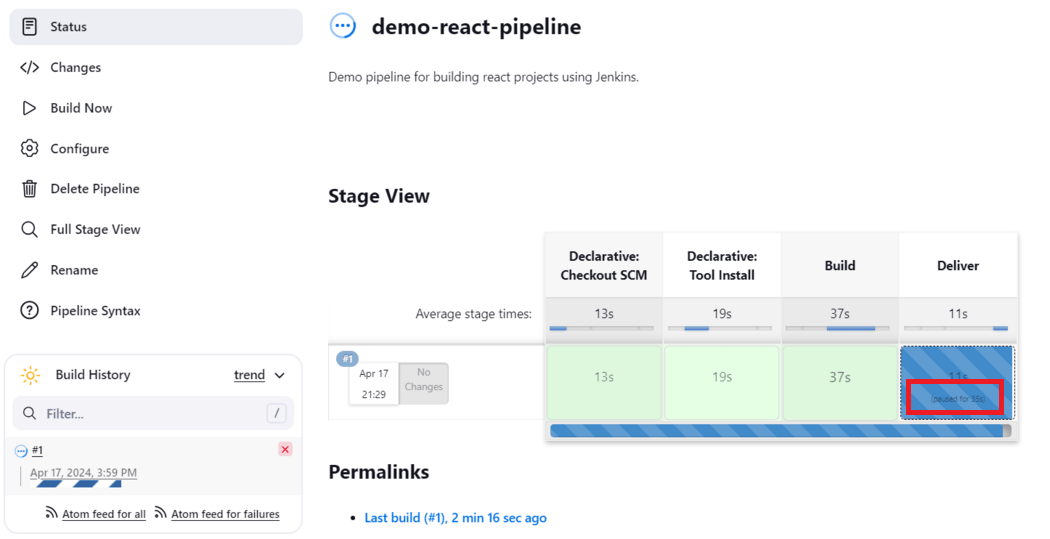
Then wait for a while as it will take some time to pull the npm modules. Monitor the stage view for the Deliver stage. When the deliver stage is paused, it means that the react application is running:
When you see this, open a browser tab on your computer and visit http://localhost:3000.You should see your application up and running:

Remember that you build is still not complete. After you view this, head back to your Jenkins job page.
Output
On the Job page, click on the build no. This will take you to another page, click on the paused for input option:

After this you will see a dialogue box as as:
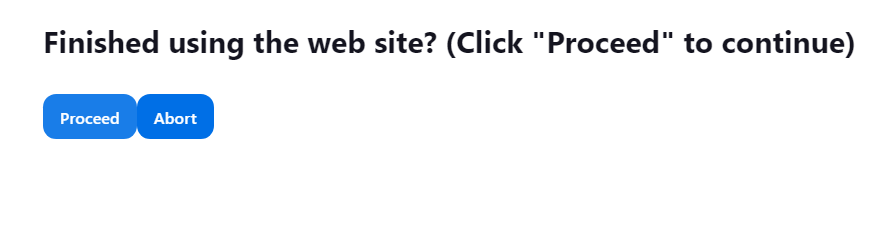
Click on Proceed. This will complete your build Job. The final complete job looks like the following:
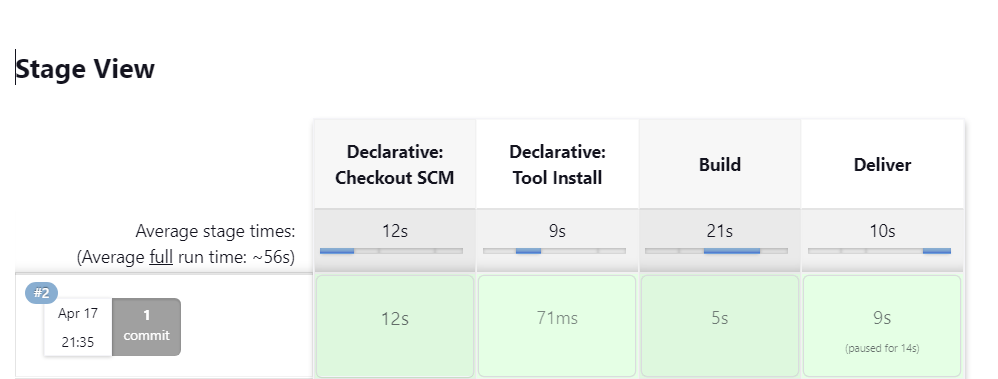
All the steps are Green which means that our build completed successfully.
Conclusion
In this article we covered a lot of things. We setup our computer to build our projects using Jenkins and also learnt how we can do so through Docker. We hosted our code on a source code manager and externalized our build process using Pipeline-as-a-code. The code we wrote for our file was in the form of a bash script. Next, we viewed our running application and afterwards, we successfully stopped the process and completed our build. That were indeed a lot of things. If you faced any unwanted errors, please feel free to discuss in the comments below.
Build React App In Jenkins – FAQ’s
Can I use any other scripts other than bash?
Yes, if you know how to write scripts in shell or python then please do so. But please remember that the underlying operating system should have that particular support. For example PowerShell for windows or zsh for MacOS.
How can I use other ports other than 3000?
If you want to use other ports then simply start the docker image with the following changes:
docker run -u 0 -d -p 8080:8080 -p 50000:50000 -p <port_no>:3000 -v /data/jenkins:/var/jenkins_home jenkins/jenkins:lts
This will bind the port number 3000 on docker to the port you want to use on your computer.
Can I use my local NodeJS installation?
Yes, just remember to point to it while setting up your tools.
Share your thoughts in the comments
Please Login to comment...