Analyzing Documents Using Watson Discovery Service – IBM Watson
Last Updated :
10 Jan, 2023
Watson Discovery Service is a new suite of APIs that enables you to ingest, normalize, enrich, index, search, and explore your data, both structured and unstructured. Watson Discovery gives you the ability to store, analyze, and understand your data at scale. First, Watson ingests and standardizes all of your data, no matter the type. Just load it and go. Watson then enriches your data using natural language understanding capabilities. Think sentiment and emotion analysis, named entity extraction, and concept tagging. For example, extracting sentiment from the past few months of your customers’ chat history. This can be done in seconds.
You can utilize Watson Discovery to extract important data from documents. When dealing with an enormous amount of text documents, Watson Discovery is a valuable tool to optimize your workflow by applying the Natural Language Processing (NLP) algorithm to extract, valuable information, sentiment, concepts, semantic roles from your collection of documents.
Requirements:
- IBM Cloud account: A credit card is NOT required to sign up for the IBM Cloud Lite account and there is no charge associated with creating a Lite plan instance of the Watson Discovery service.
- A device with a good internet connection.
Procedure:
Step 1: Create an IBM Cloud Account: Use the link given to signup or login to the IBM cloud. https://cloud.ibm.com/registration. If you already have an IBM Cloud account you can just log in using the above link.
NOTE: To get enhanced benefits, please sign up with you business or corporate email address rather than a free email ID like Gmail, Hotmail, etc.
Step 2: Confirm Your Email Address: An email is sent to your email address to confirm your account. Go to your email account, and click on the Confirm Account link in the email that was sent to you.
Step 3: Log in to Your Account.
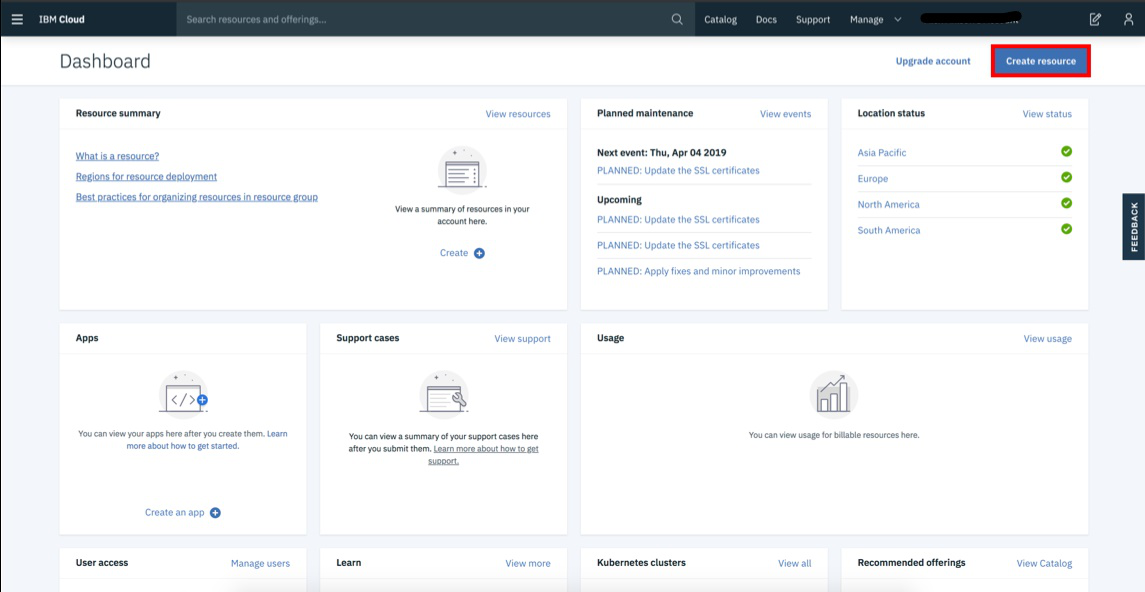
Step 4: Create a New Resource: On your dashboard page, click on the ‘Create a resource’ on the top right to create a new source.
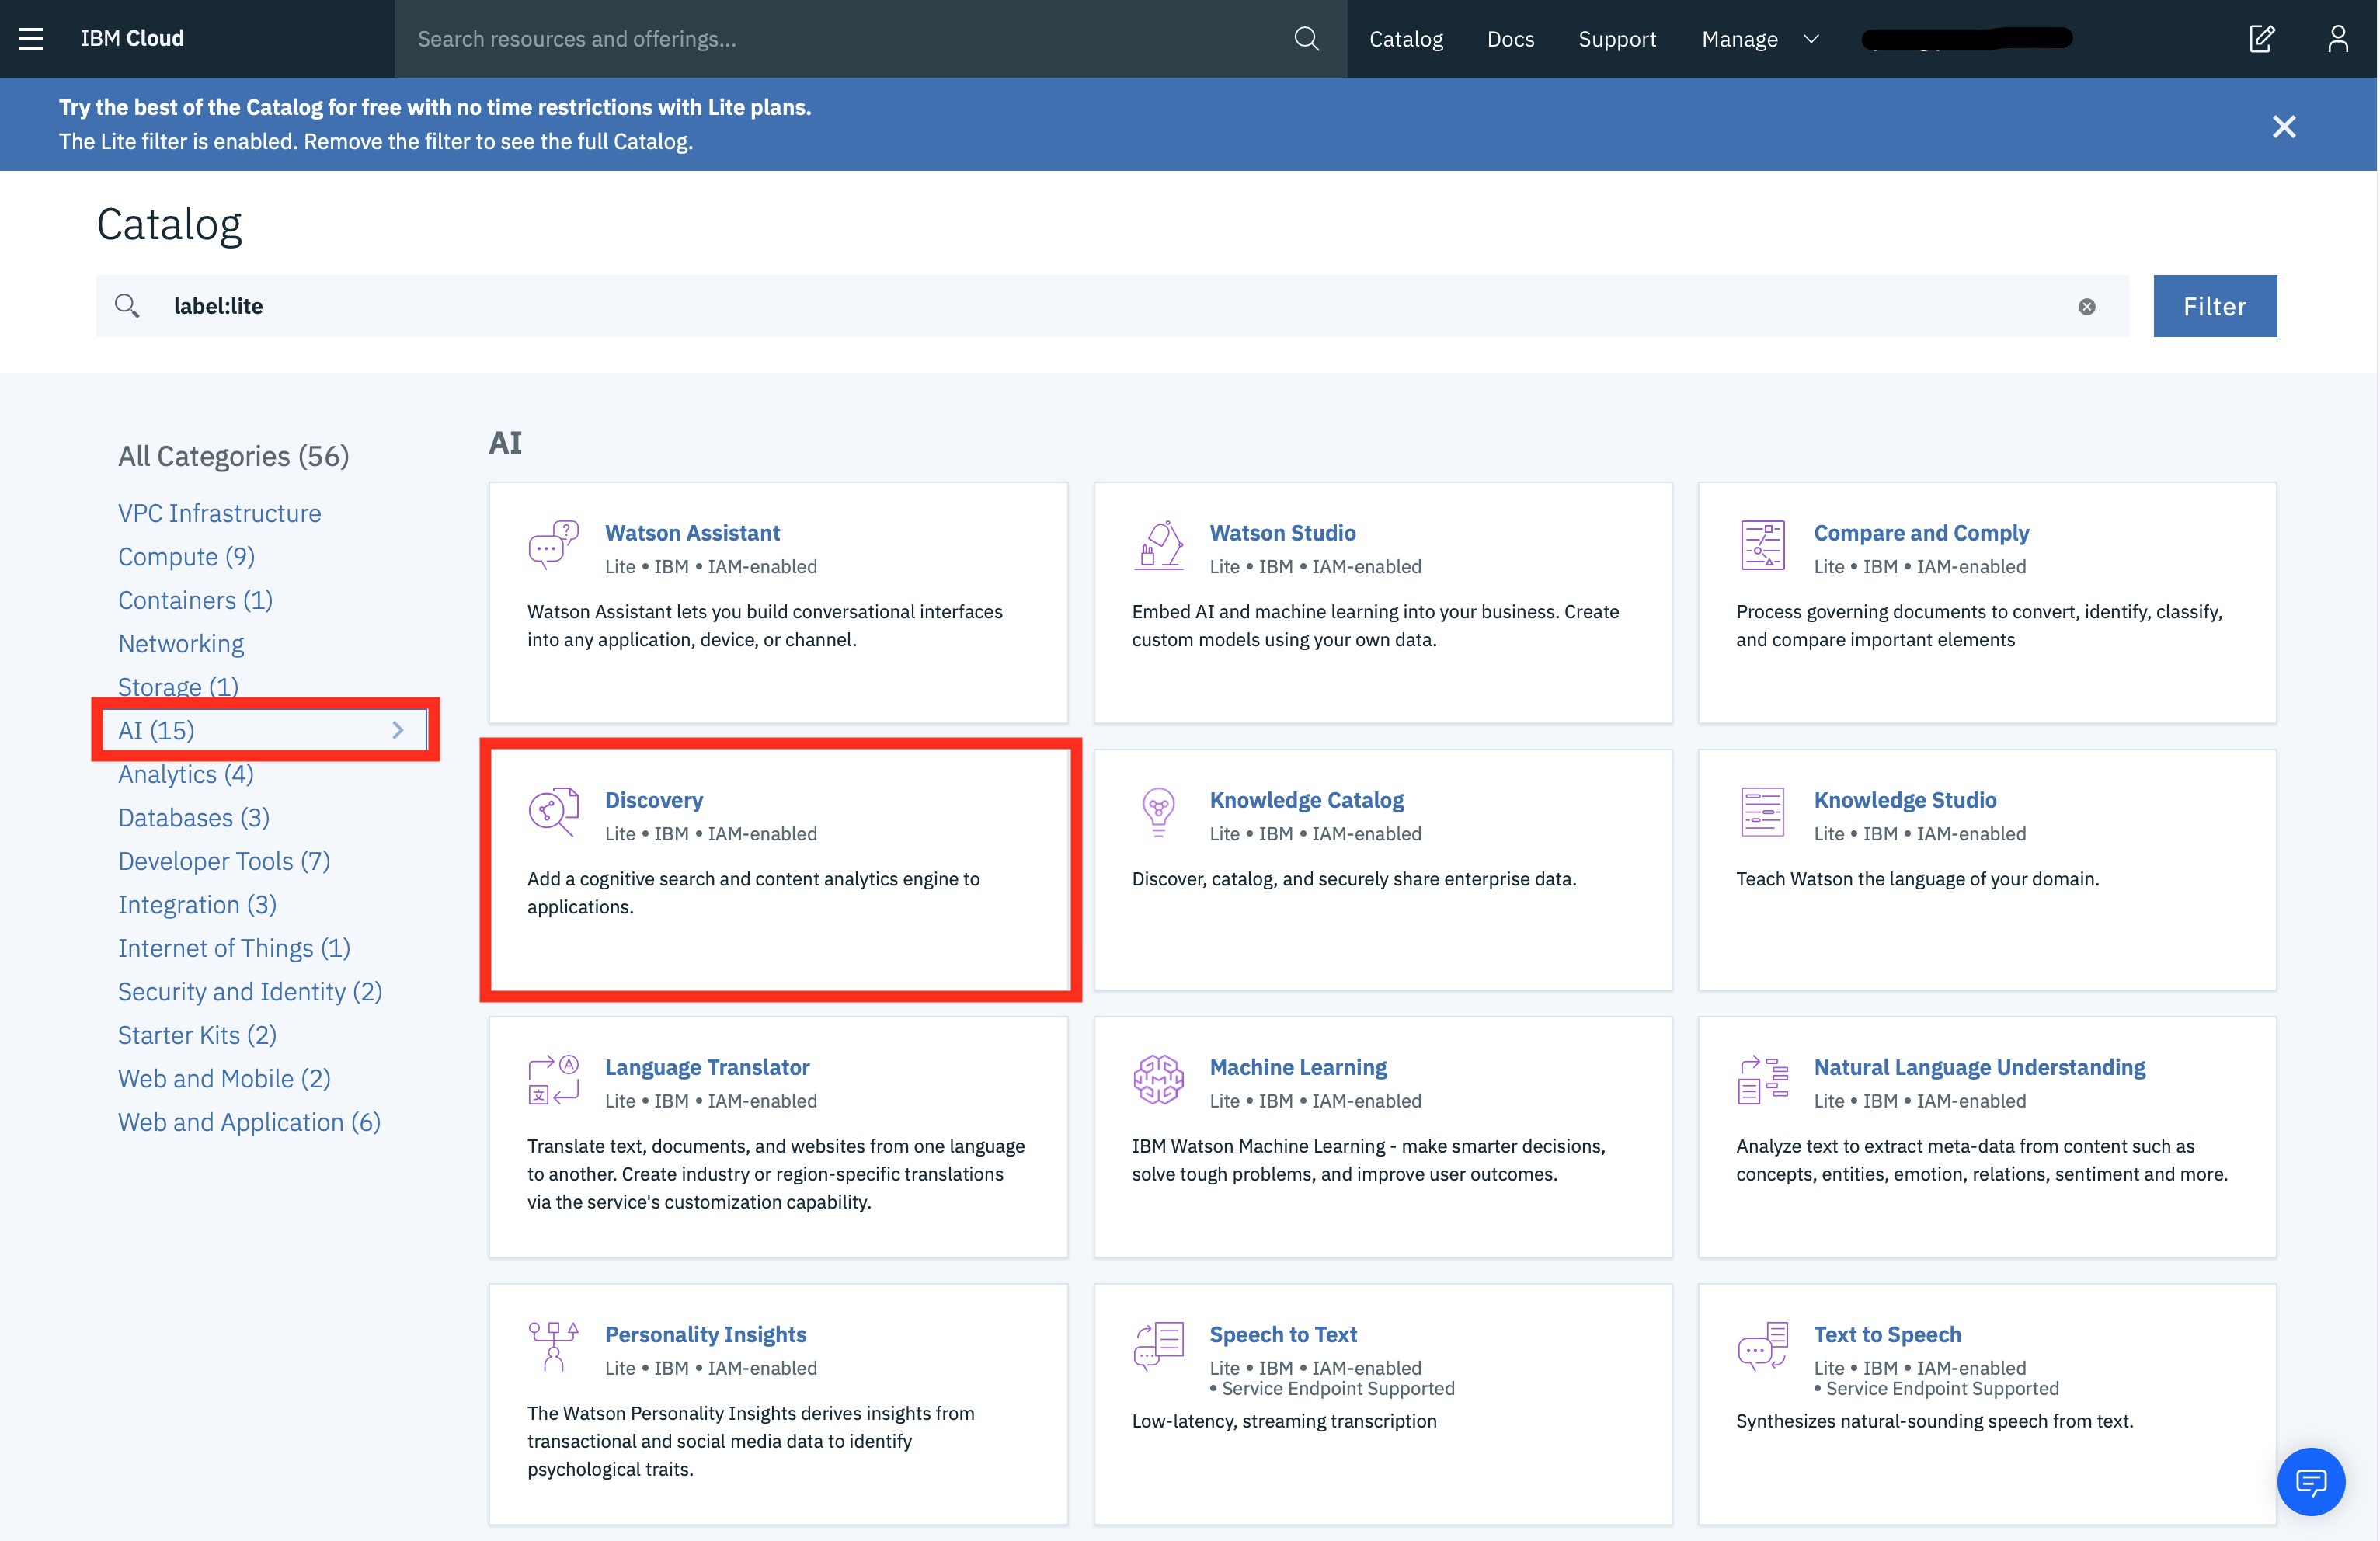
Step 5: Create a Watson Discovery Resource: On the Catalog page, select the AI category from the left pane, and then select the Watson Discovery resource.
Step 6: Name your Service Instance and Choose your Region: On the next page, you will get to name your service instance and choose your region. Click on the arrow to reveal the drop-down menu of regions. Make sure to select the region that is closest to you.
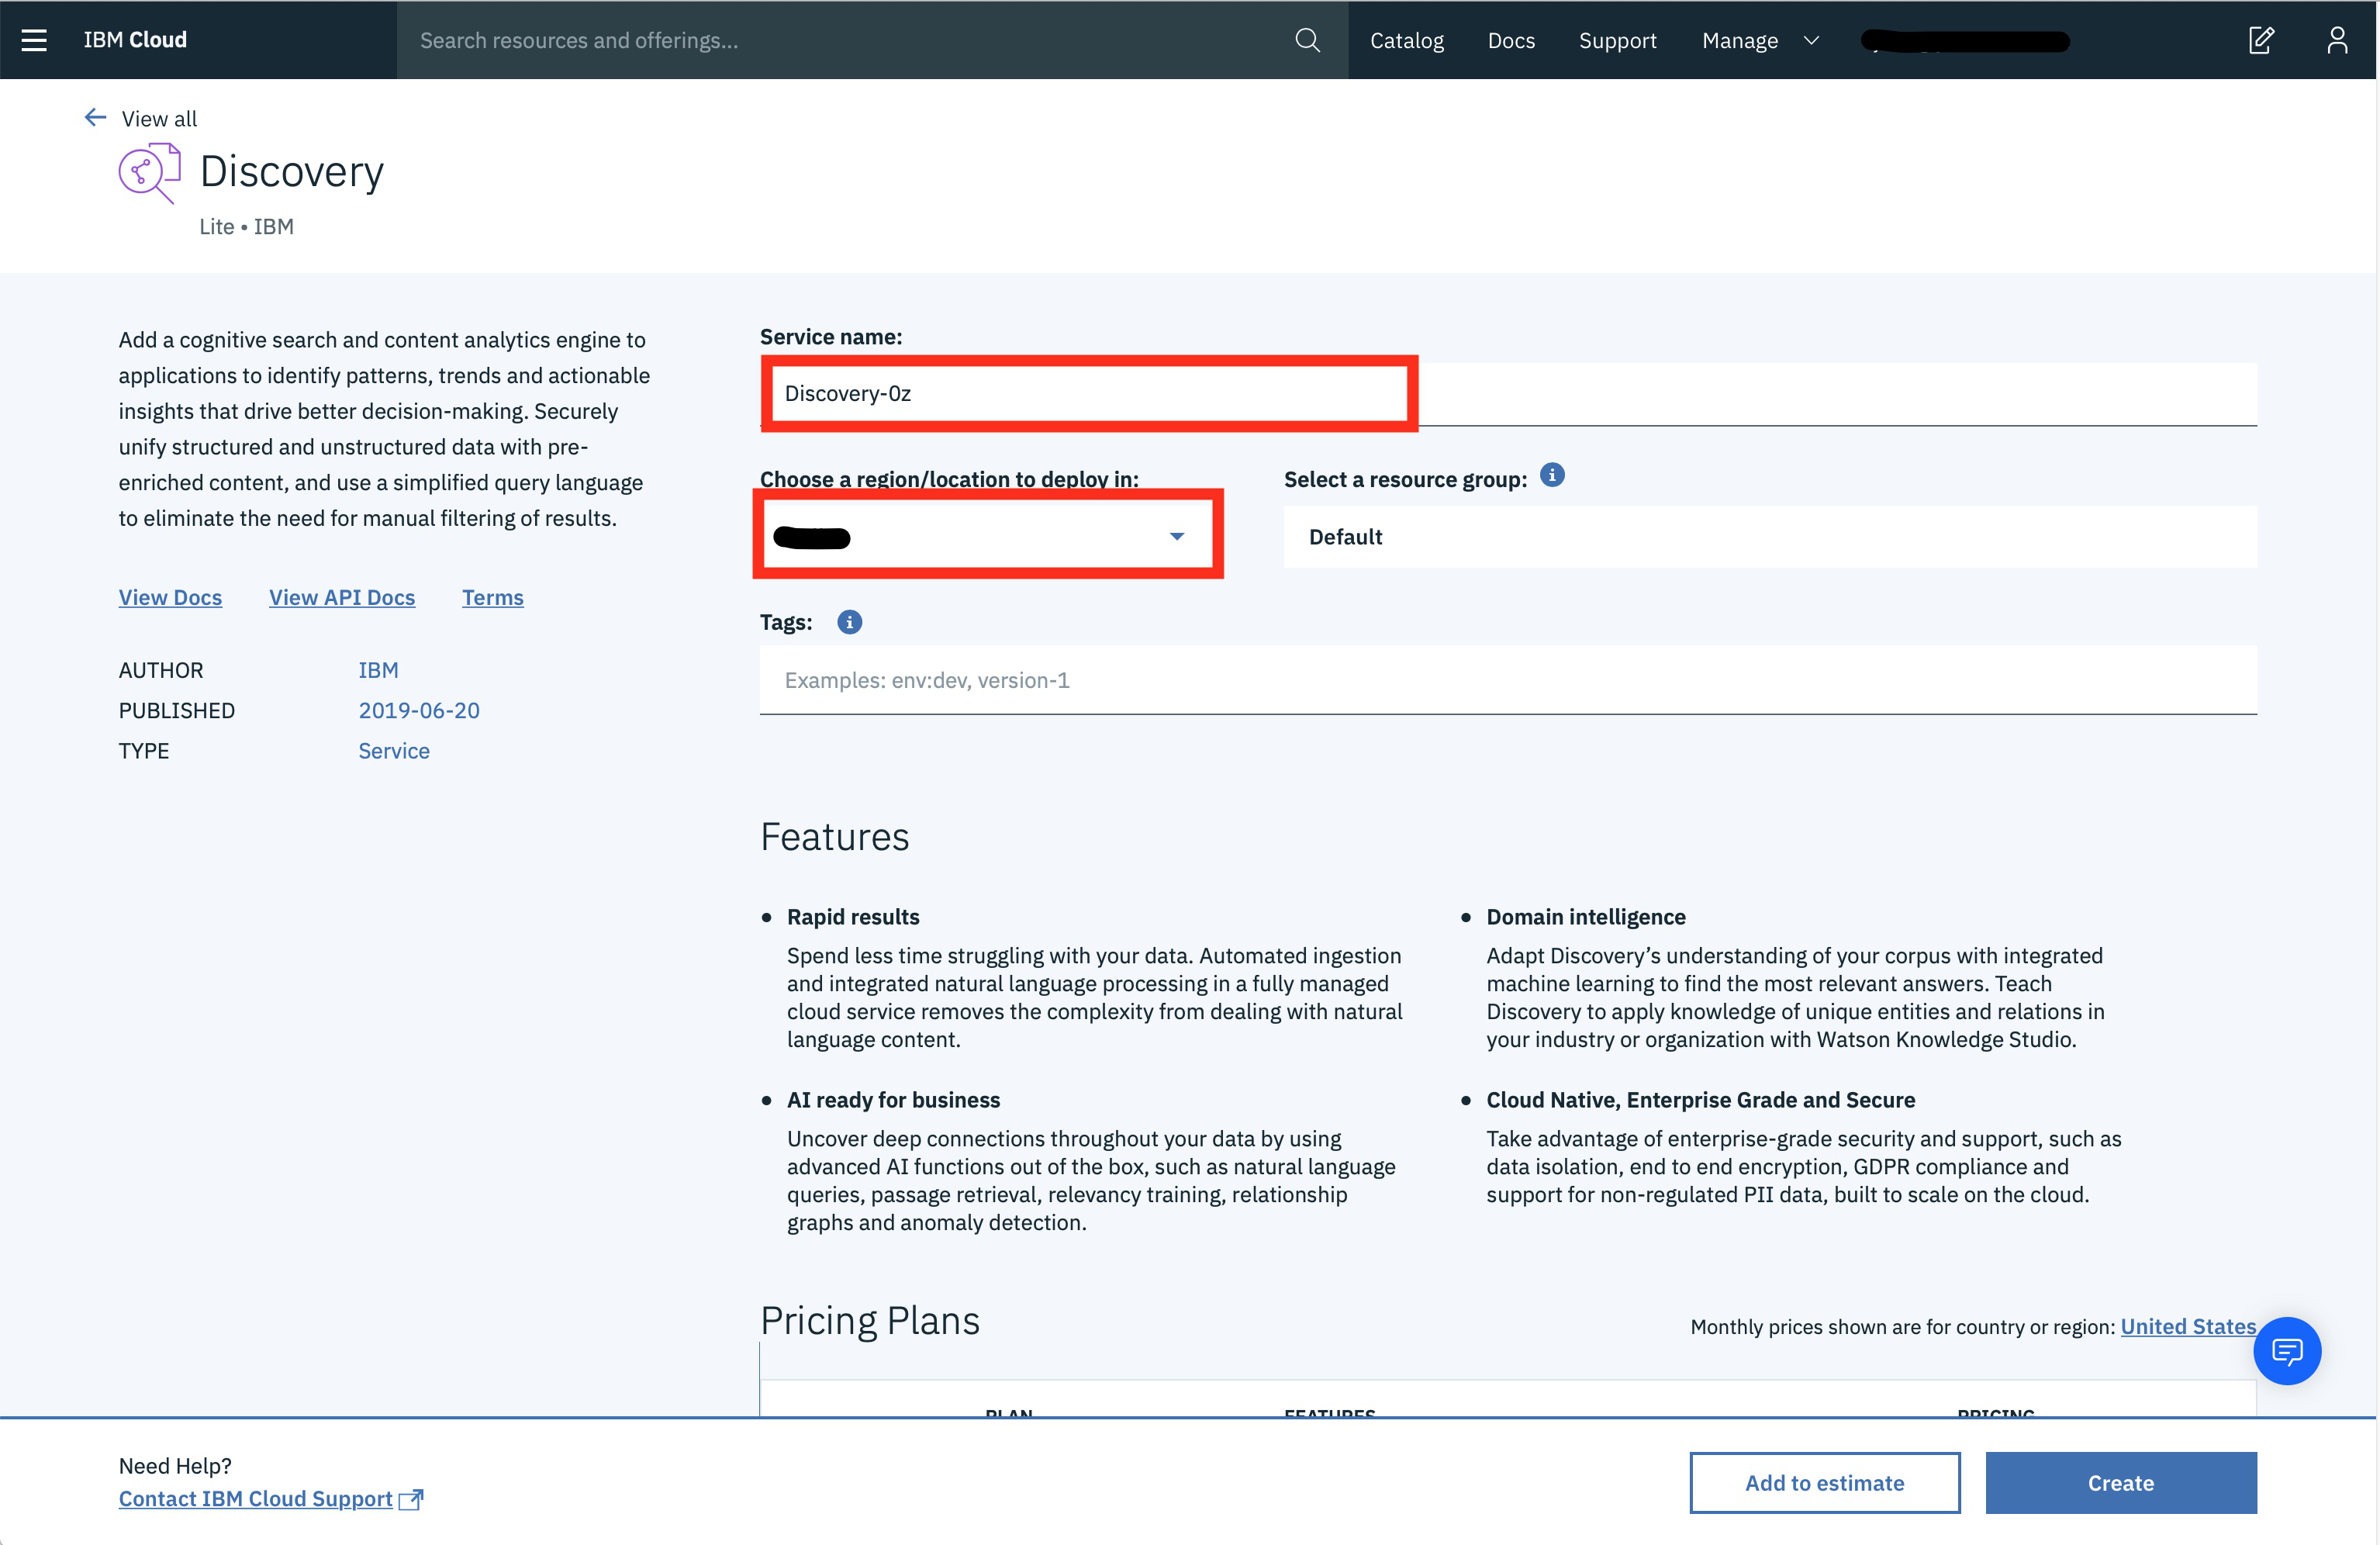
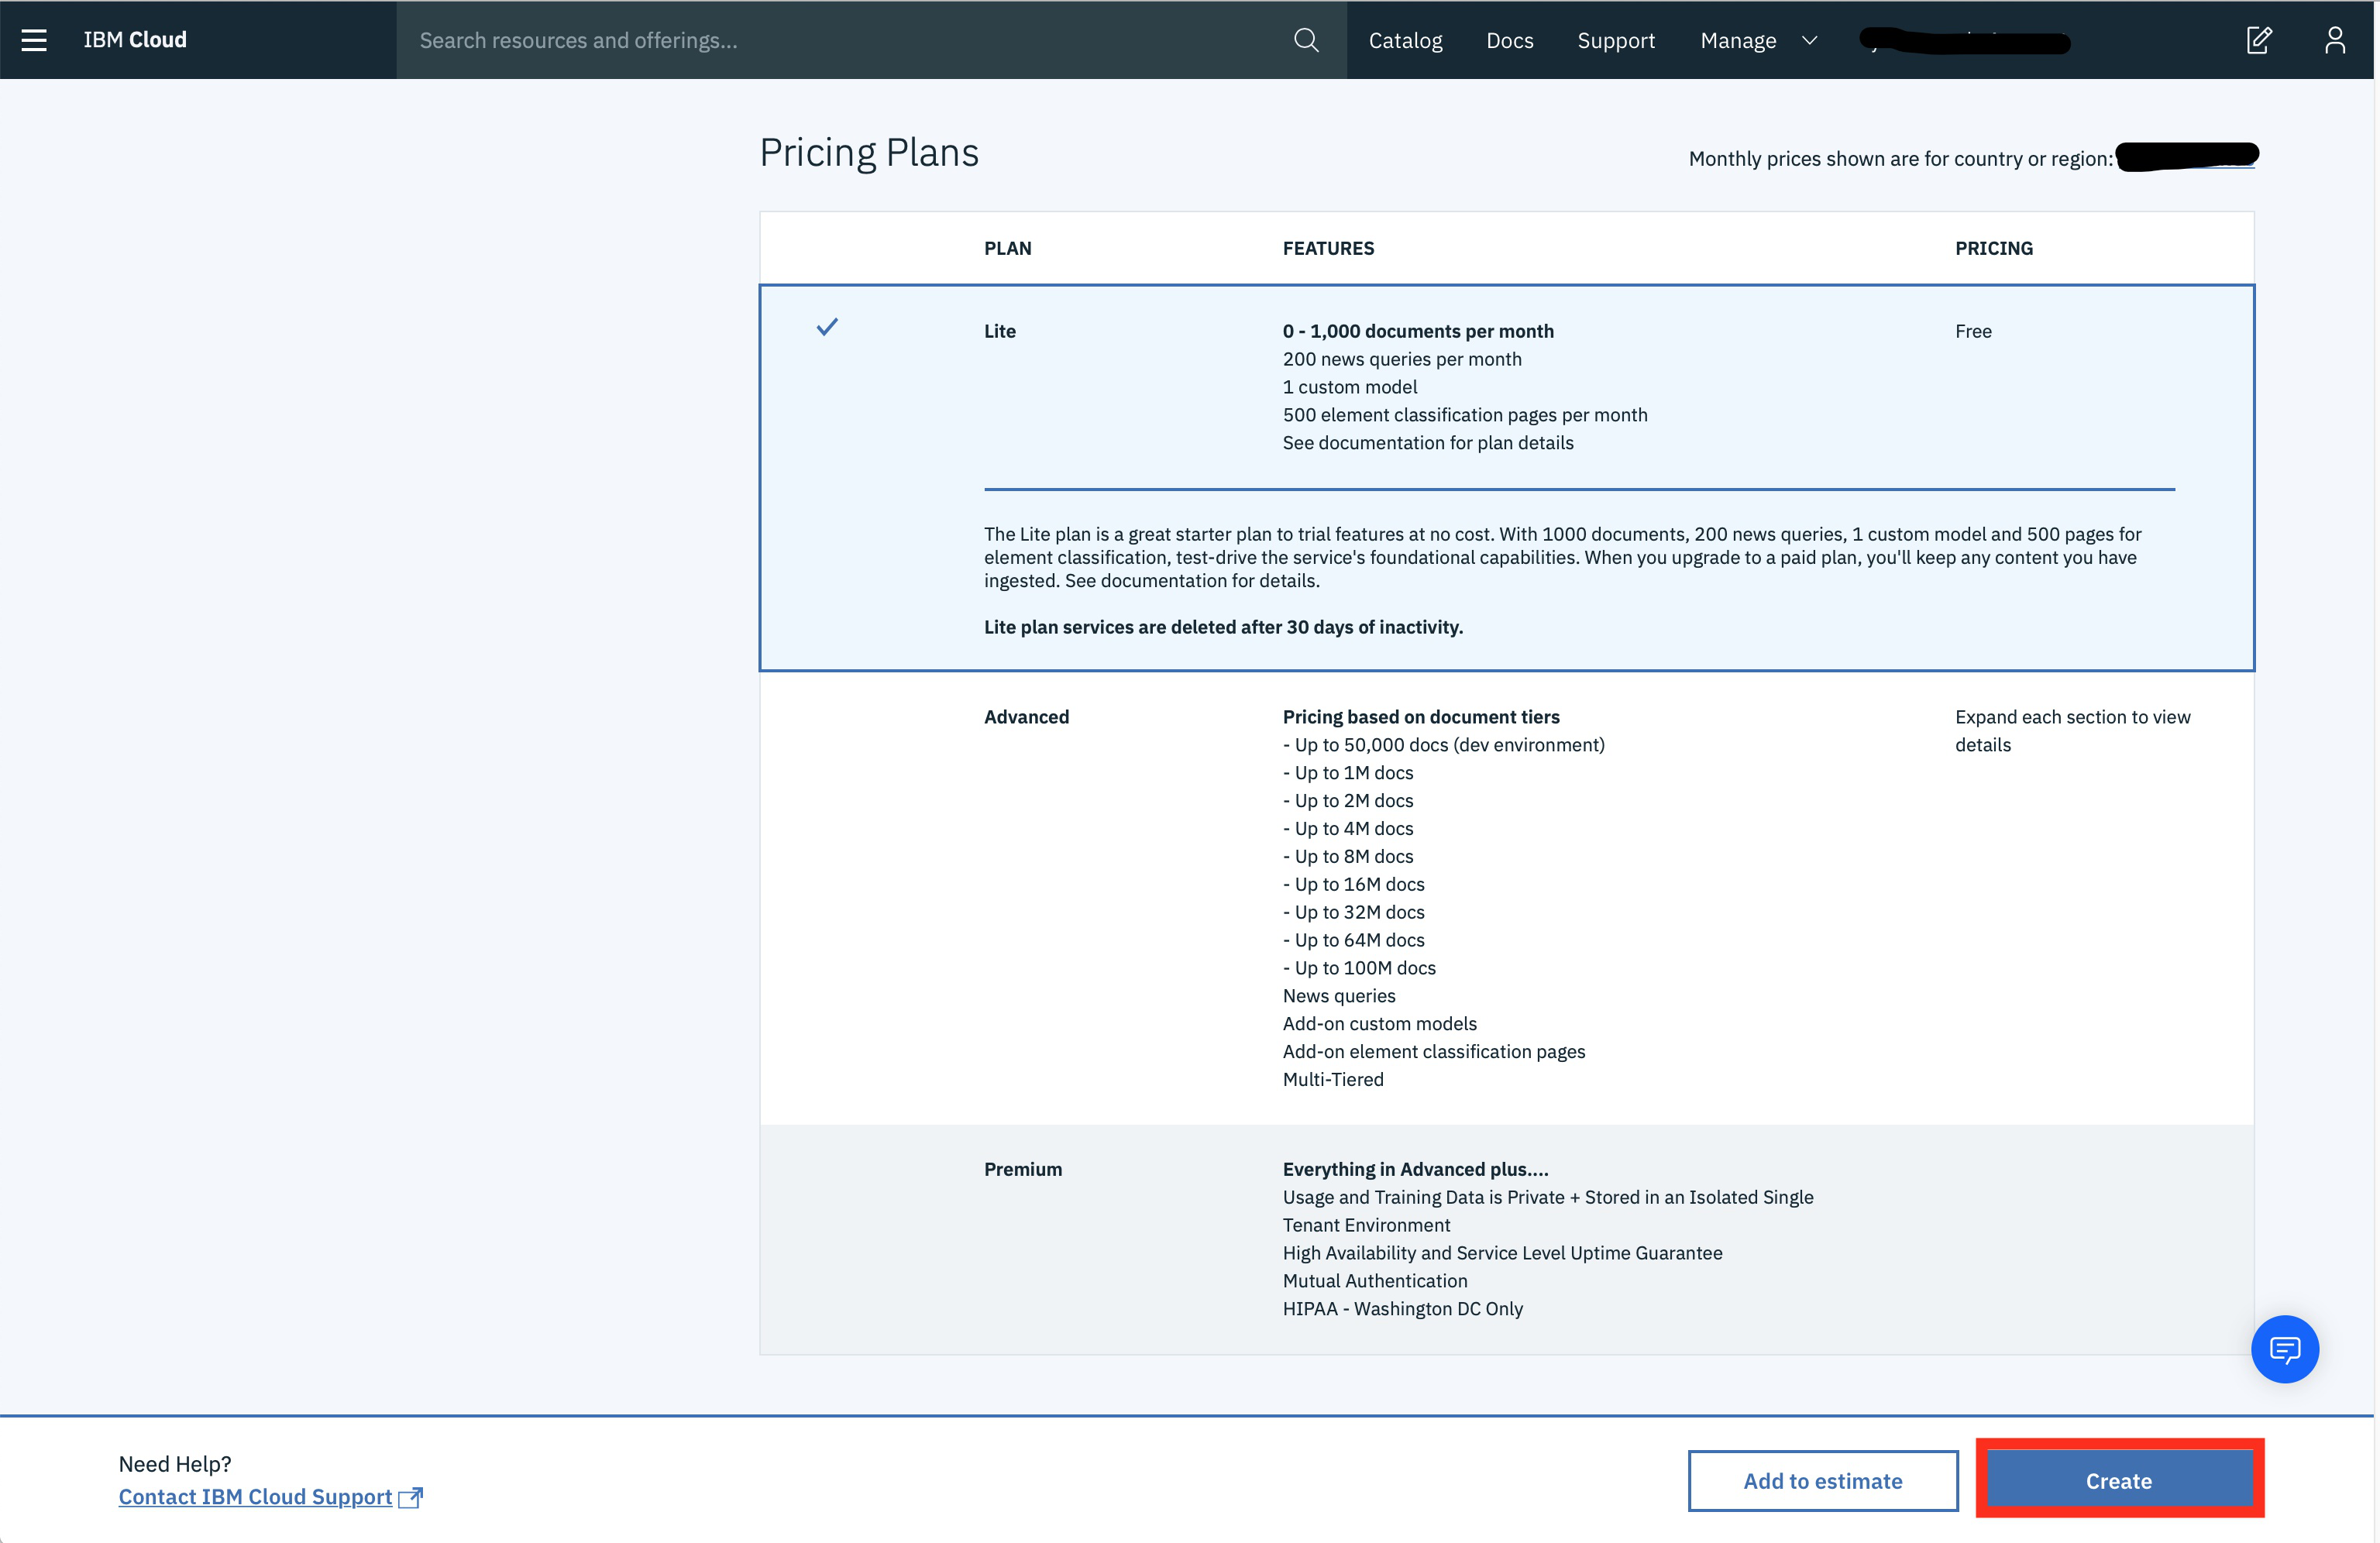
Then scroll down and make sure that the lite plan is selected, and click the Create button.
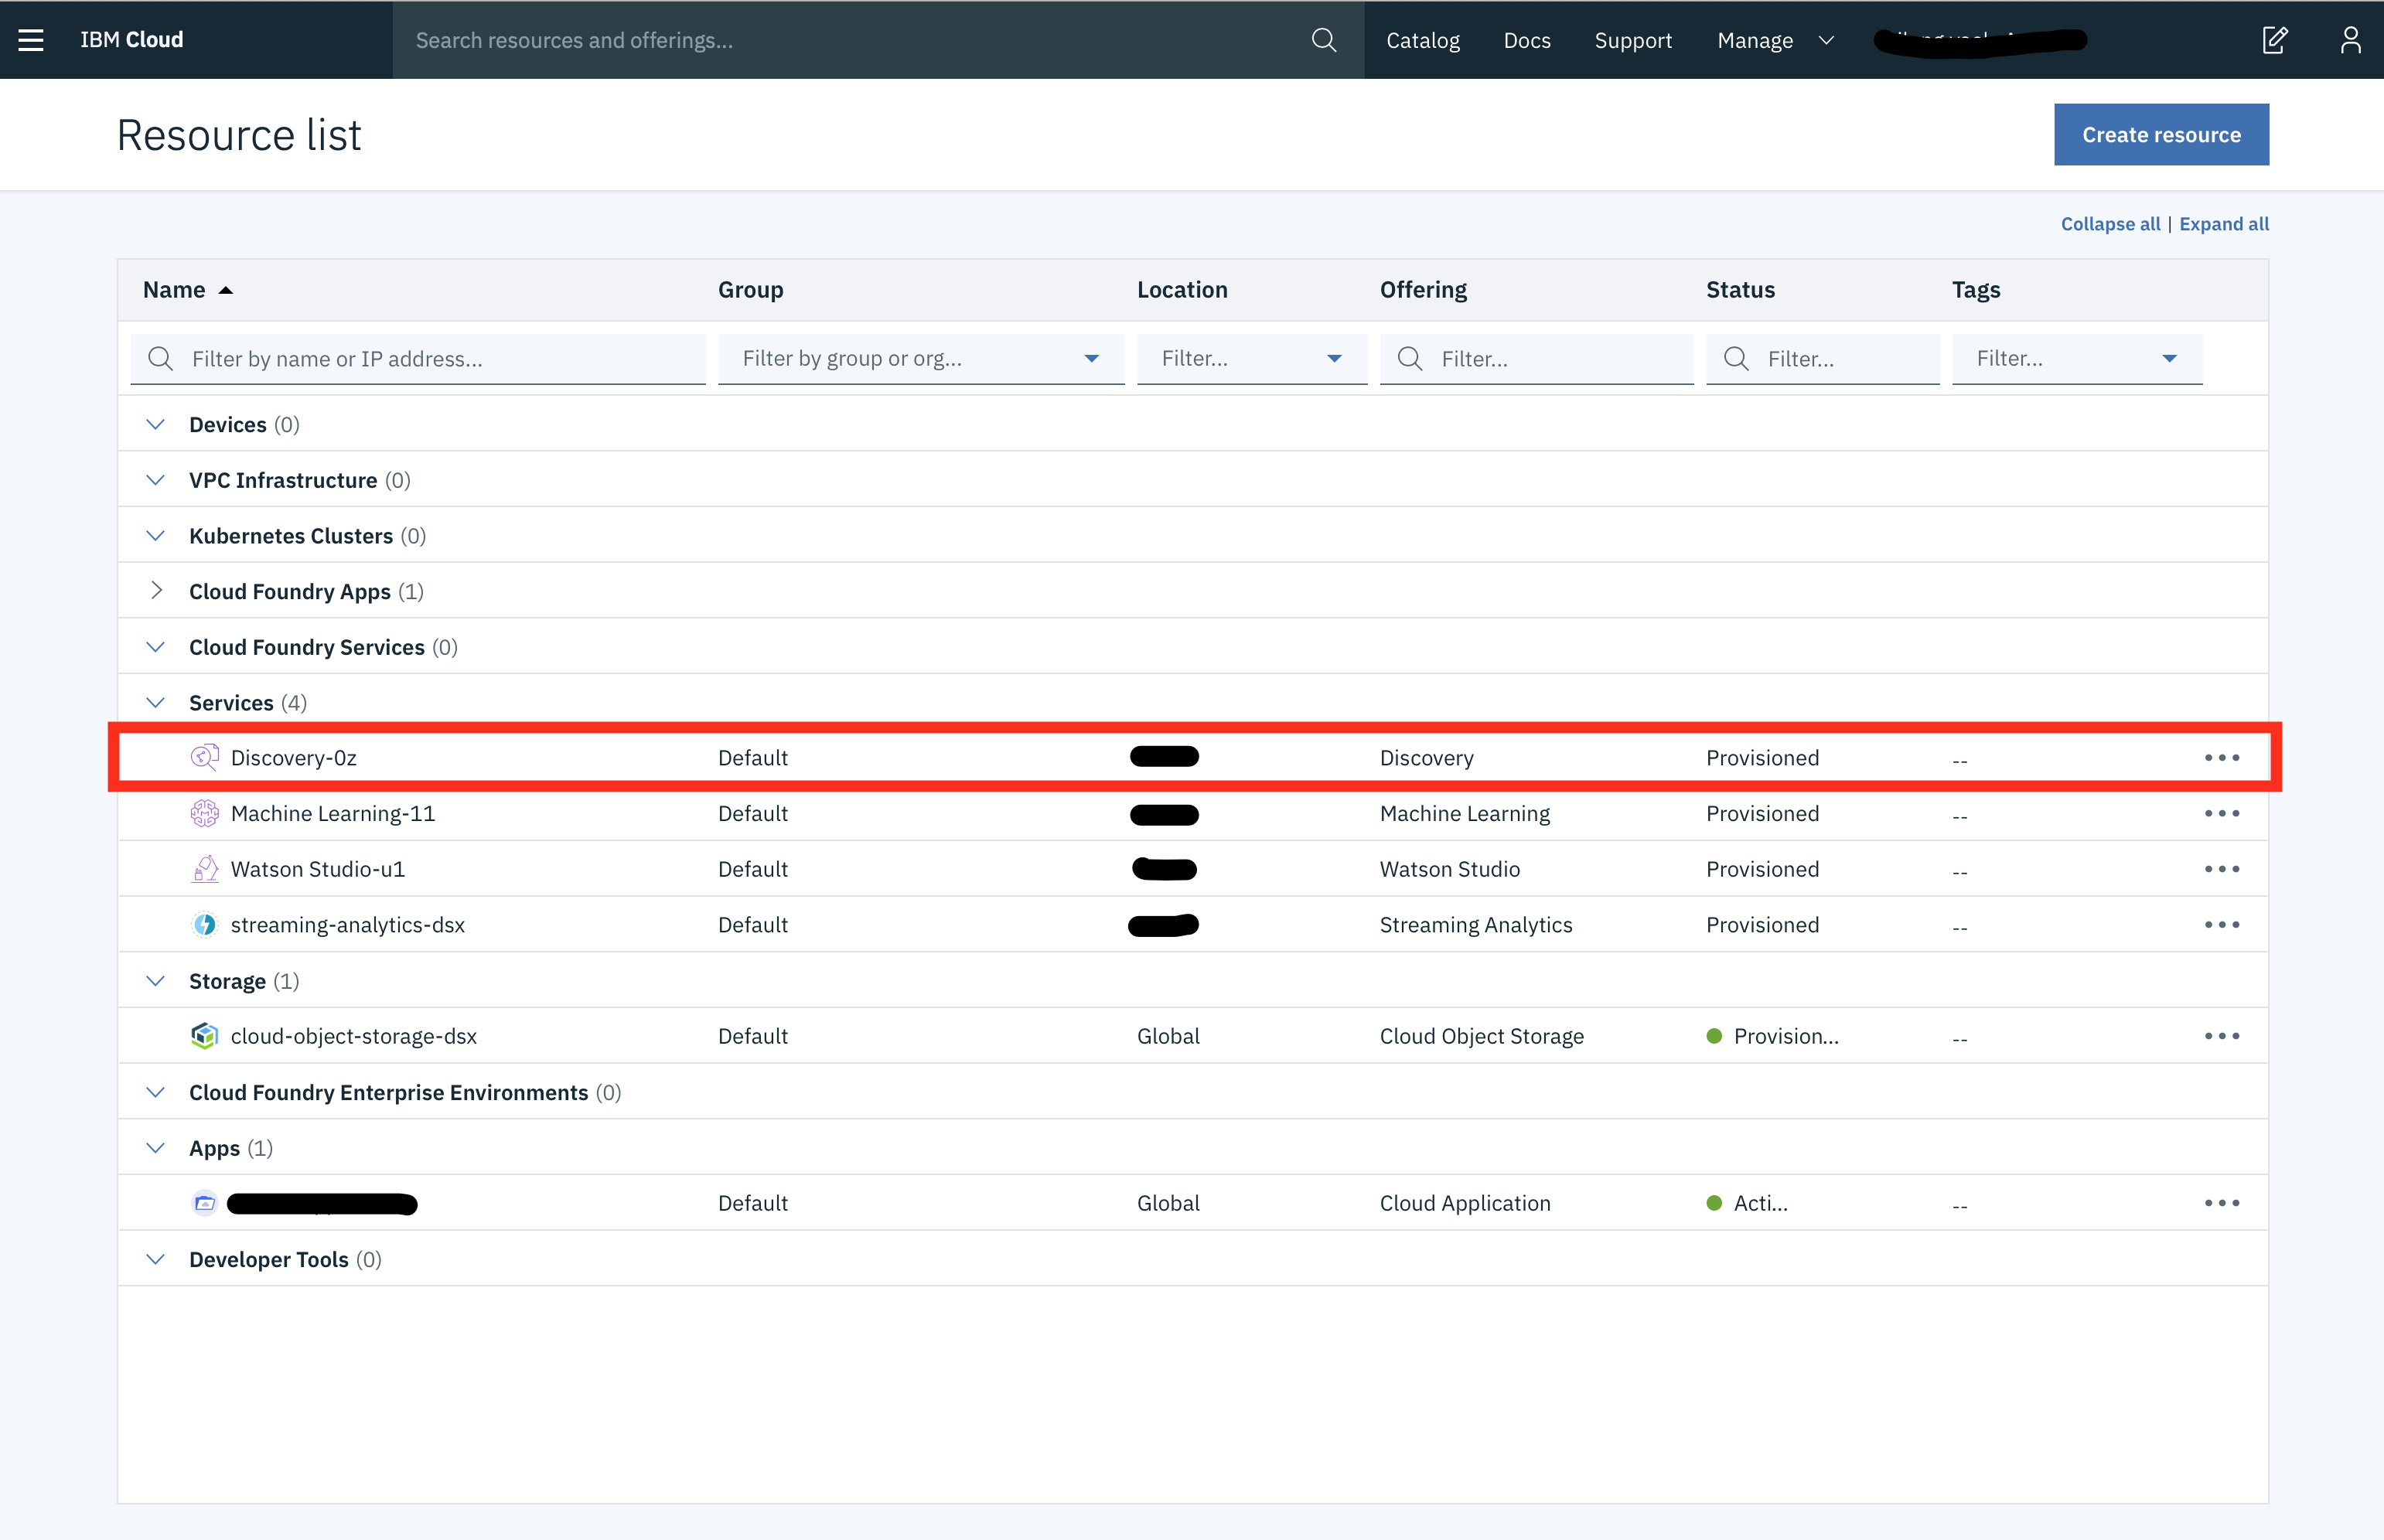
This will start creating your Watson Discovery instance. Once the service has been created, you can get into your Watson Discovery instance by clicking the Discovery instance under the Services tab.
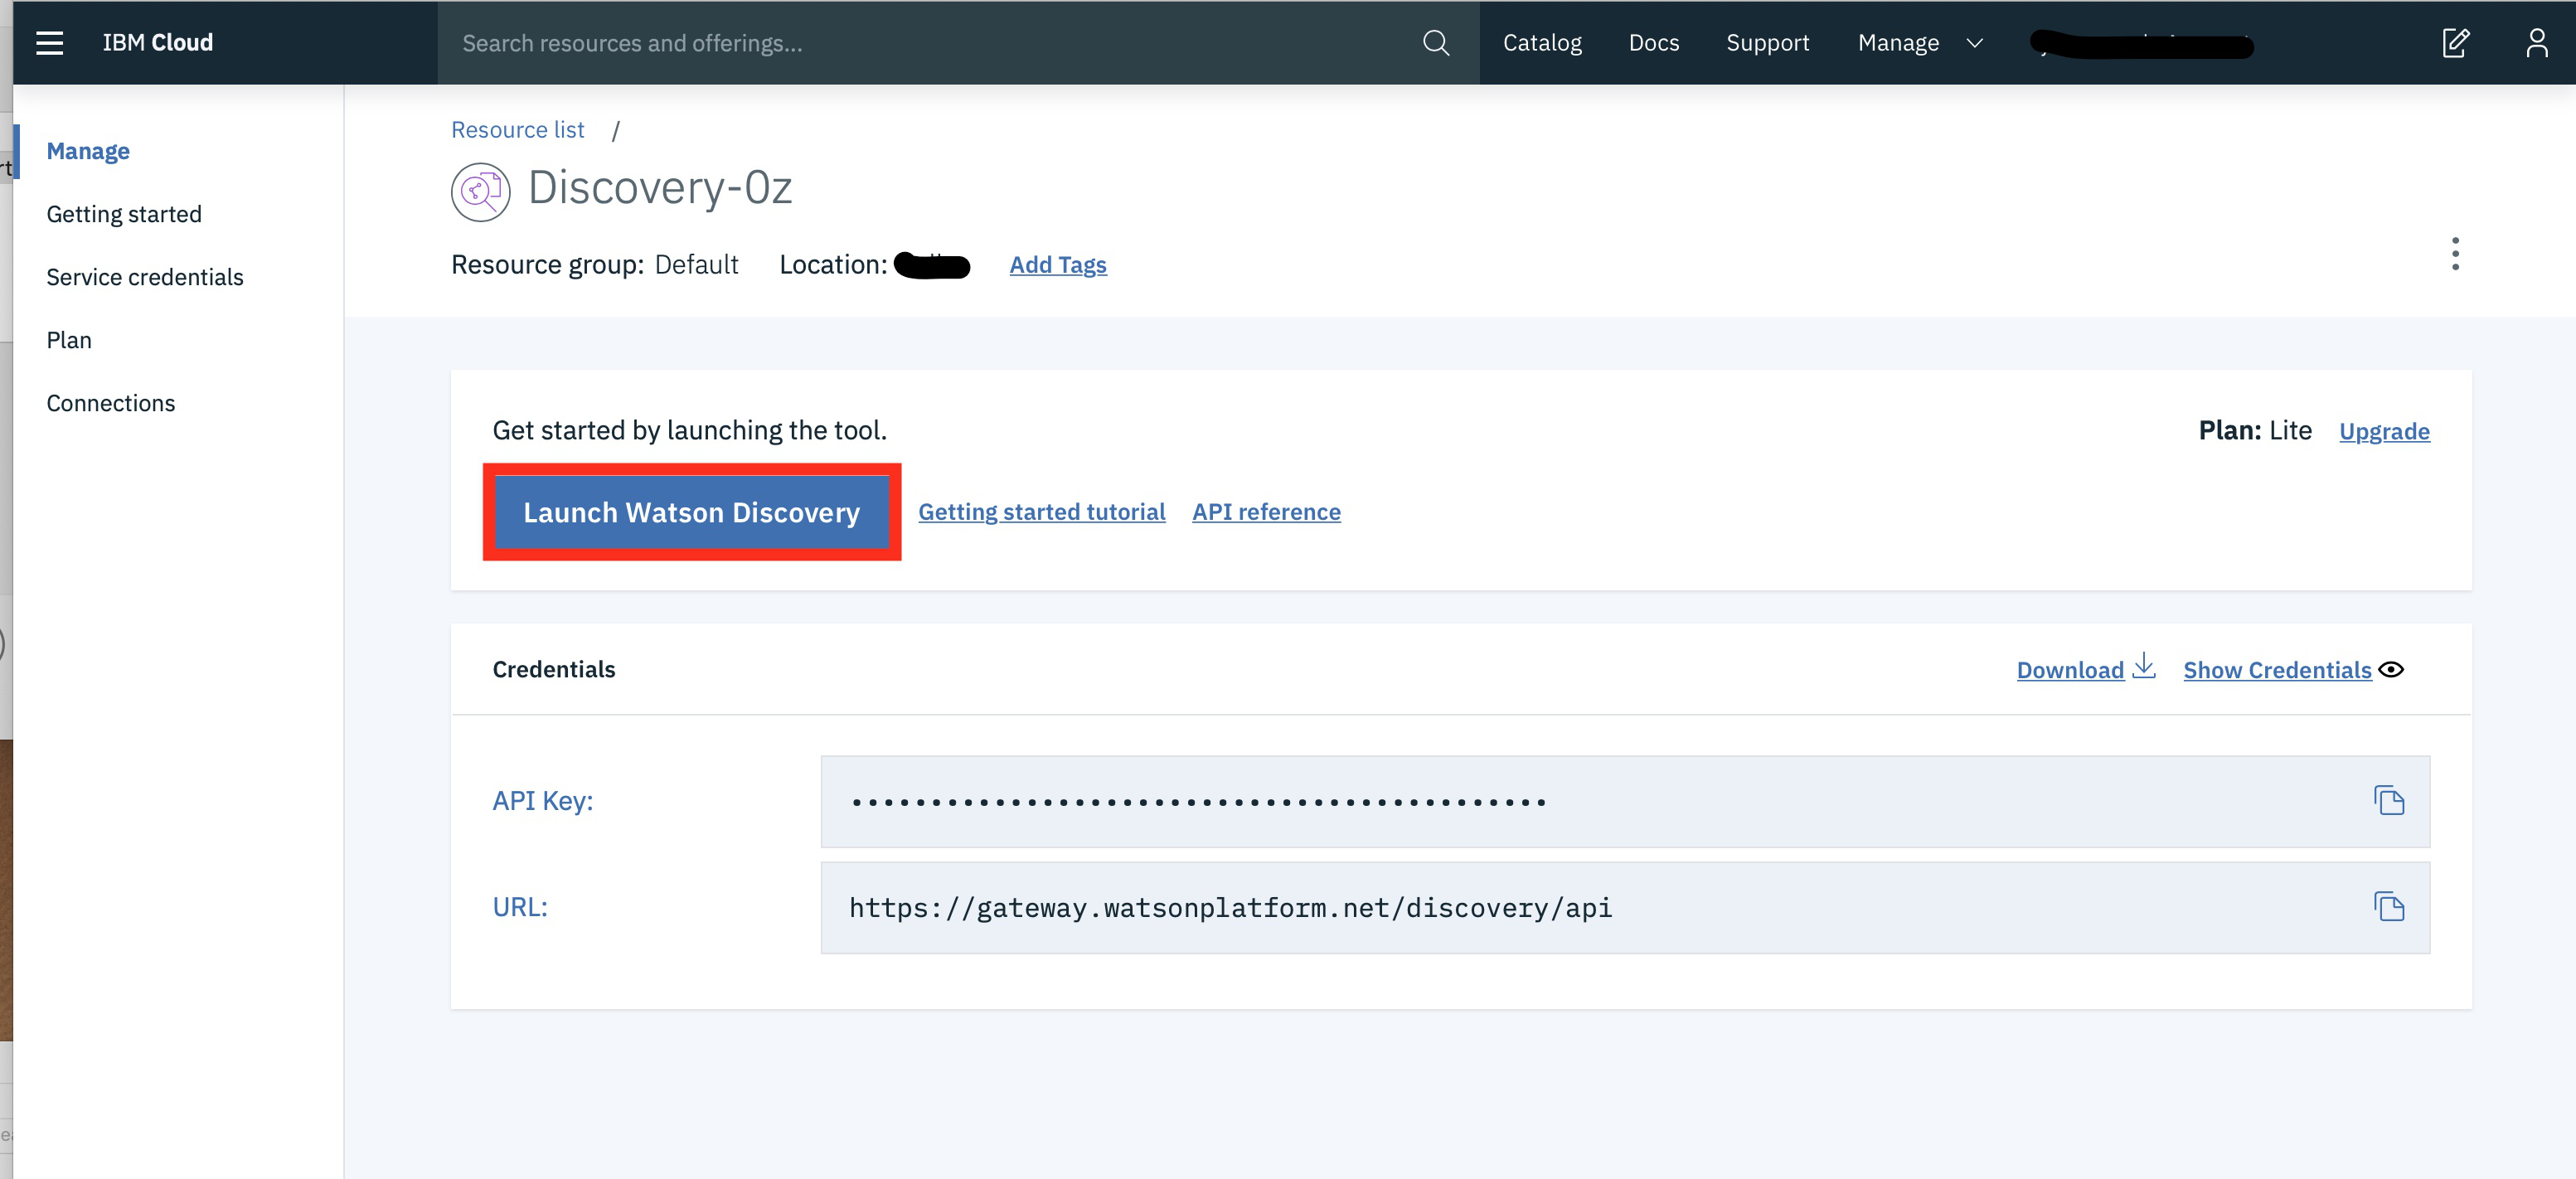
Step 7: Launch your Service: Launch your service by clicking Launch Watson Discovery.
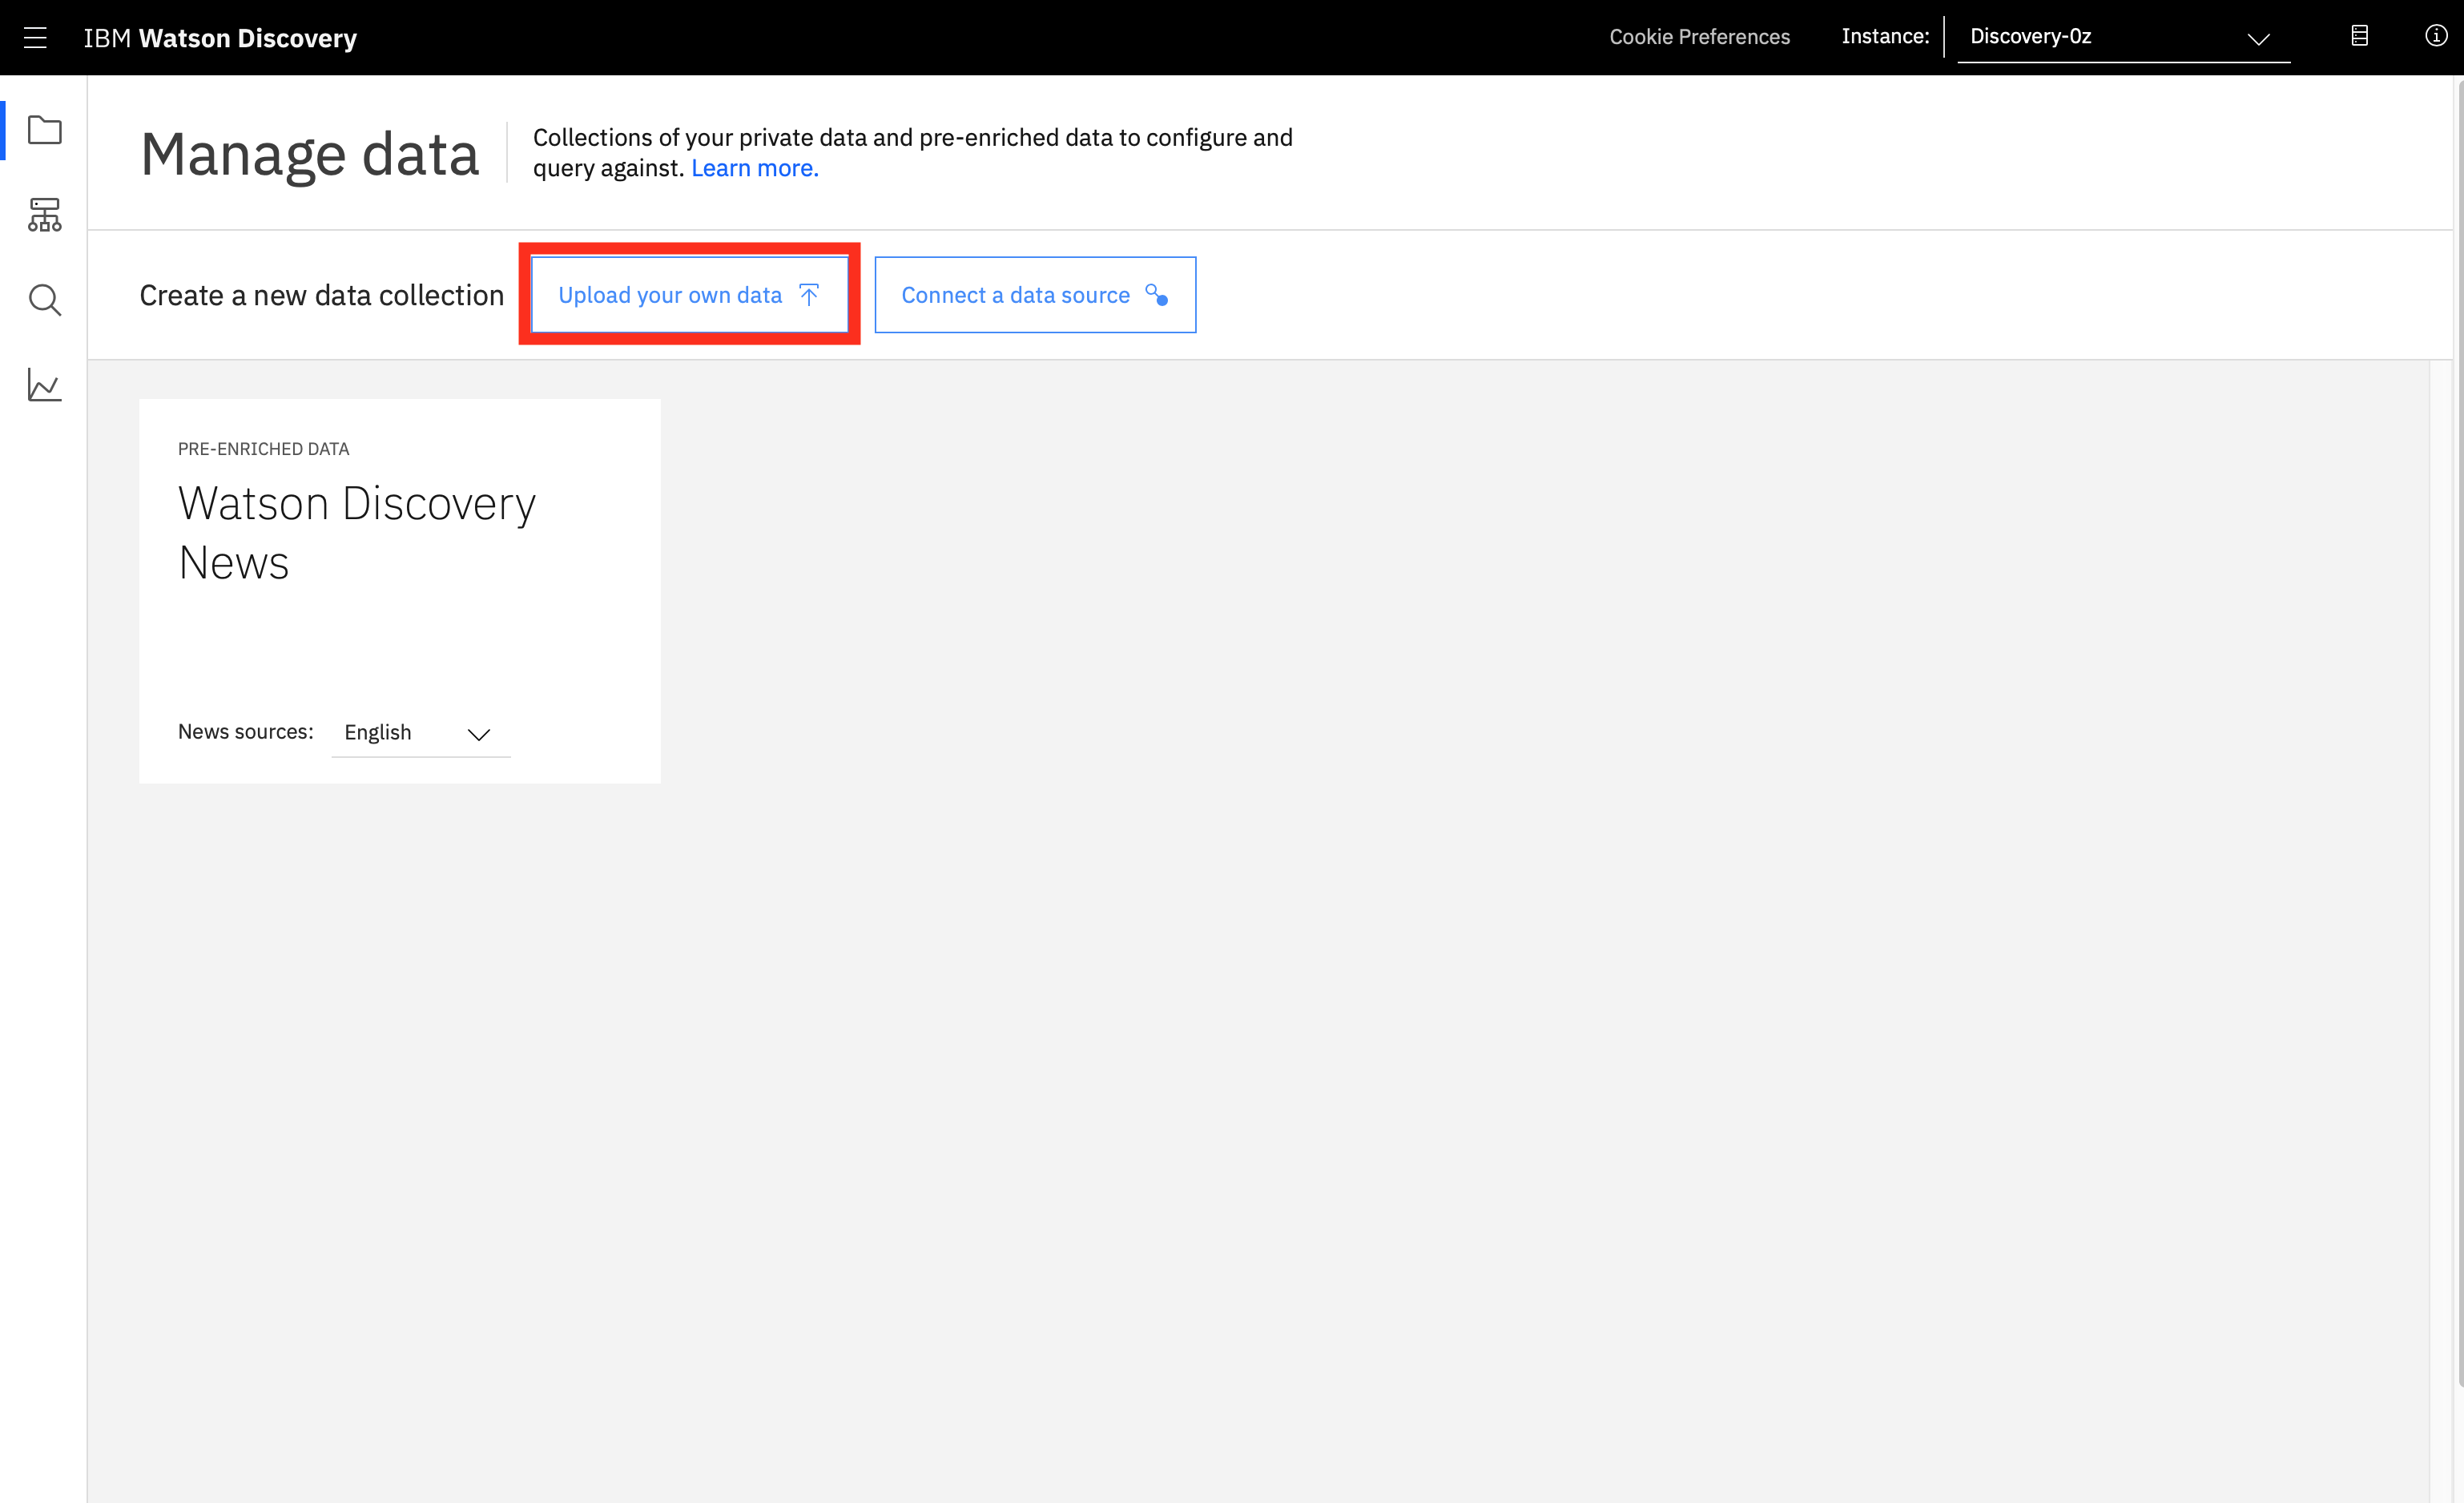
Step 8: Setting up Your Collection: Your collection will be hosted in a Collection, click on “Upload your own data” to create your collection.
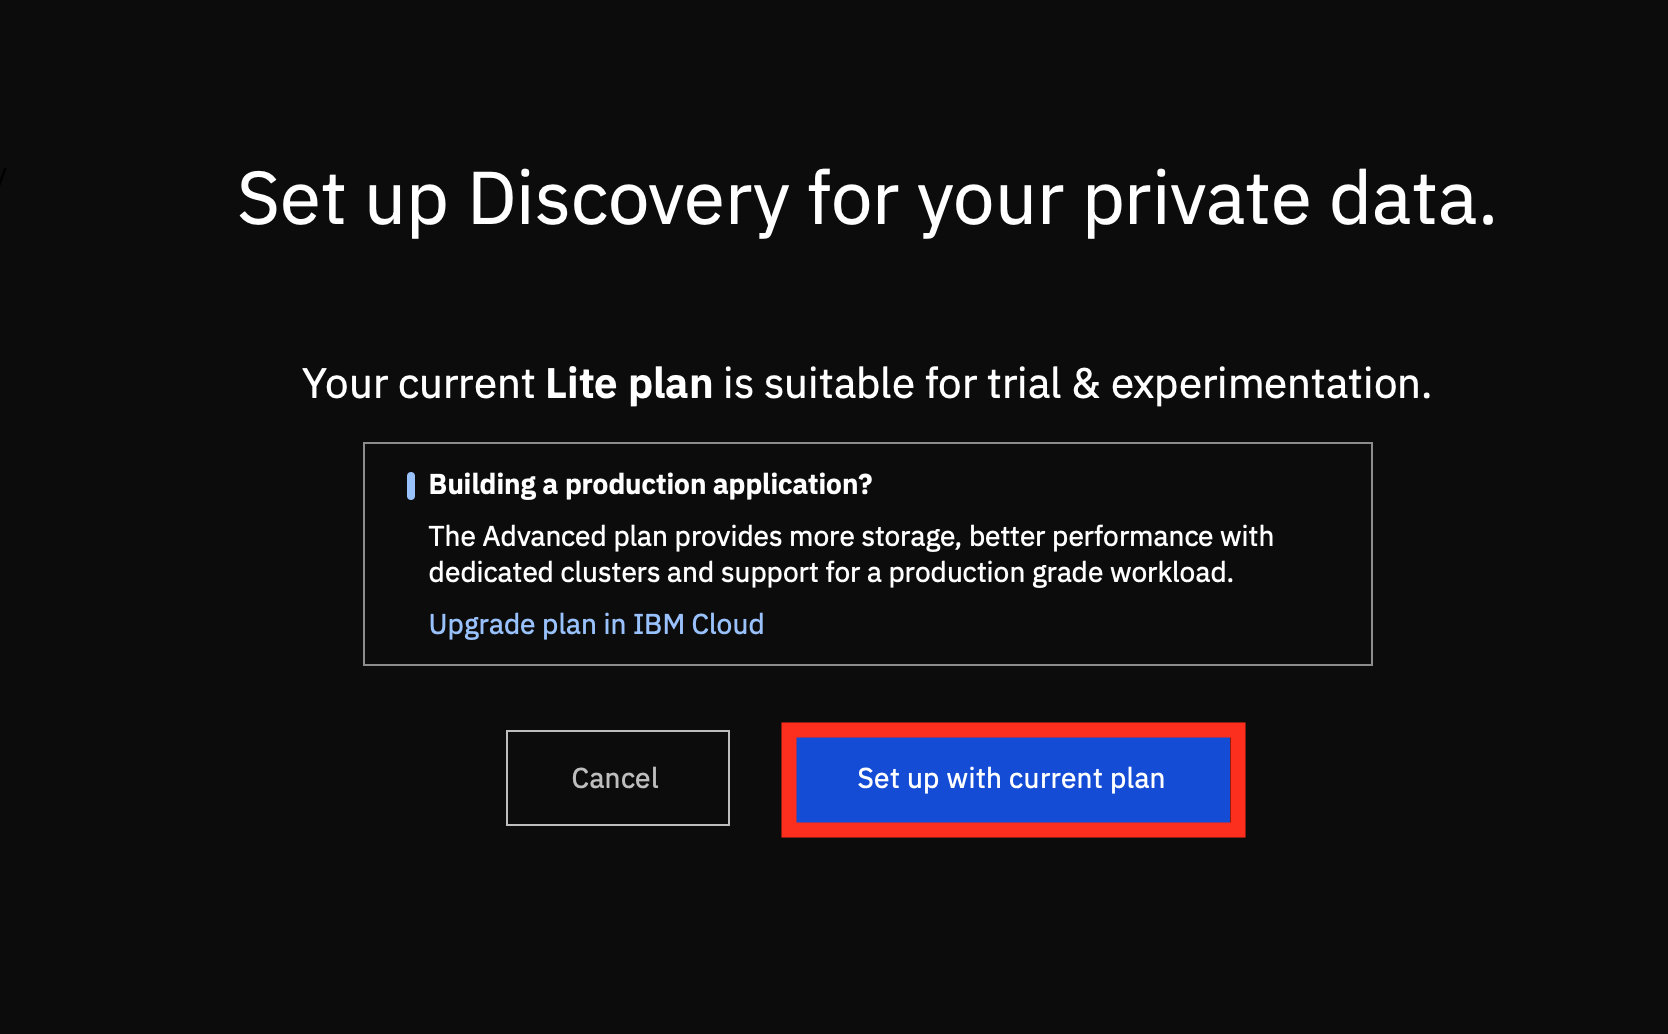
You will be prompted to upgrade to the Advance plan, but for this exercise, you only need the Lite plan, so you could Set up with the current plan.
Since we are creating a collection for our documents, you can give your collection a name, and set the language of your documents to English.

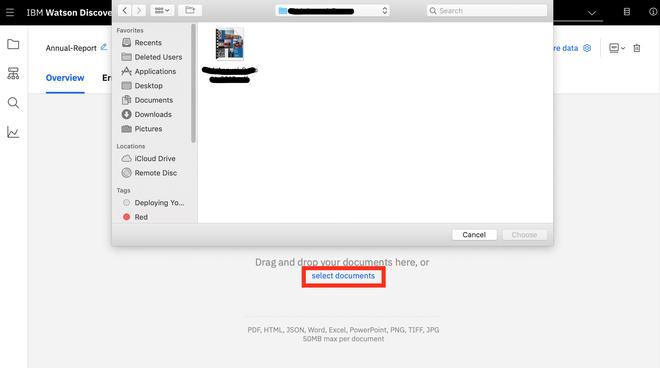
Step 9: Uploading your Documents: Click on the select document and choose your document.
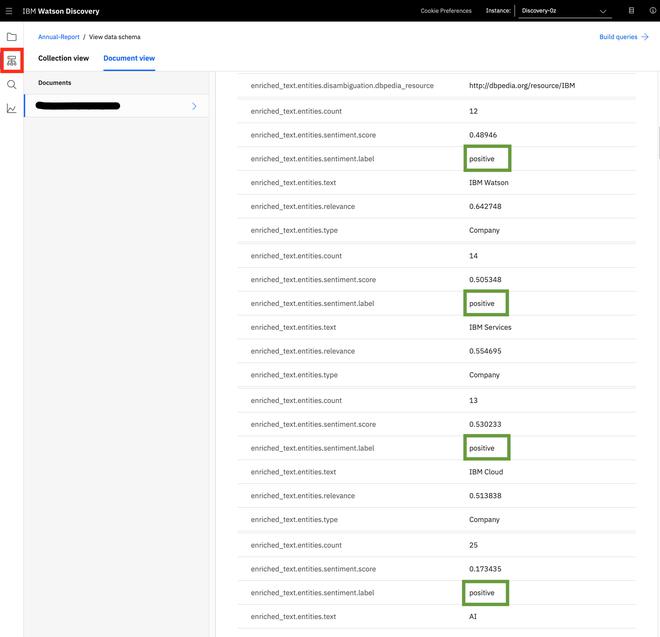
Step 10: Analyzing your Document: After your document has finished processing, click on the Schema tag highlighted by the red box, and click on the document view. As you scroll down you can see the sentiment level of each entity. In this case, it is positive for IBM Watson, IBM Services, IBM Cloud, and AI. So this tool has improved my workflow by providing me the sentiment for IBM Watson, IBM Services, and IBM Cloud without someone reading through the whole document.
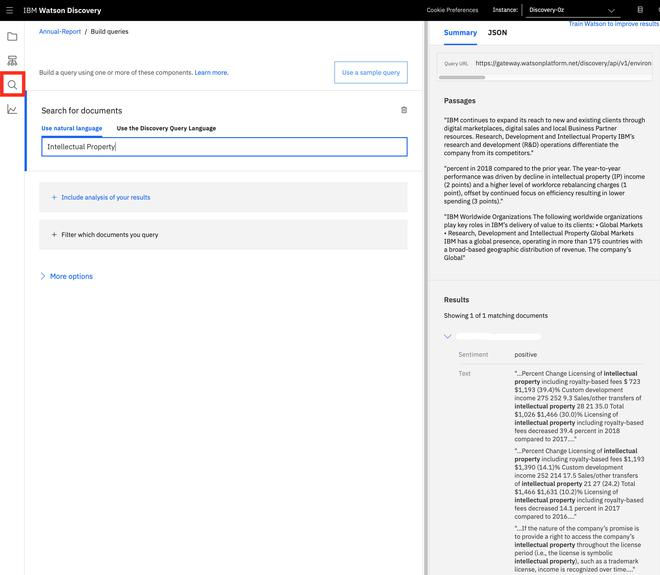
Step 11: Querying your Document: You can also extract important information from your document by using keywords. Click on the Search tab, and enter your keywords in the Search for documents section. In this case, we are searching for Intellectual Property, Watson Discovery has returned the result for “Intellectual Property” in our document on the bottom right corner.
Now you have learned how to analyze any amount of documents easily and very quickly using the IBM Watson Discovery service.
Share your thoughts in the comments
Please Login to comment...