Working on Git for GUI
Last Updated :
21 Apr, 2020
Git has its native environment within the terminal. All the new features are updated first at the command line, and only there is the full power of Git. But plain text isn’t the simplest choice for all tasks; sometimes some users are much more comfortable with a point-and-click interface, a visual representation is what they need.
Note: There’s nothing these graphical clients can do that the command-line client can’t; the command-line is still where you’ll have the most power and control when working with your repositories.
Working with GUI
Git GUI is Tcl/Tk based graphical user interface to Git. It focuses on allowing users to make changes to their repository by making new commits, amending existing ones, creating branches, performing local merges, and fetching/pushing to remote repositories.
The first thing we need to do is install Git on Windows; you can do so with the following steps:
Step 1: Download and install the latest version of Git for Windows.
Step 2: Use the default options for each step in the installation.
Step 3: Remove Git Bash Desktop Icon.
Step 4: Go to Start > All Programs > Git > Git GUI and make a Desktop Shortcut.
Getting started with Git GUI
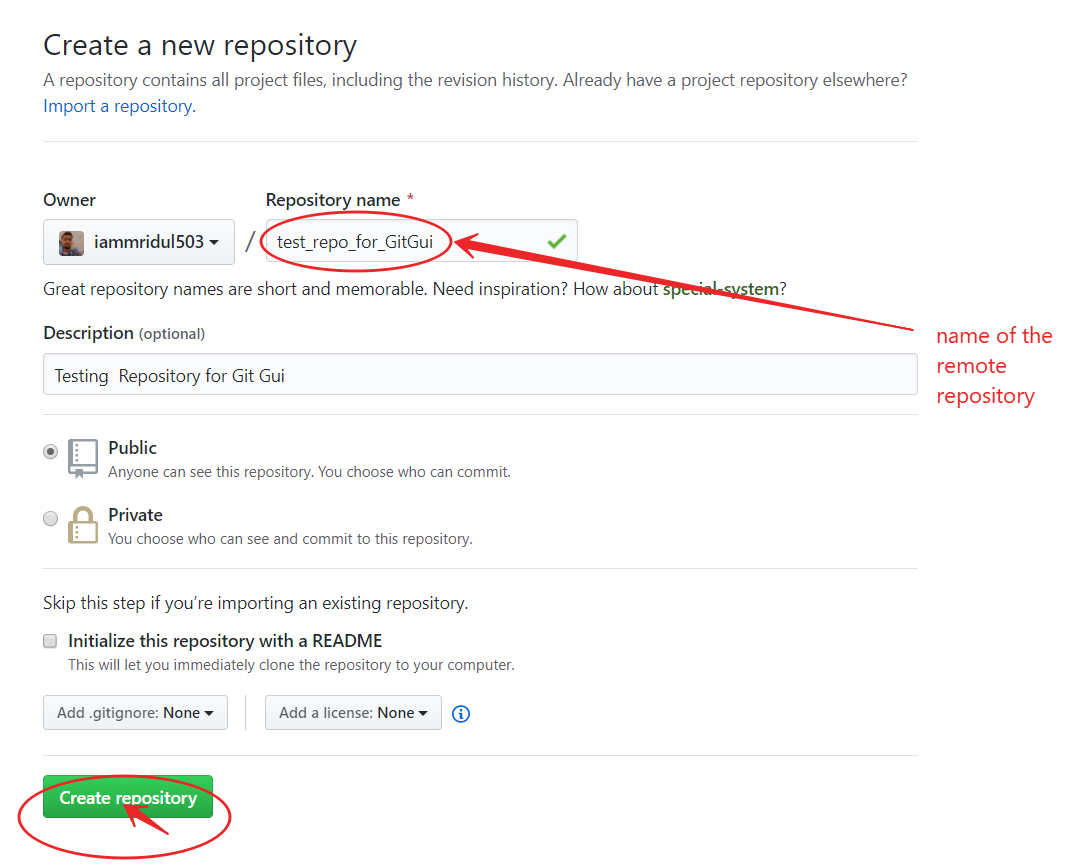
Step 1: Create Remote Repository
Now, we need a Git repository, and we’ll create a new remote repository on Github.
Step 2: Create a Local Repository
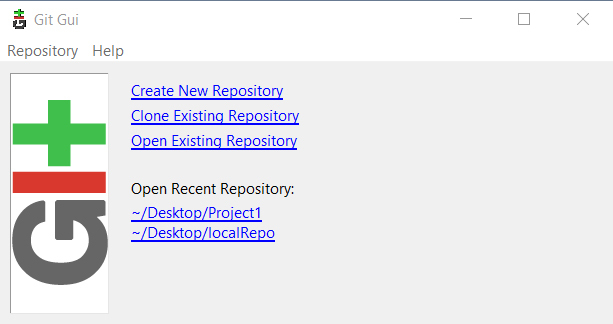
For creating a local repository: in our Git GUI, click on “Create New Repository”.
Select the location you wish to store your repository in. It is important to note that the selected repository location
MUST NOT exist.
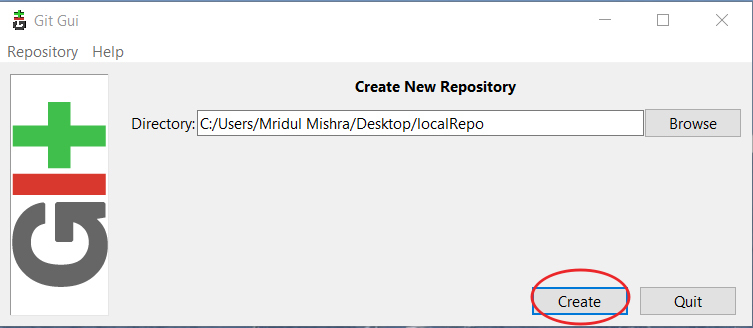
In order for this new repository to be initialized, you must first create a file, any file, in your local repo.Then, you must Commit and Push to the remote Git repository location.
Step 3: Clone a Remote Repository to a Local Repository
In order to clone a repository, click on the “Clone Existing Repository” link in the Git GUI window. An existing repository is one that is already initialized and/or has commits pushed to it.
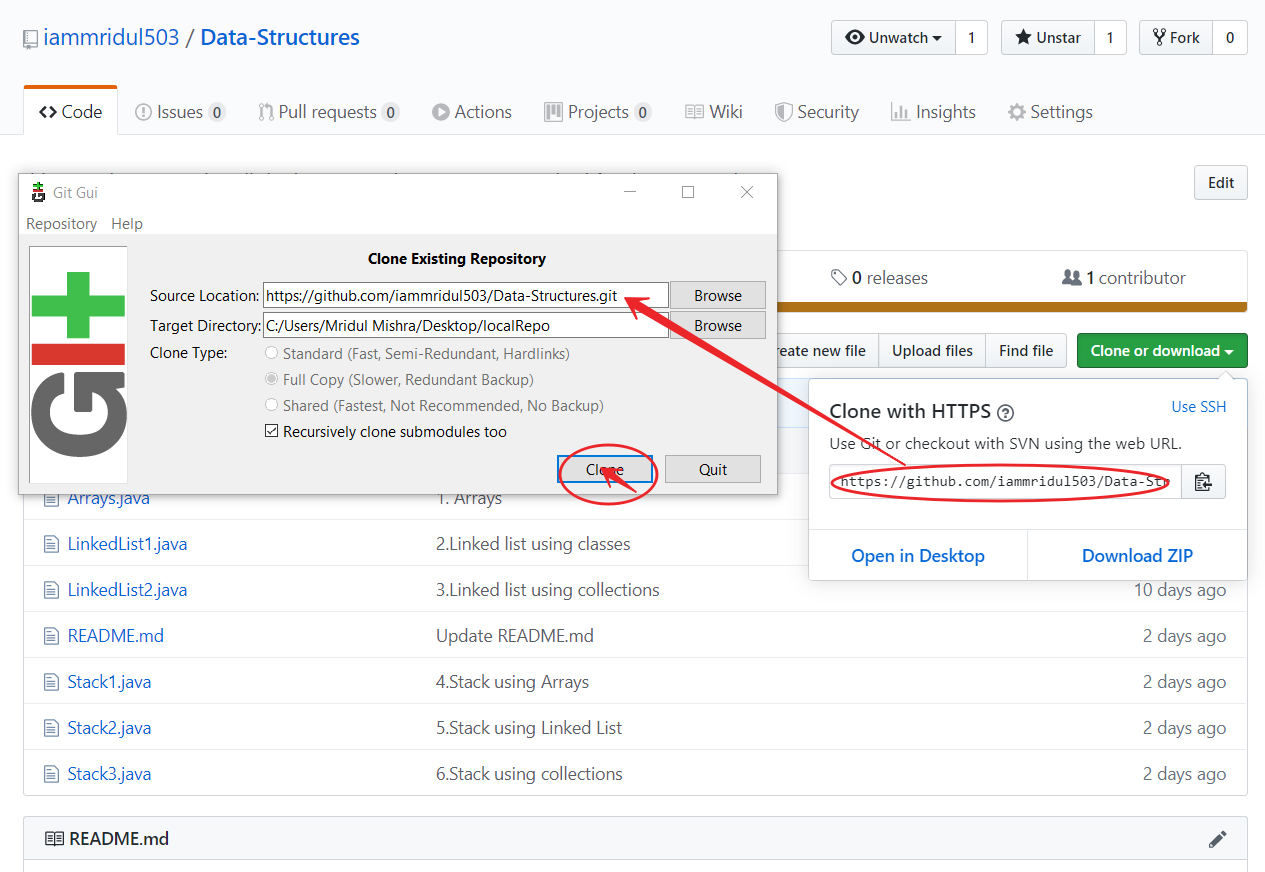
Note: In the Source Location field, fill in the Git remote repository location. The target directory works as same in the case of creating a local repository. Git will attempt to create it, and it will fail if it already exists.
Working with the GUI Client
The Git GUI makes it easier to perform Git-related tasks, such as staging changes, commits, and pushes.
Staged Changes
When we move files to a Git directory, you will see all the files in the “Unstaged Changes” window. This basically means that new files have been added, removed, updated, etc. When we click the “Stage Changed” button, it will attempt to add all the new files to the Git index.

Git Equivalent Command:
git add file_name
git status
Commits
After we’ve staged your changes, we need to commit them to your local repository. Type a Commit Message that makes sense to the changes that were made. When we are done, press the Commit button.
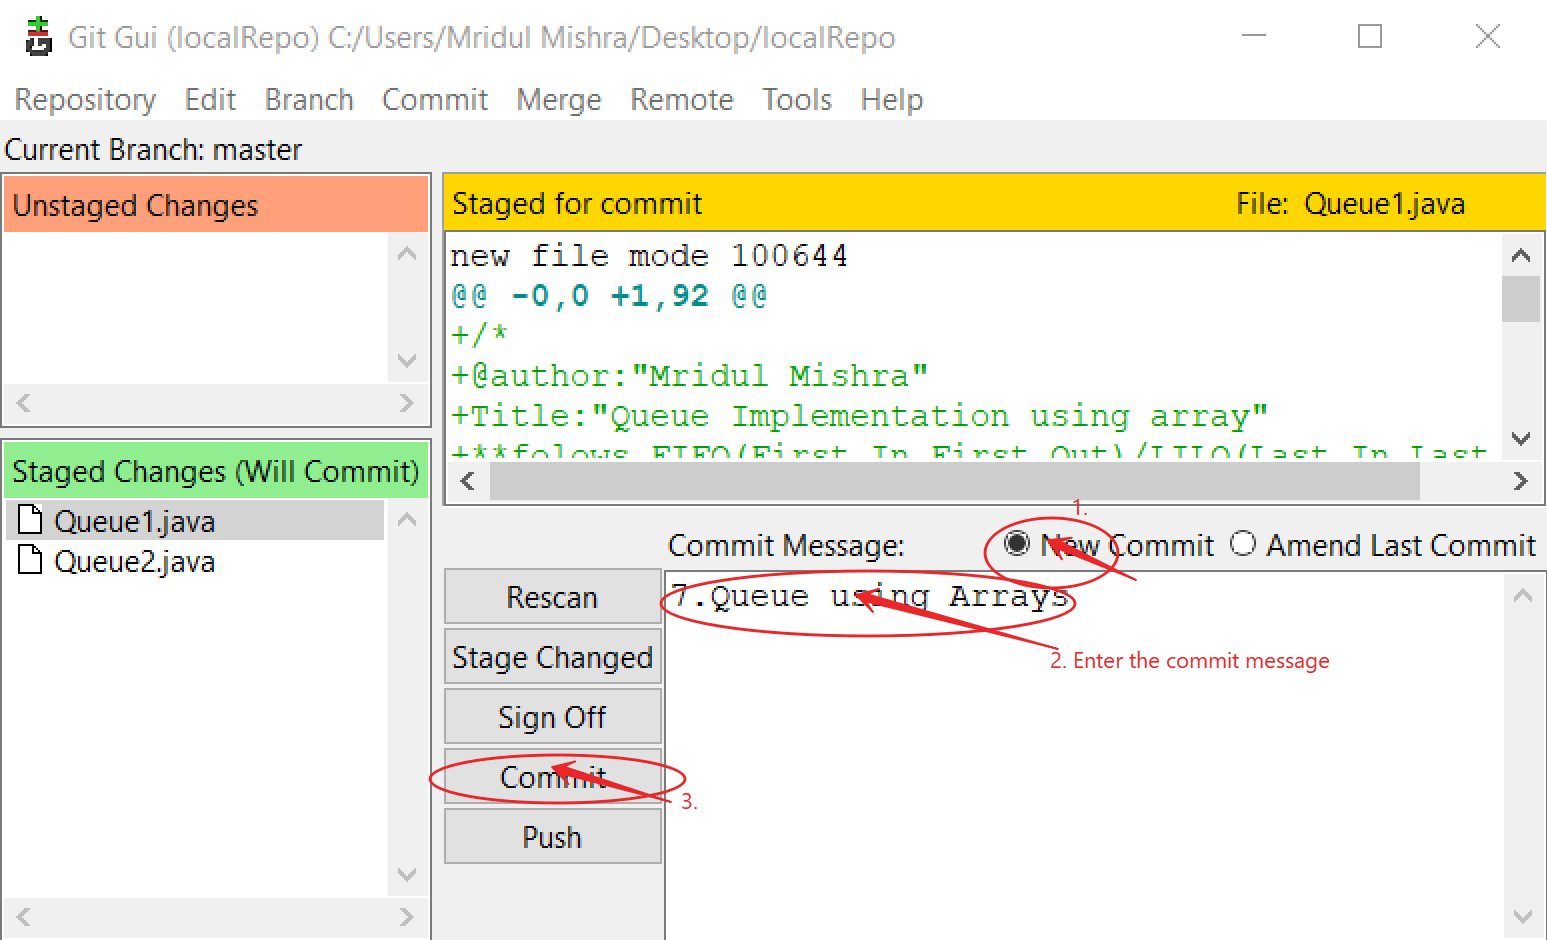
Git Equivalent Command:
git commit -m "message"
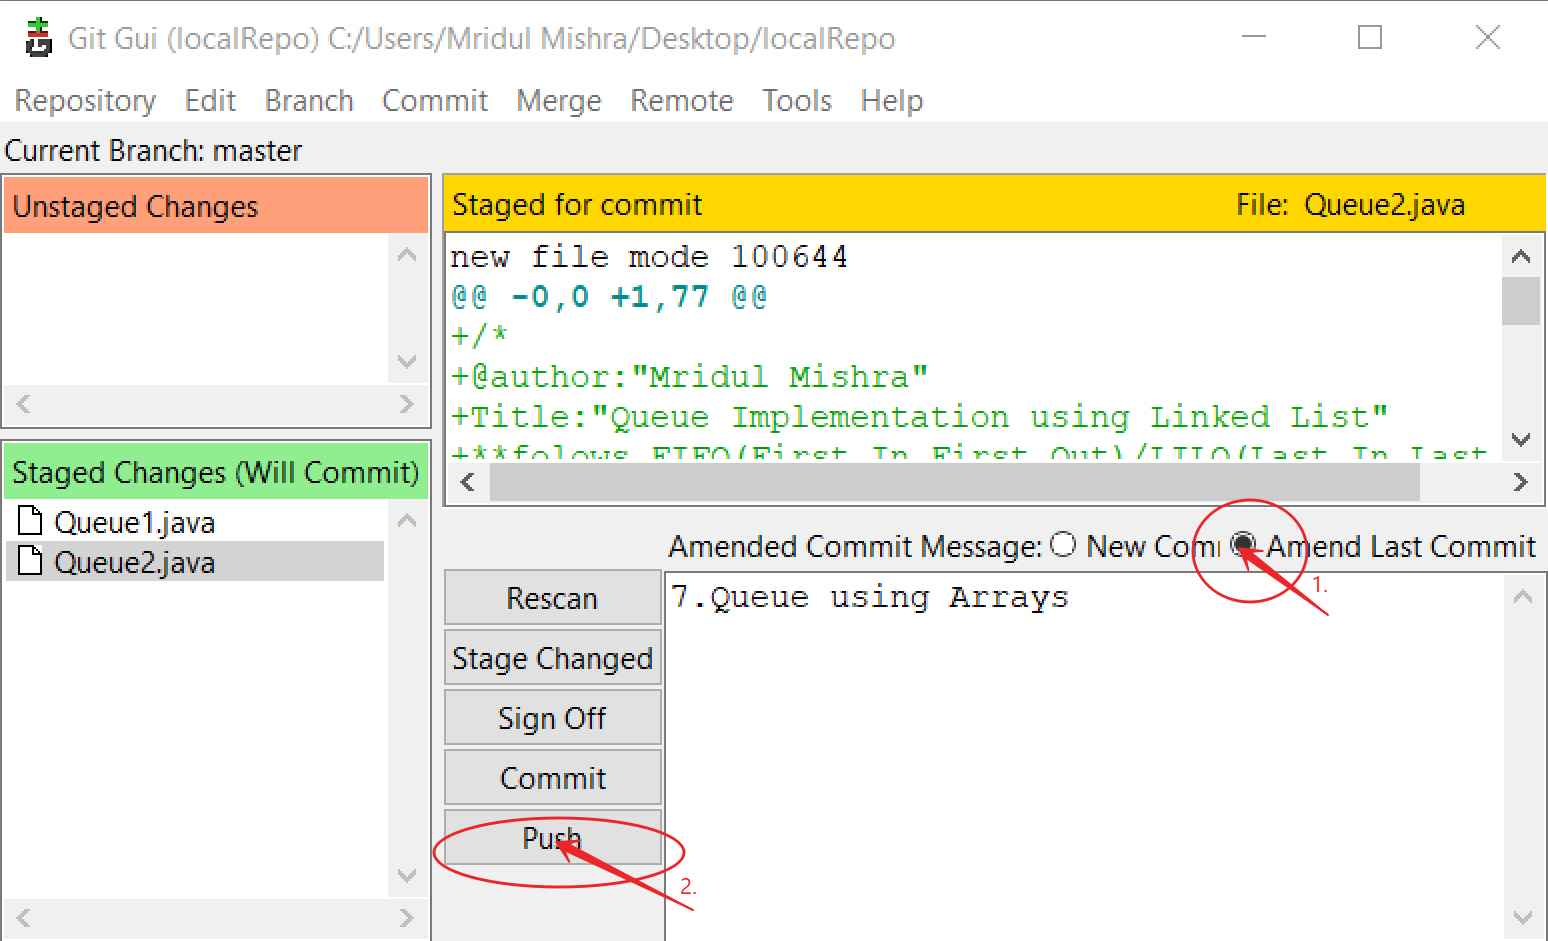
Pushing
After we have committed all the codes in the local repository, we need to push these changes to our remote repository on GitHub. Without pushing the changes, others would not be able to access the code.
Before we can proceed to push, we need set up a location to push to. Most folks refer to this location as “origin”. In Git, “origin” is a shorthand name for the remote repository that a project was originally cloned from. More precisely, it is used instead of that original repository’s URL – and thereby makes referencing much easier.
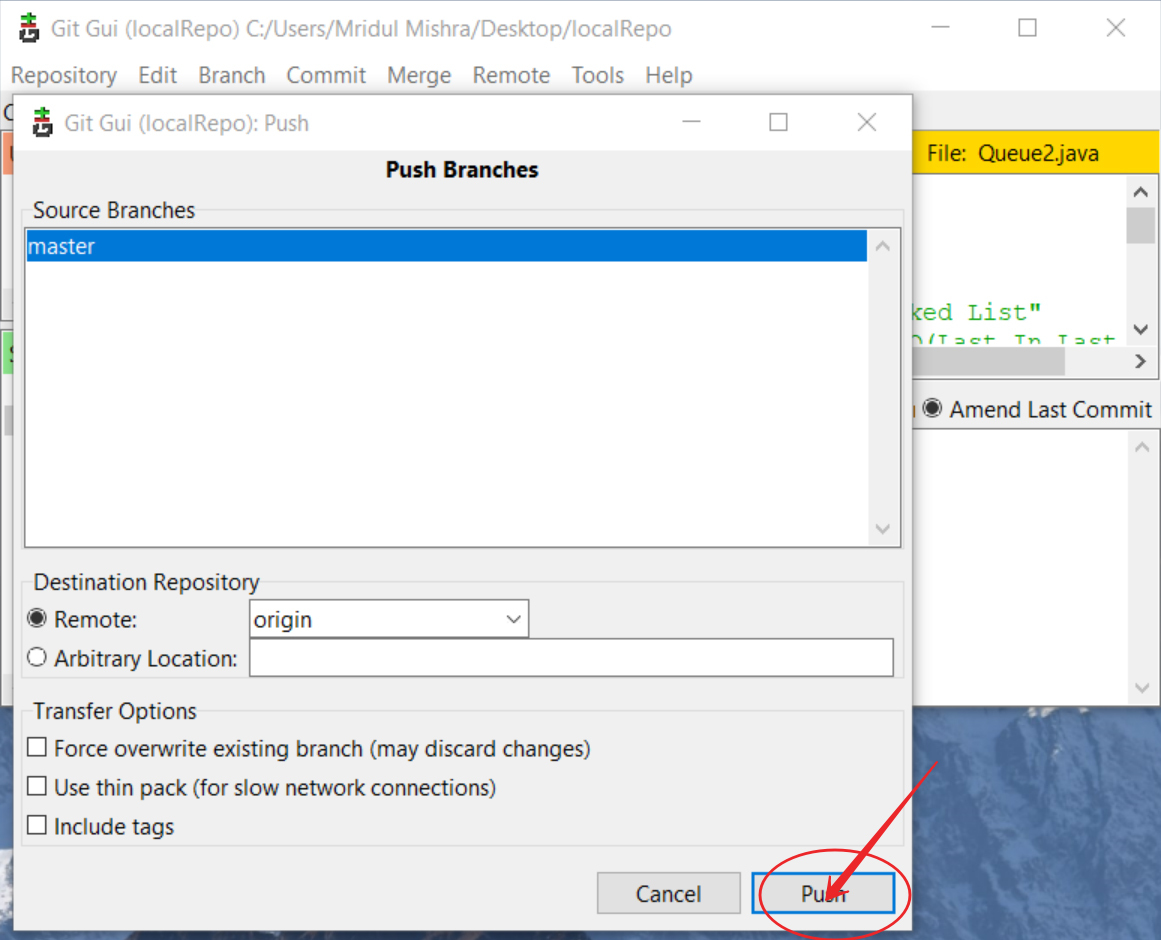

Git Equivalent Command:
git push -u origin master
This way GUI makes it a lot easier to work with GIT for the users that do not prefer the command line.
Share your thoughts in the comments
Please Login to comment...