What is the difference between null=True and blank=True in Django?
Last Updated :
25 Sep, 2023
When working with Django models, you may come across two common field options: null=True and blank=True. While they may seem similar at first glance, they serve distinct purposes and have a significant impact on how data is stored and validated in your application.
Difference between null=True and blank=True in Django
Understanding the difference between null=True and blank=True is crucial when working with Django models. null=True pertains to the database schema, allowing for NULL values in the database, while blank=True is related to form validation, enabling fields to be left empty in form submissions.
Use Cases for null=True
- Optional Fields: Use null=True for fields that are not required for all instances of the models. For example, a user’s middle name is optional, so you might set null=True for a middle_name field.
- Database-level Constraints: When you need to enforce database-level constraints that allow for missing data, such as foreign keys that reference optional records, you can use null=True.
Use Cases for blank=True
- Optional Form Fields: Use blank=True when you want to allow users to leave certain form fields empty. For example, a blog post’s introductory title might be optional, so you’d set blank=True for the title field.
- Custom Form Validation: If you plan to implement custom validation logic for a field, blank=True can be useful in cases where you want to allow empty values but still perform additional validation checks.
Setting up the Project
To install Django follow these steps.
Step 1: First make a project with the name ‘mini’ by using the command :
Django-admin startproject mini
cd mini
Step 2: Create an application named ‘mini’ by using the command :
python3 manage.py startapp mini
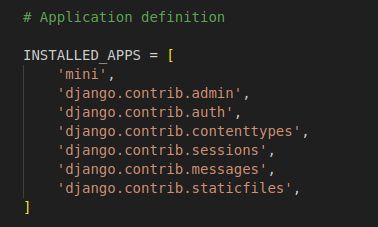
Register your app in setting.py
Step3 : Creating all the necessary Files
mini/model.py: These fields define the structure of the “UserProfile” model, which can be used to store information about user profiles in a Django application.
Python3
from django.db import models
class UserProfile(models.Model):
first_name = models.CharField(max_length=50, null=True, blank=True)
last_name = models.CharField(max_length=50, null=True)
email = models.EmailField(null=False, blank=True)
birthdate = models.DateField(null=False)
|
mini/forms.py: This form can be used in Django views to handle user input and create or update UserProfile instances with the data submitted through the form.
Python3
from django import forms
from .models import UserProfile
class UserProfileForm(forms.ModelForm):
class Meta:
model = UserProfile
fields = '__all__'
|
mini/views.py: Create views for displaying and handling the user profile form in views.py. In this example:
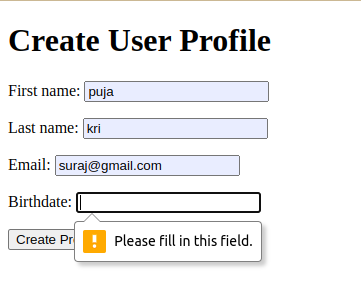
- first_name can be empty in both the database and forms because it has both null=True and blank=True.
- last_name can be empty in the database but is required in forms because it has null=True (for the database) but does not have blank=True (for forms).
- email cannot be empty in the database but is optional in forms because it has null=False (for the database) but has blank=True (for forms).
- birthdate cannot be empty in both the database and forms because it has neither null=True nor blank=True.
Python3
from django.shortcuts import render, redirect
from .models import UserProfile
from .forms import UserProfileForm
def create_user_profile(request):
if request.method == 'POST':
form = UserProfileForm(request.POST)
if form.is_valid():
form.save()
return redirect('user_profile_list')
else:
form = UserProfileForm()
return render(request, 'myapp/create_user_profile.html', {'form': form})
def user_profile_list(request):
profiles = UserProfile.objects.all()
return render(request, 'myapp/user_profile_list.html', {'profiles': profiles})
|
mini/urls.py: Define URLs for your views in urls.py
Python3
from django.urls import path
from . import views
urlpatterns = [
path('create/', views.create_user_profile, name='create_user_profile'),
path('list/', views.user_profile_list, name='user_profile_list'),
]
|
Setting up GUI
template/create_user_profile.html: This is a short HTML template for creating a user profile page with a form.
HTML
<!DOCTYPE html>
<html>
<head>
<title>Create User Profile</title>
</head>
<body>
<h1>Create User Profile</h1>
<form method="post">
{% csrf_token %}
{{ form.as_p }}
<input type="submit" value="Create Profile">
</form>
</body>
</html>
|
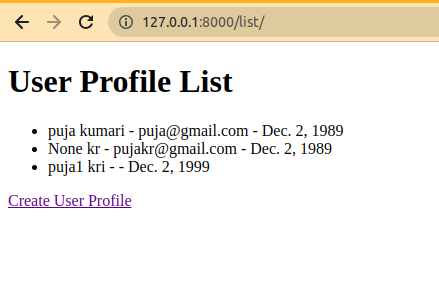
trmplate/user_profile_list.html: This HTML template is designed to display a list of user profiles with their information and provide a link to create a new user profile.
HTML
<!DOCTYPE html>
<html>
<head>
<title>User Profile List</title>
</head>
<body>
<h1>User Profile List</h1>
<ul>
{% for profile in profiles %}
<li>{{ profile.first_name }} {{ profile.last_name }} - {{ profile.email }} - {{ profile.birthdate }}</li>
{% endfor %}
</ul>
<a href="{% url 'create_user_profile' %}">Create User Profile</a>
</body>
</html>
|
Applying Migrations
Run these commands to apply the migrations:
python3 manage.py makemigrations
python3 manage.py migrate
Deployement of the project
Run the server with the help of following command:
python3 manage.py runserver
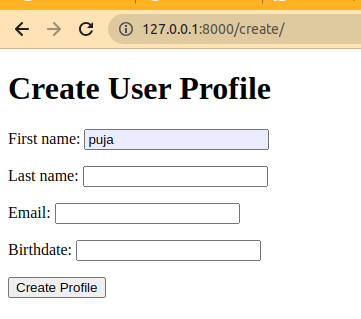
Output:
Remember to migrate your Django application after defining the model to update the database schema accordingly. You can do this using the makemigrations and migrate commands:
Share your thoughts in the comments
Please Login to comment...