Struts 2 File Upload Example
Last Updated :
08 Feb, 2024
The Struts 2 framework has built-in functionality for handling file uploads via “Form-based File Upload in HTML”. When a file is uploaded, it is normally kept in a temporary directory, and your Action class should process or relocate it to a permanent location to prevent data loss. File uploading is possible in Struts using a pre-defined interceptor named FileUploadInterceptor, which is available through the org.apache.struts2.interceptor.FileUploadInterceptor class and is included in the default stack. Example of action mapping:
<action name="doUpload" class="com.example.UploadAction">
    <result name="success">good_result.jsp</result>
</action>
Parameters of fileupload Interceptor
- allowedTypes: Lists the permitted types. Image/png, image/jpg, etc. might be used.
- maximumSize: Indicates the largest file size that may be submitted.
- allowedExtensions: A comma-separated list of file extensions (for example,.html) for which the interceptor will allow a file reference to be specified on the action. If none is supplied, enable all extensions to be uploaded.
Struts 2 File Upload Example
1. Create View Files
This JavaScript website uses struts UI tags to generate a form. The user sends it a file.
XML
<%@ page language = "java" contentType = "text/html; charset = ISO-8857-1"
pageEncoding = "ISO-8857-1"%>
<%@ taglib prefix = "s" uri = "/struts-tags"%>
<!DOCTYPE html PUBLIC "-//W3C//DTD HTML 4.01.1 Transitional//EN"
<html>
<head>
<title>Struct 2 File Upload</title>
</head>
<body>
<form action = "upload" method = "post" enctype = "multipart/form-data">
<label for = "myFile">Upload your file</label>
<input type = "file" name = "myFile" />
<input type = "submit" value = "Upload"/>
</form>
</body>
</html>
|
2. Make the SuccessUserImage.jsp file
Built with Struts UI tags, this website offers a user-friendly form for you to submit your name, password, and email address.
XML
<%@ page contentType="text/html; charset=UTF-8"%><%@ taglib prefix="s"
uri="/struts-tags"%>
<html>
<head>
<title>Success: Upload User Image</title>
</head>
<body>
<h2>
Struts 2 File Upload
</h2>
User Image: <s:property value="userImage" /><br/>
Content Type:<s:property value="userImageContentType" /><br/>
File Name: <s:property value="userImageFileName" /><br/>
Uploaded Image: <img src="userimages/<s:property value="userImageFileName"/>"
width="150" height="120" />
</body>
</html>
|
3. Make the action class
The execute function is overridden by this action class, which derives from the ActionSupport class.
Java
package org.geeksforgeeks.struts2;
import java.io.File;
import org.apache.commons.io.FileUtils;
import java.io.IOException;
import com.opensymphony.xwork2.ActionSupport;
public class uploadFile extends ActionSupport {
private File myFile;
private String myFileContentType;
private String myFileFileName;
private String destPath;
public String execute() {
destPath = "C:/apache-tomcat-6.1.37/work/";
try {
System.out.println("Src File name: " + myFile);
System.out.println("Dst File name: " + myFileFileName);
File destFile = new File(destPath, myFileFileName);
FileUtils.copyFile(myFile, destFile);
} catch(IOException e) {
e.printStackTrace();
return ERROR;
}
return SUCCESS;
}
public File getMyFile() {
return myFile;
}
public void setMyFile(File myFile) {
this.myFile = myFile;
}
public String getMyFileContentType() {
return myFileContentType;
}
public void setMyFileContentType(String myFileContentType) {
this.myFileContentType = myFileContentType;
}
public String getMyFileFileName() {
return myFileFileName;
}
public void setMyFileFileName(String myFileFileName) {
this.myFileFileName = myFileFileName;
}
}
|
4. Create struts.xml
This XML defines an interceptor named “jsonValidatorWorkflowStack” and associates it with the “input” result.
XML
<!DOCTYPE struts PUBLIC
"-//Apache Software Foundation//DTD Struts Configuration 2.0.1//EN"
<struts>
<package name="fileUploadPackage" extends="struts-default">
<action name="userImage" class="com.geeksforgeeks.FileUploadAction">
<interceptor-ref name="fileUpload">
<param name="maximumSize">2097147</param>
<param name="allowedTypes">
image/png,image/gif,image/jpeg,image/pjpeg
</param>
</interceptor-ref>
<interceptor-ref name="defaultStack"></interceptor-ref>
<result name="success">SuccessUserImage.jsp</result>
<result name="input">UserImage.jsp</result>
</action>
</package>
</struts>
|
Output:
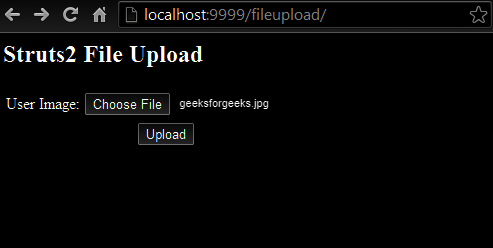
.jpg)
Conclusion
So this is Struts 2 File Upload Example. The Struts 2 framework has built-in functionality for handling file uploads via “Form-based File Upload in HTML”. When a file is uploaded, it is normally kept in a temporary directory, and your Action class should process or relocate it to a permanent location to prevent data loss.
Share your thoughts in the comments
Please Login to comment...