Spring WebFlux Testing
Last Updated :
17 Mar, 2024
In Spring Boot, Spring WebFlux is the reactive programming framework that can provide support for the building of asynchronous, non-blocking, and event-driven applications when it comes to testing in the spring WebFlux.
Key Terminologies:
- Unit Testing: It can involve testing individual components of the application. In Spring WebFlux, this might include testing individual handlers, controllers, and services using mocking frameworks like Mockito or using the built-in utilities provided by Spring.
- Integration Testing: It can involve testing for the interactions between the different components of the application. In the spring WebFlux, WebFlux can involve testing the interaction between controllers, services, and repositories possibly using an embedded database or the other infrastructure components.
- WebTestClient: It is the testing utility provided by the spring WebFlux for testing web applications and it can allow us to perform HTTP requests against the application and verify the responses. We can use it to test both functional and reactive endpoints.
- MockServer: This is the library that can allow the mock HTTP servers for testing purposes, and it can be used to mock the external dependencies or the services that the application interacts with over HTTP.
- SpringBootTest: This is an annotation that can be provided by Spring Boot for the integration testing, and it can allow the bootstrap to the entire application context and perform the end-to-end tests on the application.
- @WebFluxTest: This is an annotation that can be provided by the spring Boot for the testing Spring WebFlux applications, and it can be used to the test individuals web components such as the controllers and handlers by the auto configuration only the relevant parts of the application context.
Some Important Testing related annotations:
- @RunWith: It can be used at the class level to the specify the spring Runner and which is responisible for the executing the tests within the Spring context and it can enable the integration of the spring TestContext Framework with JUnit 4.
- @SpringBootTest: It can be used to the specify that the test should loads the entire the spring application and it can be used to the perform the integration testing by the bootstrapping the application context and the executing the tests against it.
- @WebFluxTest: It can be used to the specify that the test should only the load the relevant parts of the spring application context required the testing a webflux controller and it can be used to the perform the focused the testing of web components without loading the entire applications.
- @MockBean: It is used to the mock to the bean of the particular type in the Spring application and it can creates the partial mock of the bean that can allowing the retain the original behavior or the bean while selectively the mocking certain methods.
- @Test: It is used to the mark the method as a test method and it is used in the conjunction with the testing frameworks like JUnit to the indicate the methods should be executing the tests.
- @Before, @BeforeEach: These are used to the specify the methods that should be the executed before the each methods. It is used for the setting the up preconditions require for the tests.
- @After, @AfterEach: This is used to the specify the methods that should be the executed after each method and it can typically use for the cleaning up the resource or the resetting the state after the tests.
Example Project:
Step 1: Create the spring project using spring initializer and it named as spring-webflux-testing-demo on creating the project adding the below dependencies into the project.
Dependencies:
- Spring Reactive Web
- Spring Data Reactive MongoDB
- Lombok
- Spring Dev tools
Once create the spring project then the file structure looks like the below image.

Step 2: Create the new package and it named as model in that package create the new java class and it named as the User.
Go to src > main > java > com.gfg.springwebfluxtestingdemo > model > User and put the below code.
Java
package com.gfg.springwebfluxtestingdemo.model;
import lombok.AllArgsConstructor;
import lombok.Data;
import lombok.NoArgsConstructor;
import org.springframework.data.annotation.Id;
@Data
@AllArgsConstructor
@NoArgsConstructor
public class User {
@Id
private String id;
private String name;
private int age;
}
|
Step 3: Create the new package named repository in that package create the new Java interface named UserRepository.
Go to src > main > java > com.gfg.springwebfluxtestingdemo > repository > UserRepository and put the below code.
Java
package com.gfg.springwebfluxtestingdemo.repository;
import com.gfg.springwebfluxtestingdemo.model.User;
import org.springframework.data.repository.reactive.ReactiveCrudRepository;
import org.springframework.stereotype.Repository;
import reactor.core.publisher.Flux;
import reactor.core.publisher.Mono;
@Repository
public interface UserRepository extends ReactiveCrudRepository<User, String> {
Mono<User> findById(String id);
Flux<User> findAll();
Mono<Void> save(User user);
}
|
Step 4: Create the new package and it named as service in that package create the new java class and it named as UserService .
Go to src > main > java > com.gfg.springwebfluxtestingdemo > service> UserService and put the below code.
Java
package com.gfg.springwebfluxtestingdemo.service;
import com.gfg.springwebfluxtestingdemo.model.User;
import org.springframework.stereotype.Service;
import reactor.core.publisher.Flux;
import reactor.core.publisher.Mono;
@Service
public interface UserService {
Mono<User> getUserById(String id);
Flux<User> getAllUsers();
Mono<Void> saveUser(User user);
}
|
Step 5: Create the new package and it named as service in that package create the new java class and it named as UserServiceImpl .
Go to src > main > java > com.gfg.springwebfluxtestingdemo > service> UserServiceImpl and put the below code.
Java
package com.gfg.springwebfluxtestingdemo.service;
import com.gfg.springwebfluxtestingdemo.model.User;
import com.gfg.springwebfluxtestingdemo.repository.UserRepository;
import lombok.RequiredArgsConstructor;
import org.springframework.stereotype.Service;
import reactor.core.publisher.Flux;
import reactor.core.publisher.Mono;
@Service
@RequiredArgsConstructor
public class UserServiceImpl implements UserService {
private final UserRepository userRepository;
@Override
public Mono<User> getUserById(String id) {
return userRepository.findById(id);
}
@Override
public Flux<User> getAllUsers() {
return userRepository.findAll();
}
@Override
public Mono<Void> saveUser(User user) {
return userRepository.save(user);
}
}
|
Step 6: Create the new package and it named as controller in that package create the new java class and it named as UserController.
Go to src > main > java > com.gfg.springwebfluxtestingdemo > controller > UserController and put the below code.
Java
package com.gfg.springwebfluxtestingdemo.controller;
import com.gfg.springwebfluxtestingdemo.model.User;
import com.gfg.springwebfluxtestingdemo.service.UserService;
import lombok.RequiredArgsConstructor;
import org.springframework.http.HttpStatus;
import org.springframework.web.bind.annotation.*;
import reactor.core.publisher.Flux;
import reactor.core.publisher.Mono;
@RestController
@RequiredArgsConstructor
public class UserController {
private final UserService userService;
@GetMapping("/users/{id}")
public Mono<User> getUserById(@PathVariable String id) {
return userService.getUserById(id);
}
@GetMapping("/users")
public Flux<User> getAllUsers() {
return userService.getAllUsers();
}
@PostMapping("/users")
@ResponseStatus(HttpStatus.CREATED)
public Mono<Void> saveUser(@RequestBody User user) {
return userService.saveUser(user);
}
}
|
Step 7: Open the main class file and add the @EnableReactiveMongoRepositories annotation into it.
Java
package com.gfg.springwebfluxtestingdemo;
import org.springframework.boot.SpringApplication;
import org.springframework.boot.autoconfigure.SpringBootApplication;
import org.springframework.data.mongodb.repository.config.EnableReactiveMongoRepositories;
@SpringBootApplication
@EnableReactiveMongoRepositories
public class SpringWebfluxTestingDemoApplication {
public static void main(String[] args) {
SpringApplication.run(SpringWebfluxTestingDemoApplication.class, args);
}
}
|
Step 8: Create the new package and it named as controller in that package create the new java class and it named as UserControllerTest.
Go to src > test > java > com.gfg.springwebfluxtestingdemo > controller > UserControllerTest and put the below code.
Java
package com.gfg.springwebfluxtestingdemo.controller;
import com.gfg.springwebfluxtestingdemo.model.User;
import com.gfg.springwebfluxtestingdemo.service.UserService;
import org.junit.jupiter.api.BeforeEach;
import org.junit.jupiter.api.Test;
import org.springframework.http.MediaType;
import org.springframework.test.web.reactive.server.WebTestClient;
import reactor.core.publisher.Flux;
import reactor.core.publisher.Mono;
import static org.mockito.Mockito.mock;
import static org.mockito.Mockito.when;
class UserControllerTest {
private WebTestClient webTestClient;
private UserService userService;
@BeforeEach
void setUp() {
userService = mock(UserService.class);
webTestClient = WebTestClient.bindToController(new UserController(userService)).build();
}
@Test
void getUserById() {
User user = new User("1", "Sweta", 24);
when(userService.getUserById("1")).thenReturn(Mono.just(user));
webTestClient.get().uri("/users/1")
.exchange()
.expectStatus().isOk()
.expectBody(User.class).isEqualTo(user);
}
@Test
void getAllUsers() {
User user1 = new User("1", "Sweta", 24);
User user2 = new User("2", "Ami", 26);
when(userService.getAllUsers()).thenReturn(Flux.just(user1, user2));
webTestClient.get().uri("/users")
.exchange()
.expectStatus().isOk()
.expectBodyList(User.class).contains(user1, user2);
}
@Test
void saveUser() {
User user = new User("1", "Sweta", 24);
when(userService.saveUser(user)).thenReturn(Mono.empty());
webTestClient.post().uri("/users")
.contentType(MediaType.APPLICATION_JSON)
.body(Mono.just(user), User.class)
.exchange()
.expectStatus().isCreated();
}
}
|
Step 9: Create the new package and it named as service in that package create the new java class and it named as UserServiceTest.
Go to src > test > java > com.gfg.springwebfluxtestingdemo > service > UserServiceTest and put the below code.
Java
package com.gfg.springwebfluxtestingdemo.service;
import com.gfg.springwebfluxtestingdemo.model.User;
import com.gfg.springwebfluxtestingdemo.repository.UserRepository;
import org.junit.jupiter.api.BeforeEach;
import org.junit.jupiter.api.Test;
import reactor.core.publisher.Flux;
import reactor.core.publisher.Mono;
import reactor.test.StepVerifier;
import static org.mockito.Mockito.mock;
import static org.mockito.Mockito.when;
class UserServiceTest {
private UserService userService;
private UserRepository userRepository;
@BeforeEach
void setUp() {
userRepository = mock(UserRepository.class);
userService = new UserServiceImpl(userRepository);
}
@Test
void getUserById() {
User user = new User("1", "Sweta", 24);
when(userRepository.findById("1")).thenReturn(Mono.just(user));
Mono<User> result = userService.getUserById("1");
StepVerifier.create(result)
.expectNext(user)
.verifyComplete();
}
@Test
void getAllUsers() {
User user1 = new User("1", "Sweta", 24);
User user2 = new User("2", "Ami", 26);
when(userRepository.findAll()).thenReturn(Flux.just(user1, user2));
Flux<User> result = userService.getAllUsers();
StepVerifier.create(result)
.expectNext(user1)
.expectNext(user2)
.verifyComplete();
}
@Test
void saveUser() {
User user = new User("1", "Sweta", 24);
when(userRepository.save(user)).thenReturn(Mono.empty());
Mono<Void> result = userService.saveUser(user);
StepVerifier.create(result)
.verifyComplete();
}
}
|
Step 10: Open the test main class and put the below code.
Java
package com.gfg.springwebfluxtestingdemo;
import org.junit.jupiter.api.Test;
import org.springframework.boot.test.context.SpringBootTest;
@SpringBootTest
class SpringWebfluxTestingDemoApplicationTests {
@Test
void contextLoads() {
}
}
|
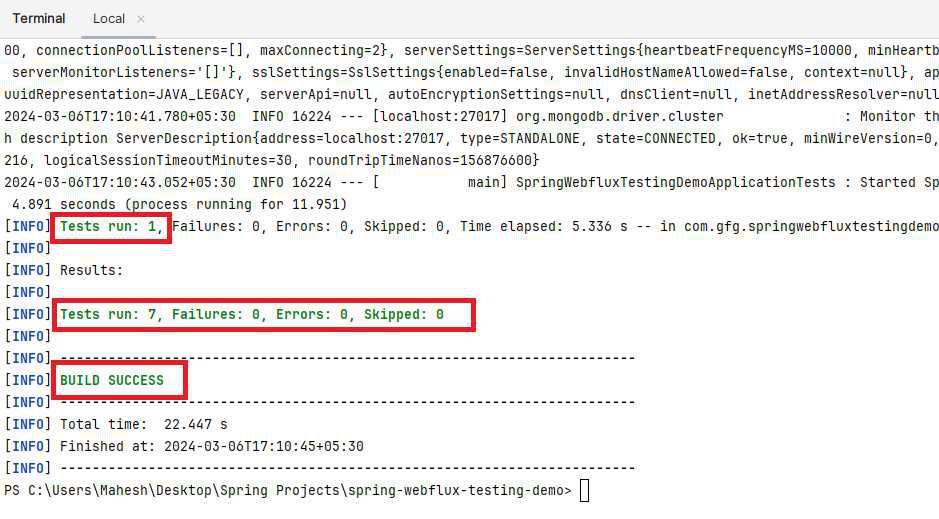
Step 11: Once completed the writing the test cases for the UserController and UserService and run test the cases using the below command:
mvn test
Refer the below image for the better understanding.

Below we can see the all the tests runs and build successfully.
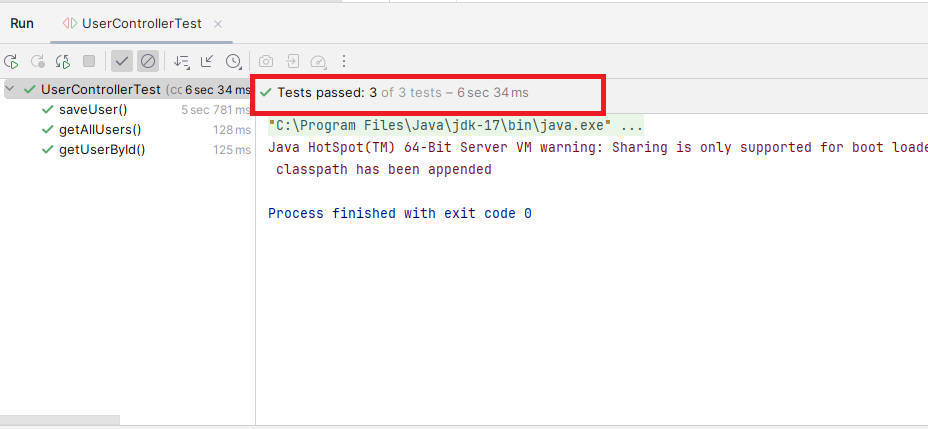
UserControllerTest Test Cases:
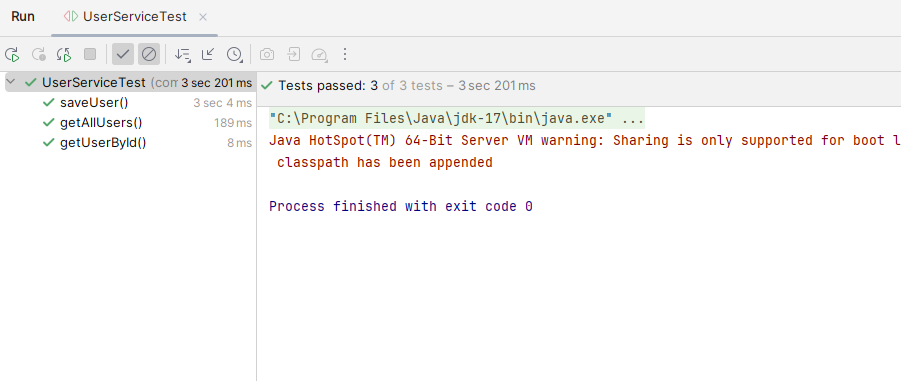
UserServiceTest Test Cases:
If we can follow the above steps, then we can successfully build the Spring WebFlux testing application with CRUD operations of the spring project.
Share your thoughts in the comments
Please Login to comment...