Spring @Lazy Annotation
Last Updated :
05 Apr, 2024
In Spring Framework, the @Lazy annotation can be used to configure the lazy initialization of the beans. By default, Spring initializes all singleton beans eagerly at the application startup. However, in certain scenarios where the bean initialization is resource intensive or not immediately required, lazy initialization improves the application startup time and resource utilization.
Key Terminologies:
- Lazy Initialization: It postpones the creation of the object until it is first requested. This is useful when the object creation is resource-intensive or when the object is not immediately required during the application startup.
- Singleton Beans: These can be the beans for which the single instance is created per the Spring container. By default, all the spring beans are singleton beans unless configured otherwise.
Steps to Implement the @Lazy Annotation
- Step 1: Add @Lazy Annotation: We can add the @Lazy annotation to the bean definition to configure the lazy initialization of the project.
- Step 2: Configure the Application Context: We can ensure that the lazy initialization is enabled in the Spring application context of the configuration.
- Step 3: Use Lazy-initialized Beans: We can inject the lazy-initialized beans into the other components where needed of the Spring project.
Use of @Lazy annotation in a Spring Project
We will develop a simple Spring project with @Lazy Annotations.
Step 1: Create a Spring project using Spring Initializr. After creating successfully, add the necessary dependencies to the project as mentioned below.
Dependencies:
- Spring Web
- Lombok
- Spring Dev Tools
After creation is done, the file structure will look like the below image:

Step 2: Create the new Java package and it named as bean. In that package, create a new Java class named as TimeConsumingBean.
Go to src > main > java > lazydemo > bean > TimeConsumingBean and put the below code.
Java
package org.example.lazydemo.bean;

import jakarta.annotation.PostConstruct;
import org.springframework.context.annotation.Lazy;
import org.springframework.stereotype.Component;

@Component
@Lazy
public class TimeConsumingBean {

    @PostConstruct
    public void init() {
        // Simulate time-consuming initialization
        try {
            Thread.sleep(5000); // Sleep for 5 seconds
        } catch (InterruptedException e) {
            e.printStackTrace();
        }
        System.out.println("Time-consuming bean initialized!");
    }

    public void doSomething() {
        System.out.println("Doing something with time-consuming bean...");
    }
}
Step 3: Create the new Java package and it named as controller. In that package, create a new Java class named as MyController.
Go to src > main > java > lazydemo > controller > MyController and put the below code.
Java
package org.example.lazydemo.controller;

import org.example.lazydemo.bean.TimeConsumingBean;
import org.springframework.beans.factory.annotation.Autowired;
import org.springframework.web.bind.annotation.GetMapping;
import org.springframework.web.bind.annotation.RestController;

@RestController
public class MyController {

    @Autowired
    private TimeConsumingBean timeConsumingBean; // Autowire the TimeConsumingBean

    @GetMapping("/action")
    public String performAction() {
        timeConsumingBean.doSomething(); // Call the doSomething() method of TimeConsumingBean
        return "Action performed!";
    }
}
Step 4: Open the main class of the project and put the below code.
Java
package org.example.lazydemo;

import org.springframework.boot.SpringApplication;
import org.springframework.boot.autoconfigure.SpringBootApplication;

@SpringBootApplication
public class LazyDemoApplication {

    public static void main(String[] args) {
        SpringApplication.run(LazyDemoApplication.class, args);
    }

}
build.gradle:
plugins {
    id 'java'
    id 'org.springframework.boot' version '3.2.4'
    id 'io.spring.dependency-management' version '1.1.4'
}

group = 'org.example'
version = '0.0.1-SNAPSHOT'

java {
    sourceCompatibility = '17'
}

configurations {
    compileOnly {
        extendsFrom annotationProcessor
    }
}

repositories {
    mavenCentral()
}

dependencies {
    implementation 'org.springframework.boot:spring-boot-starter-web'
    compileOnly 'org.projectlombok:lombok'
    developmentOnly 'org.springframework.boot:spring-boot-devtools'
    annotationProcessor 'org.projectlombok:lombok'
    testImplementation 'org.springframework.boot:spring-boot-starter-test'
}

tasks.named('test') {
    useJUnitPlatform()
}
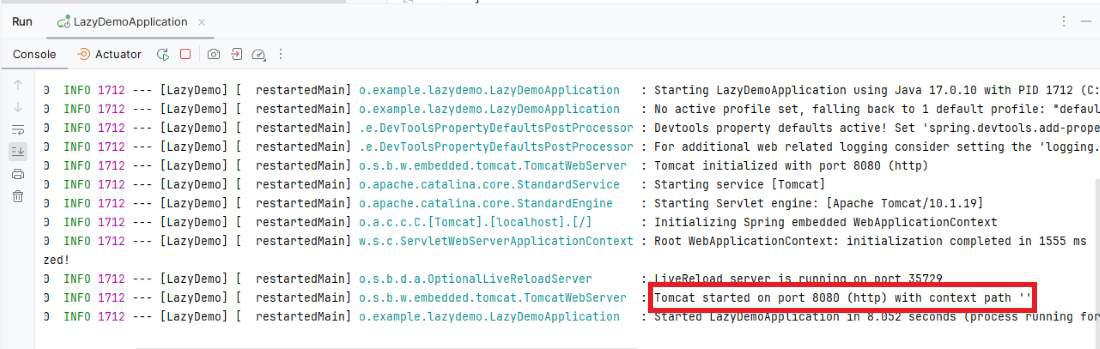
Step 5: Once the project completed, run it as spring application and it will run on port 8080. Refer the below image for better understanding.
Output:
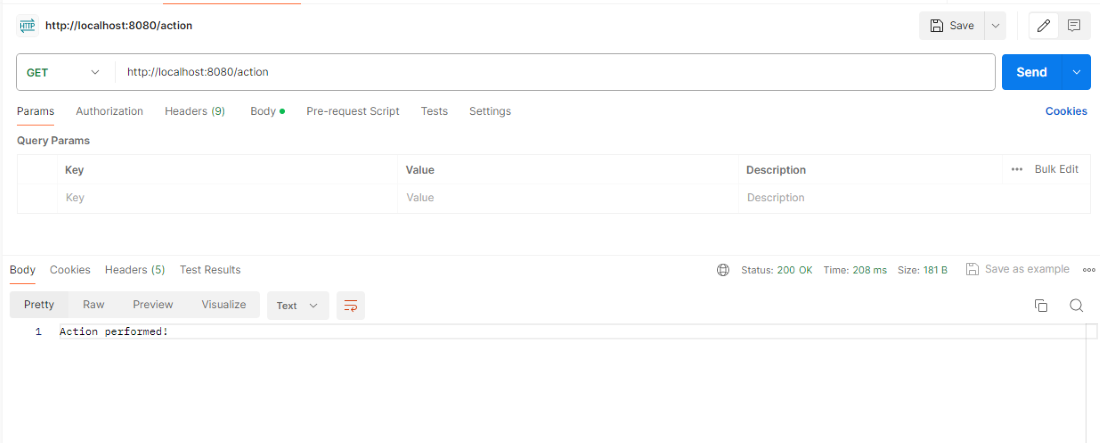
Postman Output:
GET http://localhost:8080/action
Console Output:
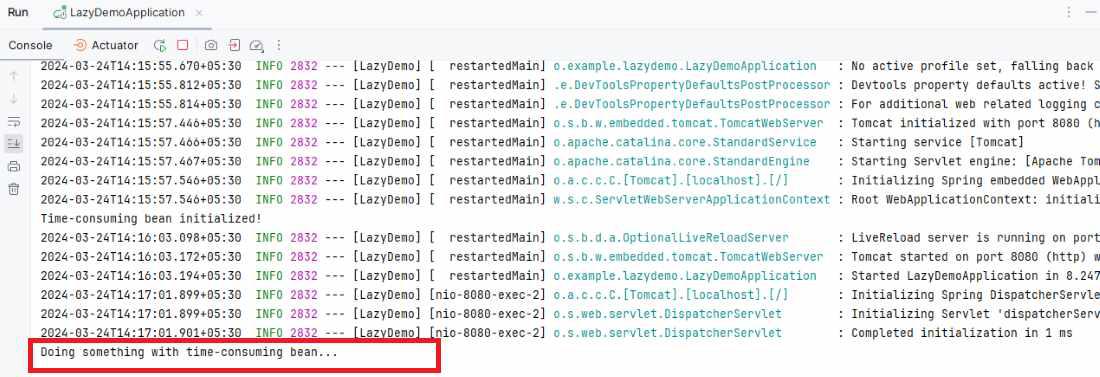
- In the above project, we demonstrate the usage of the @Lazy annotation in the Spring Boot for lazy initialization of the time-consuming bean.
- The TimeConsumingBean simulates the time-consuming initialization processes and marks it with the @Lazy.
- We can refer its initialization until it’s the first requested.
- It can help improve the application startup time.
- Especially, if the bean initialization process is the resource intensive and not the immediately required.
Share your thoughts in the comments
Please Login to comment...