Spring Boot – REST API Documentation using Swagger
Last Updated :
17 Dec, 2023
REST stands for Representational State Transfer. REST is an architectural design pattern that defines constraints that are used in web service development. Swagger is a framework in which we can test our REST APIs for different HTTP requests i.e. :
In this article, we will be discussing using Swagger for documenting APIs in Spring Boot applications.
What is Swagger?
Swagger is an open-source API Documentation framework used for documenting the rest APIs. it provides the HTML view of the API documentation with JSON support and detailed information on the HTTP methods. REST APIs are designed to be used in some kinds of applications.
Steps to use Swagger for documenting APIs
There are two Main Steps to use Swagger for Documenting APIS these are Project Setup and then Setting up Swagger.
Project Setup
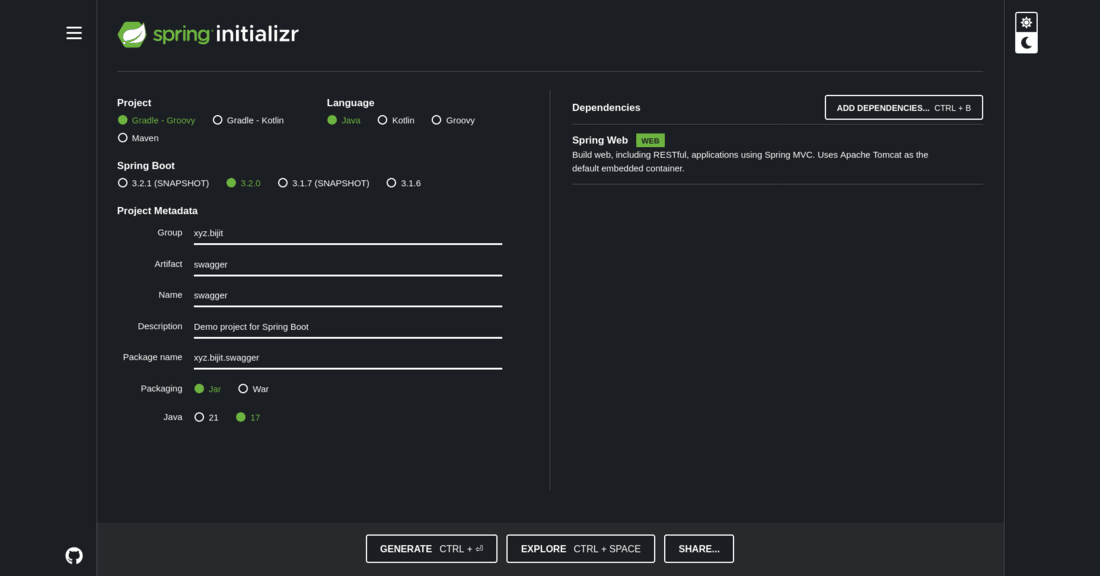
Step 1: Maven Project
- Go to https://start.spring.io/ and create a Maven project with the latest version of Spring Boot.
- Add the Web dependencies to the project.
- Download the project.
.png)
- Extract the project and open with VS Code (Or any IDE you prefer), you can see a similar project structure (as shown below).
.png)
- Now, open a terminal and run using the below command:
mvn install
- To install the dependency and then run follow the below command:
mvn spring-boot:run
Now start the spring boot project,
.png)
Step 2: Gradle Project
- Go to https://start.spring.io/ and create a Gradle project with the latest version of Spring Boot.
- Add the Web dependencies to the project.
- Download the project.
- Extract the project and open with VS Code (Or any IDE you prefer), you can see a similar project structure (as shown below)
.png)
- Now, open a terminal and run,
./gradlew build
- Then, run using the below command:
./gradlew bootrun
Start the Spring project,
.png)
Step 3: Create a Rest Controller
Now let’s create a controller class which handles the HTTP request and return a response.
- Create a controller class(model class) that will be sent as a JSON response.
Java
package xyz.bijit.swagger;
public class Tweet {
private Integer id;
private String title;
private String msg;
public Integer getId() {
return id;
}
public void setId(Integer id) {
this.id = id;
}
public String getTitle() {
return title;
}
public void setTitle(String title) {
this.title = title;
}
public String getMsg() {
return msg;
}
public void setMsg(String msg) {
this.msg = msg;
}
}
|
- Now create a service class to perform addTweet and getTweet,
Java
package xyz.bijit.swagger;
import org.springframework.stereotype.Service;
import java.util.ArrayList;
import java.util.List;
@Service
public class TweetService {
private List<Tweet> tweetList = new ArrayList<>();
public void addTweet(){
Tweet tweet = new Tweet();
tweet.setId(1);
tweet.setTitle("My first tweet");
tweet.setMsg("This is a dummy tweet for demonstration purposes.");
tweetList.add(tweet);
Tweet tweet2 = new Tweet();
tweet2.setId(2);
tweet2.setTitle("My second tweet");
tweet2.setMsg("This is the second dummy tweet for demonstration purposes.");
tweetList.add(tweet2);
}
public List<Tweet> getTweets() {
return tweetList;
}
}
|
- Now create the RestController Class.
Java
package xyz.bijit.swagger;
import org.springframework.beans.factory.annotation.Autowired;
import org.springframework.web.bind.annotation.*;
import java.util.List;
@RestController
public class TweetController {
@Autowired
private TweetService tweetService;
@PostMapping("/add")
public void addTweet() {
tweetService.addTweet();
}
@GetMapping("/view")
public List<Tweet> viewTweets() {
return tweetService.getTweets();
}
@GetMapping("/hello")
public String hello(){
return "Hello World!";
}
}
|
The @RestController annotation marks a class as a REST controller, which is responsible for handling HTTP requests and generating responses in a RESTful manner. Now make a post request using curl.
curl --request POST \
  --url http://localhost:8080/add
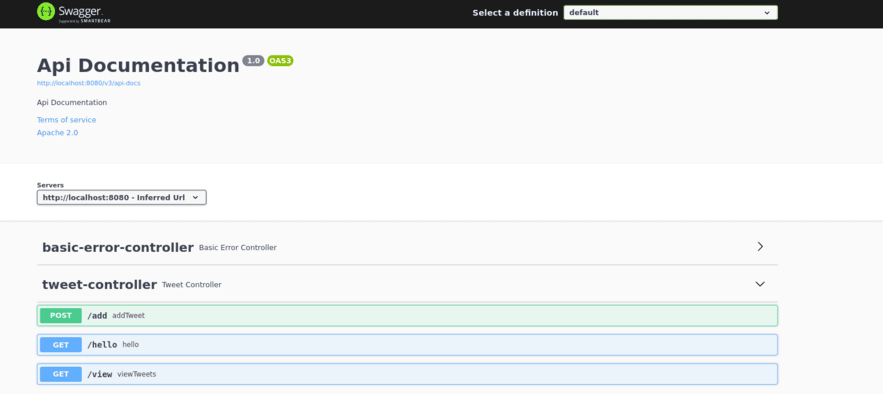
- Go to the URL http://localhost:8080/view.
.png)
Setting up Swagger
Step 1: Adding Maven Dependency
To enable the Swagger in Spring Boot application with maven dependency, add the following dependencies in build configuration (pom.xml) file.
<dependency>
            <groupId>io.springfox</groupId>
            <artifactId>springfox-swagger2</artifactId>
            <version>2.7.0</version>
</dependency>
<dependency>
            <groupId>io.springfox</groupId>
            <artifactId>springfox-swagger-ui</artifactId>
            <version>2.7.0</version>
</dependency>
Run the below command in terminal to install the dependencies:
mvn clean install
Step 2: Adding Gradle Dependency
To install the Swagger in Spring Boot application with gradle dependency, add the following dependencies in build configuration (build.gradle) file.
dependencies {
    implementation 'io.springfox:springfox-swagger2:2.7.0'
    implementation 'io.springfox:springfox-swagger-ui:2.7.0'
}
Run the below command to install the dependencies and build the project:
./gradlew clean build
Step 3: Configure Main Class
Enable main application file to use Swagger.
@EnableSwagger2 is used for it and after enabling it, main application file should like as follows:
Java
import org.springframework.boot.SpringApplication;
import org.springframework.boot.autoconfigure.SpringBootApplication;
import org.springframework.web.servlet.config.annotation.EnableWebMvc;
import springfox.documentation.swagger2.annotations.EnableSwagger2;
@SpringBootApplication
@EnableSwagger2
@EnableWebMvc
public class SwaggerApplication {
public static void main(String[] args) {
SpringApplication.run(SwaggerApplication.class, args);
}
}
|
Step 4: Configure Swagger
Java
import org.springframework.context.annotation.Configuration;
import springfox.documentation.builders.PathSelectors;
import springfox.documentation.builders.RequestHandlerSelectors;
import springfox.documentation.spi.DocumentationType;
import springfox.documentation.spring.web.plugins.Docket;
@Configuration
public class SwaggerConfig {
public Docket SwaggerApi() {
return new Docket(DocumentationType.SWAGGER_2)
.select()
.apis(RequestHandlerSelectors.any())
.paths(PathSelectors.any())
.build();
}
|
Output:
- Documentation is available at the following url for json format: http://server:port/v2/api-docs
- server: The server name or IP
- port: The server port

- Documentation is available at the following url with UI: http://server:port/swagger-ui/index.html/
Note: If you are using spring security make sure to Whitelist the above url
Accessing Swagger UI
Now navigate to http://server:port/swagger-ui/index.html/.
Share your thoughts in the comments
Please Login to comment...