In microservices, we have several different services responsible for different functionalities. These services act like smaller application modules, which together form the application. Each of these modules has its own responsibility, based on the business logic of the application being built. These services then perform the CRUD (Create, Retrieve, Update, Delete) operations over the respective databases.
The process of developing our application takes place across different environments. Initially, the application is developed in the staging/development environments and then the application’s codebase is gradually promoted to higher environments, that is the User Acceptance Test (UAT) environment and finally the Production Environment.
The objective for having different environments is to ensure our application code adheres to the specific standards as per the business requirements and is defect-free before it goes live and is used by the respective end users.
Hence, to achieve this we need to configure our application with certain properties specific to the respective environments.
Prerequisites for the Topic
- Project: Maven
- Language: Java
- Java Version: 11
- Packaging: Java Archive
- IDE: Eclipse (with Spring Tool Suite installed)
- Database: MySQL (with MySQL workbench)
Example
We may use different databases for different environments. That is, a different database for the development/staging environment and a different one for the Production environment.
Hence, for this purpose, our database server connection string as well as the credentials to connect to the given database would differ from environment to environment. Similarly, there may be certain other properties too, that would differ from one environment to the other environment.
Hence at any given time, there is a need to set up our application to be executed in different modes. These modes are called as your application profiles.
Managing the application across different profiles
In microservices architectural style, we have several different services. Each of these services act as smaller modules of our huge application.
Configuring individual property files specific to the respective environments in our individual services makes our application tightly coupled. Rather, this responsibility is handed over to a single micro service. This single micro service is referred to as the Spring Boot Cloud’s Configuration Server.
The property files for all our services are placed inside this Spring Boot Cloud Configuration Server.
Set up and demonstrate the use of the Spring Boot Cloud Configuration Server
In this example, we shall consider a banking application being built. This application has a micro service called as the loans service. This service is responsible for issuing loans to the respective customers. These loan details of the customers are stored in a database. The databases used here, will differ from one environment to another environment. These database configuration property files will be stored in the classpath of the project.The property files for the loans service application in the System Integration Test (SIT), User Acceptance Test (UAT) and the default environment will be named as, loans-sit.properties, loans-uat.properties and loans.properties respectively.
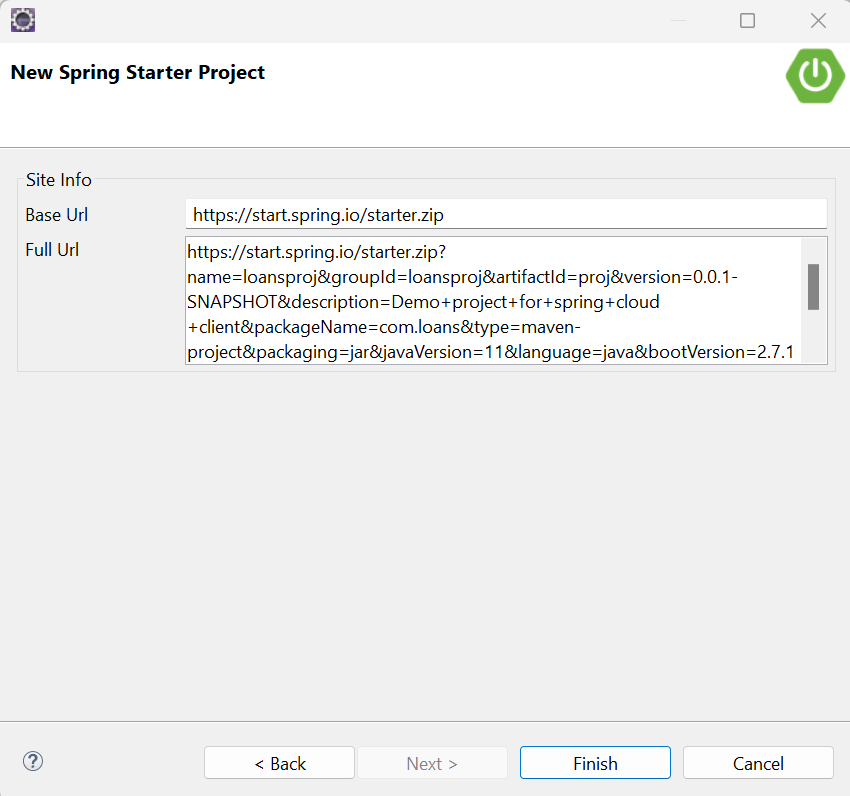
The Spring Boot Projects are created using the Spring Starter Project utility.
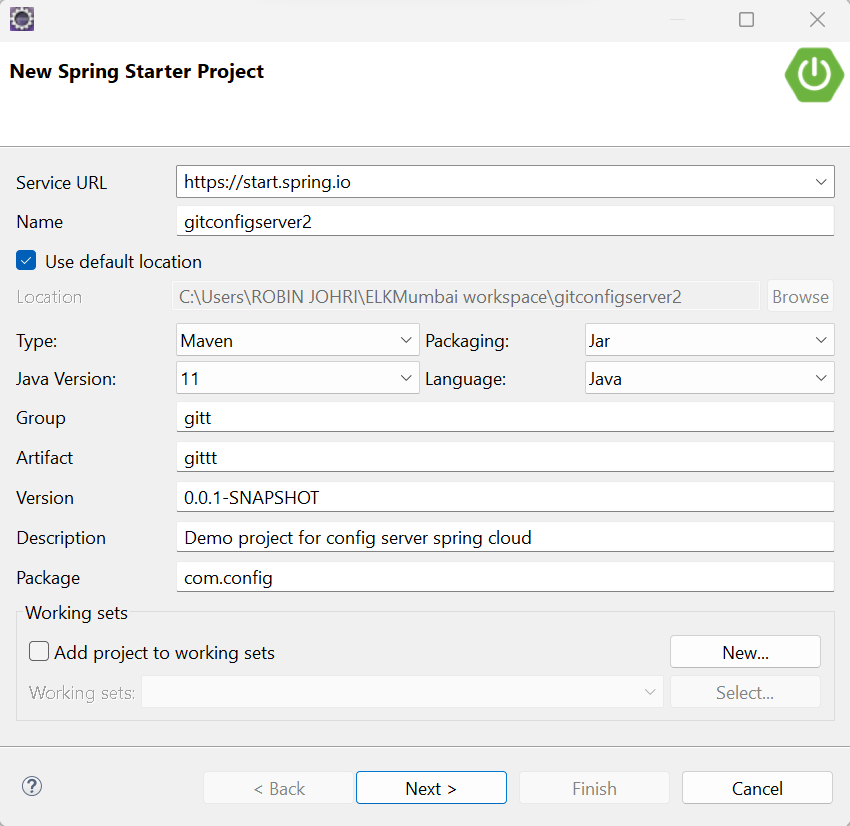
- Create the Configuration Server Spring Boot Project in Eclipse IDE by going to,
File -> New -> Spring Starter Project
- This will open the Spring Starter Project dialogue box below.
- Enter the project metadata details, giving any name to your project that you choose and click on Next.
Select the two dependencies below to be added to your project and click on Next:
- Spring Boot DevTools
- Config Server
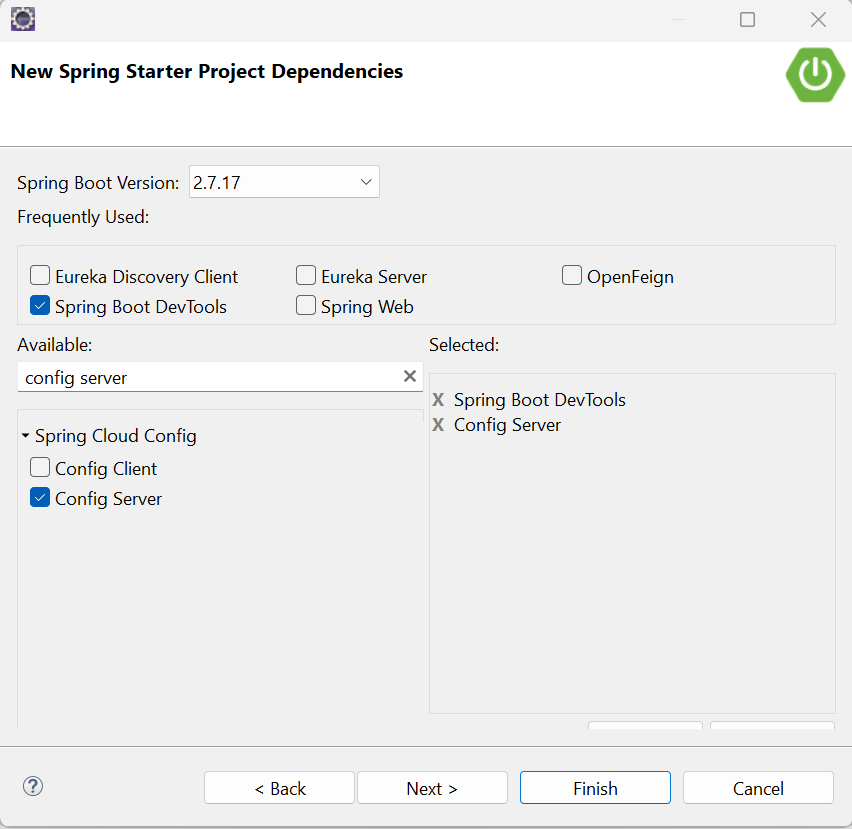
Click on Finish.
Now we have created the Configuration Server project. In the same way, let us create the Loans service project.
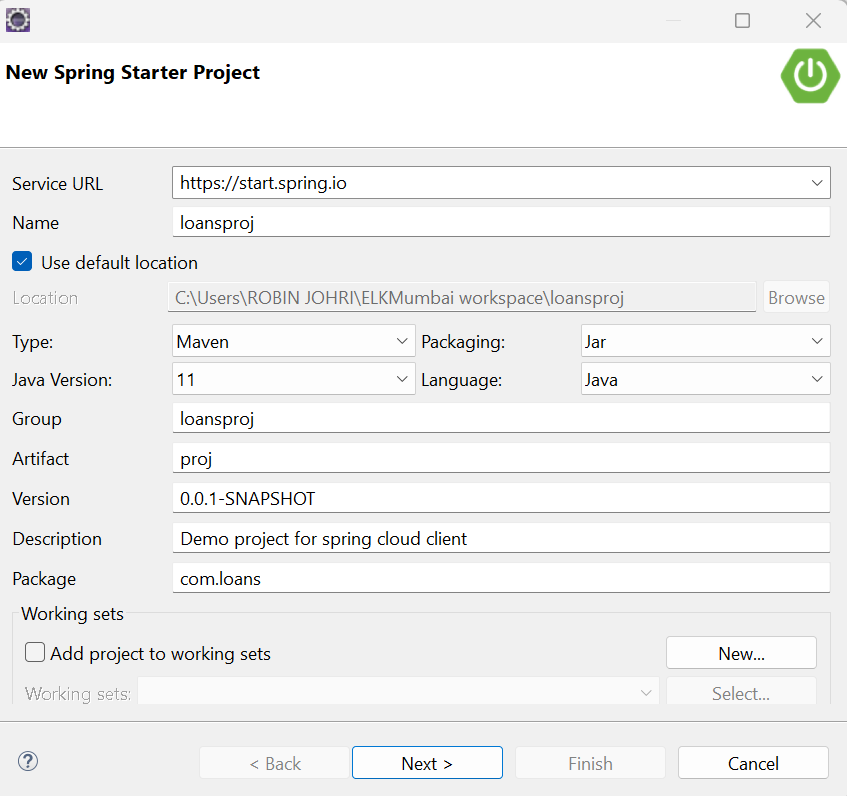
- Create the Loans service Spring Boot Project in Eclipse IDE by going to,
File -> New -> Spring Starter Project
- This will open the Spring Starter Project dialogue box below.
- Enter the project metadata details, giving any name to your project that you choose and click on Next.
Select the 5 dependencies below to be added to your project and click on Next:
- Spring Boot DevTools
- Config Client
- Spring Data JPA
- MySQL Driver
- Spring Web

Click on Finish.
Finally, we have the following Maven Dependencies added in the pom.xml file.
Spring Boot DevTools dependency
Config Server dependency
Config Client dependency
Spring Data JPA dependency
MySQL Driver dependency
Spring Web dependency
Setting Up the Configuration Server:
Java
import org.springframework.boot.SpringApplication;
import org.springframework.boot.autoconfigure.SpringBootApplication;
import org.springframework.cloud.config.server.EnableConfigServer;
@SpringBootApplication
@EnableConfigServer
public class Gitconfigserver2Application {
public static void main(String[] args) {
SpringApplication.run(Gitconfigserver2Application.class, args);
}
}
|
In the above code snippet,
- The @EnableConfigServer annotation denoting the application will act like a configuration server.
- The @SpringBootApplication annotation enables the auto configuration feature.
Application.properties file of the Configuration Server:
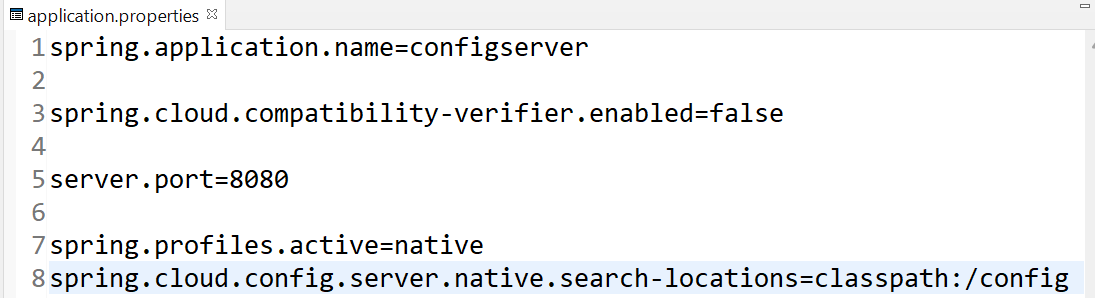
The property spring.profiles.active=native specifies that the property files will be stored in our system’s location i.e. inside the config folder (created by us) which is located in the classpath of our project provided by the property spring.cloud.config.server.native.search-locations
The below image shows the exact location into which the property files should be placed:
That is, src > main > resources > config
loans.properties file:

loans-sit.properties file:

loans-uat.properties file:

pom.xml file for the Configuration Server application
XML
<?xml version="1.0" encoding="UTF-8"?>
<modelVersion>4.0.0</modelVersion>
<parent>
<groupId>org.springframework.boot</groupId>
<artifactId>spring-boot-starter-parent</artifactId>
<version>2.6.2</version>
<relativePath/>
</parent>
<groupId>gitt</groupId>
<artifactId>gittt</artifactId>
<version>0.0.1-SNAPSHOT</version>
<name>gitconfigserver2</name>
<description>Demo project for config server spring cloud</description>
<properties>
<java.version>11</java.version>
<spring-cloud.version>2020.0.2</spring-cloud.version>
</properties>
<dependencies>
<dependency>
<groupId>org.springframework.boot</groupId>
<artifactId>spring-boot-devtools</artifactId>
<scope>runtime</scope>
<optional>true</optional>
</dependency>
<dependency>
<groupId>org.springframework.boot</groupId>
<artifactId>spring-boot-starter-test</artifactId>
<scope>test</scope>
</dependency>
<dependency>
<groupId>org.springframework.cloud</groupId>
<artifactId>spring-cloud-config-server</artifactId>
</dependency>
</dependencies>
<dependencyManagement>
<dependencies>
<dependency>
<groupId>org.springframework.cloud</groupId>
<artifactId>spring-cloud-dependencies</artifactId>
<version>${spring-cloud.version}</version>
<type>pom</type>
<scope>import</scope>
</dependency>
</dependencies>
</dependencyManagement>
<build>
<plugins>
<plugin>
<groupId>org.springframework.boot</groupId>
<artifactId>spring-boot-maven-plugin</artifactId>
</plugin>
</plugins>
</build>
</project>
|
In the above code snippet, The spring-cloud-config-server dependency indicates that this application is the configuration server that contains all the client’s application configuration properties.
Now, creating the Loans Service project
Java
import org.springframework.boot.SpringApplication;
import org.springframework.boot.autoconfigure.SpringBootApplication;
@SpringBootApplication
public class LoansprojApplication {
public static void main(String[] args) {
SpringApplication.run(LoansprojApplication.class, args);
}
}
|
In the above code snippet, The @SpringBootApplication annotation enables the auto configuration feature.
Application.properties file of the Loans Service:
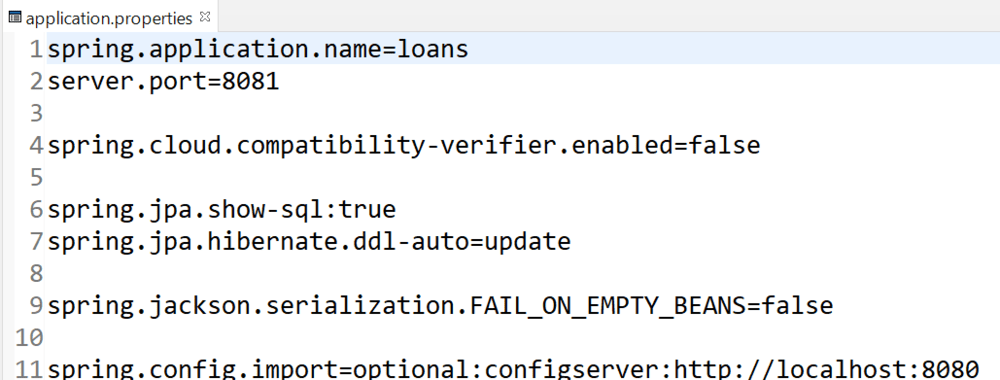
The spring.config.import property contains the Uri of the Configuration Server.
Creating the Loan Entity Object:
Java
import javax.persistence.Entity;
import javax.persistence.GeneratedValue;
import javax.persistence.Id;
@Entity
public class Loan
{
@Id
@GeneratedValue
public Integer loan_id;
public String loan_name;
public Loan()
{
super();
}
public Loan(Integer loan_id, String loan_name)
{
super();
this.loan_id = loan_id;
this.loan_name = loan_name;
}
public Integer getLoan_id()
{
return loan_id;
}
public void setLoan_id(Integer loan_id)
{
this.loan_id = loan_id;
}
public String getLoan_name()
{
return loan_name;
}
public void setLoan_name(String loan_name)
{
this.loan_name = loan_name;
}
@Override
public String toString()
{
return "Loan [loan_id=" + loan_id + ", loan_name=" + loan_name + "]";
}
}
|
In the above code snippet,
- The @Entity annotation maps this Loan class to a Loan table in the database.
- The Loan Entity object has 2 fields loan_id, loan_name denoting the unique id associated with the loan and the name of the respective loan.
- The @Id annotation makes this field, loan_id the primary key in the Loan table of the database.
- The @GeneratedValue annotation generates a unique value for each new loan_id being inserted in the database.
Creating the Controller Layer for the Loans Service:
Java
import org.springframework.beans.factory.annotation.Autowired;
import org.springframework.web.bind.annotation.PostMapping;
import org.springframework.web.bind.annotation.RequestBody;
import org.springframework.web.bind.annotation.RequestMapping;
import org.springframework.web.bind.annotation.RestController;
import com.loans.dto.Loan;
import com.loans.service.LoansService;
@RestController
@RequestMapping("/loan")
public class LoansController
{
@Autowired
LoansService loansService;
@PostMapping("/insert")
public Loan create_Loan(@RequestBody Loan loan)
{
Loan loanobj=loansService.enter_data_In_Db(loan);
if(loan!=null)
{
return loanobj;
}
else
{
Loan loansdummmy=new Loan(00,"none");
return loansdummmy;
}
}
}
|
In the above code snippet,
- The create_Loan() method inserts the Loan input object in the database. It returns back a dummy Loan object if the data insertion in the database fails.
- The @RestController annotation will automatically serialize and deserialize the Java object returned as a response into JSON.
- The @PostMapping annotation to accept the Loan object as an input in the body of the request being sent in JSON format for the /insert endpoint.
- The @Autowired annotation will initialize the LoansService object with its corresponding dependency being injected.
- The @RequestBody annotation defines the input object type, that is the corresponding Java object that will be passed to that endpoint in the body of the request .
Now, creating the service layer for the Loans Service:
Java
import org.springframework.beans.factory.annotation.Autowired;
import org.springframework.stereotype.Service;
import com.loans.dto.Loan;
import com.loans.repository.LoansRepository;
@Service
public class LoansService
{
@Autowired
LoansRepository loansRepository;
public Loan enter_data_In_Db(Loan loan)
{
return loansRepository.save(loan);
}
}
|
In the above code snippet,
- The @Service annotation denotes this class will act as the service layer and its corresponding object will be autowired.
- The @Autowired annotation will initialize the LoansRepository object with its corresponding dependency being injected from the JpaRepository interface.
- The enter_data_In_Db() method accepts the Loan object as an input and then inserts it in the database using the save() method provided by the JpaRepository interface.
Creating the Repository Layer for the Loans Service:
Java
import org.springframework.data.jpa.repository.JpaRepository;
import com.loans.dto.Loan;
public interface LoansRepository extends JpaRepository<Loan, Integer>
{
}
|
- The LoansRepository interface uses Spring’s Data JpaRepository interface by specifying the Entity object, that is the Loan object along with the primary key data type i.e. Integer.
- We use the JpaRepository Interface to perform the CRUD operations in the database.
pom.xml file for the Loans Service:
XML
<?xml version="1.0" encoding="UTF-8"?>
<modelVersion>4.0.0</modelVersion>
<parent>
<groupId>org.springframework.boot</groupId>
<artifactId>spring-boot-starter-parent</artifactId>
<version>2.6.2</version>
<relativePath/>
</parent>
<groupId>loansproj</groupId>
<artifactId>proj</artifactId>
<version>0.0.1-SNAPSHOT</version>
<name>loansproj</name>
<description>Demo project for spring cloud client </description>
<properties>
<java.version>11</java.version>
<spring-cloud.version>2020.0.2</spring-cloud.version>
</properties>
<dependencies>
<dependency>
<groupId>org.springframework.boot</groupId>
<artifactId>spring-boot-starter-data-jpa</artifactId>
</dependency>
<dependency>
<groupId>org.springframework.boot</groupId>
<artifactId>spring-boot-starter-web</artifactId>
</dependency>
<dependency>
<groupId>org.springframework.boot</groupId>
<artifactId>spring-boot-devtools</artifactId>
<scope>runtime</scope>
<optional>true</optional>
</dependency>
<dependency>
<groupId>mysql</groupId>
<artifactId>mysql-connector-java</artifactId>
<scope>runtime</scope>
</dependency>
<dependency>
<groupId>org.springframework.boot</groupId>
<artifactId>spring-boot-starter-test</artifactId>
<scope>test</scope>
</dependency>
<dependency>
<groupId>org.springframework.cloud</groupId>
<artifactId>spring-cloud-starter-config</artifactId>
</dependency>
</dependencies>
<dependencyManagement>
<dependencies>
<dependency>
<groupId>org.springframework.cloud</groupId>
<artifactId>spring-cloud-dependencies</artifactId>
<version>${spring-cloud.version}</version>
<type>pom</type>
<scope>import</scope>
</dependency>
</dependencies>
</dependencyManagement>
<build>
<plugins>
<plugin>
<groupId>org.springframework.boot</groupId>
<artifactId>spring-boot-maven-plugin</artifactId>
</plugin>
</plugins>
</build>
</project>
|
In the above code snippet, The spring-cloud-starter-config dependency indicates that this application is the client application that will use the configuration server.
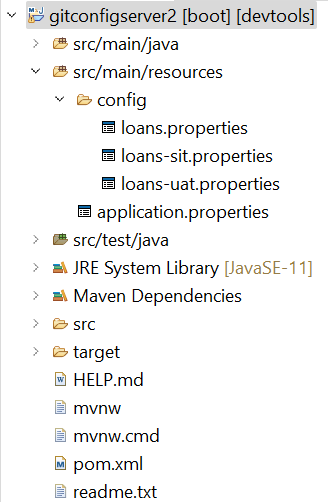
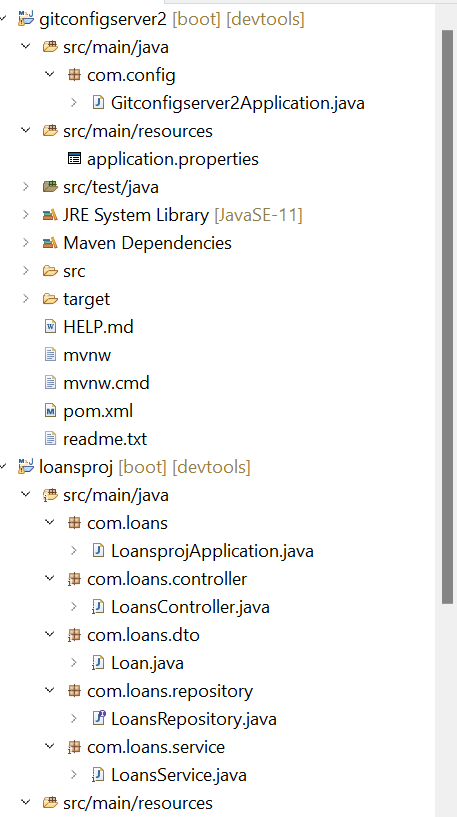
The final project Structure shall look like this below:
After starting the loans and the configserver services, by using Run As Java Application option we can verify the properties by hitting the given endpoints in Postman below:
- Default Environment (default): http://localhost:8080/loans/default
- System Integration Test (sit): http://localhost:8080/loans/sit
- User Acceptance Test Environment (uat): http://localhost:8080/loans/uat
spring.datasource.url property refers to the default profile database as shown below:
.png)
spring.datasource.url property refers to the uat profile database as shown below:
-(1).png)
spring.datasource.url property refers to the sit profile database as shown below:
.png)
Now, Create the respective databases in MySQL Workbench as below:
.png)
On hitting the endpoint http://localhost:8081/loan/insert for the sit profile we will get the below output in Postman:
.png)
The Loan Entity object is inserted into the database’s loan table:
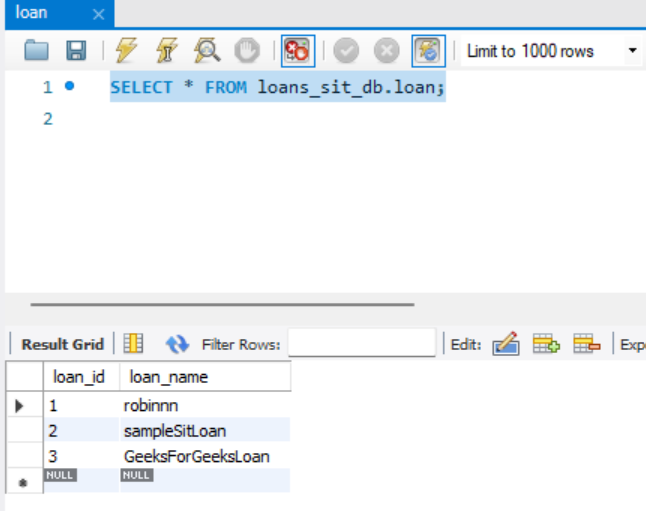
The Loan Entity with loan_id: 3 and loan_name: GeeksForGeeksLoan is successfully inserted in the loans table.
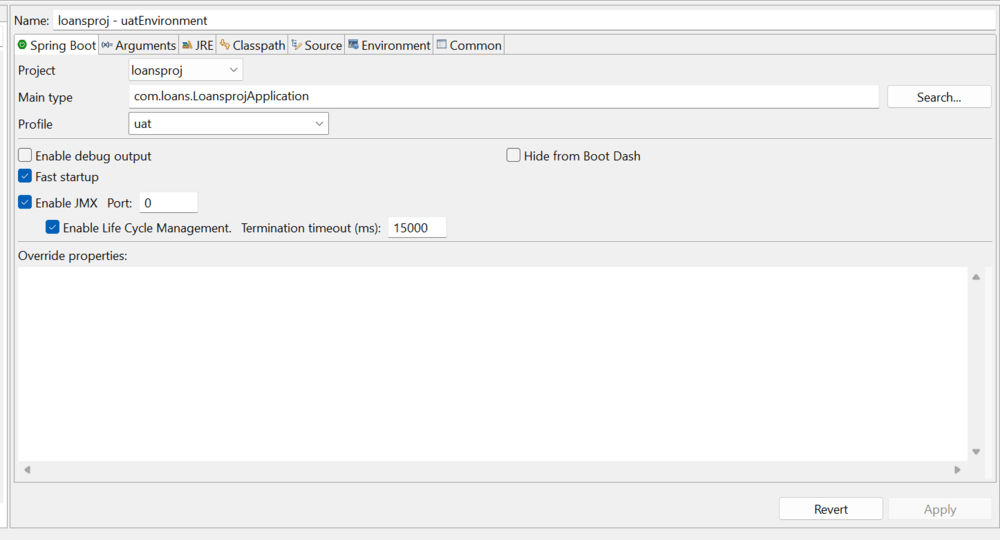
Similarly, now we can hit the same endpoint by running the loans application in different environments (uat, default) using the Spring Boot Dashboard View feature below:
Conclusion
Hence, we have seen how we could setup and run our Spring Boot Application in different profiles with the help of the Spring Boot Cloud Configuration Server, that contained the properties for the respective environments.
Share your thoughts in the comments
Please Login to comment...