Spring Boot – Admin Server
Last Updated :
05 Feb, 2024
Spring boot is one of the most popular applications to develop Java enterprise applications. When you have so many components in your application, you need to monitor and manage them. You have multiple spring boot applications running you need an admin for monitoring. Spring boot admin provides you the power to manage and monitor your spring boot applications. The Spring Boot admin treats all other spring applications configured in your system as clients and gives all necessary details about them in a web application.
Behind the scenes, Spring Boot Admin is using Spring Boot Actuator. Spring boot actuator provides endpoints to manage and monitor spring applications. But it is all manual while monitoring spring applications using an actuator, as it provides you only the endpoints and you have the format of the view and then individually check all the endpoints for better monitoring.
You can check out the following articles for a better understanding:
In this article, we will be learning how we can set up a Spring Boot – Admin Server to get insights from client spring boot applications.
Steps to Configure Spring Boot – Admin Server
Step 1: Create a spring boot application
Visit start.spring.io and create a new spring boot project which we will be using as the Spring Boot -Admin Server. Select the configurations as below:
- Project: Maven
- Language: Java
- Spring Boot version: 3.2.1
- Packaging: Jar
- Java Version: 17
Select Spring Web dependency from the dependency tab.

Click on generate and then open the project with any IDE.
Step 2: Add Spring Boot Admin Dependency
Once you open the project wait till it is configured automatically by the IDE, then open in pom.xml file and paste the following dependency for Spring boot Admin server.
<dependency>
    <groupId>de.codecentric</groupId>
    <artifactId>spring-boot-admin-starter-server</artifactId>
    <version>2.4.1</version>
</dependency>
Once you add this dependency this alone will generate the actuator endpoints for you, but you may not get the web page with proper UI. use the following dependency management to resolve this.
<dependencyManagement>
        <dependencies>
            <dependency>
                <groupId>de.codecentric</groupId>
                <artifactId>spring-boot-admin-dependencies</artifactId>
                <version>${spring-boot-admin.version}</version>
                <type>pom</type>
                <scope>import</scope>
            </dependency>
        </dependencies>
</dependencyManagement>
Please make sure to have a stable internet connection as this will download all necessary files required. Once you have pasted this reload the file.
Here is the pom.xml given below for your reference.
pom.xml:
XML
<?xml version="1.0" encoding="UTF-8"?>
<modelVersion>4.0.0</modelVersion>
<parent>
<groupId>org.springframework.boot</groupId>
<artifactId>spring-boot-starter-parent</artifactId>
<version>3.2.1</version>
<relativePath/>
</parent>
<groupId>com.gfg</groupId>
<artifactId>SpringBootAdminApp</artifactId>
<version>0.0.1-SNAPSHOT</version>
<name>SpringBootAdminApp</name>
<description>project for Spring Boot admin server</description>
<properties>
<java.version>17</java.version>
</properties>
<dependencies>
<dependency>
<groupId>org.springframework.boot</groupId>
<artifactId>spring-boot-starter-web</artifactId>
</dependency>
<dependency>
<groupId>de.codecentric</groupId>
<artifactId>spring-boot-admin-starter-server</artifactId>
<version>2.4.1</version>
</dependency>
<dependency>
<groupId>org.springframework.boot</groupId>
<artifactId>spring-boot-starter-test</artifactId>
<scope>test</scope>
</dependency>
</dependencies>
<dependencyManagement>
<dependencies>
<dependency>
<groupId>de.codecentric</groupId>
<artifactId>spring-boot-admin-dependencies</artifactId>
<version>${spring-boot-admin.version}</version>
<type>pom</type>
<scope>import</scope>
</dependency>
</dependencies>
</dependencyManagement>
<build>
<plugins>
<plugin>
<groupId>org.springframework.boot</groupId>
<artifactId>spring-boot-maven-plugin</artifactId>
</plugin>
</plugins>
</build>
</project>
|
Step 3: Add Annotation
Annotation as metadata about the program and doesn’t affect the program. We will give annotation to declare our spring boot application as Spring boot admin server.

Navigate to the src -> main -> java -> com.gfg.SpringBootAdminApp -> SpringBootAdminAppApplication file then add the Spring boot annotation.
@EnableAdminServer
This will mark our application as Spring Boot Admin application, and we will be able to see other application’s details.
SpringBootAdminAppApplication.java:
Java
import de.codecentric.boot.admin.server.config.EnableAdminServer;
import org.springframework.boot.SpringApplication;
import org.springframework.boot.autoconfigure.SpringBootApplication;
@EnableAdminServer
@SpringBootApplication
public class SpringBootAdminAppApplication {
public static void main(String[] args) {
SpringApplication.run(SpringBootAdminAppApplication.class, args);
}
}
|
Step 4: Change Application properties
Add the following block of code in the application.properties file inside the resource folder.
application.properties:
spring-application.name=spring-boot-admin
server.port =8093
security.user.name=admin
security.user.password=admin
As the default port for the web applications is 8080, and there may be other client applications running on port 8080, we have changed the port no for this application to 8093. We have also configured the username and password for the admin to login. You can explore more add other configurations here as per your requirements.
Step 5: Access Spring Boot – Admin Server
Go to SpringBootAdminAppApplication.java and run the Spring Boot application.

You can see that our spring boot application has started on port no 8093.
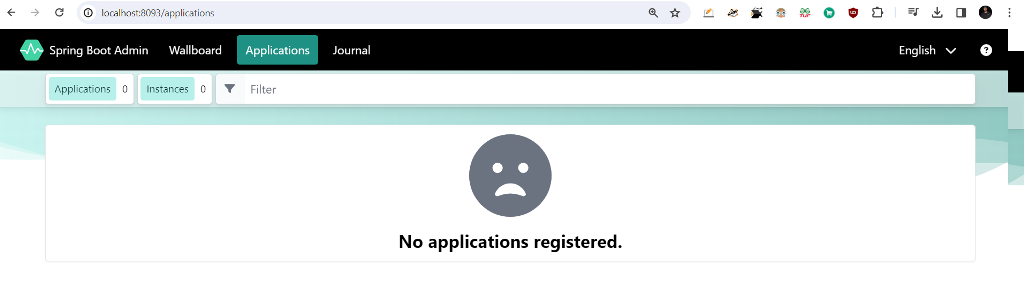
On your web browser, go to localhost:8093 and you should be able to see the Spring boot admin server homepage.
Conclusion
Now you have successfully learned how to create a spring boot admin server panel to manage spring microservices and Spring boot applications in a better way. You can now create a client application and link it to your admin server and access all relevant details. You can explore the Spring Boot Admin server panel and learn how you can apply other customizations to make a better use of it. Overall, this Admin server will save you from manually looking for actuator endpoints by providing all details in one web page with better user interface and usability.
Share your thoughts in the comments
Please Login to comment...