Simple Chat Room using Python
Last Updated :
19 Feb, 2022
This article demonstrates – How to set up a simple Chat Room server and allow multiple clients to connect to it using a client-side script. The code uses the concept of sockets and threading.
Socket programming
Sockets can be thought of as endpoints in a communication channel that is bi-directional and establishes communication between a server and one or more clients. Here, we set up a socket on each end and allow a client to interact with other clients via the server. The socket on the server side associates itself with some hardware port on the server-side. Any client that has a socket associated with the same port can communicate with the server socket.
Multi-Threading
A thread is a sub-process that runs a set of commands individually of any other thread. So, every time a user connects to the server, a separate thread is created for that user, and communication from the server to the client takes place along individual threads based on socket objects created for the sake of the identity of each client.
We will require two scripts to establish this chat room. One to keep the serving running, and another that every client should run in order to connect to the server.
Server Side Script
The server-side script will attempt to establish a socket and bind it to an IP address and port specified by the user (windows users might have to make an exception for the specified port number in their firewall settings, or can rather use a port that is already open). The script will then stay open and receive connection requests and will append respective socket objects to a list to keep track of active connections. Every time a user connects,
a separate thread will be created for that user. In each thread, the server awaits a message and sends that message to other users currently on the chat. If the server encounters an error while trying to receive a message from a particular thread, it will exit that thread.
Usage
This server can be set up on a local area network by choosing any on the computer to be a server node, and using that computer’s private IP address as the server IP address.
For example, if a local area network has a set of private IP addresses assigned ranging from 192.168.1.2 to 192.168.1.100, then any computer from these 99 nodes can act as a server, and the remaining nodes may connect to the server node by using the server’s private IP address. Care must be taken to choose a port that is currently not in usage. For example, port 22 is the default for ssh, and port 80 is the default for HTTP protocols. So these two ports preferably, shouldn’t be used or reconfigured to make them free for usage.
However, if the server is meant to be accessible beyond a local network, the public IP address would be required for usage. This would require port forwarding in cases where a node from a local network (node that isn’t the router) wishes to host the server. In this case, we would require any requests that come to the public IP addresses to be re-routed towards our private IP address in our local network, and would hence require port forwarding.
For more reading on port forwarding: link
To run the script, simply download it from the GitHub link specified at the bottom of the post, and save it at a convenient location on your computer.
/* Both the server and client script can then be run
   from the Command prompt (in Windows) or from bash
   Terminal (Linux users) by simply typing
   "python chat_server.py  " or "python client.py  ".
   For example, */
python chat_server.py 192.168.55.13 8081
python client.py 192.168.55.13 8081
Below is the Server side script that must be run at all times to keep the chatroom running.
Python3
import socket
import select
import sys
from thread import *
server = socket.socket(socket.AF_INET, socket.SOCK_STREAM)
server.setsockopt(socket.SOL_SOCKET, socket.SO_REUSEADDR, 1)
if len(sys.argv) != 3:
print ("Correct usage: script, IP address, port number")
exit()
IP_address = str(sys.argv[1])
Port = int(sys.argv[2])
server.bind((IP_address, Port))
server.listen(100)
list_of_clients = []
def clientthread(conn, addr):
conn.send("Welcome to this chatroom!")
while True:
try:
message = conn.recv(2048)
if message:
print ("<" + addr[0] + "> " + message)
message_to_send = "<" + addr[0] + "> " + message
broadcast(message_to_send, conn)
else:
remove(conn)
except:
continue
def broadcast(message, connection):
for clients in list_of_clients:
if clients!=connection:
try:
clients.send(message)
except:
clients.close()
remove(clients)
def remove(connection):
if connection in list_of_clients:
list_of_clients.remove(connection)
while True:
conn, addr = server.accept()
list_of_clients.append(conn)
print (addr[0] + " connected")
start_new_thread(clientthread,(conn,addr))
conn.close()
server.close()
|
Client-Side Script
The client-side script will simply attempt to access the server socket created at the specified IP address and port. Once it connects, it will continuously check as to whether the input comes from the server or from the client, and accordingly redirects output. If the input is from the server, it displays the message on the terminal. If the input is from the user, it sends the message that the user enters to the server for it to be broadcasted to other users.
This is the client-side script, that each user must use in order to connect to the server.
Python3
import socket
import select
import sys
server = socket.socket(socket.AF_INET, socket.SOCK_STREAM)
if len(sys.argv) != 3:
print ("Correct usage: script, IP address, port number")
exit()
IP_address = str(sys.argv[1])
Port = int(sys.argv[2])
server.connect((IP_address, Port))
while True:
sockets_list = [sys.stdin, server]
read_sockets,write_socket, error_socket = select.select(sockets_list,[],[])
for socks in read_sockets:
if socks == server:
message = socks.recv(2048)
print (message)
else:
message = sys.stdin.readline()
server.send(message)
sys.stdout.write("<You>")
sys.stdout.write(message)
sys.stdout.flush()
server.close()
|
Output:
In the picture given below, a server has been initialized on the left side of the terminal and a client script on the right side of the terminal. (Splitting of terminal done using tmux, ‘sudo apt-get install tmux’). For initialization purposes, you can see that whenever a message is sent by a user, the message along with IP address is shown on the server-side.
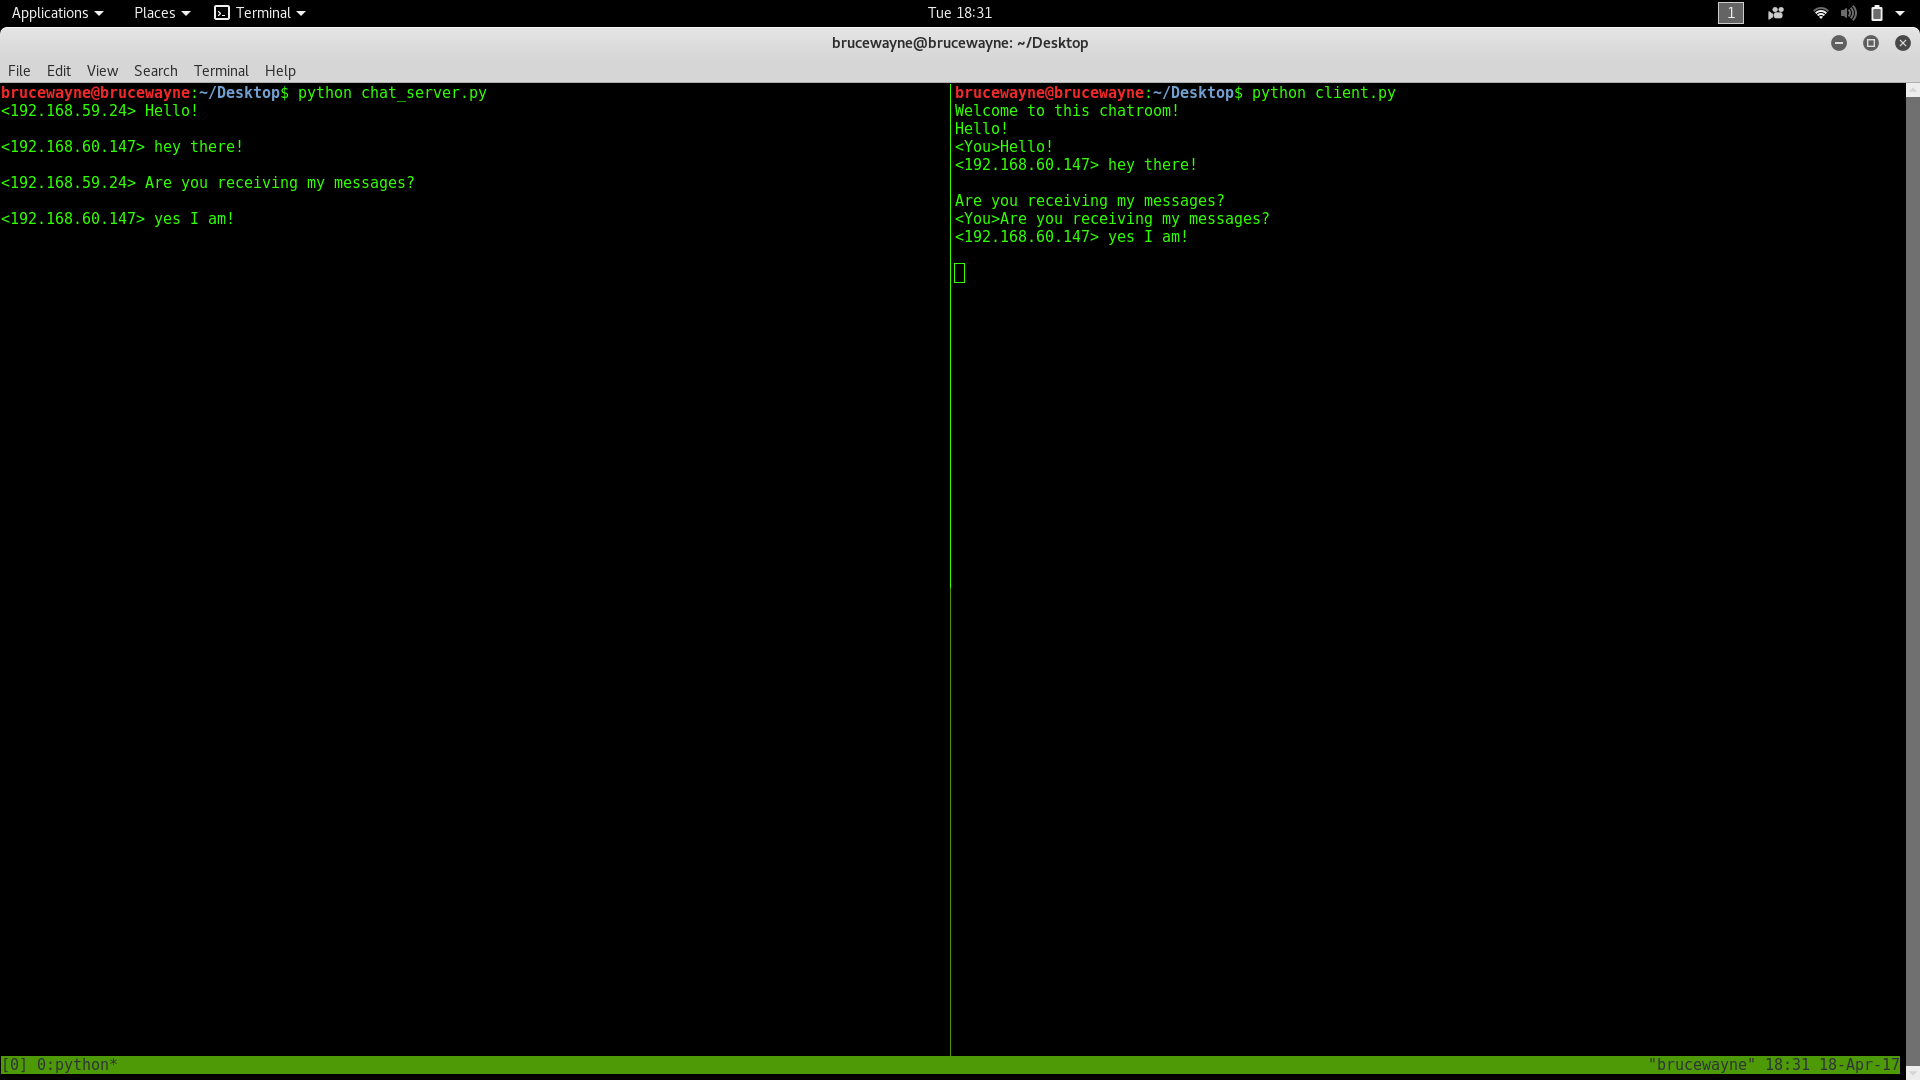
The below picture has a basic conversation between two people on the same server. Multiple clients can connect to the server in the same way!
Link to download script: link
Share your thoughts in the comments
Please Login to comment...