React Native Height
Last Updated :
26 May, 2021
The following approach covers how to set Height in react-native. For this, we are going to use Height property. It basically provides a particular height to a given component.
Syntax:
height : value
Now let’s start with the implementation:
-
Step 1: Open your terminal and install expo-cli by the following command.
npm install -g expo-cli
-
Step 2: Now create a project by the following command.
expo init myapp
-
Step 3: Now go into your project folder i.e. myapp
cd myapp
Project Structure: It will look like the following.
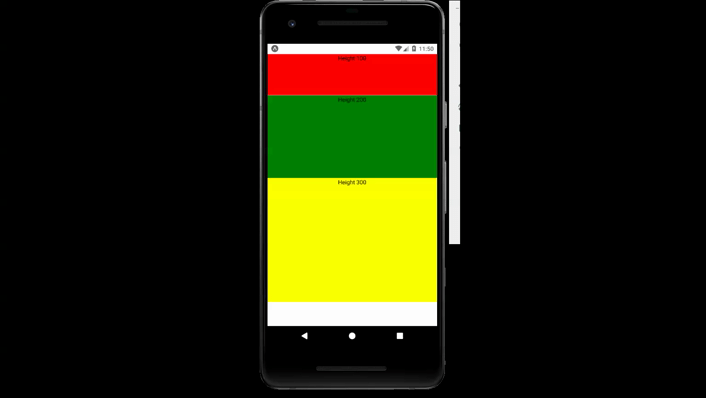
Example: Now let’s implement the Height. Here we are going to provide different heights to different text views.
App.js
App.js
import React from 'react';
import { StyleSheet, View , Text } from 'react-native';
export default function App() {
return (
<View style={{marginTop : 25}}>
<View style={{height : 100 , backgroundColor : "red" ,
alignItems : 'center'}}>
<Text>Height 100</Text>
</View>
<View style={{height : 200 , backgroundColor : "green" ,
alignItems : 'center'}}>
<Text>Height 200</Text>
</View>
<View style={{height : 300 , backgroundColor : "yellow" ,
alignItems : 'center'}}>
<Text>Height 300</Text>
</View>
</View>
);
}
|
Start the server by using the following command.
npm run android
Output: If your emulator did not open automatically then you need to do it manually. First, go to your android studio and run the emulator. Now start the server again.
Reference: https://reactnative.dev/docs/height-and-width
Share your thoughts in the comments
Please Login to comment...