QueryDSL in a Spring Boot Application
Last Updated :
06 Mar, 2024
In Spring Boot, QueryDSL can be defined as the Query Domain Specific Language, and it is a framework that can provide a type-safe way to construct queries in Java. It can allow the developers can write queries fluently and concisely of string-based queries such as SQL injection vulnerabilities and lack of the compile time safe QueryDSL generates the query classes and entity classes based on the database schema.
Key Terminologies
- QueryDSL: This stands for Query Domain Specific Language, and it is a framework that can provide a type-safe way to construct queries in Java.
- Query Class: It is a pre-defined class that can represent the query that can be executed against the database, and it generates the classes based on the domain model and database schema.
- Query Entity: It can represent the database table or view and it can generate the entity classes based on the JPA entity annotations.
- Expression: Expressions in QueryDSL can represent the value or the function that can be used in a query.
- Path: It can represent the property of the field of an entity, and it can be used to reference the columns in the query. It can be used to build the predicates and expressions.
Implementation of QueryDSL in Spring Boot Application
We can develop the spring application that can take an employee CSV file as input and that CSV file contains the names and salaries then QueryDSL can process the file then generate the output CSV that can calculate the bonus of the employees.
Step 1: We can create the spring project using Spring STS IDE including the below-mentioned dependencies into the project.
Dependencies:
- Spring Data for JPA
- Spring Web
- Lombok
- Spring Dev Tools
External dependencies:
        <dependency>
            <groupId>com.querydsl</groupId>
            <artifactId>querydsl-mongodb</artifactId>
        </dependency>
        <dependency>
            <groupId>com.querydsl</groupId>
            <artifactId>querydsl-apt</artifactId>
            <scope>provided</scope>
            <classifier>jakarta</classifier>
            <version>${querydsl.version}</version>
        </dependency>
        <!-- https://mvnrepository.com/artifact/com.mysema.maven/apt-maven-plugin -->
        <dependency>
            <groupId>com.mysema.maven</groupId>
            <artifactId>apt-maven-plugin</artifactId>
            <version>1.1.3</version>
        </dependency>
External Plugin:
 <plugin>
                <groupId>com.mysema.maven</groupId>
                <artifactId>apt-maven-plugin</artifactId>
                <version>1.1.3</version>
                <executions>
                    <execution>
                        <goals>
                            <goal>process</goal>
                        </goals>
                        <configuration>
                            <outputDirectory>target/generated-sources/java</outputDirectory>
                            <processor>com.querydsl.apt.jpa.JPAAnnotationProcessor</processor>
                        </configuration>
                    </execution>
                </executions>
            </plugin>
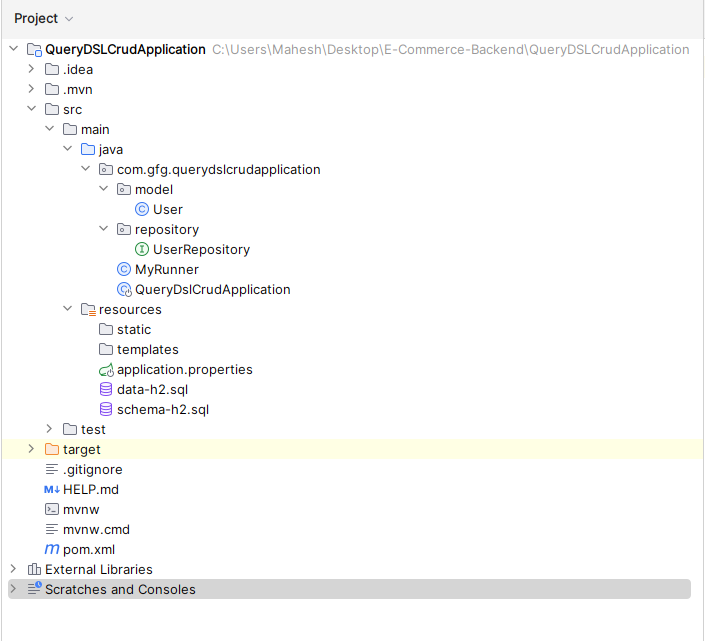
Once complete the creation of the spring project then the spring project file structure look like the below image.
Step 2: Create the sql file and it named as schema-h2.sql and it can be created the table for the users of the sql database.
Go to src > resources > schema-h2.sql and put the below code.
CREATE TABLE user_seq  (
                      id BIGINT AUTO_INCREMENT PRIMARY KEY,
                      name VARCHAR(255) NOT NULL, -- Adding NOT NULL constraint
                      age INT
);
Step 3: Create the SQL file and it named as data-h2.sql and it can be inserting the data into the table for the users of the SQL database.
Go to src > resources > data-h2.sql and put the below code.
INSERT INTO user_seq (name, age) VALUES ('Mahesh Kadambala', 21);
INSERT INTO user_seq (name, age) VALUES ('Eswar Betha', 22);
INSERT INTO user_seq (name, age) VALUES ('Jagan Mall', 25);
INSERT INTO user_seq (name, age) VALUES ('Ruchitha', 22);
INSERT INTO user_seq (name, age) VALUES ('Sirisha', 26);
INSERT INTO user_seq (name, age) VALUES ('Hema Nookeswari', 21);
INSERT INTO user_seq (name, age) VALUES ('tarun', 25);
INSERT INTO user_seq (name, age) VALUES ('Lohith', 28);
INSERT INTO user_seq (name, age) VALUES ('Deepthi', 22);
INSERT INTO user_seq (name, age) VALUES ('Raju', 29);
INSERT INTO user_seq (name, age) VALUES ('Santhosh', 30);
Step 4: Open the application.properties file and put the below code for the MongoDb database configuration and server port assigning to the application.
spring.datasource.url=jdbc:mysql://localhost:3306/querydsl
spring.datasource.username=root
spring.datasource.password=
server.port=8083
spring.jpa.properties.hibernate.dialect=org.hibernate.dialect.MySQLDialect
spring.main.banner-mode=off
spring.jpa.hibernate.ddl-auto=none
logging.pattern.console=%d{dd-MM-yyyy HH:mm:ss} %magenta([%thread]) %highlight(%-5level) %logger.%M - %msg%n
Step 5: Create the new package and it named as model in that package create the java class named as User.
Go to src > com.gfg.querydslcrudapplication > model > User and put the below code.
Java
import jakarta.persistence.*;
import lombok.AllArgsConstructor;
import lombok.Data;
import lombok.NoArgsConstructor;
import java.util.Objects;
@Entity
@Data
@Table(name = "user_seq")
@AllArgsConstructor
@NoArgsConstructor
public class User {
@Id
@GeneratedValue(strategy = GenerationType.IDENTITY)
private Long id;
private String name;
private Integer age;
@Override
public boolean equals(Object obj) {
if (this == obj) {
return true;
}
if (obj == null) {
return false;
}
if (getClass() != obj.getClass()) {
return false;
}
final User other = (User) obj;
if (!Objects.equals(this.id, other.id)) {
return false;
}
if (!Objects.equals(this.name, other.name)) {
return false;
}
return Objects.equals(this.age, other.age);
}
@Override
public String toString() {
var builder = new StringBuilder();
builder.append("User{id=").append(id).append(", name=").append(name)
.append(", age=").append(age).append("}");
return builder.toString();
}
}
|
Step 6: Create the new package and it named as repository in that package create the java interface named as UserRepository.
Go to src > com.gfg.querydslcrudapplication > repository > UserRepository and put the below code.
Java
import com.gfg.querydslcrudapplication.model.User;
import org.springframework.data.querydsl.QuerydslPredicateExecutor;
import org.springframework.data.repository.CrudRepository;
import org.springframework.stereotype.Repository;
@Repository
public interface UserRepository extends CrudRepository<User, Long>, QuerydslPredicateExecutor<User> {
}
|
Step 7: Create the java class named as MyRunner that can be implements the CommandLineRunner.
Go to src > com.gfg.querydslcrudapplication > MyRunner and put the below code.
Java
import com.gfg.querydslcrudapplication.model.QUser;
import com.gfg.querydslcrudapplication.repository.UserRepository;
import com.gfg.querydslcrudapplication.model.User;
import org.slf4j.Logger;
import org.slf4j.LoggerFactory;
import org.springframework.beans.factory.annotation.Autowired;
import org.springframework.boot.CommandLineRunner;
import org.springframework.stereotype.Component;
import java.util.ArrayList;
import java.util.List;
import java.util.Random;
@Component
public class MyRunner implements CommandLineRunner {
private static final Logger logger = LoggerFactory.getLogger(MyRunner.class);
@Autowired
private UserRepository userRepository;
@Override
public void run(String... args) throws Exception {
var qUser = QUser.user;
User initialUser = new User(null, "John Doe", 30);
initialUser = userRepository.save(initialUser);
logger.info("Initial user inserted: {}", initialUser);
List<User> sampleUsers = generateSampleUsers(25);
sampleUsers = (List<User>) userRepository.saveAll(sampleUsers);
logger.info("25 sample users inserted: {}", sampleUsers);
List<User> users = (List<User>) userRepository.findAll(
qUser.name.endsWith("est").and(qUser.age.lt(29))
);
logger.info("Users with age less than 29 and name ending with 'est': {}", users);
List<User> usersWithAgeAbove30 = (List<User>) userRepository.findAll(
qUser.age.goe(30)
);
logger.info("Users with age greater than or equal to 30: {}", usersWithAgeAbove30);
}
private List<User> generateSampleUsers(int count) {
List<User> users = new ArrayList<>();
Random random = new Random();
for (int i = 0; i < count; i++) {
String name = "User" + (i + 1);
int age = random.nextInt(100);
users.add(new User(null, name, age));
}
return users;
}
}
|
Step 8: Open the main class and put the below code.
Java
import org.springframework.boot.SpringApplication;
import org.springframework.boot.autoconfigure.SpringBootApplication;
@SpringBootApplication
public class QueryDslCrudApplication {
public static void main(String[] args) {
SpringApplication.run(QueryDslCrudApplication.class, args);
}
}
|
Step 9: Once completed the spring project runs the application as spring project then it runs on the port 8083 then you will find the output of the project and this project can generates the sample users and inserted data can show the output. Refer the below image for the better understanding.
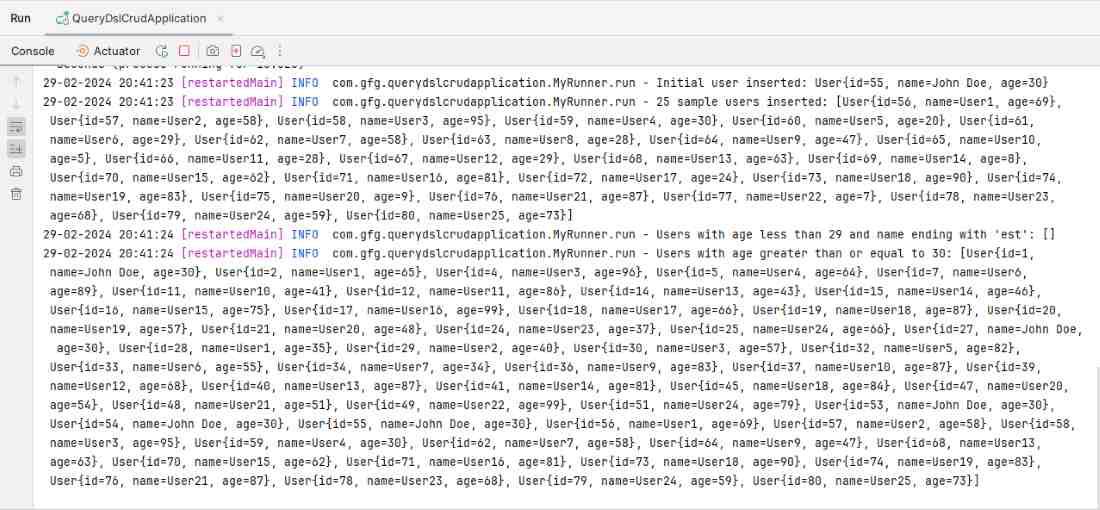
We can follow the above step then you can successfully complete the demonstration of the QueryDSL application of the spring project.
Share your thoughts in the comments
Please Login to comment...