Monitoring multiple ports in tcpdump
Last Updated :
15 Nov, 2023
In the world of network monitoring and security, tcpdump is a widely used tool for capturing and examining network data in real time. This article explores the importance of monitoring multiple ports with tcpdump, making it easier to understand how this tool is crucial for managing networks and enhancing security.
To monitor traffic on multiple ports using tcpdump, you need to specify a list of ports you want to capture. A Berkeley Packet Filter (BPF) expression with the desired port numbers can do this. Every packet captured by tcpdump undergoes a comparison with the BPF filter to determine if it should be displayed or saved.
Stepwise Implementation –
First, we must install the Linux system in our host system to perform this task.
Prerequisite:
1. VirtualBox
2. VMware
3. Kali Linux, Ubuntu Linux, or CentOS.
Step 1: To begin monitoring multiple ports with tcpdump, it is advisable to initiate a port scanning operation on the target system or network. This port scanning procedure serves the purpose of discovering information about the available ports.
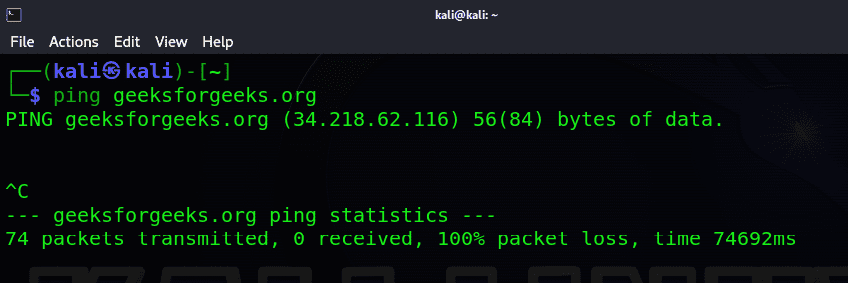
Before proceeding with port scanning, it’s essential to initiate a ping to the IP address, as depicted in the below.
$ ping <target_ip_or_hostname>
By the ping command followed by the IP address or hostname, your computer sends a series of small data packets to the target. If the target is reachable and responsive, you will receive packets in return, and this allows you to measure the response time.
Step2: Using the Nmap we will identify the open ports and closed ports.
$ nmap -p- <target_ip_or_hostname>
The nmap command is a powerful network scanning tool used to discover open ports on a target machine.
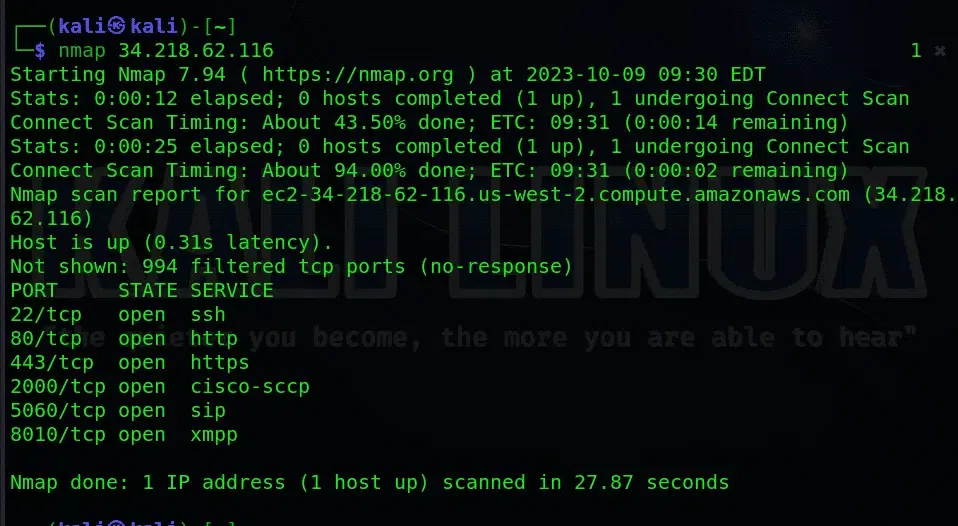
Nmap
Step3: To check all the ports on the targeted or host domain, you can use the following command:
$ nmap -p 1-1024 34.218.62.116
nmap -p 1-1024 is used to scan the most common ports (1 to 1024). This command aids in comprehending which services are currently operational and accessible on the target domain.
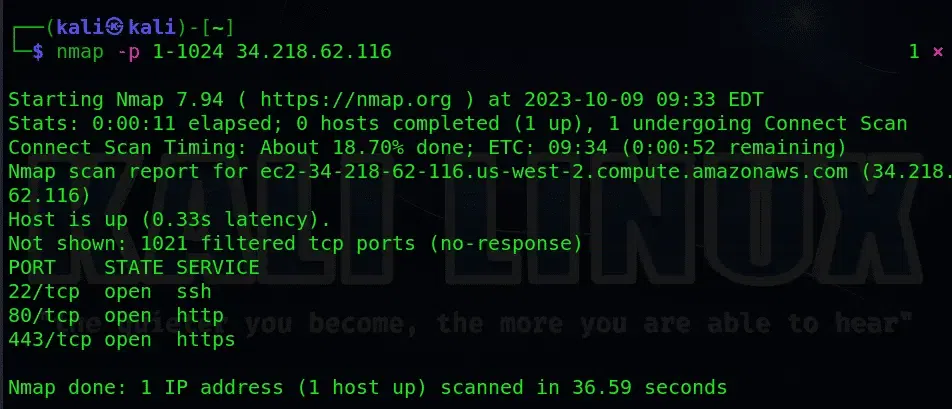
Nmap
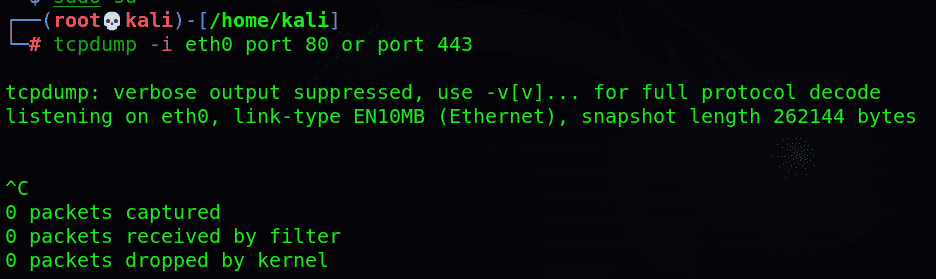
Step4: To identify open port numbers and create a tcpdump command for monitoring, you can use the following command, assuming you want to capture both the traffic passing through a specific port and HTTP traffic passing via port 80:
$ tcpdump port 80 or port 443
Step5: You can use the identified open port numbers to create a tcpdump command for monitoring. Here’s an example command:
$ sudo tcpdump -i <interface> -n -nn -vv -XX -f 'port <port1> or port <port2> or port <port3>' -s 0
The tcpdump command serves the purpose of capturing and analyzing network packets. When executed with elevated privileges (sudo), it gains the capability to capture network packets on a designated network interface.
|
Prevent hostname and port resolution, improving output readability and efficiency.
|
|
Increases verbosity, providing more detailed packet information.
|
|
Prints both ASCII and hexadecimal packet data for comprehensive analysis.
|
|
Specifies a filter for focusing on specific ports of interest.
|
Step6: After executing the tcpdum command Monitor Captured Traffic and Analyze Captured Data.
$ sudo tcpdump -i eth2
 ‘-i eth2’ : This option specifies the network interface (‘eth2‘ in this case) on which you want to capture network packets. The ‘-i flag’ is used to indicate the interface you want to monitor. In this example, it’s set to ‘eth2’, which means you will capture packets on the network interface named ‘eth2’.
So, the command is telling tcpdump to capture and display network packets on the ‘eth2′ network interface with elevated (superuser) privileges.
Frequently Asked Questions:
Q 1. What is tcpdump, and how is it used for network packet monitoring?
tcpdump is a command-line network packet capturing tool. It allows users to capture and analyze network traffic in real-time. It’s widely used for network diagnostics, security analysis, and troubleshooting. You can specify filters to capture packets on specific ports.
Q 2. How do I monitor traffic on multiple ports simultaneously with tcpdump?
To monitor traffic on multiple ports, use the -f option followed by a filter specifying multiple port numbers. For example, tcpdump -i <interface> -nn -vv -f ‘port 80 or port 443’ captures packets on ports 80 and 443. You can add more ports as needed.
Q 3. Can I monitor both incoming and outgoing traffic on multiple ports?
Yes, tcpdump captures both incoming and outgoing traffic by default. When you specify a port filter, it captures packets related to that port, whether they are incoming or outgoing.
Q 4. How do I view the content of captured packets in a human-readable format?
To view the content of captured packets in a human-readable format, use the -A option. For example, tcpdump -i <interface> -nn -vv -f ‘port 80 or port 443’ -A will display packet data in ASCII. This is useful for understanding packet payloads.
Q 5. Are there any security or privacy considerations when using tcpdump for monitoring network traffic?
Yes, using tcpdump can capture sensitive information, so it should be used responsibly and with proper authorization. Ensure that you comply with applicable laws and privacy regulations when capturing network data.
Conclusion:
So, Overall, monitoring multiple ports in tcpdump is vital for network management and security. Tcpdump allows network professionals to capture and analyze traffic on specific ports, enabling the detection of anomalies.Tcpdump’s versatility in monitoring multiple ports allows for the detection of unusual or suspicious network activity. This capability is particularly crucial in identifying unauthorized access or unexpected traffic patterns that may indicate security breaches or network misuse.
Share your thoughts in the comments
Please Login to comment...