Mongoose Schema API
Last Updated :
29 Dec, 2022
Mongoose is a package offered for Node JS in order to handle the querying, building schemas, and working out the business logic using MongoDB. Mongoose provides the ability to connect to a MongoDB instance, either local or a cloud-based instance.
Mongoose provides a long list of APIs in order to work and communicate with the database. One of them is the Schema API. Whenever we want to store any kind of data inside our database, we need to follow a particular schema according to which our data will be stored. For example, a schema to store an exercise will contain the following fields – exercise-name, exercise-description, and exercise-duration.
The most important functions which are used while working with the Schema API are as follows:
- Schema(): This function helps us to define the schema of the entity we want to store inside our database. The function takes as an input, all the fields of the entity, such as username, age, email, etc.
- model(): This function helps us to create a model/instance of a record of the entity we want to insert in our database. Once a model is created, we can use all the database operations such as insert, update, find, delete, etc. The function takes as an input, the name of our model and the schema of the entity we wish to store inside our database.
The syntax for creating a new schema using the Schema API is as follows:
const newEntity = new mongoose.Schema({
    field1: type of field(String/Number/Boolean and more)
    field2: type of field
    ...
})
The Schema just created is stored inside the variable newEntity.
Let us take a look at some examples to understand the Mongoose Schema API.
Step 1: Create a new folder called mongoose_examples. Open your command prompt and navigate to this folder. Now, type in the following command:
npm init -y
This will setup the package.json file for us, so that we can install all the necessary packages. Now, open your command prompt and type in the following command-
npm install mongoose express
This will install the mongoose and express packages for us. Now, inside the mongoose_examples folder, create a new file called index.js. Your final folder structure should look like this.
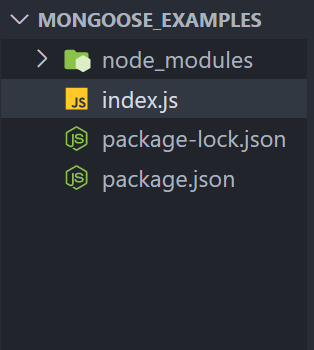
Final Folder Structure
Step 2: Open index.js. In the first example, we are creating an exercise schema, inserting some data inside it, and finally, reading the data, and displaying it on the webpage.
Filename: index.js
Javascript
const express = require('express');
const mongoose = require('mongoose');
const app = express();
const port = 5000;
const uri =
mongoose.connect(uri);
const connection = mongoose.connection;
connection.once('open', () => {
console.log('Connected to MongoDB successfully.');
});
const Schema = mongoose.Schema;
const newExercise = new Schema({
name: { type: String },
description: { type: String },
duration: { type: Number }
});
const Exercise = mongoose.model('Exercise', newExercise);
app.post('/insertExercise', (req, res) => {
Exercise.create({
name: 'Cycling',
description: 'Cycling on the road',
duration: 30
});
res.send('Exercise inserted successfully.');
});
app.get('/findExercises', (req, res) => {
Exercise.find()
.then((exercise) => res.send(exercise))
.catch((error) => res.send('Error' + error));
});
app.get('/', (req, res) => {
res.send('Mongoose Schema API');
});
app.listen(port, () => {
console.log(`Server is listening on the port ${port}.`);
});
|
Open your terminal and type the following command:
node index.js
You should see something like this in your terminal:
Server is listening on the port 5000.
Connected to MongoDB successfully.
Step 3: Go to the URL http://localhost:5000/insertExercise and perform a post request to insert an exercise. We will be using Thunderclient for the same which is a VS Code Extension for performing GET, POST, DELETE requests. You will get the following output.
Now, go to the URL http://localhost:5000/findExercises to display the exercise we just inserted. You will get the following output.
Step 4: In the next example, we will perform an update operation using Mongoose. For the same, we have already created the following sample database.
Step 5: Open index.js. What we are doing here is updating the price of Samsung 30s from 22000 to 30000. We will use the updateOne function provided by Mongoose for the same.
Filename: index.js
Javascript
const express = require('express');
const mongoose = require('mongoose');
const app = express();
const port = 5000;
const uri =
mongoose.connect(uri);
const connection = mongoose.connection;
connection.once('open', () => {
console.log('Connected to MongoDB successfully.');
});
const Schema = mongoose.Schema;
const newMobile = Schema({
name: { type: String },
price: { type: Number },
rating: { type: Number },
isBig: { type: Boolean }
});
const Item = mongoose.model('Item', newMobile);
app.post('/updateMobile', (req, res) => {
Item.updateOne(
{ name: 'Samsung 30s' },
{ price: 30000 },
(err, docs) => {
if (err) {
res.send(err);
}
else {
res.send('Document updated successfully.');
}
})
});
app.get('/findUpdatedMobile', (req, res) => {
Item.findOne({ name: 'Samsung 30s' })
.then((mobile) => res.send(mobile))
.catch((err) => res.send(err));
});
app.get('/', (req, res) => {
res.send('Mongoose Schema API');
});
app.listen(port, () => {
console.log(`Server is listening on the port ${port}.`);
});
|
Step 6: Now go to your ThunderClient. Type in the URL http://localhost:5000/updateMobile and perform a post request. You will see the following output:
Step 7: Now, type in the URL http://localhost:5000/findUpdatedMobile and you will get the update document. You will see the following output.
Reference: https://mongoosejs.com/docs/
Share your thoughts in the comments
Please Login to comment...