Manually Add a User Without Tools Like useradd and adduser in Linux
Last Updated :
29 Feb, 2024
Adding a user manually in Linux without using tools like useradd or adduser involves modifying system files directly. This method is not recommended for regular use, as it requires careful editing of system files and can lead to errors if not done correctly. However, in some situations, such as when these tools are not available or not working, it can be useful to know how to add a user manually. In this article, we will explain how to manually add a user in Linux
This article provides a step by step guide to add user manually, without using “useradd” or “adduser”.
- useradd: The useradd command in Linux is a tool used to add or create new user on the system. It is mainly used to create user, configuring the login shell of the user.
- adduser: It is also a user management tool but with a prominent management utility. It is often found in Debian-based distribution such as Ubuntu, Kali Linux, and its derivatives.
It is used to add user simply and it also provides more interactive features such as it adds user with a communal nature such as notifying user with questions and suggestions to assist and configure new user accounts, it also add default configuration and used with default values using various attributes.
- Permissions and Security: Both tools useradd and adduser do not sett up permissions for the user’s home directory or any other resources.
- Additional Configuration: For advanced user management tasks, such as setting up user groups, secondary groups, or setting up custom home directory, user might need to use additional commands or do the manual configuration after using tools like adduser or useradd.
- Lack of Validation: Both tools do not necessarily validate all parameters, so incorrect usage might lead to unexpected results or errors.
File System changes after creation of new user.
- The /etc/passwd file is updated with new entry of user.
- The /etc/shadow file is update with entry of our new user, containing encrypted password information.
- The new home directory is created in /home directory and the contents of /skel directory is copied in the home directory of new user, which provides default configuration and file directories for the user.
- The change of permission and ownership of user’s home directory is made to ensure the new user has significant access.
Steps to add user manually in Linux based Operating System
Step 1: Creating User
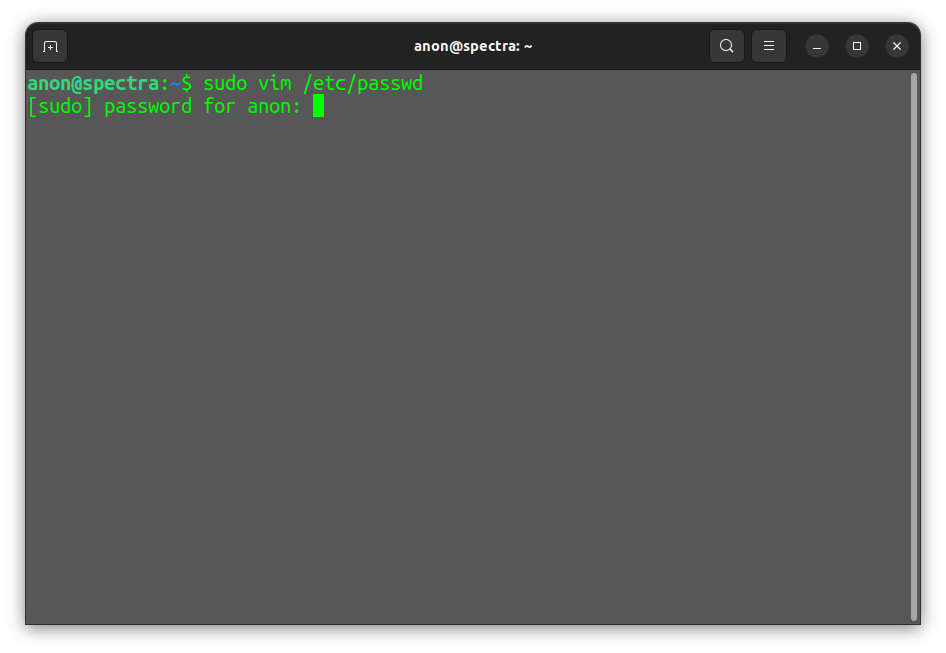
To create a user manually in linux based OS in this scenario “Ubuntu”, we will edit or add a line in passwd file located in etc directory.
‘/etc/passwd’, the passwd file consist of user information includes seven columns separated by colons.
Syntax:
Username:password:user-id:group-id:user-info:home-directory:login-shell
- Username: It is the username of the user, it should be between 1 to 32 characters long. Only (‘_’, ‘-’, ‘.’ ) special characters are allowed and cannot contain any spaces, It also should start with a letter, and they are also case-sensitive.
- Password: It is stored in hashed form, where ‘x’ is the hash stored in shadow file i.e. located in “etc/shadow”.
- User-id: It is a unique numeric value assigned to uniquely identify the used, it should not be repeated or be same as other user.
- Group-id: It is also unique numeric value representing group of the user if you want to create the user in the same group you can assign the value of the old group.
- User-info: In this field the extra info related to user is present separated by comma.
- Home-directory: It is the absolute path of the home directory of user.
- Login-shell: It is the path of shell.

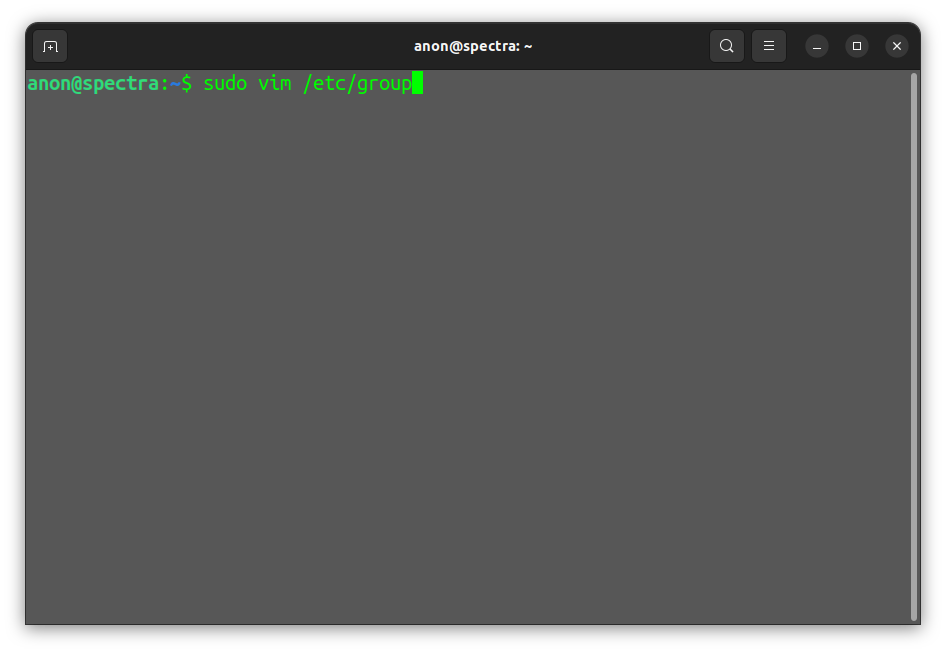
Step2: Creating Group
As we created group-id for our user in ‘/etc/passwd’ its time to add a group which coordinates with our group-id.
To create a group we will edit the group file which is located in /etc directory i.e. “/etc/group”.
It is similar to the passwd file but contains four columns separated by colons.
Syntax:
Group-name:password:group-id:
- Group Name: It must be between 1 to 32 characters long.
- Password: It is stored in hashed form, where ‘x’ is the hash stored in shadow file i.e. located in “etc/shadow”.
- group-id: Same numeric unique group-id.
The fourth column is left empty, it contains list of usernames separated by commas.

Step3: Home Directory
To create a home directory we will use copy command “cp” with -r or recursive attribute and our skeleton directory i.e. “/etc/skel”.
Syntax:
cp --recursive /etc/skel /home/username

Replace username with the actual username to create a home directory.
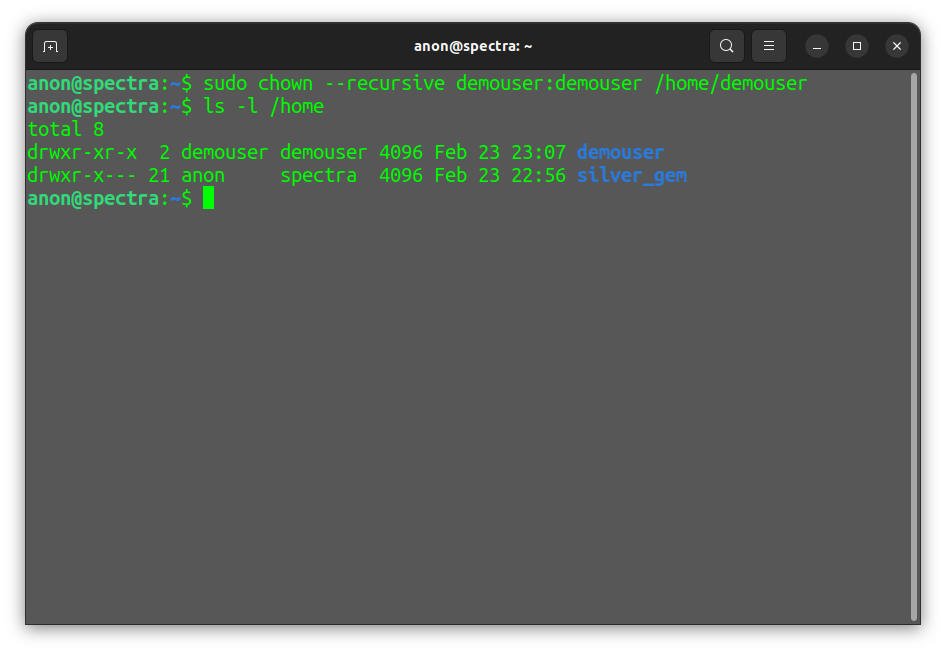
Step4: Changing ownership
The default permission of newly created user is set to root i.e. the “home” of our user belongs to root, to change the permission and the ownership of our user, we will use “chmod“ and “chown“.
chown [options] Owner:Group file
- chown: The chown is a command line tool stands for change owner, it is used to change the owner and group of files and directories.
- options: In our case we will use “-r” recursive flag with chown to change the ownership of the “home” of our new user.
- Owner: In place of owner we will assign new user’s username or its unique numeric ID.
- Group: In place of group we will assign group of our new user or its unique numeric ID.
- File: In place of file we will assign the path of our “home” as we have to change the permission of home of our user.
Step5: Changing permission
To change the permission of our user’s home directory we will use chmod with recursive option and mode.
chmod option mode file
- chmod: The chmod is a command line tool stands for change mode, it is used to change the permission of files and directories. It allows user to set permission who can read, write and execute the file or directory in the system.
- option: In our case we will use “-r” recursive flag with chown to change the mode of the “home” of our new user.
- mode: It specifies the permission to be changed, and is represented by symbolic or octal representation.
- file: It is simply the path of the file or directory whose permission we have to change in our case it is “/home/username“.

Step6: Creating Password
To create password for our newly created user we will use a command line utility “passwd“.
Syntax:
passwd username
replace the username with actual username.

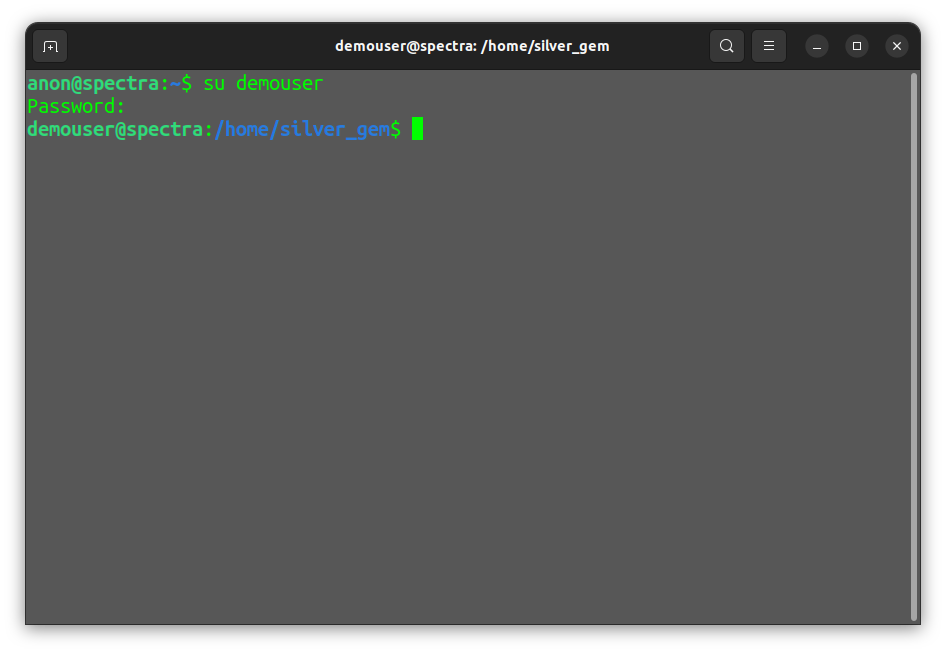
Step7: whoami
To confirm the successful creation of our new user we will login to our new user and confirm the creation of user using “whoami” command.
$ su demouser
Password:
$ whoami
demouser

Permissions and ownerships
We can also manage the permission and ownership of our user’s home directory for example if we want give read, write and execute permission to user and no permission to group and others, we will assign mode 700 in step 5. We can change and grant permission as per our requirements for user, group and others. We just have to keep in mind that each digit represents the combination of read (4), write (2), and execute (1) permissions and granting permission to user, group and other respectively.
We can also change the ownership of the user, for example we can assign different group to our user’s home directory in step 4
Example:
chown --recursive demouser:group1 /home/demouser
Security consideration
When adding user manually we should consider the following secure steps to protect against potential vulnerabilities:
- Creating a secure password is a first and most common step to make our system more secure.
- Assigning appropriate privileges to the new user account is a good step as it limits the use to access the whole system and allows them to perform their intended tasks.
- Assuring that the user have the permission of read, write and execute for their own home directory and the access of other’s home directory is denied.
- Monitoring user’s activity on the system and maintaining detailed logs of user actions is also a good step towards security as it helps to detect suspicious behavior or unauthorized access attempts.
What are the essential steps to manually add a user in Linux?
Manually adding a user generally involves creating a new entry in “/etc/passwd “and “/etc/shadow ” file for the user, setting up a home directory, configuring permissions, and optionally adding the user to relevant groups.
What permissions should I set for the user’s home directory?
The user’s home directory generally have mode 700 i.e. only user have the permission to read, write and execute and groups and other’s have no permissions.
Can I simply edit /etc/passwd and /etc/shadow to add a user?
Yes, technically you can edit the files but you must keep the syntax of the file in mind or there will be the risk of errors, else you can also use tools like adduser or useradd.
How to assign a password for new user?
You can simply set password for new user using a command line tool “passwd” .
Can I use shell scripting to automate the manual user creation process?
Yes, shell scripting can be used to automate the manual user creation process. However, it’s crucial to thoroughly test scripts to ensure they function as intended and handle errors gracefully.
Conclusion
In this article we have covered all the necessary steps to manually add a user in Linux. Adding the user manually is complex process but crucial process to create the user, there are several essential steps such as creating a new entry in /etc/passwd file to create and store the information of user, editing /etc/group file to create a group for user. Giving proper permission to user’s home directory and setting up password for more secure environment. But still using tools such as “adduser” or “useradd” for new user creating is recomended as they consumes less time and the chances of error is reduced
Share your thoughts in the comments
Please Login to comment...