JSP – Registration Form
Last Updated :
02 Apr, 2024
JSP can be defined as JavaServer Pages. It is a technology that can be used for developing dynamic web pages. The JSP registration form allows to the users to input their information and it is typically for registration purposes and submit it to the server for processing. It consists of the HTML for the layout and structure, and it is combined with the Java code to handle the server-side processing such as the data validation storage and response generation.
Key Terminologies:
- JSP(JavaServer Pages): It is a technology that can enable the creation of dynamic web pages using Java and it can allow mixing the static HTML content with dynamic Java code. This file has .jsp extension and is translated into the servlets by the web container before being executed.
- Registration Form: The web form used to collect user information such as the name, phone number, address, etc. Typically for the registration process and these commonly on the websites and applications that are required the user accounts.
- Scriptlet: It is a block of the java code that can be embedded with a JSP page with the delimited by the <% %> tags.
- Request Parameter: The request parameter sent from the client to the server as part of the HTTP request. In the registration form, form inputs fields values are sent as the request parameters to the server when the form will be submitted.
- Server-side Processing: The processing of the data that can occur on the server after receiving the request from the client. The server-side processing involves tasks such as data validation database interaction and generating the response to send back to the client.
Steps to Generate Registration Form in JSP
We can develop the simple registration JSP form with basic details of the user after then processing from the server then response back display the data to the client as the result.
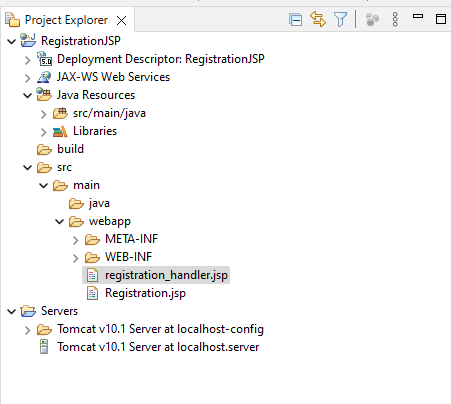
Step 1: Create the dynamic web project using Eclipse and it is named as the RegistrationJSP Open the project into the eclipse.
Once the project then the file structure looks like the below image.
Step 2: Create the new JSP file and it named as the Registration.jsp and this file can be used to create the registration form to gather data from the user.
Go to src > webapp > Registration.jsp and put the below code.
HTML
<%@ page language="java" contentType="text/html; charset=UTF-8"
    pageEncoding="UTF-8"%>
<!DOCTYPE html>
<html>
<head>
    <meta charset="UTF-8">
    <title>Registration Form</title>
    <style>
        /* CSS styles for the registration form container */
        .registration-container {
            width: 600px; /* Set the width of the container */
            margin: 0 auto; /* Center the container horizontally */
            padding: 20px; /* Add some padding inside the container */
            border: 2px solid #ccc; /* Add a border */
            border-radius: 10px; /* Add some border radius */
            background-color: #f9f9f9; /* Background color */
        }

        /* CSS styles for the heading */
        .registration-heading {
            text-align: center; /* Center the heading text */
        }

        /* CSS styles for input fields */
        .input-field {
            width: 100%;
            padding: 8px;
            margin: 5px 0;
            box-sizing: border-box;
        }
    </style>
</head>
<body>

<div class="registration-container">
    <h2 class="registration-heading">Registration Form</h2>
    <form action="registration_handler.jsp" method="post">
        <label for="firstname">First Name:</label>
        <input type="text" id="firstname" name="firstname" class="input-field" required><br>

        <label for="lastname">Last Name:</label>
        <input type="text" id="lastname" name="lastname" class="input-field" required><br>

        <label for="email">Email:</label>
        <input type="email" id="email" name="email" class="input-field" required><br>

        <label for="mobile">Mobile Number:</label>
        <input type="tel" id="mobile" name="mobile" class="input-field" required><br>

        <label for="address">Address:</label>
        <textarea id="address" name="address" class="input-field" required></textarea><br>

        <label for="branch">Branch:</label>
        <input type="text" id="branch" name="branch" class="input-field" required><br>

        <label for="year">Year:</label>
        <input type="text" id="year" name="year" class="input-field" required><br>

        <label for="percentage">Percentage:</label>
        <input type="text" id="percentage" name="percentage" class="input-field" required><br>

        <input type="submit" value="Register">
    </form>
</div>

</body>
</html>
Step 3: Create the new JSP file and it named as the registration_handler.jsp and this file can be used to processing the user data from the server and response back to the client.
Go to src > webapp > registration_handler.jsp and put the below code.
HTML
<%@ page language="java" contentType="text/html; charset=UTF-8"
    pageEncoding="UTF-8"%>
<!DOCTYPE html>
<html>
<head>
    <meta charset="UTF-8">
    <title>Registration Handler</title>
    <style>
        /* CSS styles for the registration form container */
        .registration-container {

            width: 600px; /* Set the width of the container */
            margin: 20px auto; /* Center the container horizontally with some top margin */
            padding: 20px; /* Add some padding inside the container */
            border: 2px solid #ccc; /* Add a border */
            border-radius: 10px; /* Add some border radius */
            background-color: #f9f9f9; /* Background color */
        }

        /* CSS styles for the heading */
        .registration-heading {
            text-align: center; /* Center the heading text */
        }

        /* CSS styles for input fields */
        .input-field {
            width: 100%;
            padding: 8px;
            margin: 5px 0;
            box-sizing: border-box;
        }
    </style>
</head>
<body>

<div class="registration-container">
    <h2 class="registration-heading">Registration Details</h2>
    <%
        // Retrieve form data
        String firstName = request.getParameter("firstname");
        String lastName = request.getParameter("lastname");
        String email = request.getParameter("email");
        String mobile = request.getParameter("mobile");
        String address = request.getParameter("address");
        String branch = request.getParameter("branch");
        String year = request.getParameter("year");
        String percentage = request.getParameter("percentage");
    %>
    <p><strong>First Name:</strong> <%= firstName %></p>
    <p><strong>Last Name:</strong> <%= lastName %></p>
    <p><strong>Email:</strong> <%= email %></p>
    <p><strong>Mobile Number:</strong> <%= mobile %></p>
    <p><strong>Address:</strong> <%= address %></p>
    <p><strong>Branch:</strong> <%= branch %></p>
    <p><strong>Year:</strong> <%= year %></p>
    <p><strong>Percentage:</strong> <%= percentage %></p>
</div>

</body>
</html>
Step 4: Once the project completes and it runs as the tomcat sever then it will run on the port 8082. Refer the blow images for the better understanding.
Output:
Registration Form:
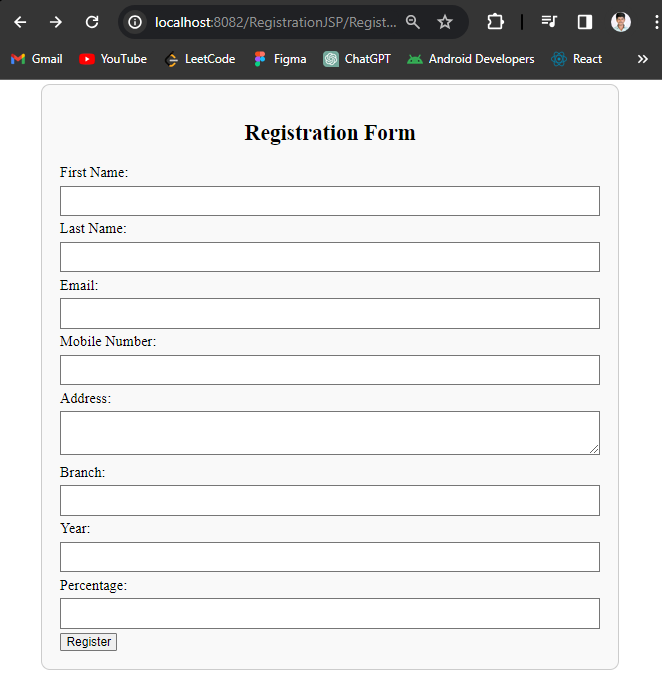
If we are following the above steps, then we can successfully develop the JSP Registration Form project.
Share your thoughts in the comments
Please Login to comment...