How to Use Storage Console in Firebase?
Last Updated :
05 Dec, 2022
You may upload and share user-generated content, such as photographs and videos, using Cloud Storage for Firebase, which enables you to integrate rich media content into your apps. We will now go over how to set up and customize an Android application using Firebase so that it can leverage cloud storage.
Without further ado, we will dive straight into the process to know how the Storage Console works.
Step 1: Creating the Default Storage Bucket
- Select Storage in the Firebase console’s navigation bar, then click Get started.
- Review the messaging of utilizing security rules to protect your cloud storage data. Consider establishing your guidelines for public access as you develop.
- For your default Cloud Storage bucket, choose a location. Your project’s default Google Cloud Platform (GCP) resource location is defined by this location setting. The GCP services in your project call for a location setting, notably your Cloud Firestore database and your App Engine app.
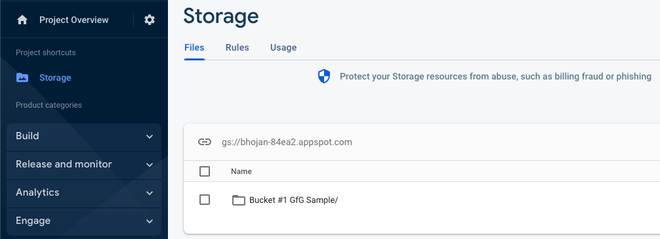
Image#1: Creating the Bucket inside the Storage Tab
By following the steps above, we will be creating such a bucket.
Step 2: Setting Up the Access
Now, we will see how to allow the globe and the world to see the files which we have put in our bucket, we will need to update some access in there.
ProTip: Be sure to restrict your Cloud Storage once more when you set up authentication since this does make it accessible to everyone, including users of other apps.
Only authenticated users can read or write data in Cloud Storage by default since read and write access is restricted. You can put up your rules for public access to get going without setting up authentication.
You can specify how your data should be formatted, how it should be indexed, and when it can be read from and written to using Cloud Storage for Firebase’s declarative rules language.
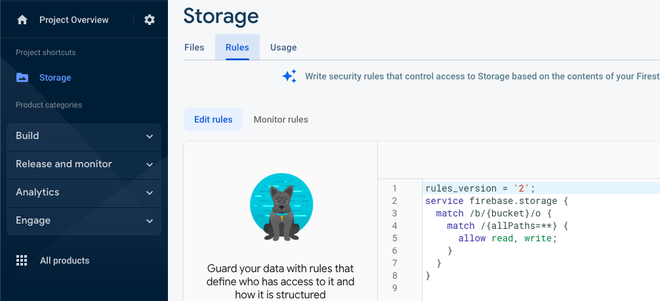
Image#2: The rules, blunt and simple
Step 3: Use the URL to configure the Storage and Bucket
- Open the Firebase console and navigate to your Storage dashboard.
- Look at the file viewer’s header after selecting the Files tab.
- Into your clipboard, copy the URL. The format is often project-id.appspot.com.
- Add the storageBucket attribute with the URL of your bucket to the firebaseConfig object in your application
Conclusion
By following the above-mentioned steps you will successfully be able to Use the Storage Functionality provided in the Firebase Console, hope you learned something new and would use it on a project!
Share your thoughts in the comments
Please Login to comment...