To regulate access and maintain security, Linux/Unix systems must have the ability to lock and unlock user accounts. It offers the adaptability required to handle a range of security and operational scenarios while making sure that only authorized users have access. Some of the reasons why locking and unlocking user accounts is essential for system security are mentioned below.
- Security: A user account can be locked to stop someone from using it without authorization. Access that is not authorized may result in security events like data loss or breaches.
- Account Management: Proper account management may include locking accounts. For instance, to ensure that someone who leaves the company, no longer has access to company resources, the account should be closed. When a new employee wants access, unlocking may be done.
- Temporary Suspension: User access can be temporarily suspended for maintenance or system updates by locking accounts. The accounts can be unlocked after the maintenance is finished.
- Multiple Failed Attempts: Multiple failed login attempts can be detected by a system, and the account can then be immediately locked to prevent brute-force attacks.
In this article we will discuss some of the common methods to lock and unlock user accounts in Linux/Unix-based OS:
Locking/Unlocking a User in Linux
Since we are modifying user account settings that have an impact on system security, we must have superuser permissions to lock or unlock user accounts. To grant superuser permission, type the following command:
sudo su
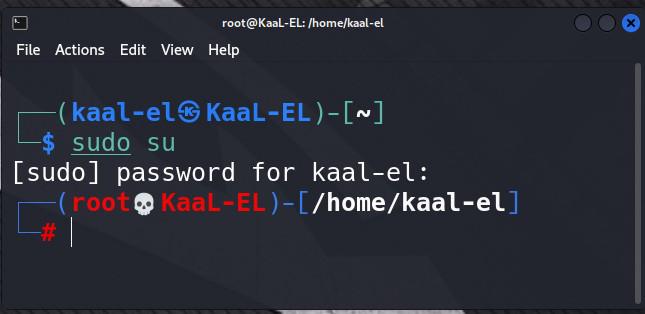
Granting Root Permission
Below are the methods that can help us to lock/unlock a user in Linux:
- Method 1: Using the “passwd” command
- Method 2: Using the “usermod” command
- Method 3: Using the “chage” command
So, let’s discuss each of the methods in detail:
Method 1: Using the “passwd” command
1. Steps to Lock User Accounts:
In Linux, we can use the “passwd” command with the “-l” option to lock a user account. This option locks a user account, preventing the user from logging in.
Step 1: Open the terminal and run the following command as the root user or with superuser privileges.
passwd -l username
Step 2: Just replace “username” with the name of the user account you want to lock.
Output:
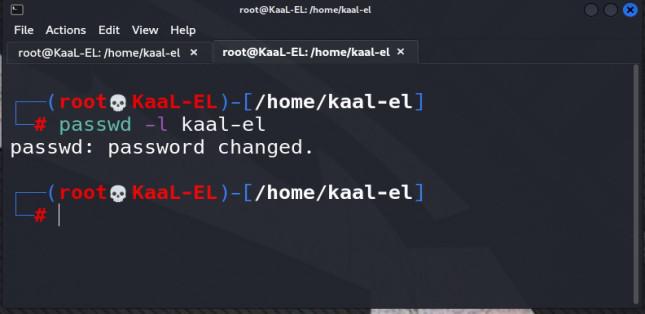
User Account Locked
The user will no longer be able to log in, and the account will now be locked. They will be prompted for their password, but access will be denied, as shown in the screenshot below.
Output:
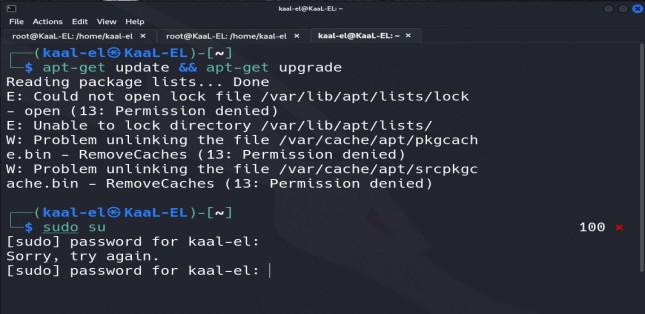
Access Denied
2. Checking the Status of User Account:
Step 1: Fire up the terminal.
Step 2: To check the status of the user account whether it is locked or unlocked type the following command.
passwd -S username
Output:
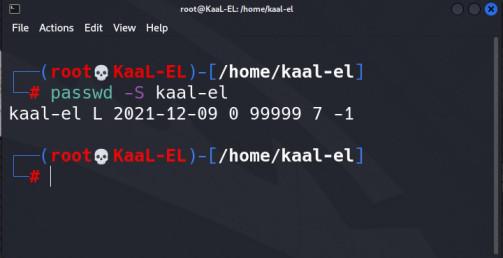
Status of User Account
Here “kaal-el” is the username and “L” stands for Locked status.
3. Steps to Unlock User Accounts:
In Linux, we can use the “passwd” command with the “-u” option to unlock a user account.
Step 1: Open the terminal.
Step 2: Run the following command as the root user or with superuser privileges.
passwd -u username
Step 3: Just replace “username” with the name of the user account you want to unlock.
Output:
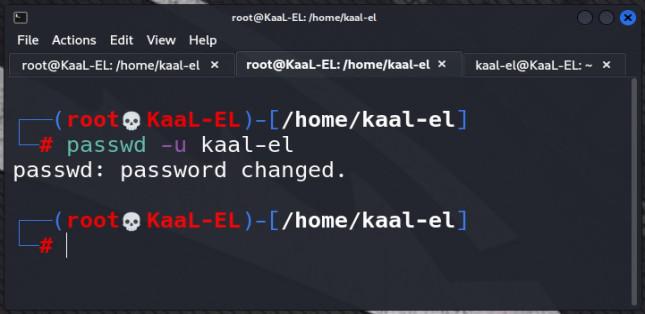
User Account Unlocked
Step 4: A prompt to change the user’s password will now show up. We have two options:
- Create a new password.
- Hit the Enter key to save the current one.
The user account should be unlocked, and the user should be able to log in again after executing this command.
Method 2: Using the “usermod” command
In Linux, we can change the properties of a user account by using the “usermod” command. It lets us modify a user’s home directory, login shell, username, user ID (UID), and more.
1. Steps to Lock User Accounts:
Step 1: Open up the terminal.
Step 2: To lock the user account use “usermod” with the “-L” or “–lock” option.
usermod --lock username
One can use the passwd command to verify the status of a locked user account.
Output:

Status of User Account after Locking
2. Steps to Unlock User Accounts:
Step 1: Open up the terminal.
Step 2: To unlock the user account use “usermod” with the “-U” or “–unlock” option.
usermod --unlock username
Step 3: Now the status of the user account can be checked by filtering the user from the “/etc/shadow“ file. Type the command below to get the status.
grep username /etc/shadow
Output:
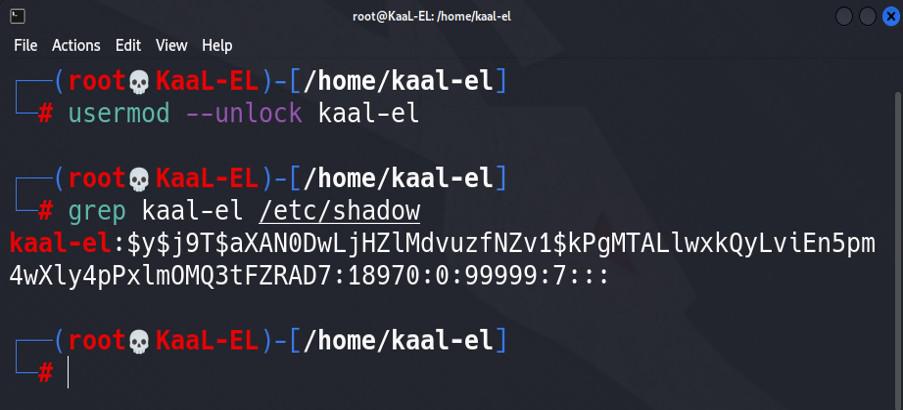
Status of User Account after Unlocking
Output:
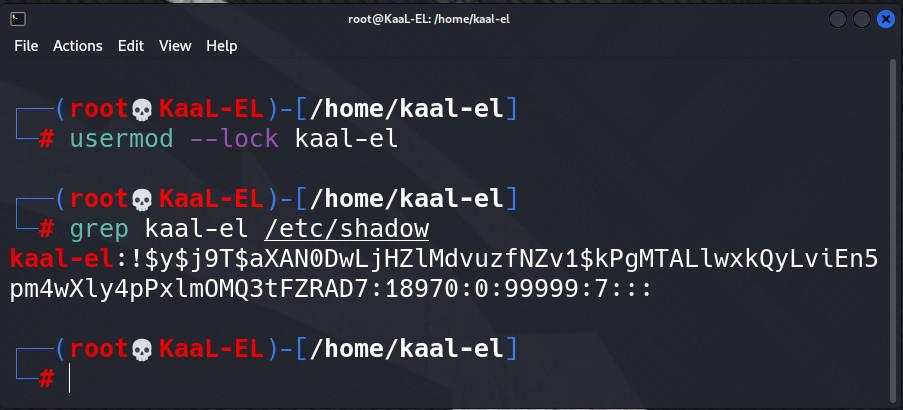
Exclamation sign(!) shows account locked
The screenshot above shows that the user account is locked, as indicated by the single exclamation sign(!) that appears after the username. If the indication is absent, the user account has been unlocked.
Method 3: Using the “chage” command
In Linux, the “chage” command is used to control user account password aging and expiration settings. Admins can set different password policy parameters and configure when a user’s password expires. The command “chage” means “change age.”
Step 1: Fire up the terminal.
Step 2: Type the following command to get details about the password aging and expiration information for a specific user account in Linux.
chage -l username
Step 3: Just replace “username” with the name of the user account. Here is an example of what the output might look like.
Output:
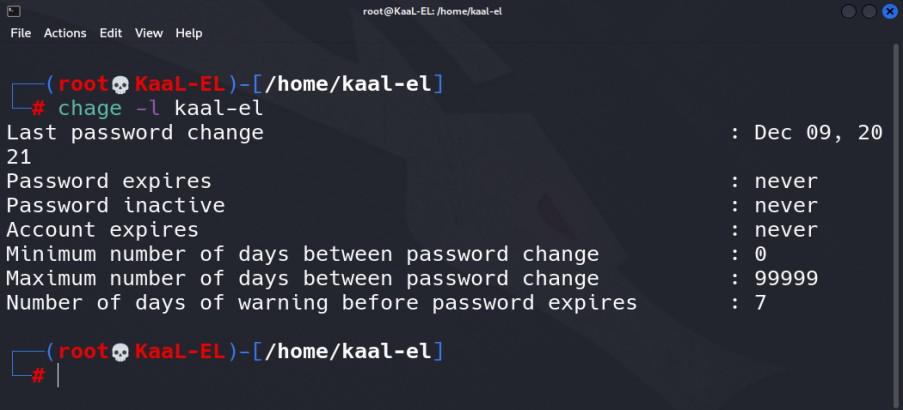
Password aging and expiration details
1. Steps to Lock User Accounts:
Step 1: Open up the terminal.
Step 2: To lock the user account set the account expiration date to “0“.
Step 3: Type the following command in the terminal to set the account expiration date to “0” which was set to “never” earlier.
chage -E0 username
When we set the account expiration date to “0” it expires on “Jan 01, 1970”. We can confirm it by running the change command with the “-l” option as explained above.
Output:
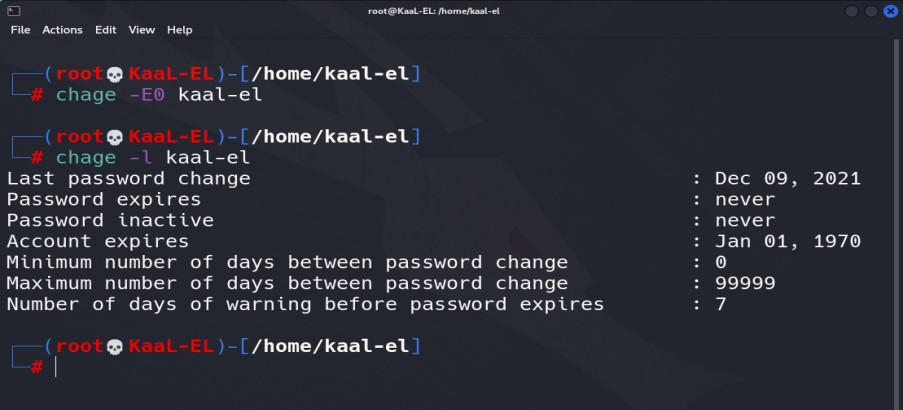
User account Locked
2. Steps to Unlock User Accounts:
Step 1: Open up the terminal.
Step 2: To unlock the user account set the account expiration date to “-1”.
Step 3: Type the following command in the terminal to set the account expiration date to “-1” .
chage -E -1 username
When we set the account expiration date to “-1”, it never expires. We can confirm it by running the chage command with the “-l” option as explained above.
Output:
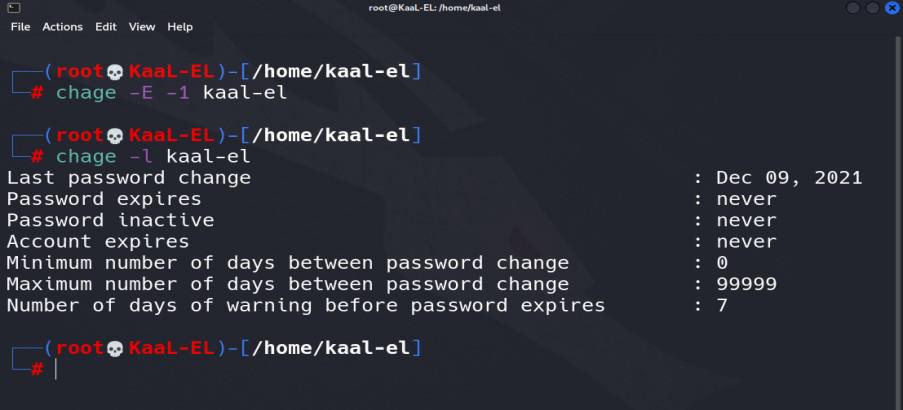
User Account Unlocked
Conclusion
In conclusion, to keep a Linux system secure, user accounts must be locked and unlocked. It gives assurance that the system can only be accessed by authorized users and that access can be granted or denied as needed. These activities are often carried out by system administrators or users with superuser permissions to properly manage user accounts. We can lock and unlock a user in any Linux distribution, and the process mentioned in this article is the same for all of them.
Share your thoughts in the comments
Please Login to comment...