How to set the appearance of the CheckBox in C#?
Last Updated :
27 Sep, 2021
The CheckBox control is the part of windows form which is used to take input from the user. Or in other words, CheckBox control allows us to select single or multiple elements from the given list. You are allowed to use a CheckBox as a normal CheckBox or a CheckBox as a button by using Appearance property provided by CheckBox class.
Appearance property is set to normal, then it behaves like the normal CheckBox and if the Appearance property set to the button, then it will work like a toggle button. By default value of this property is Normal. In Windows form, you can set this property in two different ways:
1. Design-Time: It is the simplest way to set the Appearance property of a CheckBox using the following steps:
- Step 1: Create a windows form as shown below in the image
Visual Studio -> File -> New -> Project -> WindowsFormApp
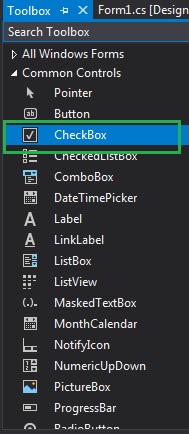
- Step 2: Drag the CheckBox control from the ToolBox and drop it on the windows form. You can place CheckBox anywhere on the windows form according to your need.
- Step 3: After drag and drop you will go to the properties of the CheckBox control to set the value of Appearance property.

Output:

2. Run-Time: It is a little bit trickier than the above method. In this method, you can set the Appearance property of a CheckBox programmatically using the following syntax:
public System.Windows.Forms.Appearance Appearance { get; set; }
It also throws an InvalidEnumArgumentException if the value assigned to this property is not from the Appearance values. Following steps are used to set the Appearance property of the CheckBox:
- Step 1: Create a checkbox using the CheckBox() constructor provided by the CheckBox class.
// Creating checkbox
CheckBox Mycheckbox = new CheckBox();
- Step 2: After creating CheckBox, set the Appearance property of the CheckBox provided by the CheckBox class.
// Set the Appearance property of the CheckBox
Mycheckbox.Appearance = Appearance.Normal;
- Step 3: And last add this checkbox control to form using Add() method.
// Add this checkbox to form
this.Controls.Add(Mycheckbox);
Example:
C#
using System;
using System.Collections.Generic;
using System.ComponentModel;
using System.Data;
using System.Drawing;
using System.Linq;
using System.Text;
using System.Threading.Tasks;
using System.Windows.Forms;
namespace WindowsFormsApp5 {
public partial class Form1 : Form {
public Form1()
{
InitializeComponent();
}
private void Form1_Load(object sender, EventArgs e)
{
Label l = new Label();
l.Text = "Select language:";
l.AutoSize = true;
l.Location = new Point(233, 111);
l.Font = new Font("Bradley Hand ITC", 12);
this.Controls.Add(l);
CheckBox Mycheckbox = new CheckBox();
Mycheckbox.Height = 50;
Mycheckbox.Width = 100;
Mycheckbox.Location = new Point(229, 136);
Mycheckbox.Text = "C#";
Mycheckbox.Appearance = Appearance.Normal;
Mycheckbox.Font = new Font("Bradley Hand ITC", 12);
this.Controls.Add(Mycheckbox);
CheckBox Mycheckbox1 = new CheckBox();
Mycheckbox1.Height = 50;
Mycheckbox1.Width = 100;
Mycheckbox1.Location = new Point(230, 198);
Mycheckbox1.Text = "Ruby";
Mycheckbox1.Appearance = Appearance.Button;
Mycheckbox1.Font = new Font("Bradley Hand ITC", 12);
this.Controls.Add(Mycheckbox1);
}
}
}
|
Output:

Share your thoughts in the comments
Please Login to comment...