How to set response header on Express JS assets?
Last Updated :
25 Dec, 2023
In Express.js applications, we can set the response headers on assets to improve performance and also control the cache behavior.
In this article, we will set the response header on Express.js assets by using 2 different approaches. We will see the practical implementation of this approach in terms of examples and output.
The following approaches will be used to set response header in Express
Prerequisites
Steps to create Express application
Step 1: In the first step, we will create the new folder by using the below command in the VScode terminal.
mkdir folder-name
cd folder-name
Step 2: After creating the folder, initialize the NPM using the below command. Using this the package.json file will be created.
npm init -y
Step 3: Now, we will install the express dependency for our project using the below command.
npm i express
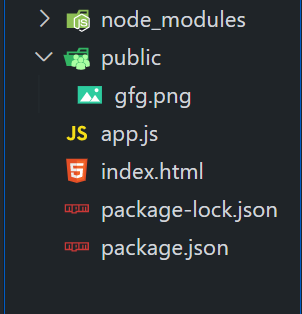
Step 4: Now create the below Project Structure of our project which includes the file as app.js and public directory in which images are stored.
Project Structure:
The updated dependencies in package.json file will look like:
"dependencies": {
    "express": "^4.18.2"
}
Approach 1: Using Middleware
- In this approach, we have defined the middleware before serving the static assets. When the request to the asset is done, it will go through the middleware in which we have set the response headers.
- In the below example, we have set the response header as “public, max-age=3600“, which specified the cache policy allowing the public caching for up to 3600 seconds.
Example: Below is the implementation of the above-discussed approach.
Javascript
const express = require("express");
const app = express();
app.use("/assets", (req, res, next) => {
res.setHeader("Cache-Control", "public, max-age=3600");
next();
});
app.use("/assets", express.static("public"));
app.get("/", (req, res) => {
res.send("Hello GeeksforGeeks!");
});
const PORT = 3000;
app.listen(PORT, () => {
console.log(`Server is running on port ${PORT}`);
});
|
Output:
Approach 2: Using Route Handler Directly
- In this approach, we are directly setting the response header in the router handler for the assets.
- We have set the 2 different headers Cache-Control” to ‘public‘ and “Expires” to indicate the asset’s expiration time (1 hour from now).
Example: Below is the implementation of the above-discussed approach.
Javascript
const express = require("express");
const app = express();
app.get("/assets/:filename", (req, res) => {
const filename = req.params.filename;
res.setHeader("Cache-Control", "public");
res.setHeader("Expires", new Date(Date.now() + 3600000).toUTCString());
res.sendFile(filename, { root: "public" });
});
app.get("/", (req, res) => {
res.send("Hello World!");
});
const PORT = 3000;
app.listen(PORT, () => {
console.log(`Server is running on port ${PORT}`);
});
|
Output:
Share your thoughts in the comments
Please Login to comment...