How to Run and Install the CloudWatch Agent on Your Servers?
Last Updated :
21 Aug, 2023
Amazon CloudWatch is a powerful tool that is used to collect metrics on resources and monitor their performance of the resources. It can monitor system-level metrics like CPU usage, memory usage, and disk space and also the application levels metrics like requests per second and error rates. By collecting these data it will help the developers to analyze and know the performance of the servers.
What is the CloudWatch Agent?
The Amazon Web Services (AWS) CloudWatch agent is a piece of software that lets you gather and keep track of metrics, logs, and events from various AWS resources and applications operating on your servers. It functions via virtual machines, on-premises servers, and an EC2 instance. It enables you to obtain insightful information and performance statistics that can be applied to analysis, monitoring, and troubleshooting in real time.
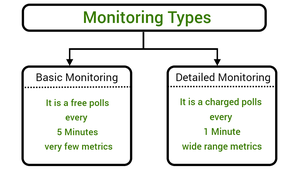
Types of Monitoring
- Basic Monitoring
- Detailed Monitoring
Benefits of Installing The CloudWatch Agent
- Real-Time Monitoring
- Custom Metrics and Logs
- Centralized Monitoring
- Automated Alarms
- Troubleshooting and Diagnosis
- Historical Analysis
- Security and Compliance
- Administration Made Simple
In general, installing the CloudWatch agent makes it easier for you to properly monitor, analyze, and manage your AWS environment, which boosts performance, reliability, and cost-saving.
Installing and Running the CloudWatch Agent On Your Servers
Make sure your server is running a supported operating system, such as Windows Server, Amazon Linux, Amazon Linux 2, CentOS, Ubuntu, or Red Hat Enterprise Linux (RHEL). Make sure your server has internet access so it can download the required configurations and packages.
Steps to Install and Configure Cloud Watch Agent
Step 1: Firstly, log in to your AWS account then If the IAM role is already created, go to -> EC2 Dashboard and create a new instance. Otherwise, Create a new IAM Role.
Step 2: Go to Instances in Resources then click on Launch Instance in EC2 Dashboard.
.jpg)
then enter the appropriate Name for example MyCWInstance and select after searching instance type Amazon Linux 2 AMI(HVM) -Kernel 5.10, SSD volume Type in Application and OS Images.
Step 3: By default, selected t2. the micro then select vockey in Key Pair then select Your IAM role in the IAM instance profile of Advanced details and successfully initiated the launch of the Instance through click on Launch Instance Button.
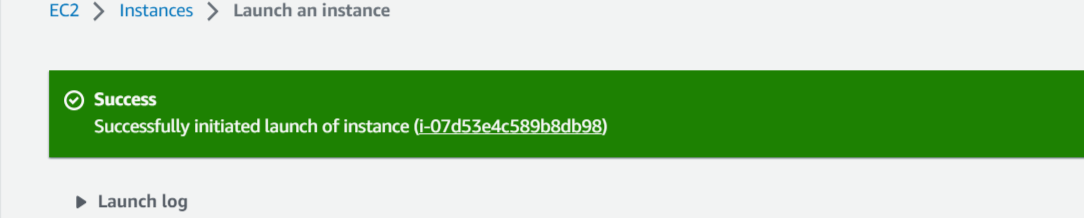 Step 4: We can see our Instance (
MyCWInstance) in EC2 instance Dashboard.
Select the check box of our Instance and go to ->Action and Connect for Connect to Instance. then click on Connect.

Step 5: Enter the command in the console ‘ sudo yum install amazon-cloud watch-agent -y ‘ to install successfully CloudWatch agent.
 Step 6: Next thing is to we need to move the folder in where it is installed then we will launch the CloudWatch Configuration result ‘ sudo /opt/aws/amazon-cloudwatch-agent/bin/amazon-cloudwatch-agent-config-wizard ‘.
- Choose Answer:
- Select OS-> Linux,
- Default Region->EC2,
- User planning to run the agent-> root,
- StatsD daemon->Yes,
- Default port [8125] -> Enter,
- IThe interval10S,
- The interval for metrics-> the 60s,
- Do you want to monitor from CollectD?-> No,
- Do you want to monitor any host metrics? ->Yes,
- Do you want to monitor CPU metrics per core->Yes,
- Do you want to add an ec2 dimension-> Yes,
- Do you want to add an ec2 dimension->Yes,
- Would you like to collect your metrics at high resolution? -> 60s,
- Default metrics-> Standard,
- Satisfied above config->Yes,
- Have any Existing CloudWatch log agent->No,
- Want to monitor->Yes,
- Log File Path-> /var/log/messages
- Log group name->ec2logforcwagentinstance
- Log stream name-> Enter for default.
- Log group->2 – 1
- Do you want to Additional log files to monitor? ->No
- Do you want to store the config in the SSM parameter store? ->No then display Program exists now.
Step 7: Clear our screen->clear then ‘ cd /opt/aws/amazon-cloud watch-agent/bin ‘ then ‘ ls ‘.
 Step 8: Enter ‘ sudo /opt/aws/amazon-cloud watch-agent/bin/amazon-cloudwatch-agent-ctl -a fetch-config -m ec2 -s -c file:/opt/aws/amazon-cloud watch-agent/bin/config.json ‘ Configuration validation succeeded.
 Step 9: Enter ‘ sudo amazon-linux-extras install epel -y ‘ then ‘ sudo yum install stress -y ‘, ‘ stress –cpu 1 ‘.
Running the CloudWatch Agent:
- Go back to services in Dashboard and click on cloud watch ->Metrics-> all Metrics-> EC2 -> select CloudWatchAgentERole and see the Graph.
- CWAgent-> ImageId, InstanceId, InstanceType, device and select CWAgent named disk_used_percent and many more to see the Graph with different colors.
- Collect Metrics and Logs with the CloudWatch Agent
The Amazon CloudWatch agent ought to now be installed and operating on your server, gathering and sending metrics and logs to CloudWatch in accordance with the configuration you provided. By monitoring your CloudWatch metrics and logs in the AWS Management Console, you can make sure that they are being processed as intended.
How to Troubleshooting the CloudWatch Agent?
The CloudWatch agent’s configuration, connectivity, and metric and log collecting issues must be found and fixed during troubleshooting. You can troubleshoot common issues with the CloudWatch agent by following these steps:
Check Agent Logs
For troubleshooting, the CloudWatch agent logs are a useful source of data. Look through the agent logs for any error or warning messages that might point to problems with the agent or its setup.
- On Linux: Logs are typically located in
/var/log/amazon/amazon-cloudwatch-agent/.
- On Windows: Logs are usually in
C:\ProgramFiles\Amazon\AmazonCloudWatchAgent\Logs\.
Check IAM Permissions
Make sure the IAM role connected to your EC2 instance (or the instance on which the agent is executing) has the authority to upload metrics and logs to CloudWatch. Policies for the IAM role should allow the necessary rights for CloudWatch actions.
Verify The Network Connection
Make sure that the server or EC2 instance executing the CloudWatch agent has reliable internet access. To send data, the agent must establish a connection with the CloudWatch service.
Examine The Agent Configuration.
Make that the ‘Amazon-cloud watch-agent. json’Amazon-cloud watch-agent.json ‘ configuration file for the CloudWatch agent is set up properly. Keep an eye out for syntax mistakes, missing values, or bad configuration choices.
FAQs On CloudWatch Agent
1. What is the CloudWatch Agent, and What Exactly Does The CloudWatch Agent Do?
The CloudWatch agent is a piece of software that Amazon Web Services makes available to users so they may gather and keep track of metrics, logs, and events from different AWS resources and server-side applications. It enables real-time monitoring, troubleshooting, and performance analysis of the infrastructure and applications.
2. How Do I Install The CloudWatch Agent On My EC2 Instances?
You must download and set up the CloudWatch agent on your EC2 instances in order to install it. Depending on the operating system (Windows or Linux), different actions must be taken. AWS offers thorough instructions on installing and configuring the agent.
3. Are On-Premises Servers Compatible With The CloudWatch Agent?
Yes, in addition to AWS resources, the CloudWatch agent can be installed on servers that are located on-site. As a result, you can keep an eye on your complete infrastructure from one location.
4. Can My Applications’ Logs Be Collected By The CloudWatch Agent?
Yes, your apps running on EC2 instances can generate logs that the CloudWatch agent can gather. These logs are forwarded to CloudWatch Logs so that you may search, monitor, and analyze them.
Share your thoughts in the comments
Please Login to comment...