How to make an Echo server with Bash?
Last Updated :
08 Dec, 2023
An Echo server is a simple network interface/application that listens for any incoming connections and requests, and then echoes back any data it receives from clients. Creating such a server is a great way to learn about network programming and the basics of client-server communication. In this article, we will guide you through the process of building an echo server using Bash, a widely available and versatile scripting language.
Prerequisites:
- A Unix-based operating system (Linux or macOS), as Bash is native to these systems.
- A basic understanding of Bash scripting.
- Some familiarity with networking concepts.
Steps to create an Echo server:
Step 1: Create the server script
Open your favorite text editor and create a file called echo_server.sh. In this case, we are using nano editor, You can do this by running the following command:
nano echo_server.sh
In this step, we will create a bash script for our echo server. This script will set up the server to listen on a specific port and respond to incoming connections.

Creating script with nano editor
Now let’s write the script in the editor, below is the code for the script:
#!/bin/bash

# Define the port on which the server will listen
PORT=12345

echo "Bash Echo Server is running and listening on port $PORT..."

# Start the server and listen for incoming connections
while true; do
  (echo -ne "HTTP/1.1 200 OK\r\n"; cat) | nc -l -p $PORT
done

Writing script code
Script Breakdown:
- We provide a message to inform the user that the Bash Echo Server is running and listening on a specific port.
- The script configures the echo server to respond with a simple HTTP 200 OK message and echo the received data.
Step 2: Make the Script Executable
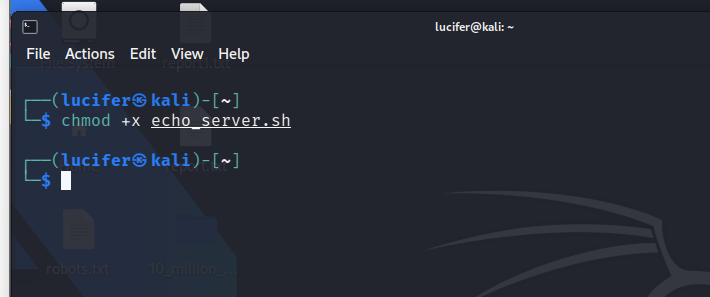
To run the script we just wrote, make it executable by the below chmod command, This command grants execute permissions to the script.
chmod +x echo_server.sh
- chmod: this command is used to change file permissions.
- +x: This is an argument that grants execute permissions to a specified file.
Making script executable
Step 3: Run the echo script
With the script ready and executable, you can now run your echo server. In the terminal, run the following command:
./echo_server.sh
The above command runs the echo_server.sh script. The ./ specifies that the script is located in the current directory.

Executing Server script
Our server is now running and listening for incoming connections on the mentioned port, now we need to test the server.
Step 4: Test the Echo Server
To test your echo server, you can use the telnet command or write a simple client script in Bash or any other programming language. Here’s a simple Bash client script to test the server:
#!/bin/bash

# Define the server host and port
SERVER_HOST="localhost"
SERVER_PORT=12345

# Send a message to the server
echo "Sending a message to the Bash Echo Server..."
echo "Hello, Bash Echo Server!" | nc $SERVER_HOST $SERVER_PORT

# Wait for a brief moment
sleep 1

# Receive and print the server's response with a timeout
response=$(nc -l -p $SERVER_PORT -w 10)  # Set a 10-second timeout
if [ -z "$response" ]; then
    echo "No response received from the server within the timeout."
else
    echo "Received a response from the server:"
    echo "$response"
fi
Script Breakdown:
- SERVER_HOST=”localhost”: We define a variable SERVER_HOST and set it to “localhost,” which means the client and server are running on the same machine.
- SERVER_PORT=12345: We define the variable SERVER_PORT and set it to the same port number used by the server.
- echo “Hello, Bash Echo Server!” | nc $SERVER_HOST $SERVER_PORT: This line sends a message to the server. The echo command outputs the message, and it is piped (|) to nc, which sends the message to the server using the specified host and port.
- nc -l -p $SERVER_PORT: This line opens another instance of nc to listen for the server’s response, effectively acting as the client’s receiver. The server will echo back the message, and it is printed to the terminal.
- We use the -w option with nc to set a timeout of 10 seconds for waiting to receive a response from the server. This means that if the server does not respond within 10 seconds, the client will exit with a message indicating that no response was received.
- We check whether the response variable is empty (indicating no response) or contains a response and then print the appropriate message.

Writing Client Script
You can save this code to a file called client.sh, make it executable, and run it. It will send a message to your echo server and print the server’s response. to make and run the script follow steps 1 to 3 again.

Output
Explanation:
In the above Output, you can see that we have successfully made the connection.
- When we start the server script, it displays a message indicating that the server is running on port 12345 and is ready to accept any incoming connections.
- In the separate terminal, you can see we have our client script running, it’s displaying a message that is about sending a message to the server.
- The client script sends the message “hello, bash echo server!” to the server on port 12345 using the nc command.
- The server receives the message from the client gives an acknowledgement of the message and echoes it as a response.
- The client script listens for a response from the server on the same port 12345 and receives an HTTP 200 OK message which tells us that the connection is successful.
Conclusion
In this article, we have learned how you can create a basic Echo Server, which listens on the specified port and address. You can always experiment and explore more by adding some more commands and actions in the script and enhancing your knowledge of bash scripting as well as the echo server. The above basic example demonstrates the principles of creating a network server and handling incoming connections.
Share your thoughts in the comments
Please Login to comment...