How to handle form data in CGI Scripts?
Last Updated :
04 Nov, 2023
In this article, we’ll guide you through the process of creating a registration form in HTML and then using a CGI script to fetch and display the submitted user data in the form of a card, along with a success message. Registration forms are a fundamental component of many web applications, allowing users to provide essential information for access or membership. By integrating CGI scripts, we can capture and process this data, enhancing user interactivity and providing a seamless user experience.
Handle Form Data in CGI
Below are the steps by which we can handle form data in CGI Scripts:
Step 1: Implementation
First, create a folder named “form” in the “htdocs” directory. Inside this “form” folder, create two files: “html.html” and “python.py”. In the “html.html” file, design the registration form. In the “python.py” file, write a CGI script to retrieve data from the registration form and generate a card with a success message.
File structure

File Structure
Step 2: Write HTML Code (html.html)
Now we will write our HTML file code in which we are creating a form that will be used to handle the form data using CGI Script. This code creates a registration form with basic styling using CSS. When users submit the form, the data will be sent to a server-side script specified in the “action” attribute of the form for processing.
HTML
<!DOCTYPE html>
<html>
<head>
<title>Registration Form</title>
<style>
/* Style for the "GeeksforGeeks" heading */
h1 {
color: green;
}
/* Style for the form container */
.form-container {
padding: 20px;
margin: 20px;
border: 1px solid #ccc;
border-radius: 5px;
}
/* Style for form labels and input fields */
label {
display: block;
margin-bottom: 10px;
}
input[type="text"],
input[type="email"],
input[type="password"] {
width: 30%;
padding: 10px;
margin-bottom: 15px;
border: 1px solid #ccc;
border-radius: 5px;
}
input[type="submit"] {
background-color: green;
color: white;
padding: 10px 20px;
border: none;
border-radius: 5px;
cursor: pointer;
}
</style>
</head>
<body>
<h1>GeeksforGeeks</h1>
<div class="form-container">
<h2>Registration Form</h2>
<form action="python.py" method="post">
<label for="name">Name:</label>
<input type="text" name="name" required><br><br>
<label for="email">Email:</label>
<input type="email" name="email" required><br><br>
<label for="password">Password:</label>
<input type="password" name="password" required><br><br>
<input type="submit" name="Register">
</form>
</div>
</body>
</html>
|
Output

Registration form
Step 3: Write Python CGI Script (python.py)
This is a Python script that acts as a server-side handler for a web form submission. It processes the form data sent from an HTML form and generates an HTML response to confirm the registration. Here’s an explanation of the code:
Retrieving Form Data:
- name = form.getvalue(‘name’): Retrieves the value of the ‘name’ field from the submitted form.
- email = form.getvalue(’email’): Retrieves the value of the ’email’ field from the submitted form.
- password = form.getvalue(‘password’): Retrieves the value of the ‘password’ field from the submitted form.
In summary, this Python script processes form data, extracts values, and generates an HTML response to confirm the registration, including the user’s name, email, and a success message.
Python3
print("Content-type: text/html\n\n")
import cgi
form = cgi.FieldStorage()
name = form.getvalue('name')
email = form.getvalue('email')
password = form.getvalue('password')
print("<html>")
print("<head>")
print("<title>Registration Confirmation</title>")
print("<style>")
print(" /* Style for the card container */")
print(" .card {")
print(" width: 300px;")
print(" padding: 20px;")
print(" margin: 20px auto;")
print(" border: 1px solid #ccc;")
print(" border-radius: 5px;")
print(" text-align: center;")
print(" }")
print("</style>")
print("</head>")
print("<body>")
print("<div class='card'>")
print("<h2>Registration Confirmation</h2>")
print("<p>Name: " + name + "</p>")
print("<p>Email: " + email + "</p>")
print("<p>Password: " + password + "</p>")
print("<p>Registration Successful! 👍</p>") # Emoji for success
print("</div>")
print("</body>")
print("</html>")
|
Output
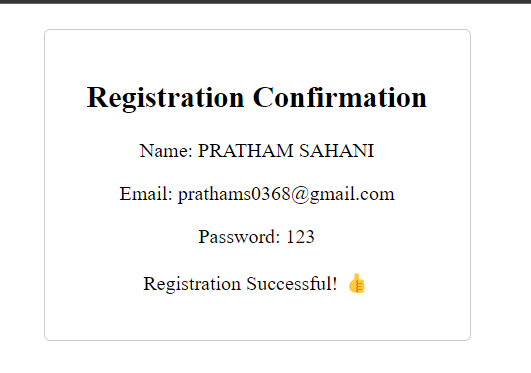
CGI scripts
Step 4: Configuration and Start the Xampp Server
You can refer Create a CGI Script for complete configuration and how we can start the server to run out CGI Script.
Step 5: Run the Script
In this step, we will run the CGI Script by using the following command in your web browser
http://127.0.0.1/form/html.html
Output

Share your thoughts in the comments
Please Login to comment...