How to Create Your Own Android Library and Publish it in GitHub?
Last Updated :
11 Jun, 2021
In this article, we are going to create our own Android Library and publish it, so that it can be used whenever it’s required in our projects. Others can also use your library in their projects. Here we are going to make a library for the blink effect which is used to highlight links, to show important announcements, etc. Benefits of using Android Library:
- To speed up development time.
- To reuse the code with particular functionality.
So let’s start.
Create the Android Library
Step 1: Open Android Studio and Create a New Project
To create a new project in Android Studio please refer to How to Create/Start a New Project in Android Studio. Name your application as BlinkEffectExample and make sure to select Kotlin as the programming language as I’m going to use Kotlin for the source code, but you can follow the same process of creating & publishing the android library for Java as well.
Step 2: Now Create a new Module in your project
Go to file > New > New Module. Select Android Library from the options and click on Next.
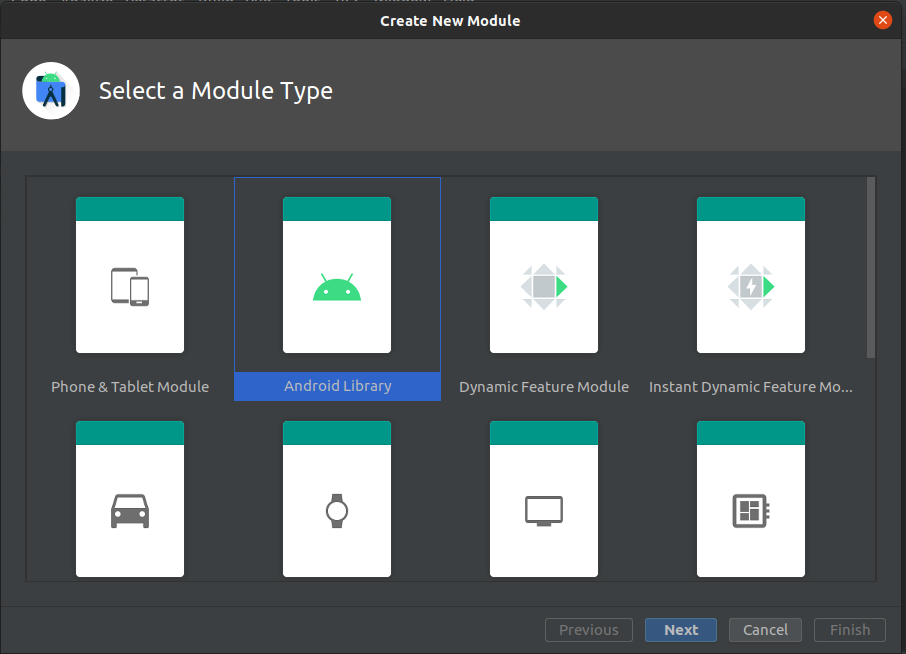
Select a module type
Name Your Library as BlinkLibrary and click Finish.
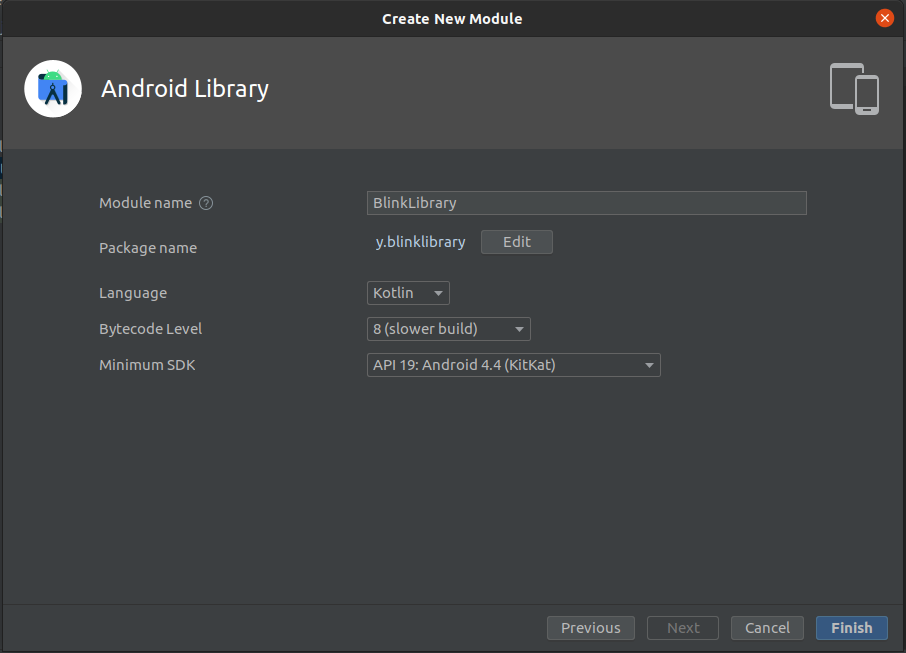
Create a new module
Your module BlinkLibrary gets created.
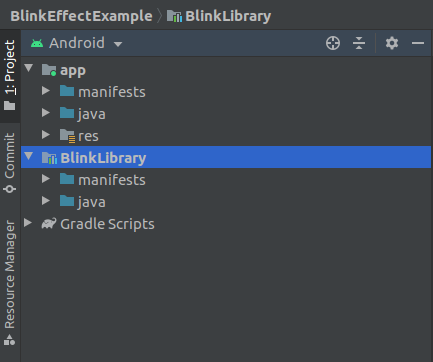
BlinkLibrary is added to the structure
Step 3: Now, it’s time to add code to our library. For this go to your module BlinkLibrary > Java > your package name(like com.learn.blinklibrary) Right-click go to New > Kotlin/class file.

Create a new file in your module and name it as BlinkEffect make sure to choose Object from the below options.
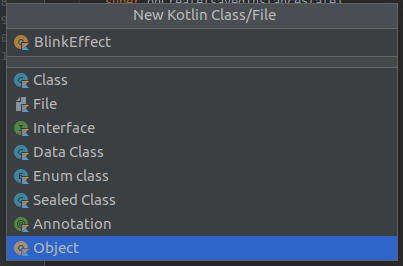
create a new file
Step 4: Modify BlinkEffect.kt as follows
Kotlin
import android.animation.ArgbEvaluator
import android.animation.ObjectAnimator
import android.graphics.Color
import android.view.View
import android.view.animation.Animation
object BlinkEffect {
fun blink(view: View) {
val animator: ObjectAnimator = ObjectAnimator.ofInt(
view, "backgroundColor", Color.YELLOW,
Color.RED, Color.GREEN
)
animator.duration = 500;
animator.setEvaluator(ArgbEvaluator())
animator.repeatCount = Animation.REVERSE
animator.repeatCount = Animation.INFINITE
animator.start()
}
}
|
We are taking view as a parameter to the blink() function so that the blink effect can be added to that particular view. Now our library is completed. It’s time to publish it, so for this create a new repository on your GitHub and push the project to it (if not please create your Github). We will use JitPack to publish our library as it makes the process a lot easier in order to publish a library.
Publishing the Android Library in GitHub
Step 1: Create a new GitHub repository.
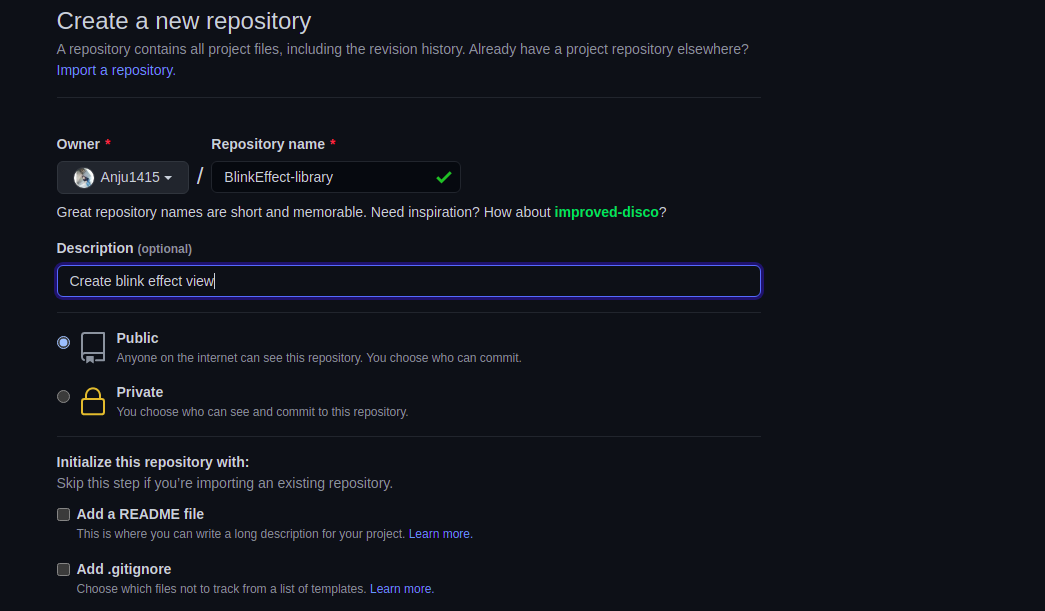
create a repository – BlinkEffect-library
Copy the repository’s https address.
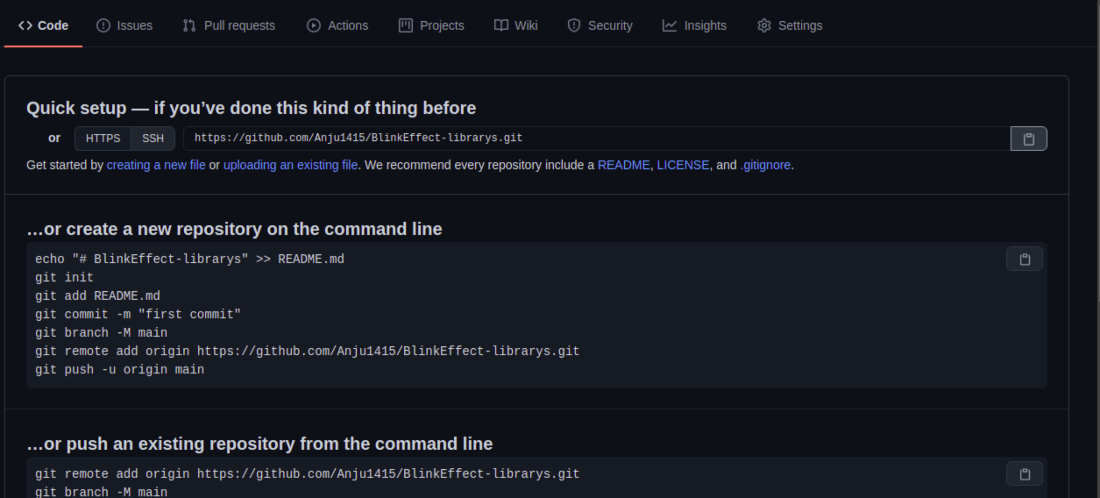
copy the repo’s address
Step 2: Push your code
Make sure git is installed in your system. If Git and GitHub are already set up in the android studio then follow the following steps to push your code.
- Go to VCS (option from menu ) > select Enable version control enable
- A dialogue box opens, select Git and click the OK button.

You will observe that color of all filename changes to a red color as shown in the below image.

Now, change the file tree structure (left panel) from android to project as shown below.

Right-click the above project name BlinkEffectExample then go to Git > Add. You will observe the color of all filename changes to green color. Now open the terminal of your android studio (find the terminal at bottom of the android studio). Do the following to add, commit and push the code.
-> git add .
-> git commit -m "blink library added"

-> git remote add origin " Paste Your-Repository-Address"
-> git push origin master
-> Give your GitHub id name & password

Your project got pushed to the repository!

You can also follow another method to push your code (when git and GitHub is not set in the android studio). Open the system’s terminal and make sure that your current directory is in “BlinkEffectExample”(folder name of your project) and perform the following commands :
-> git init
-> git add
-> git commit -m "blink library added"
Now add your remote origin by performing
-> git remote add origin “Paste Your-Repository-Address”
-> git remote -v
-> git push origin master
Your application code got pushed to the repository.
Step 3: In your repository, go to tag and select release
click on the tag and choose release
Click on create a new release.

Now add the release version and a brief introduction about your library.
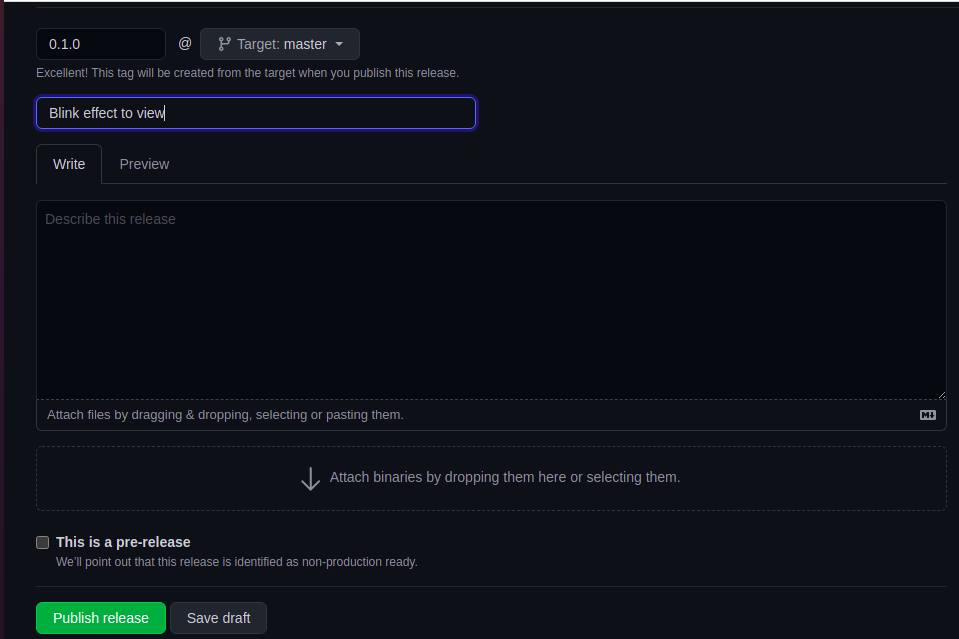
publish release
Click on publish release. Open a new tab and go to jitpack.io. Insert your repository address (in my case it’s Anju1415/BlinkEffect-library) and click on LOOKUP. Your releases will be listed.

Now click on Get it.


Your Android Library is now published and is ready to use.
Using the Android Library in Your Android App
Step 1: Now you can use this android library in any of your projects. Open any project or create a new one (Here I’m creating a new project to use this library). In your project’s build.gradle (project : applicationName) add the following line
allprojects{
…
maven { url ‘https://jitpack.io’ }
…
}

and in your app’s build.gradle (module : applicationName.app) add the dependency.
dependencies {
….
implementation ‘com.github.Anju1415:BlinkEffect-library:0.1.0’
…
}

And now you can use the library in your activity.
Step 2: Working with the activity_main.xml file
Navigate to the app > res > layout > activity_main.xml and add the below code to that file. Below is the code for the activity_main.xml file.
XML
<?xml version="1.0" encoding="utf-8"?>
<androidx.constraintlayout.widget.ConstraintLayout
android:layout_width="match_parent"
android:layout_height="match_parent"
tools:context=".MainActivity">
<Button
android:id="@+id/buttonView"
android:layout_width="wrap_content"
android:layout_height="wrap_content"
android:text="GeeksForGeeks"
android:textAllCaps="false"
app:layout_constraintBottom_toBottomOf="parent"
app:layout_constraintLeft_toLeftOf="parent"
app:layout_constraintRight_toRightOf="parent"
app:layout_constraintTop_toTopOf="parent" />
</androidx.constraintlayout.widget.ConstraintLayout>
|
Step 3: Working with the MainActivity.kt file
Go to the MainActivity.kt file and refer to the following code. Below is the code for the MainActivity.kt file. Comments are added inside the code to understand the code in more detail.
Kotlin
import androidx.appcompat.app.AppCompatActivity
import android.os.Bundle
import android.widget.Button
import com.learn.blinklibrary.BlinkEffect
class MainActivity : AppCompatActivity() {
private lateinit var btn : Button
override fun onCreate(savedInstanceState: Bundle?) {
super.onCreate(savedInstanceState)
setContentView(R.layout.activity_main)
btn = findViewById(R.id.buttonView)
btn.setOnClickListener {
BlinkEffect.blink(btn)
}
}
}
|
Output:
Source Code on GitHub: https://github.com/Anju1415/BlinkEffect-library
Share your thoughts in the comments
Please Login to comment...